
Birthdays are my favorite holiday.
Halloween? An excuse to turn every respectable profession into a naughty one. July 4th? Too loud, too hot and too many lost fingers. And Christmas? It’s a hungry bully of a holiday that just swallowed up poor Thanksgiving.
But birthdays are pure: There’s no script, no costume, no watered-down religious backstory. There are no TV specials or long lines at the airport, no greeting cards or special colored-candy to buy.
Birthdays are simply a day to say, “I’m really glad you were born. You deserve your share of the earth’s dwindling supply of oxygen and fresh water.”
Best of all, birthdays require only two things: LOVE and CAKE.
I can’t help you with the love part, but I have a few ideas about cake.
My youngest just turned two, and per tradition, I wanted to create a cake that reflected his interests and values. His favorite thing in the world? BABIES. Baby books, baby dolls, baby humans – he can’t get enough. But Scott and I agreed that it might be strange to bake a cake that looked like a baby, stick it with burning candles, and then eat it. So we decided that what he really liked was AIRPLANES.
Here’s the original design for Sam’s cake, complete with a charming variety of candy missiles:

Upon further reflection, we decided to streamline the design a bit–
EASY HOME MADE AIRPLANE CAKE:
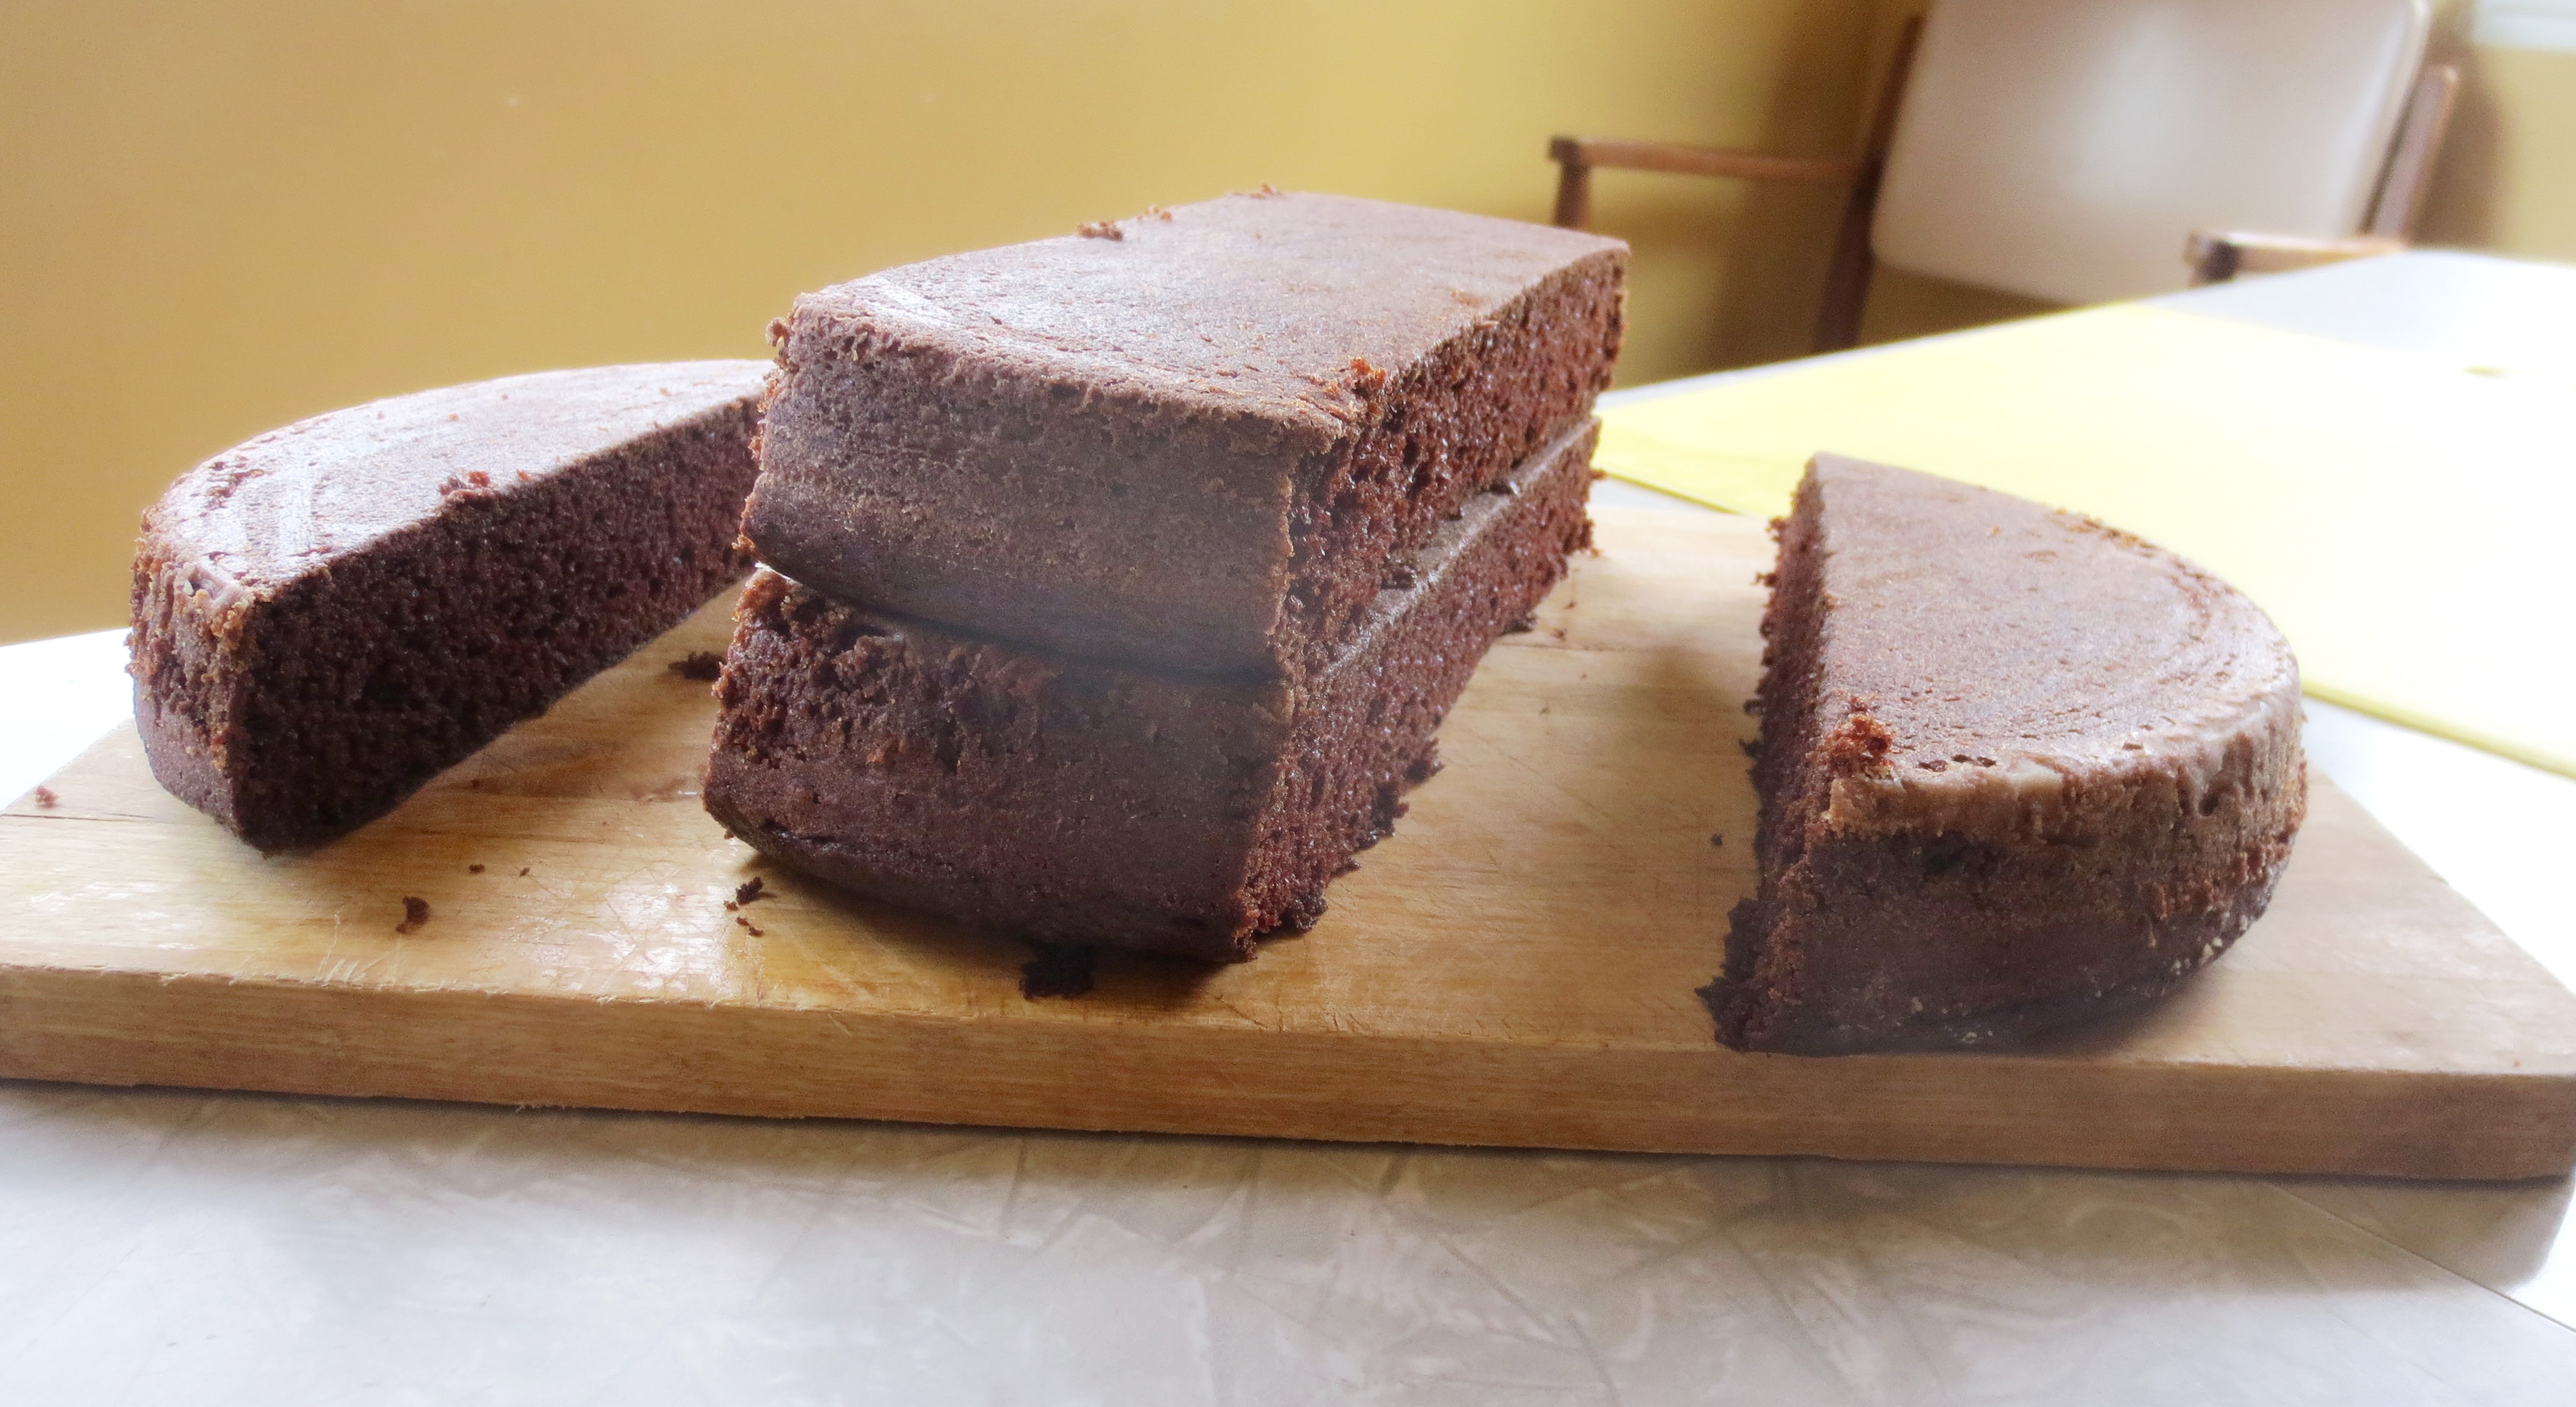
1) Make enough batter for two 9-inch cake rounds. I almost always use this cupcake recipe and double it for cakes. These days you would call it vegan, but it actually originated during the Great Depression (the first one). Cool the cakes for about 15 minutes in the pans, then another half hour on a rack.
 2) Cut each round into thirds with a serrated knife, resulting in one center piece and two “crescent pieces,” as they will now be called.
 3) Stack the two center pieces together to create the “fuselage”
 4) Cut two of the remaining crescent pieces in half, and stack them together on either side of the middle section.
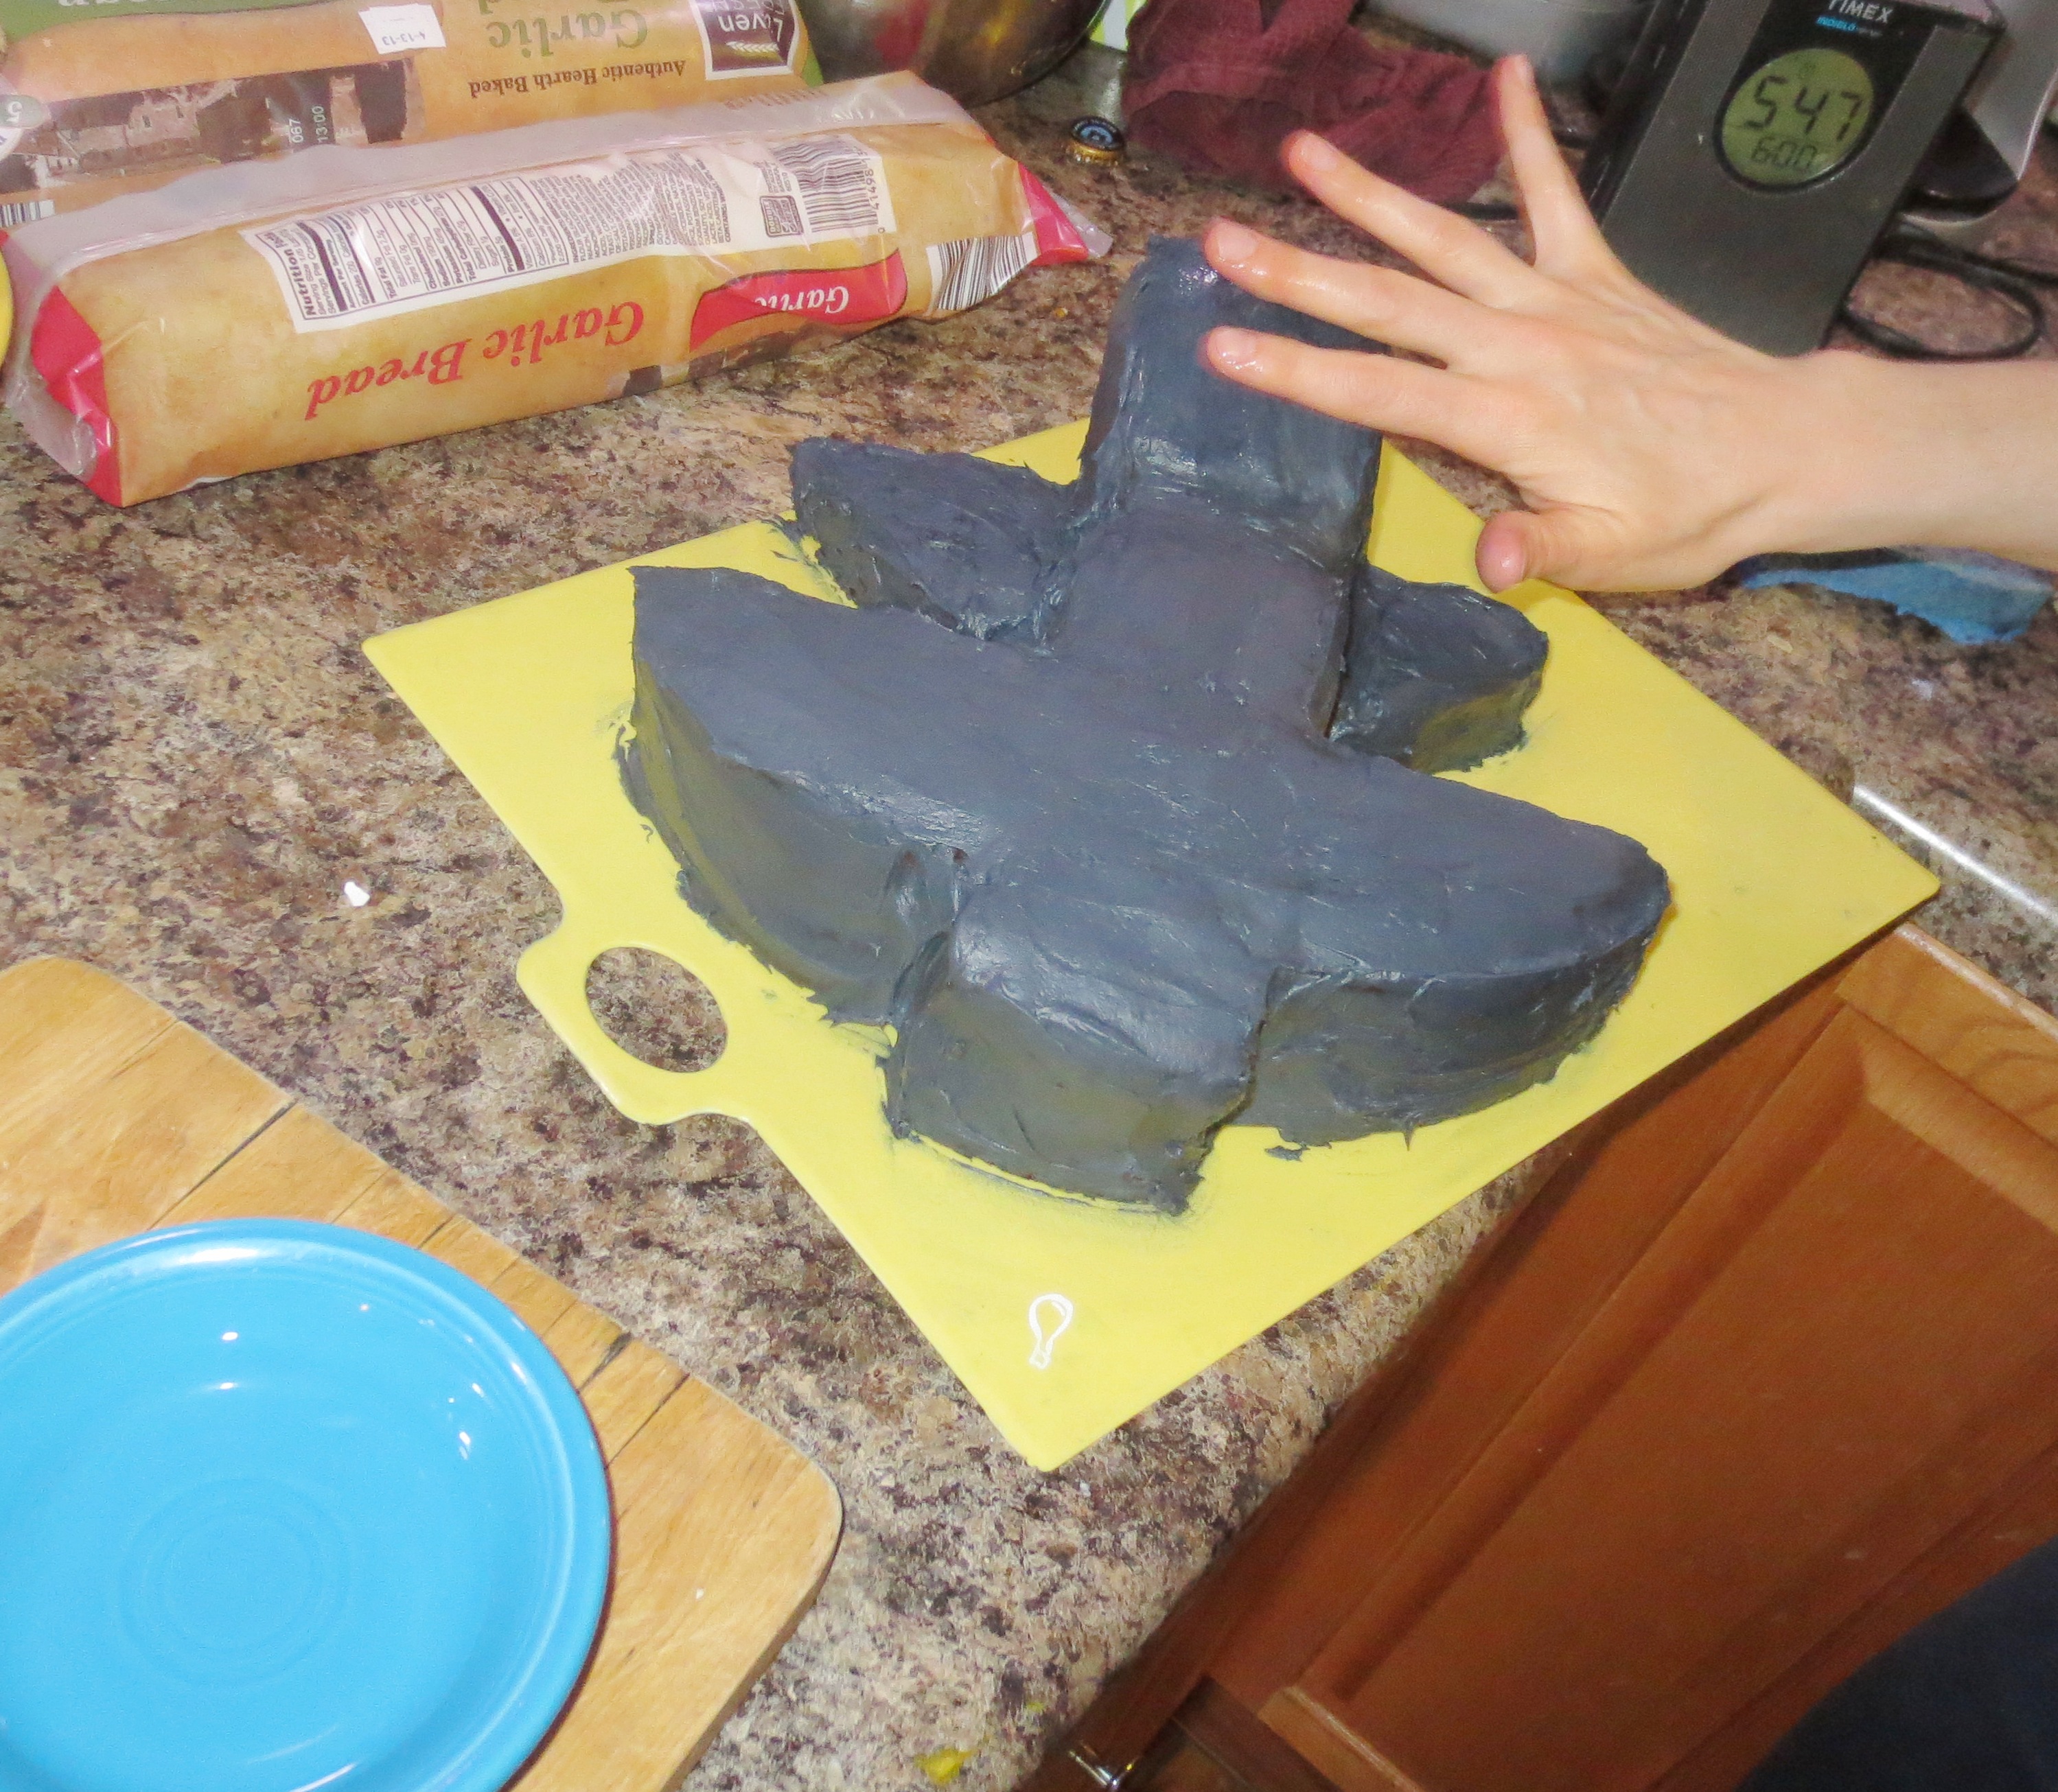
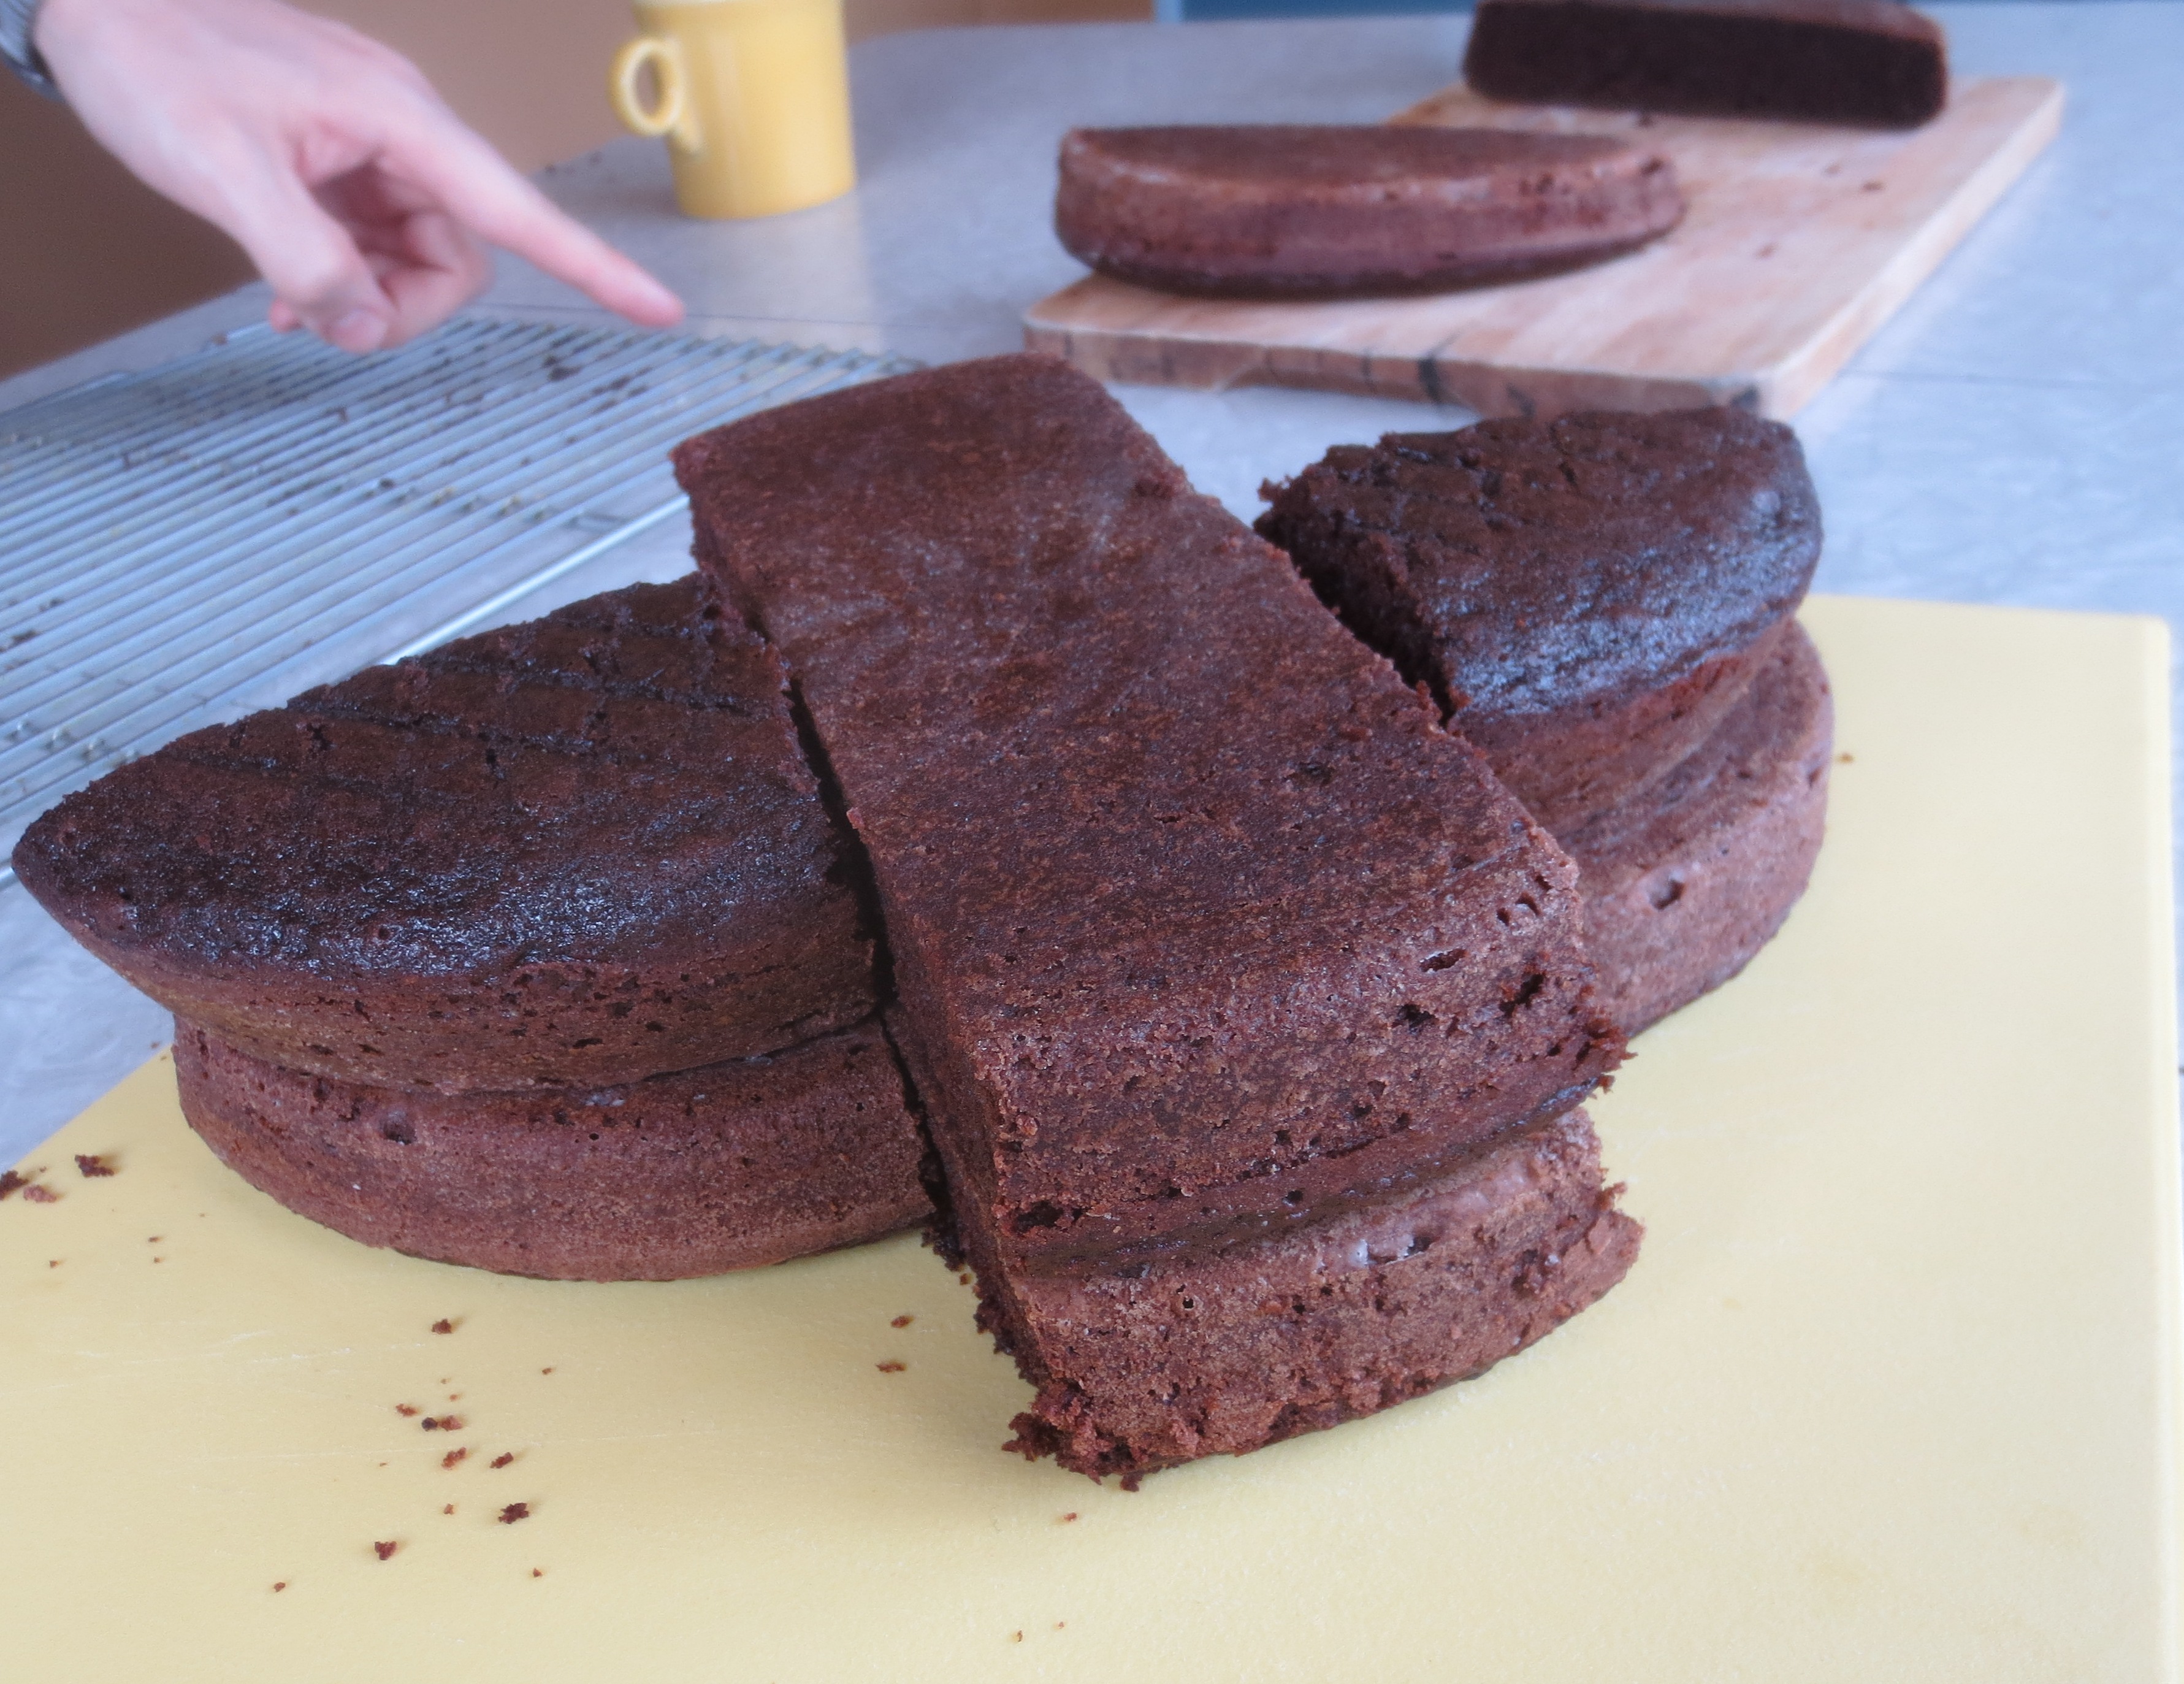 5) Locate the “tail” section of the proto-plane. Cut about an inch off of the rear of the TOP LAYER only. Place that spare part on the end of the bottom piece. You may now realize that I was making up this design as I went along.

At this point, you could easily convert this into a bat cake for the chiropteraphile in your life.
6) Now take another remaining crescent-shaped piece and cut it in half. Place each half flat-side down on the end of your fuselage to create a vertical stabilizer.
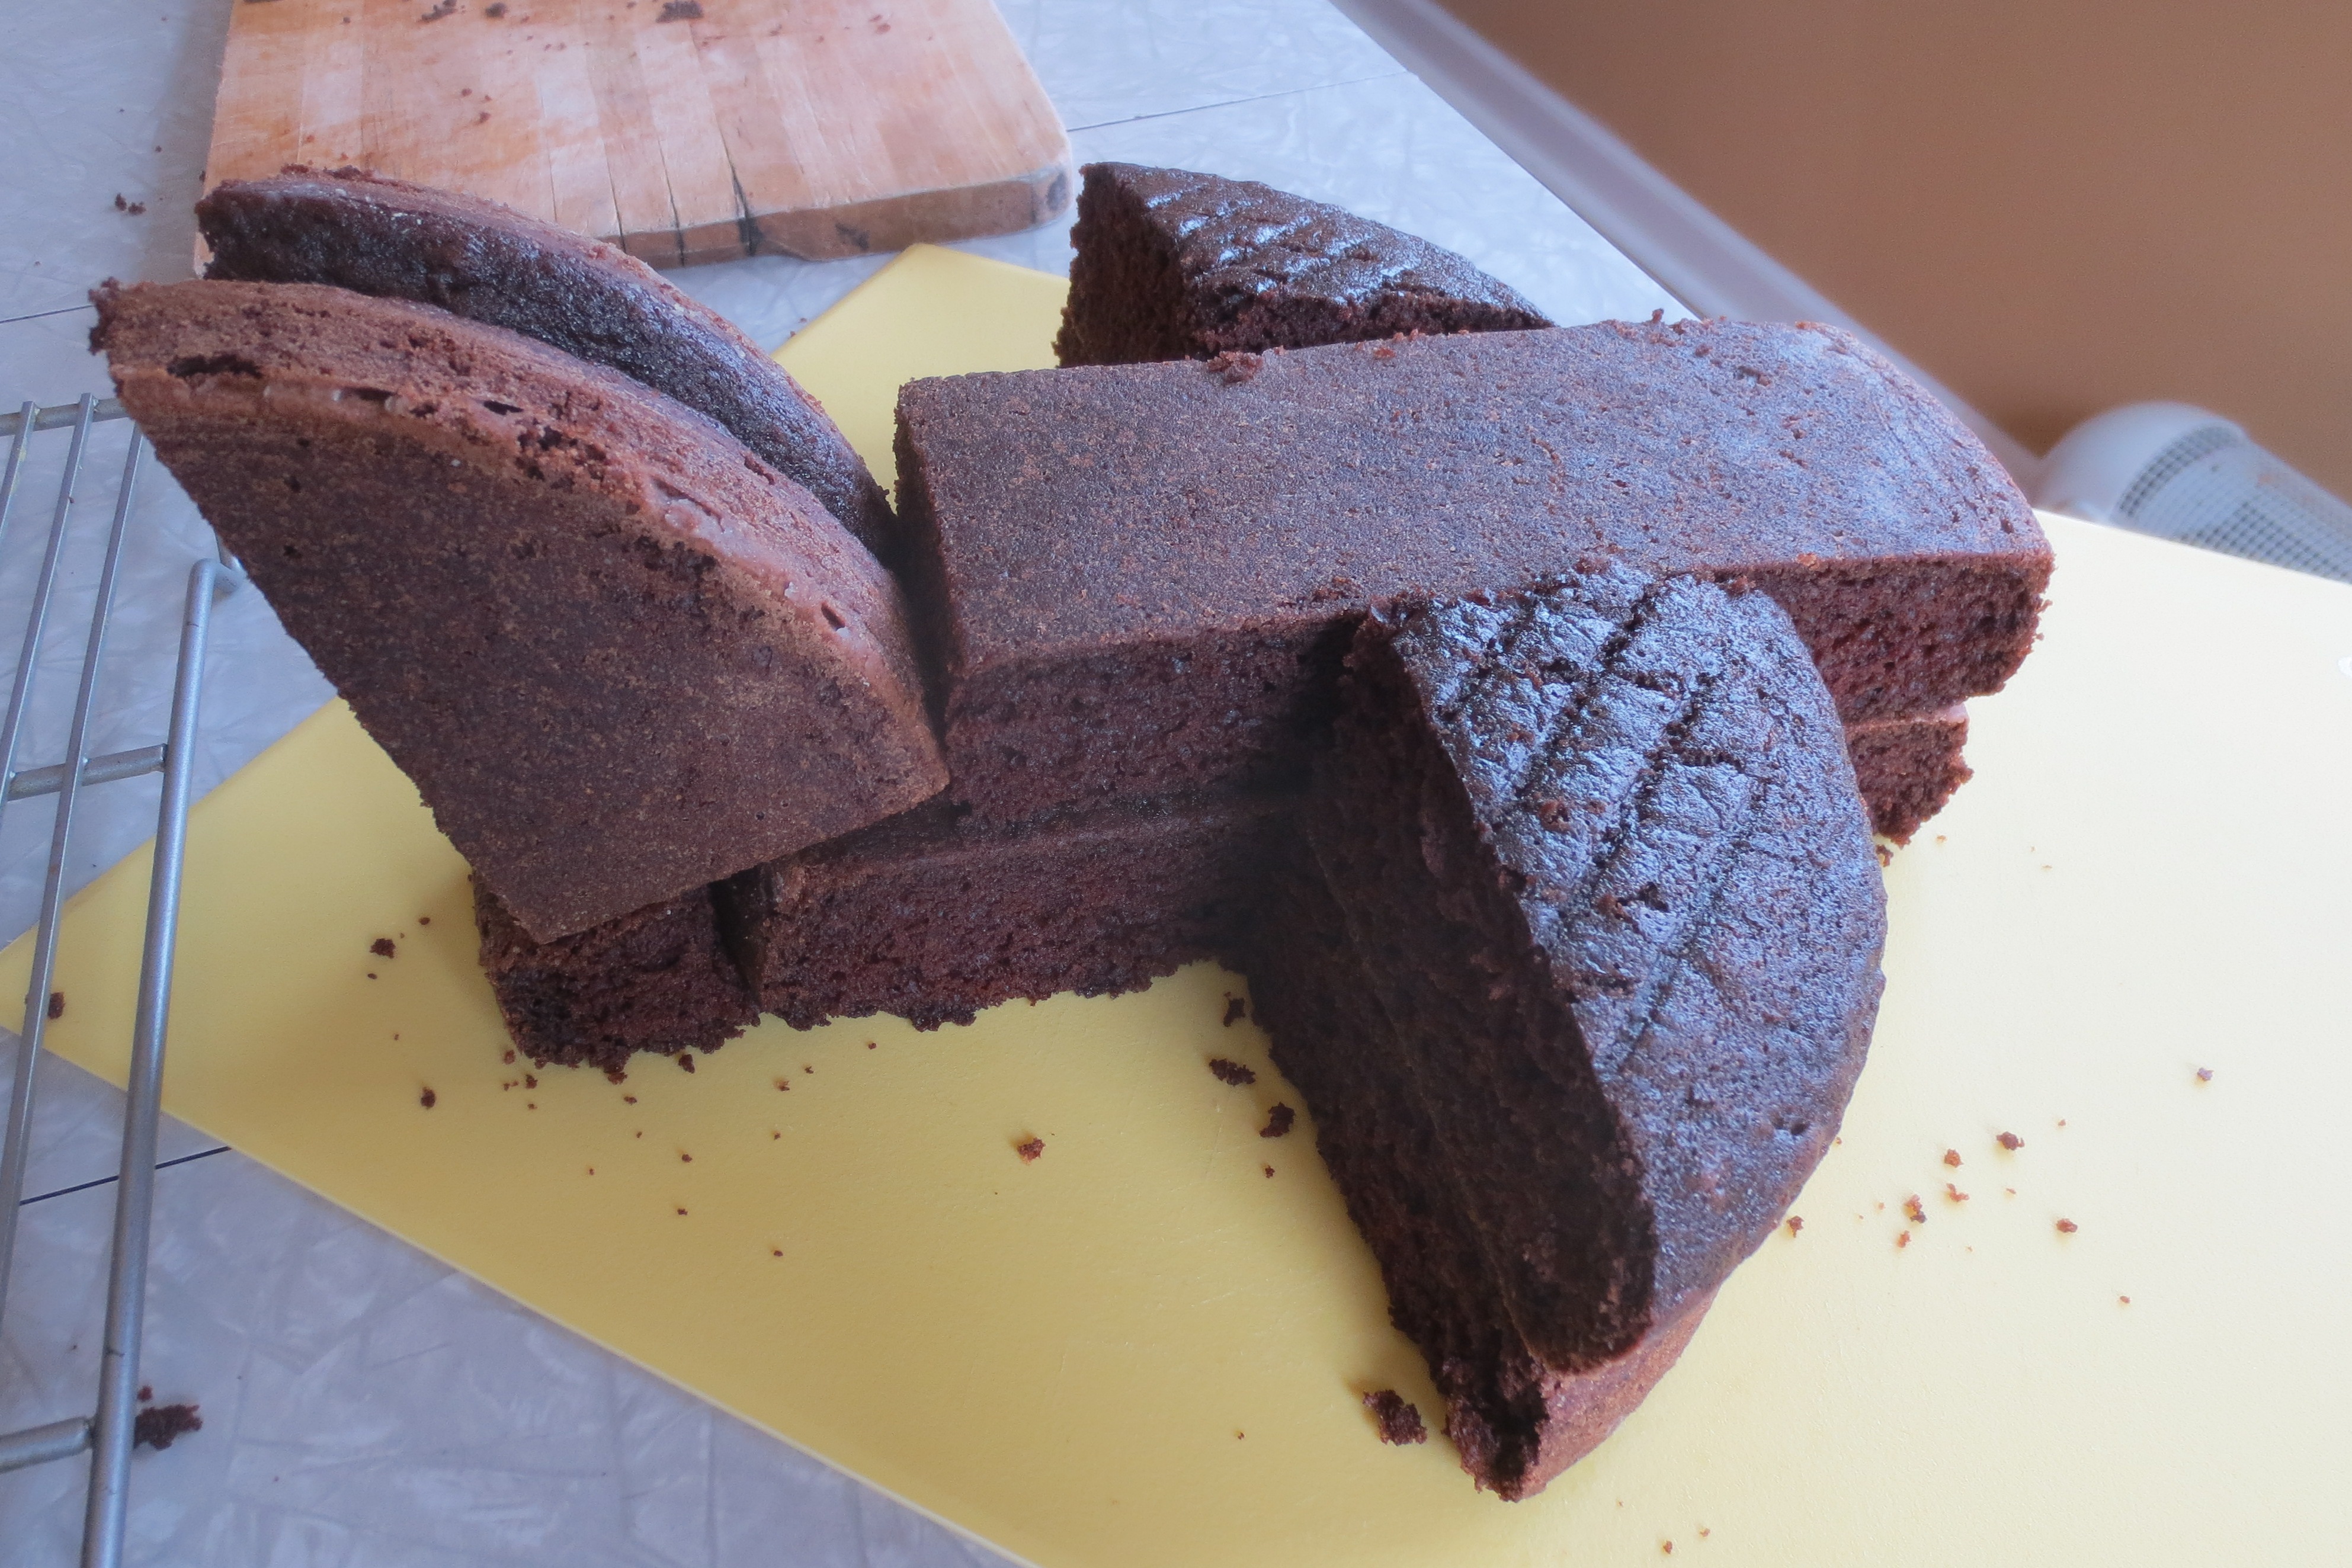
Please note that because this cake lacks a horizontal stabilizer, it has not been approved by the FAA for commercial air travel.
7) Now that you’ve got the main idea, get a big bowl of buttercream frosting (I doubled the recipe on the back of the bag of powdered sugar), and frost every surface where one piece of cake meets another.

I’ve already been contacted by Boeing to design their new 747 “Creamliner”
8) At some point you might discover that you are left with an extra crescent piece of cake. Unlike the end of an IKEA assembly project, you are encouraged to eat the mysterious leftovers. You deserve a treat, and your cake will still be structurally sound.
9) OK, I lied. It’s not structurally sound. Insert toothpicks between the fuselage and the vertical stabilizer. Remember their location before feeding them to small children or judgmental in-laws.

Note the scar on my left index finger, from a mixing accident at age 12. Three stitches later, I’ve got some baking street cred and a healthy fear of small motorized appliances.
10) Separate about half of your remaining frosting into a bowl and give your cake its first coating. This is called a “crumb coat” and it’s like primer for cakes. If your cake now looks like a snowball dropped in dirt, you’re doing it right. Refrigerate for at least 30 minutes.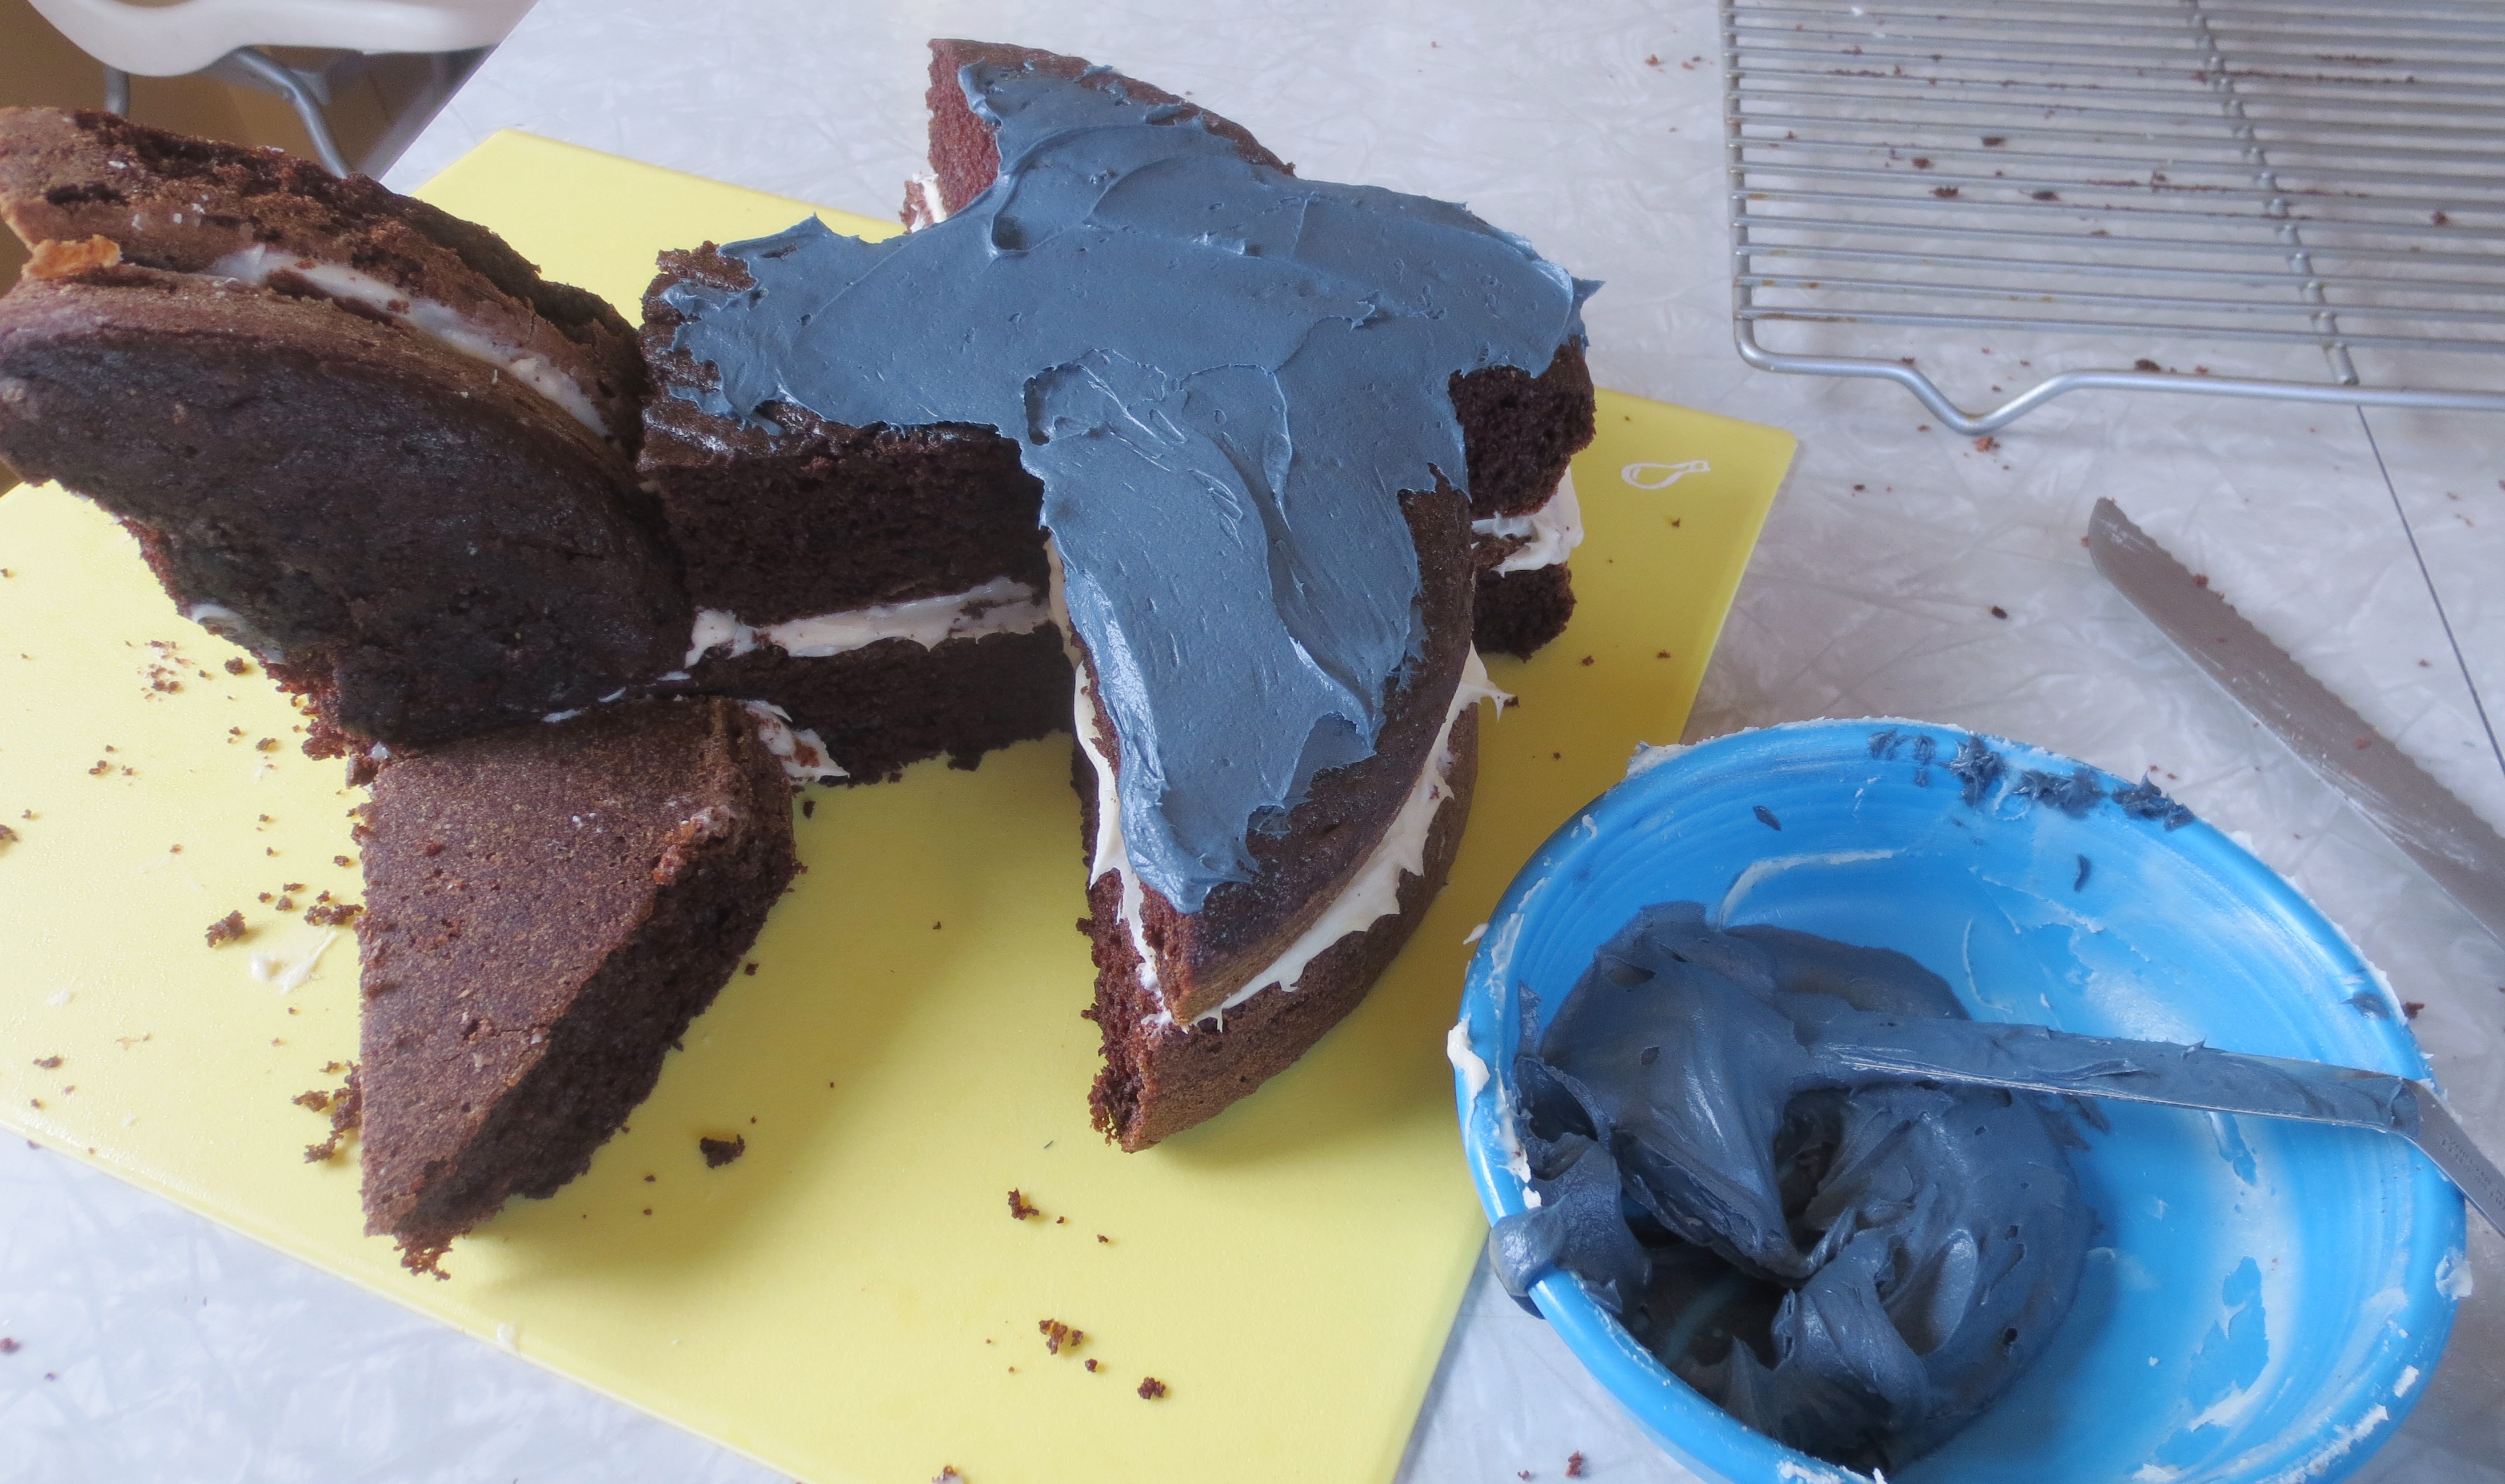 11) When that layer of frosting has cooled, smear on your “topcoat” of remaining frosting. Refrigerate again.
12) Using a bowl of warm water and your wet fingers, smooth out the chilled frosting so it’s slick and glistening. Perhaps you should do this out of sight of your party guests, ’cause it seems unhygienic to the typical American.
 13) Add additional details: This is where you can really have fun and make use of all the small, edible (or not) things around your kitchen. I cut up some candy melt
  discs to make windows, and rolled out some frozen blue modeling chocolate I had leftover from Sam’s 1st birthday cake for racing stripes.
I also pulled a couple of cotton balls off Estelle’s preschool Easter Bunny project and inserted them into the rear end of the cake for a cheerful cloud of exhaust. 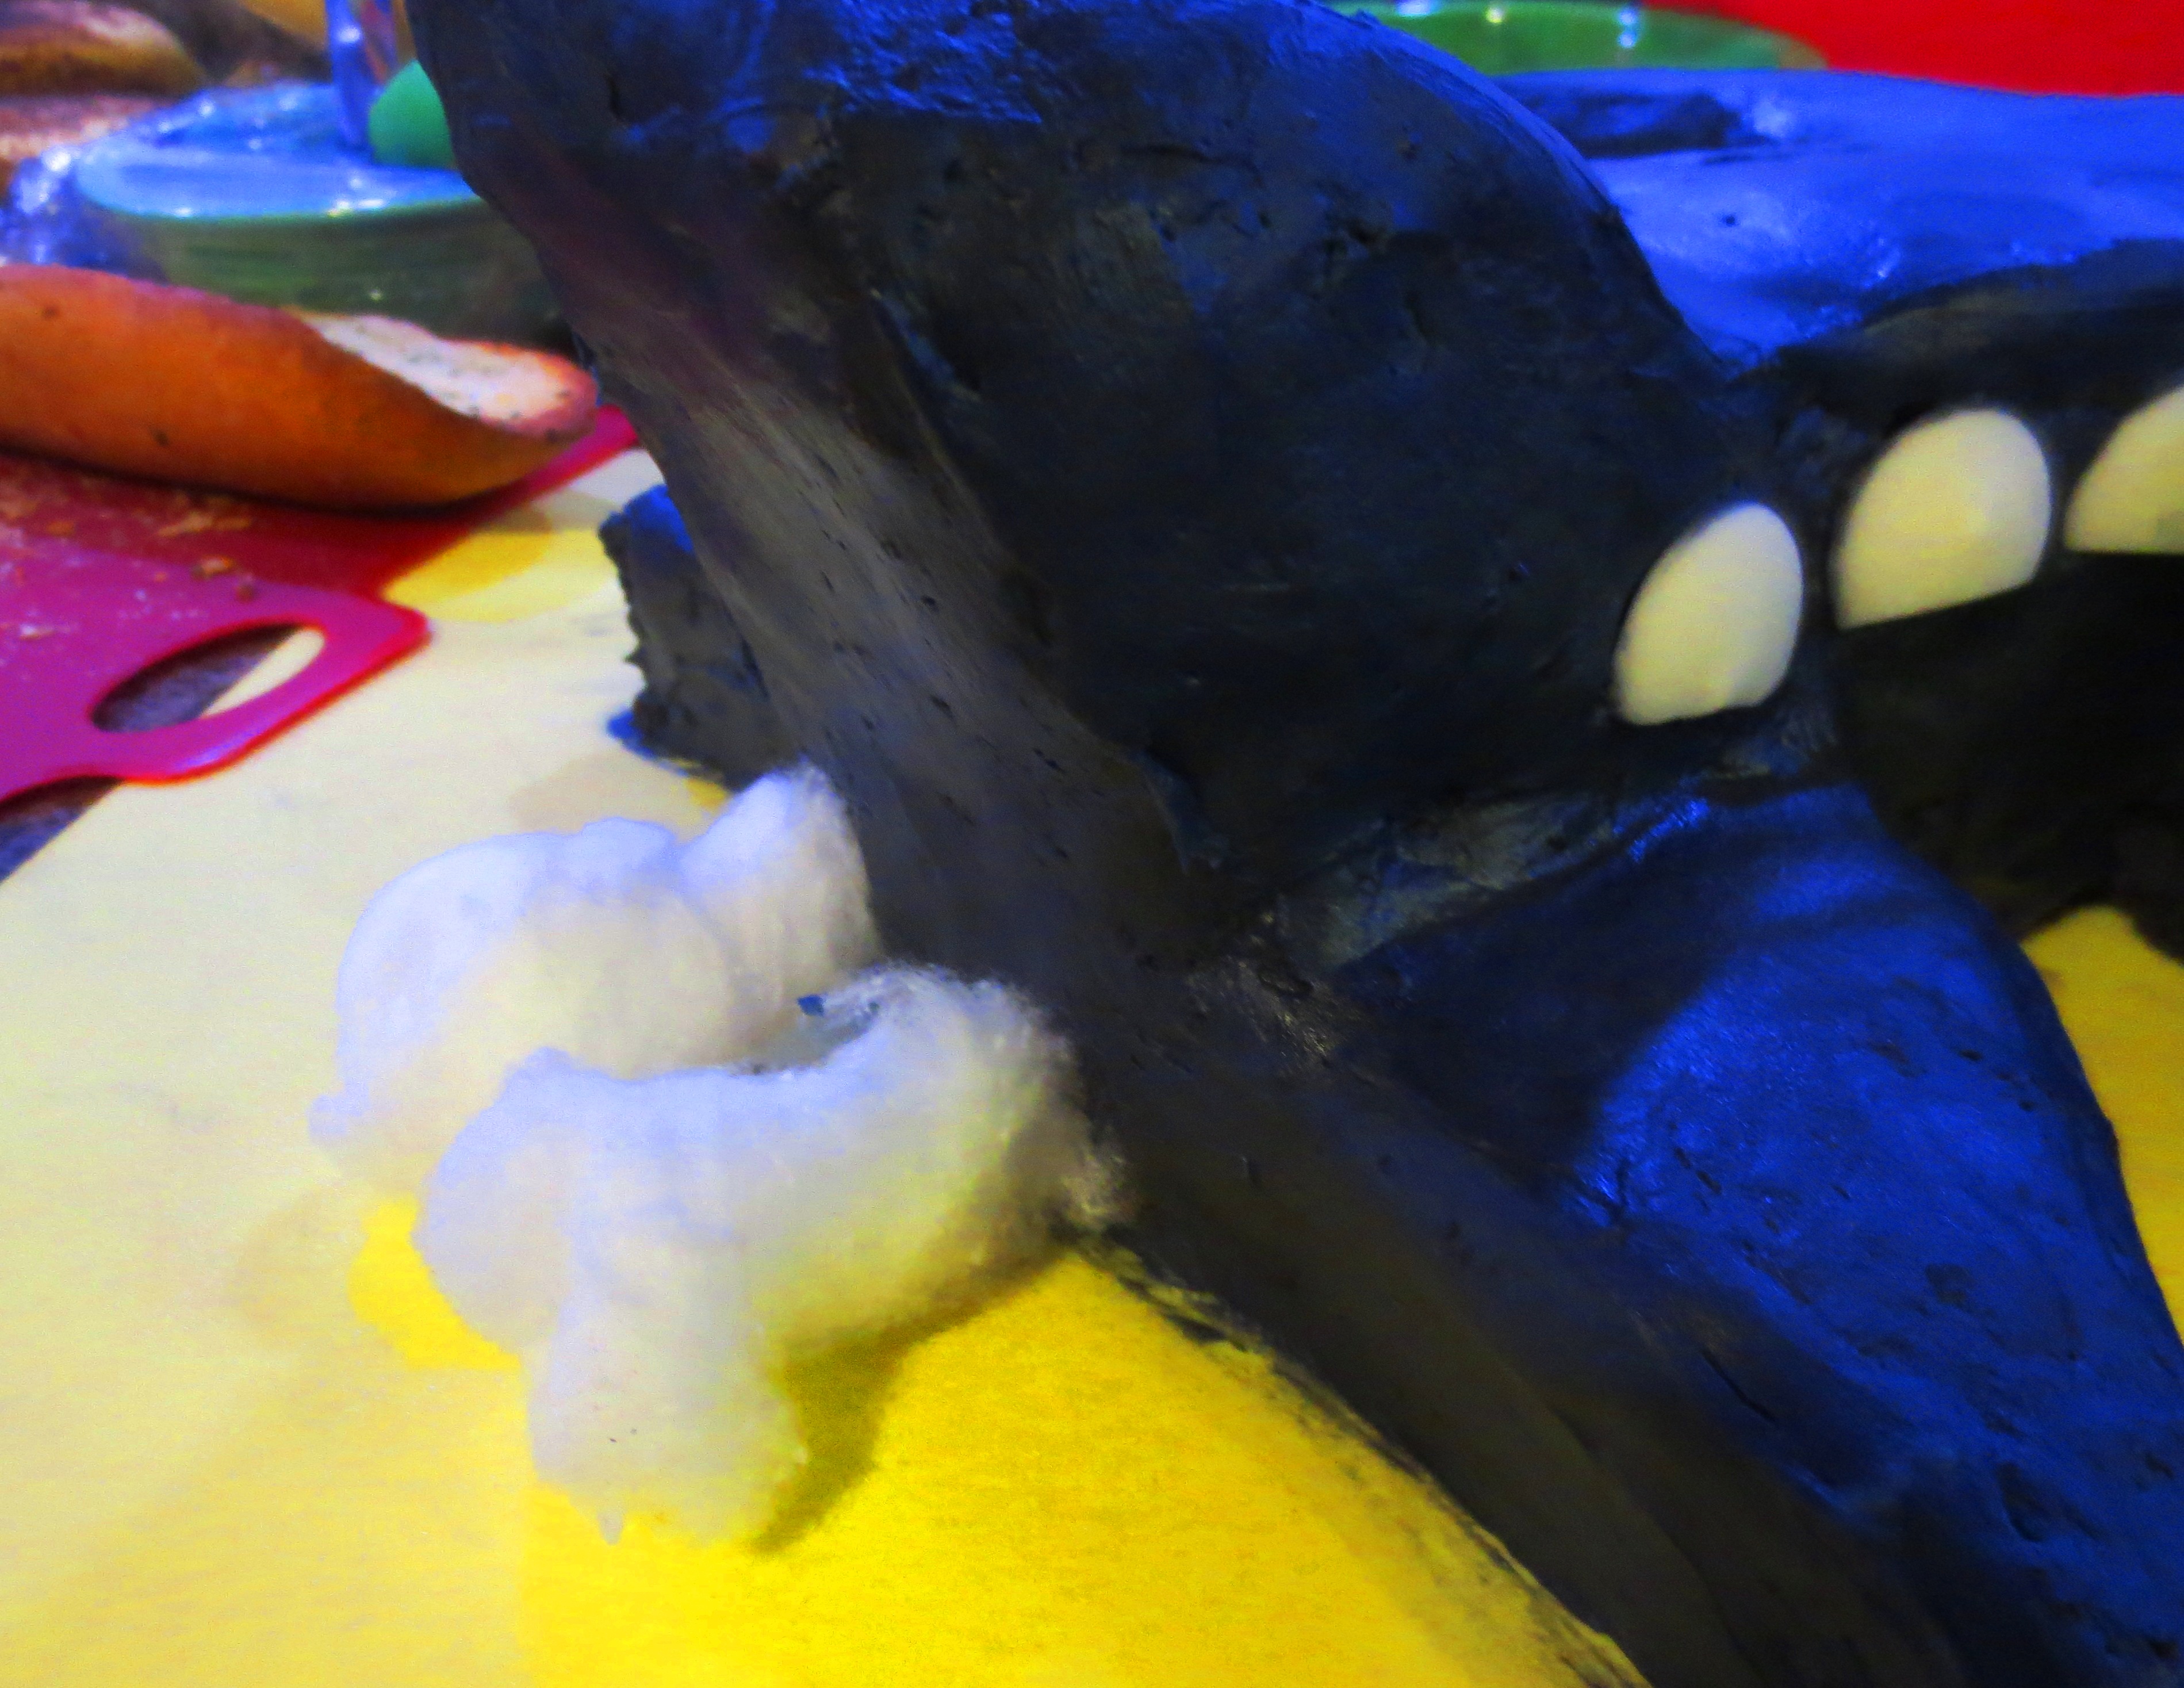 14) Light the candles, round up the party guests and sing “Happy Birthday” in the language of your choice. We prefer English and Polish.

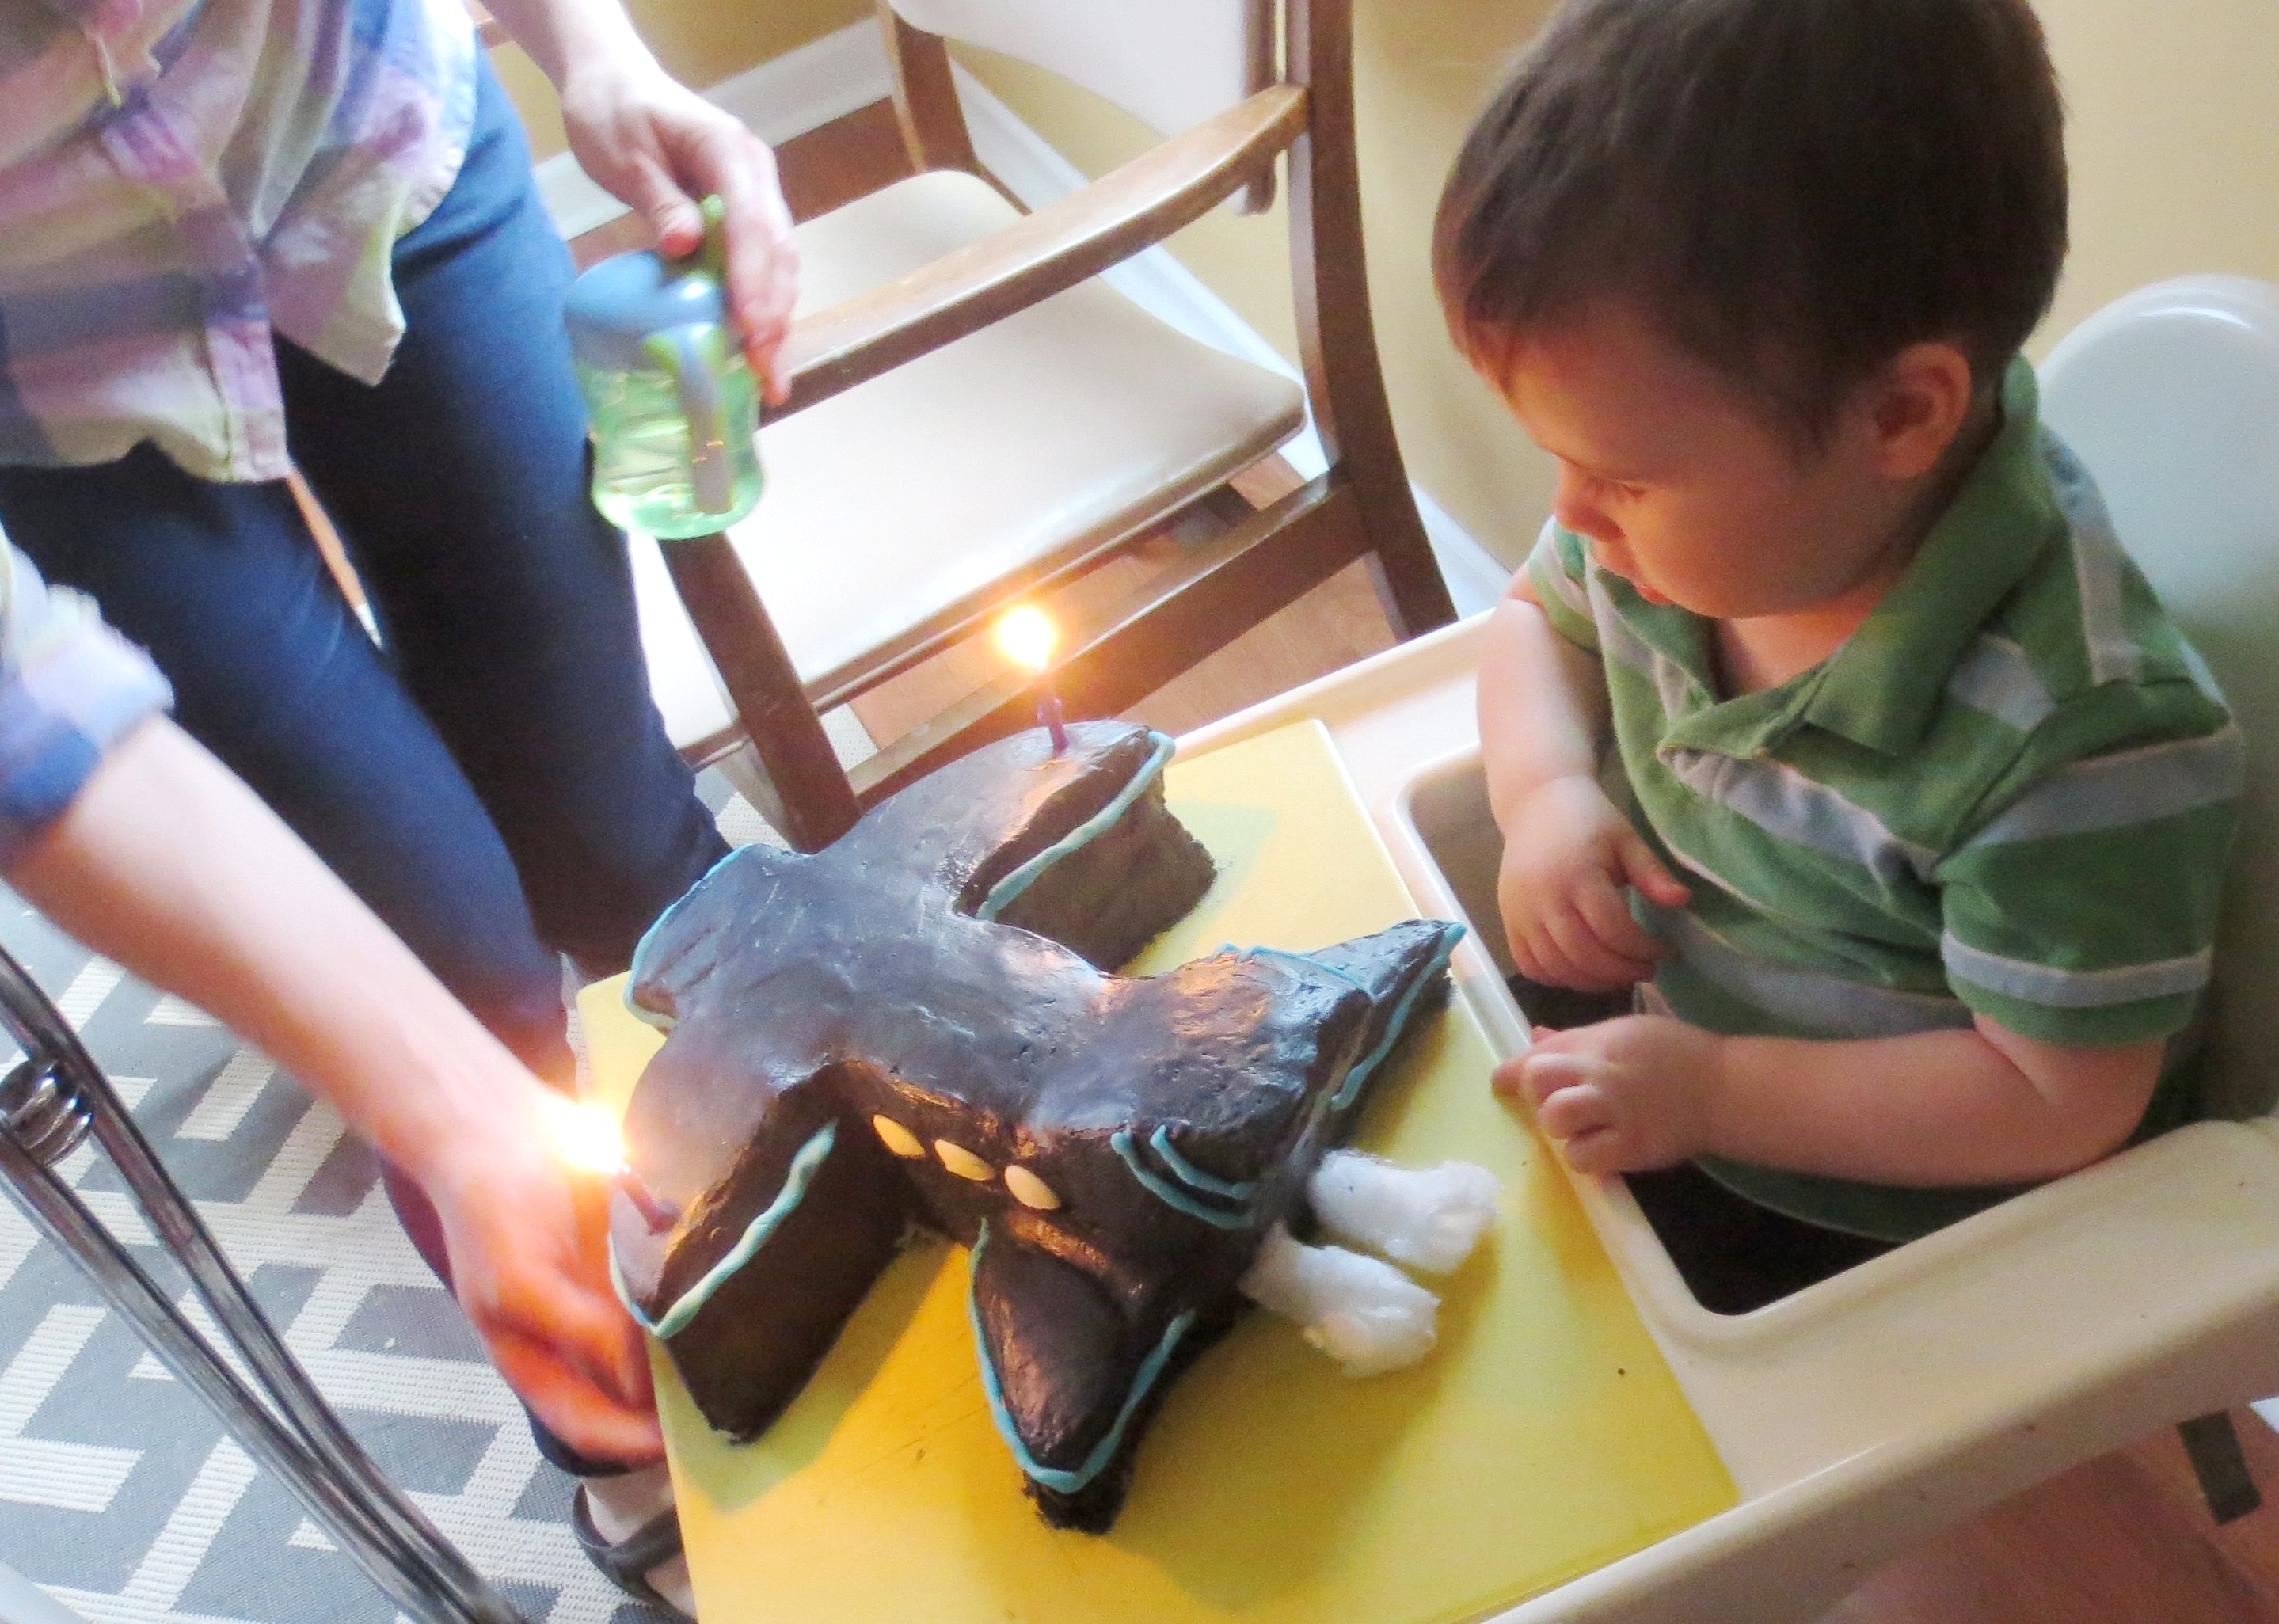 “Mommy, I was told there would be BABY cake!” said the ungrateful child.

Very cute. As a parent of the 80’s custom cakes became all the rage. Not being very patient or creative I shelled out some major bucks for Mutant Turtles, Belle and Pooh (the bear). Love your blog and found you through Retro Renovation.
Diane
Honey Stop The Car Vintage
LikeLike
Maybe you could have painted a tiny baby face in one of the windows…of the cake-plane that was going down…no, no, nevermind. I think you made a good decision. Nice work, momma!
LikeLike
I wish you had your blog when my kids were young and I was broke. Of course that was before the Internet, but still.
LikeLike
Another win, m’dear! We did a similar fly by pants (har har) for Mig’s birthday to make a bat. He was all about vampires but we decided a coffin would be too grim. Love the description of frosting primer and the exhaust. -Gin
LikeLike
Pingback: Funkify your Picnic with Psychedelic Carrot Fruit Pops | projectophile