

Robert Putnam, after winning the gold medal for Depressing the Hell out of America
When I was a young and impressionable, I read a terrifying book called “Bowling Alone,” by Robert Putnam. He describes the collapse of the American community and the decline of social capital – the kind of cohesion achieved by interacting with other human beings.** According to Putnam, folks today don’t join block clubs, political parties, or bowling leagues; if they want to roll, they bowl alone (or stay home and play bowling video games).
Ah, bowling alleys. Once the quintessential pleasure palaces of the mid-century American working class, they are closing up shop all around us.
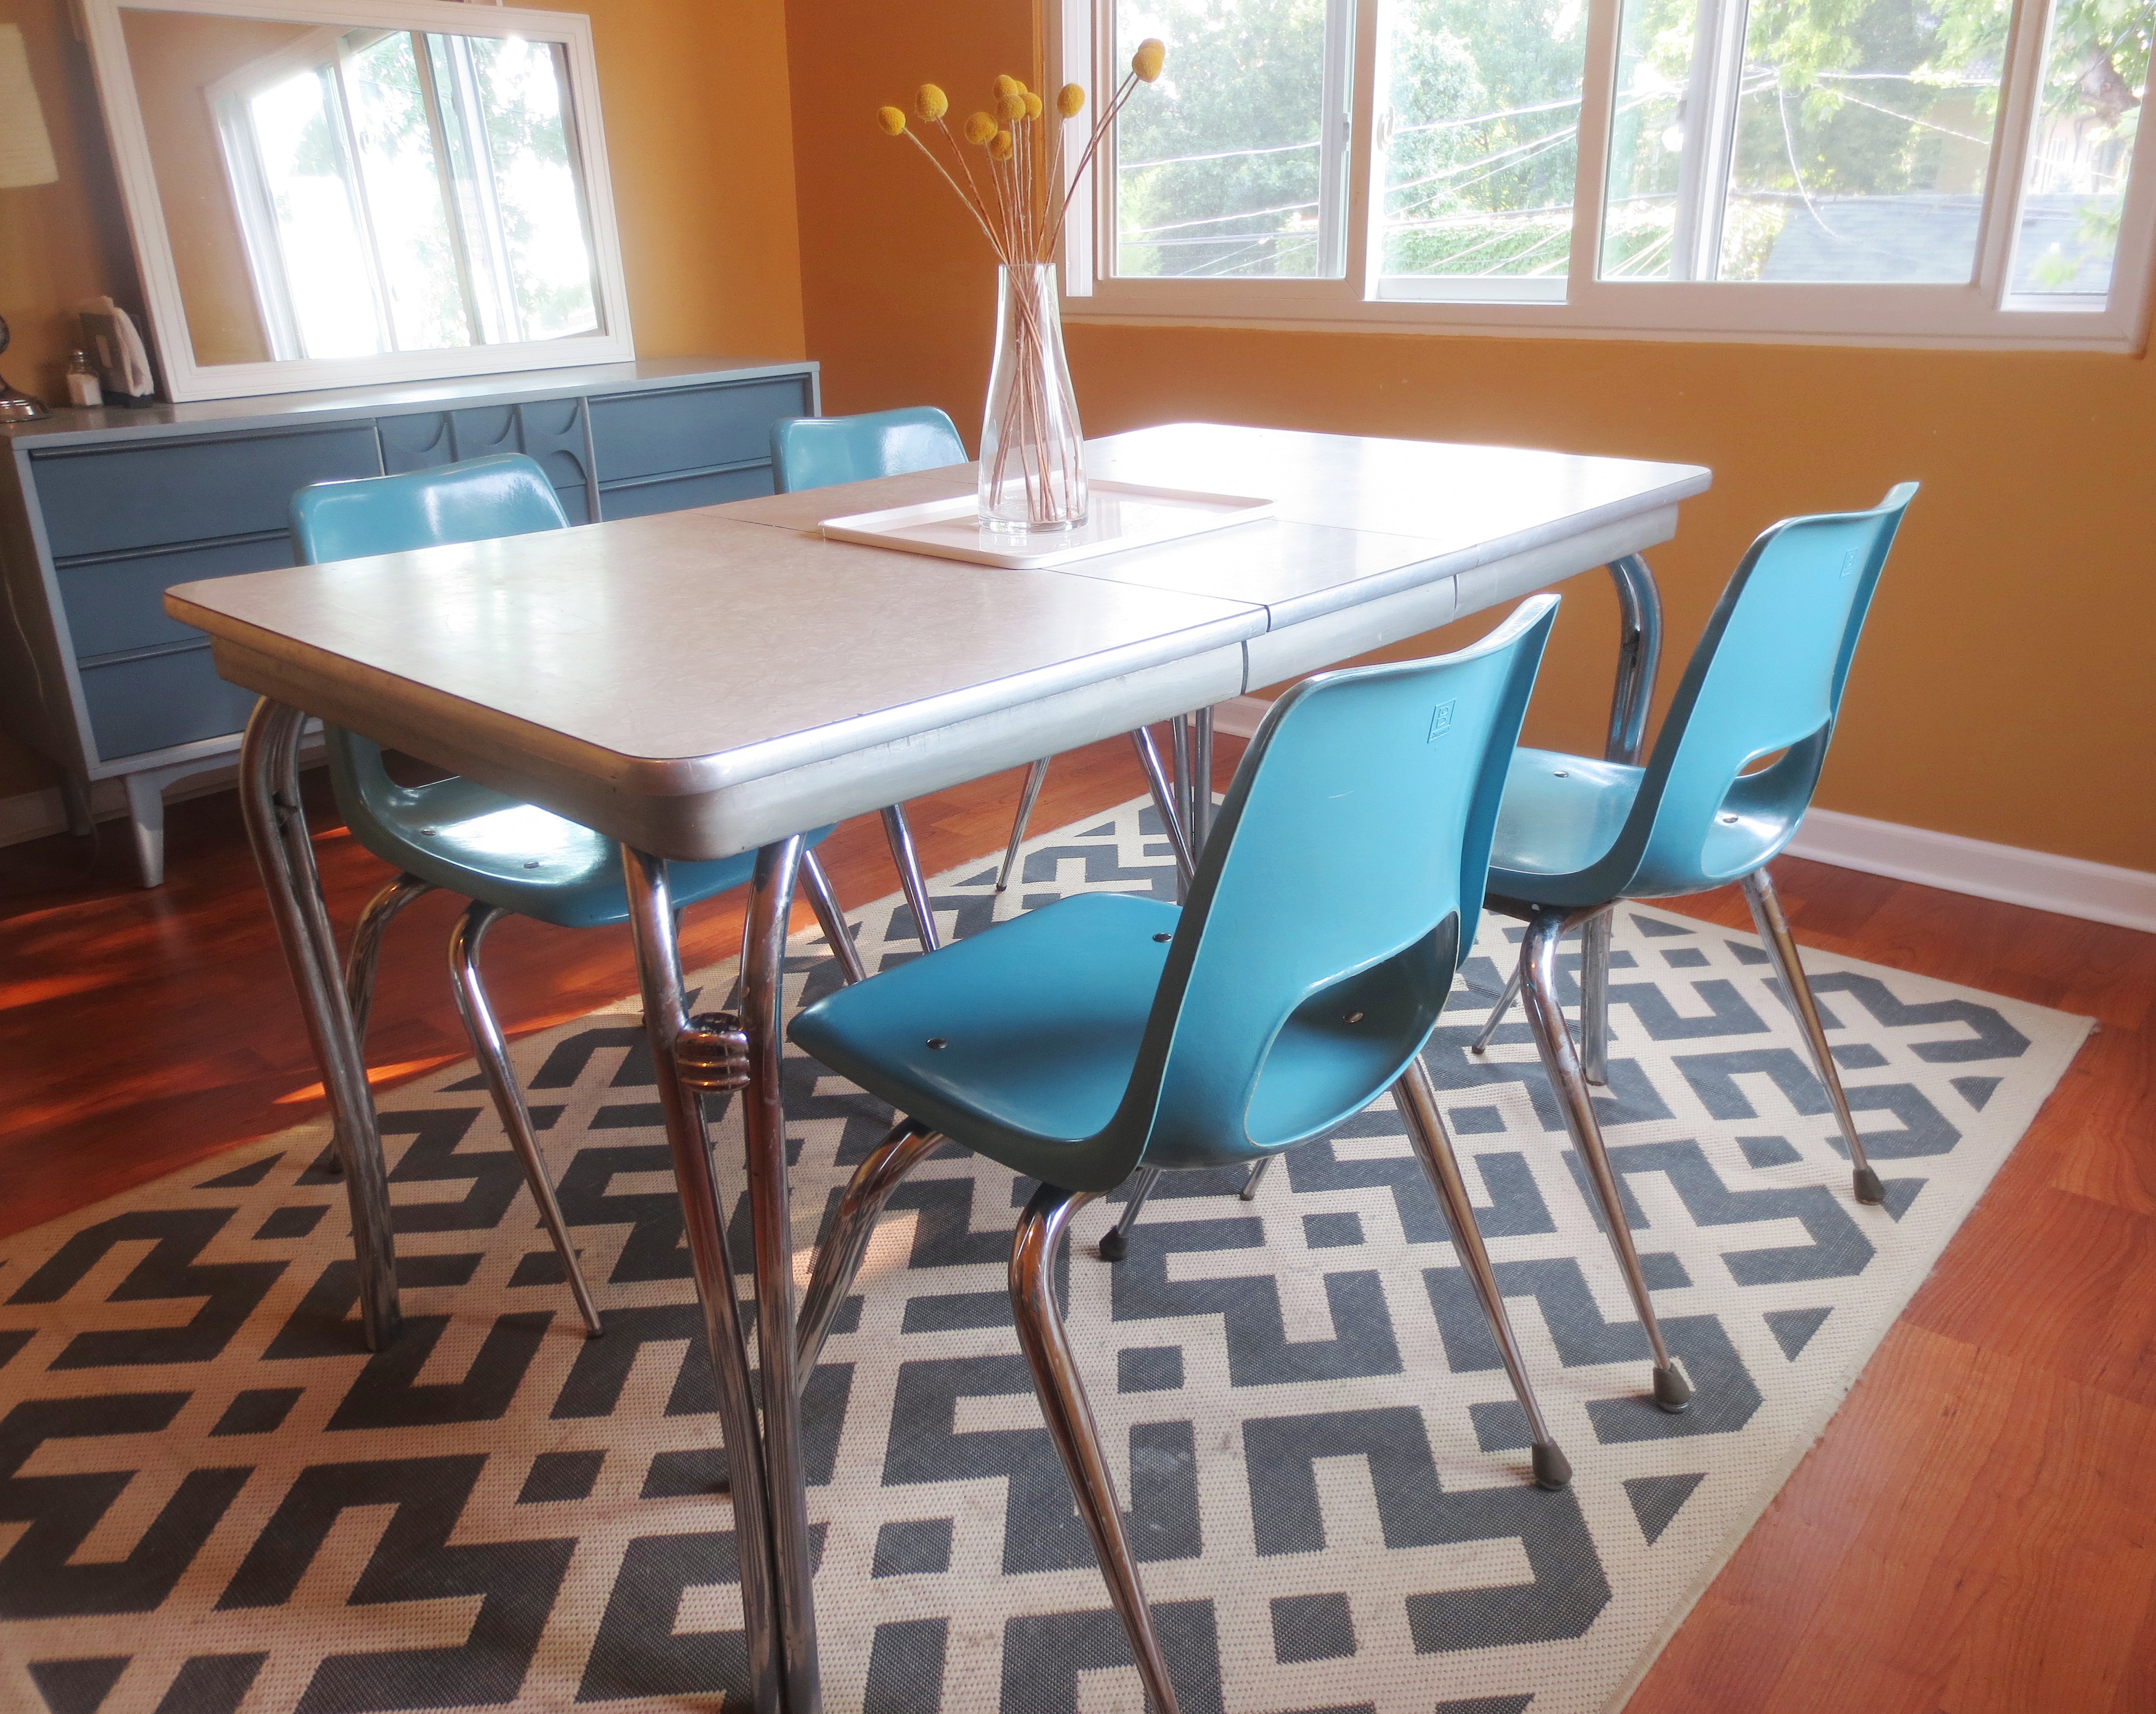
But the decay of America’s social fabric can be your gain! On Saturday, we were browsing the local yard sales and met a nice lady who returned from a bowling alley auction with a garage full of these fiberglass-and-chrome beauties! Ten dollars a piece? I’ll take four.
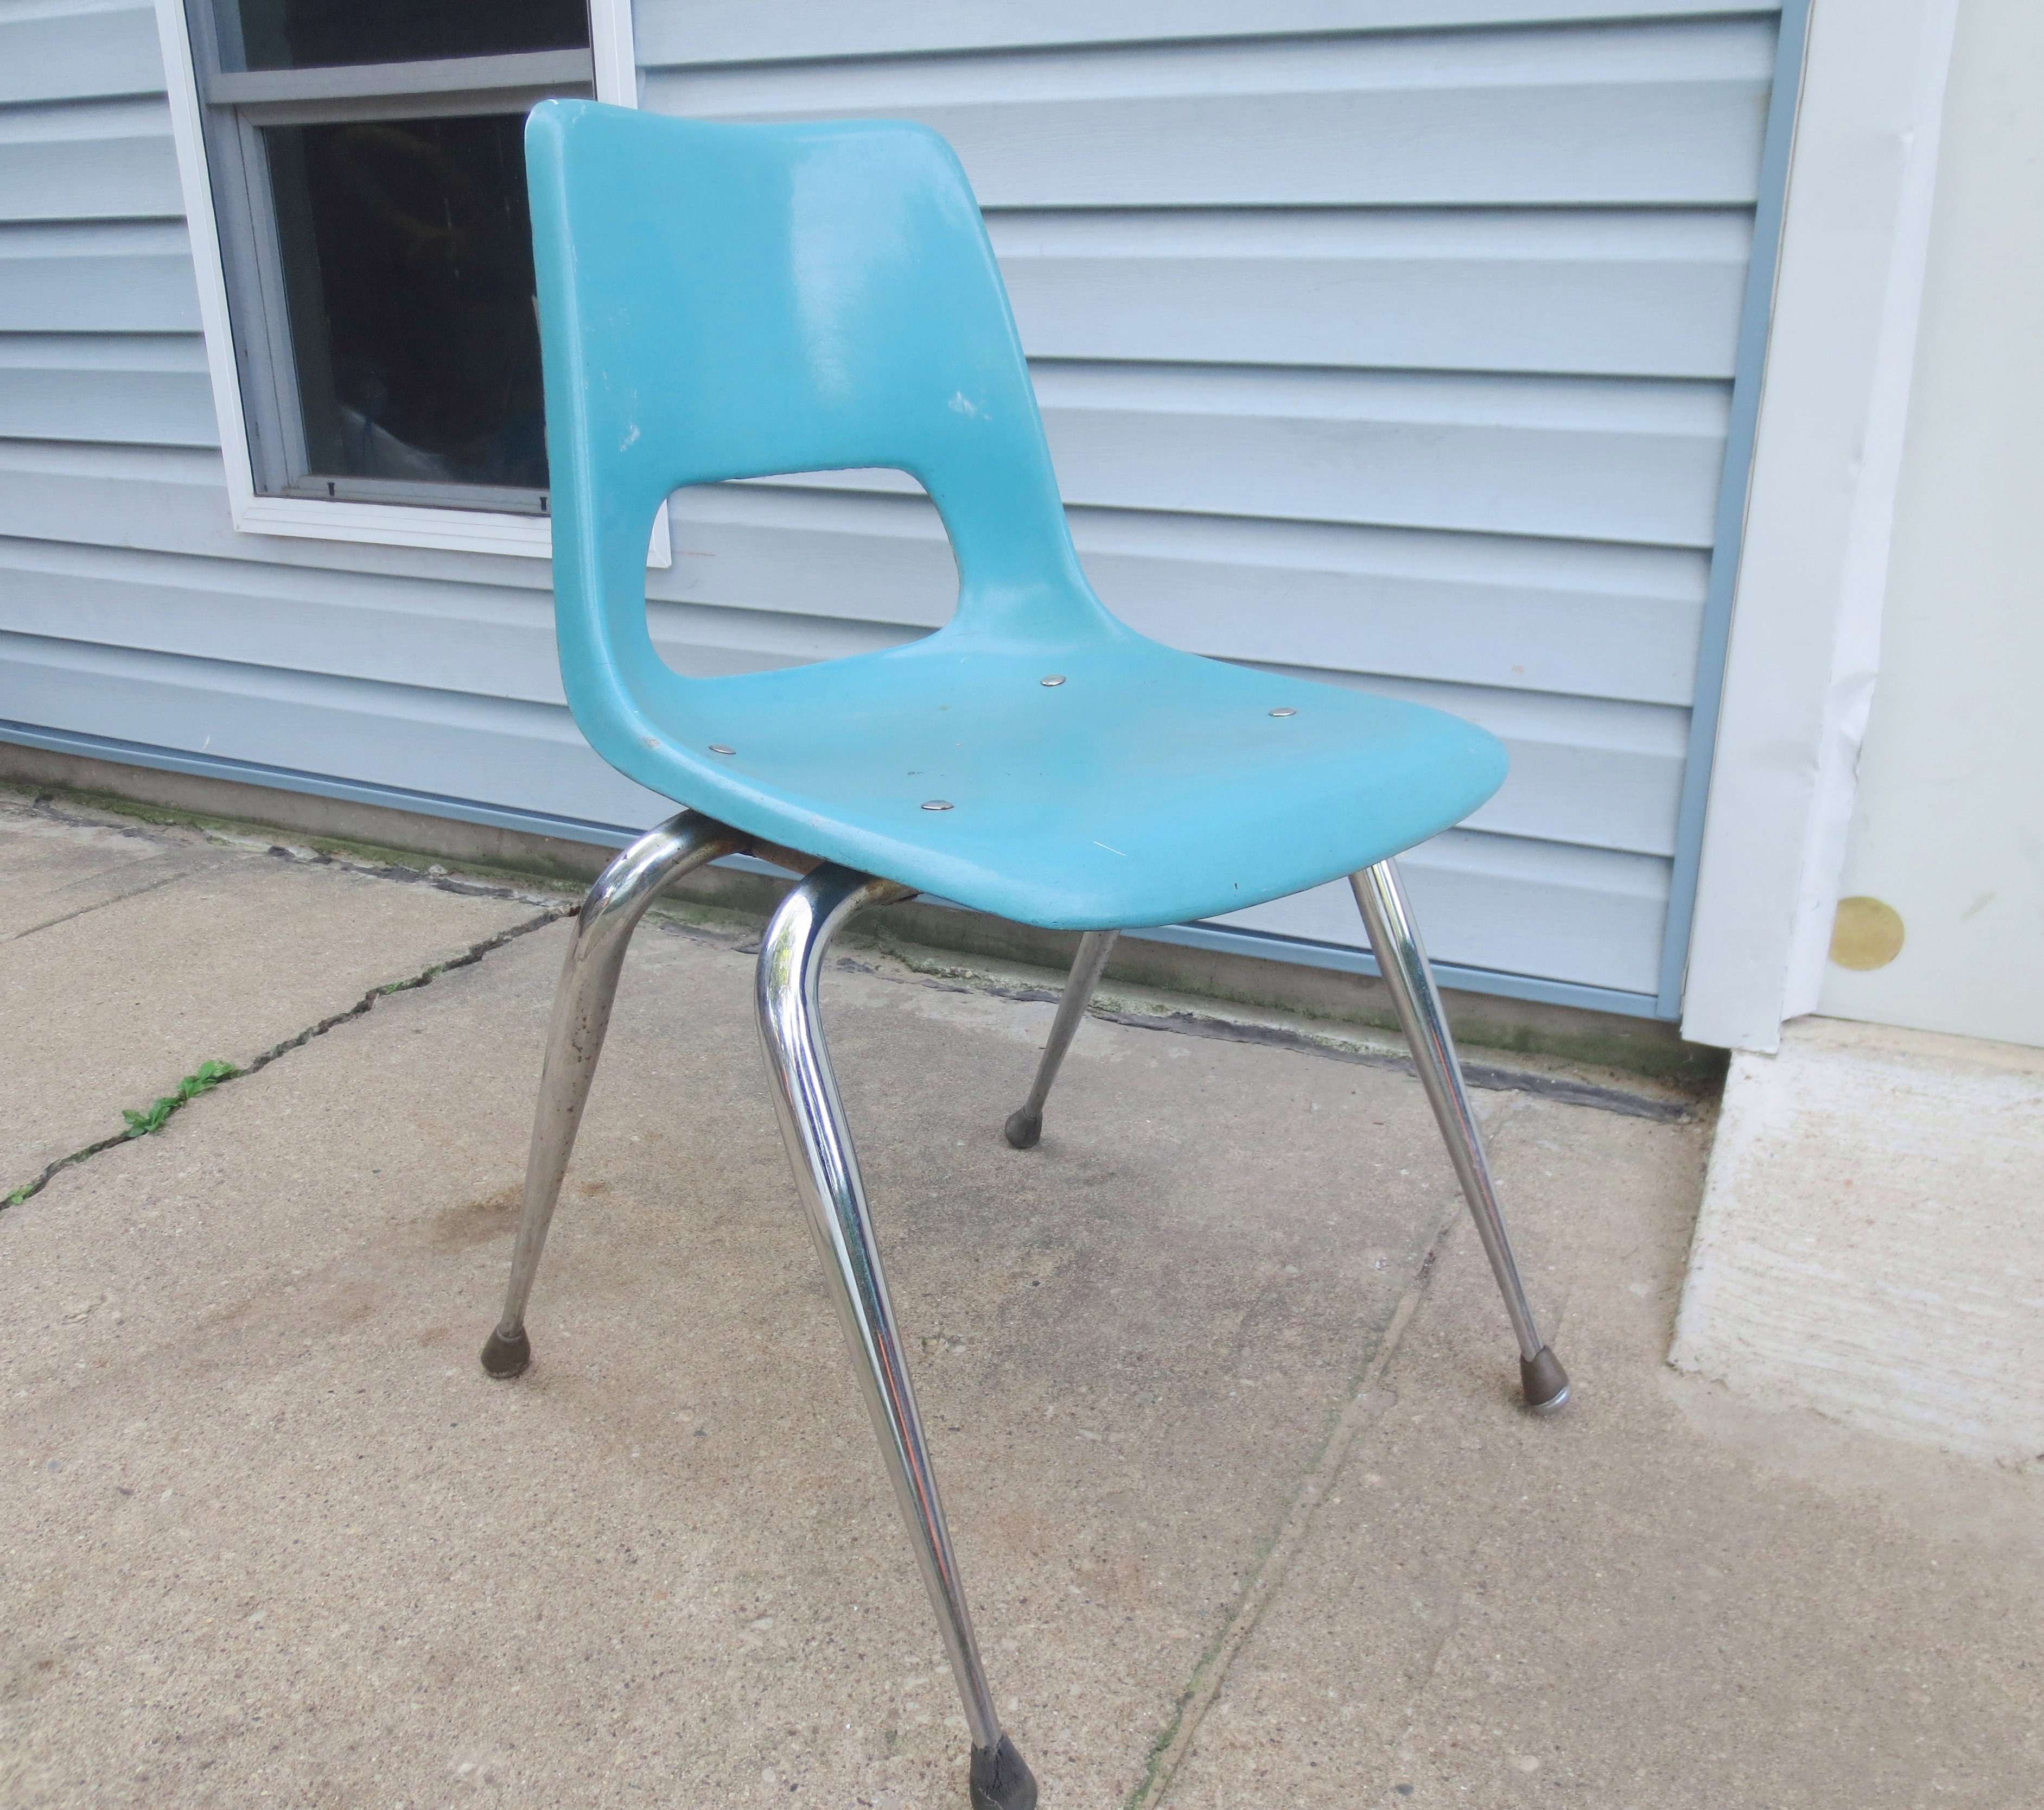
 I’d been looking to replace our cheapy plastic IKEA dining room chairs, but with something equally affordable, easy to clean, and similar in style to our chrome-and-Formica dining room table. And perhaps a bit more durable:
A perfect illustration of my love-hate relationship with IKEA.
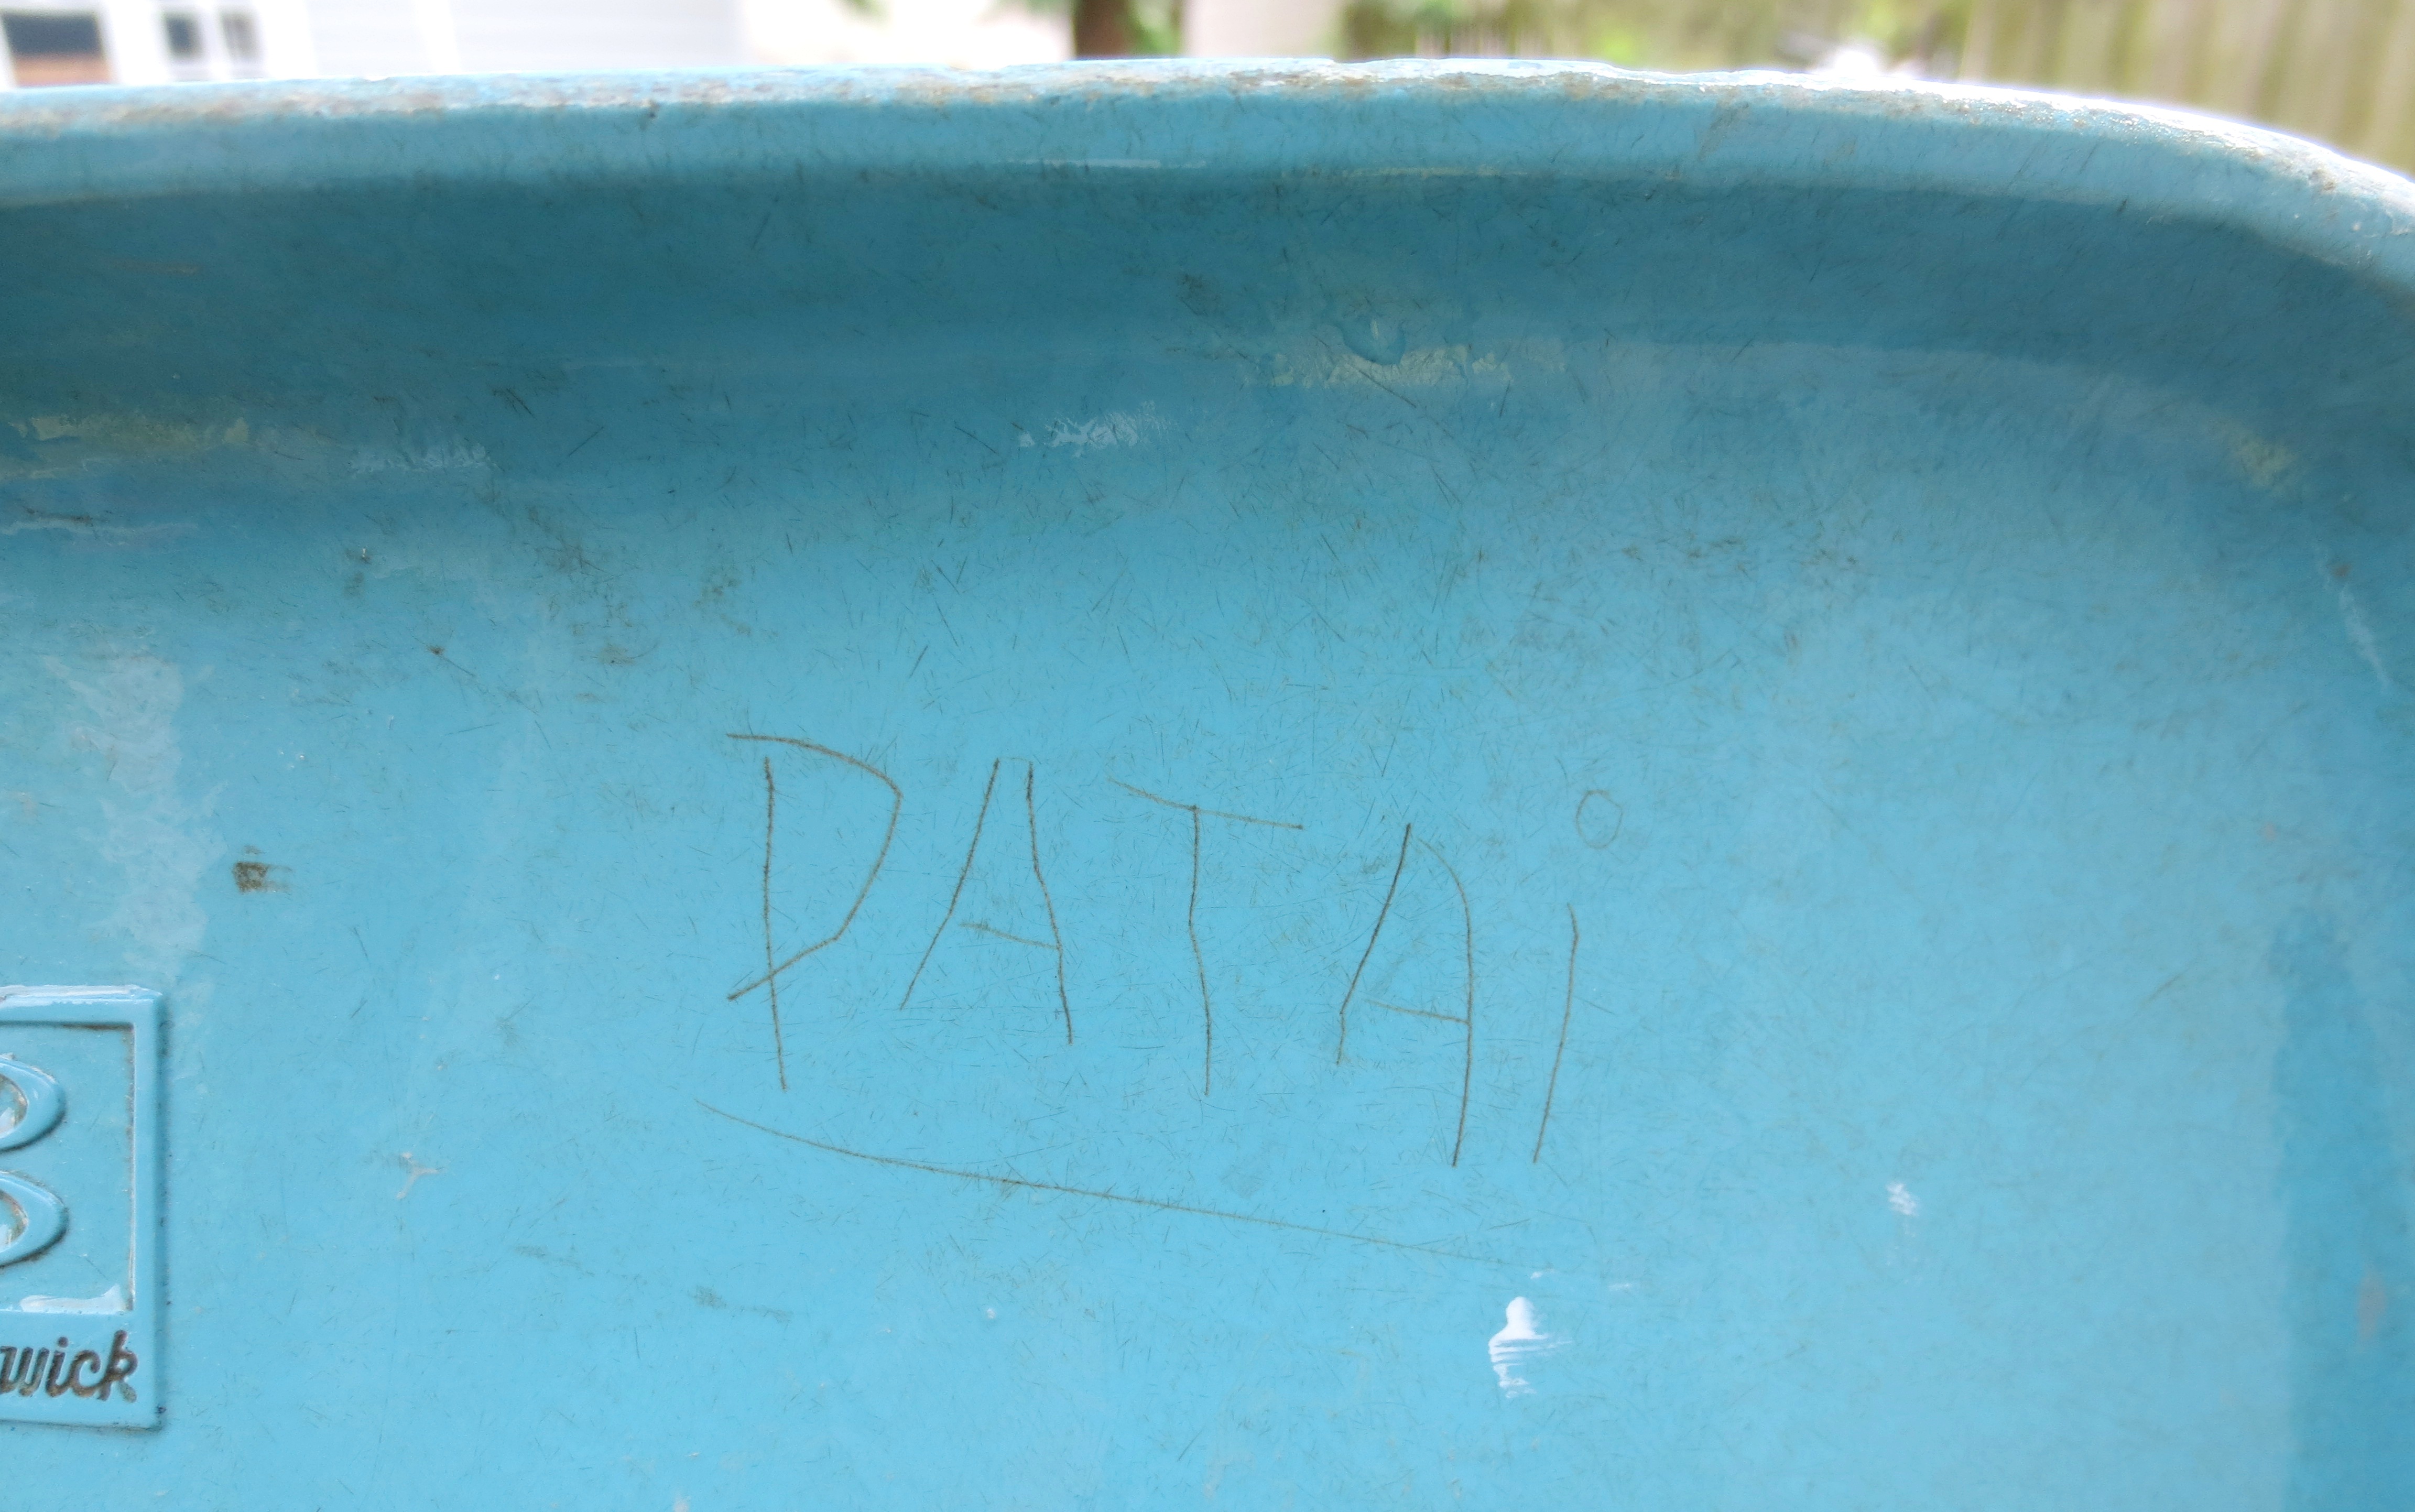
These chairs needed more than just a hose down in the back yard — I was looking at five decades of rust, nicotine, pencil marks and scratches (never mind the dried gum).

Sorry to show everybody your underside, mister chair.
HOW TO RESTORE 40+ YEAR-OLD FIBERGLASS BOWLING ALLEY CHAIRS:
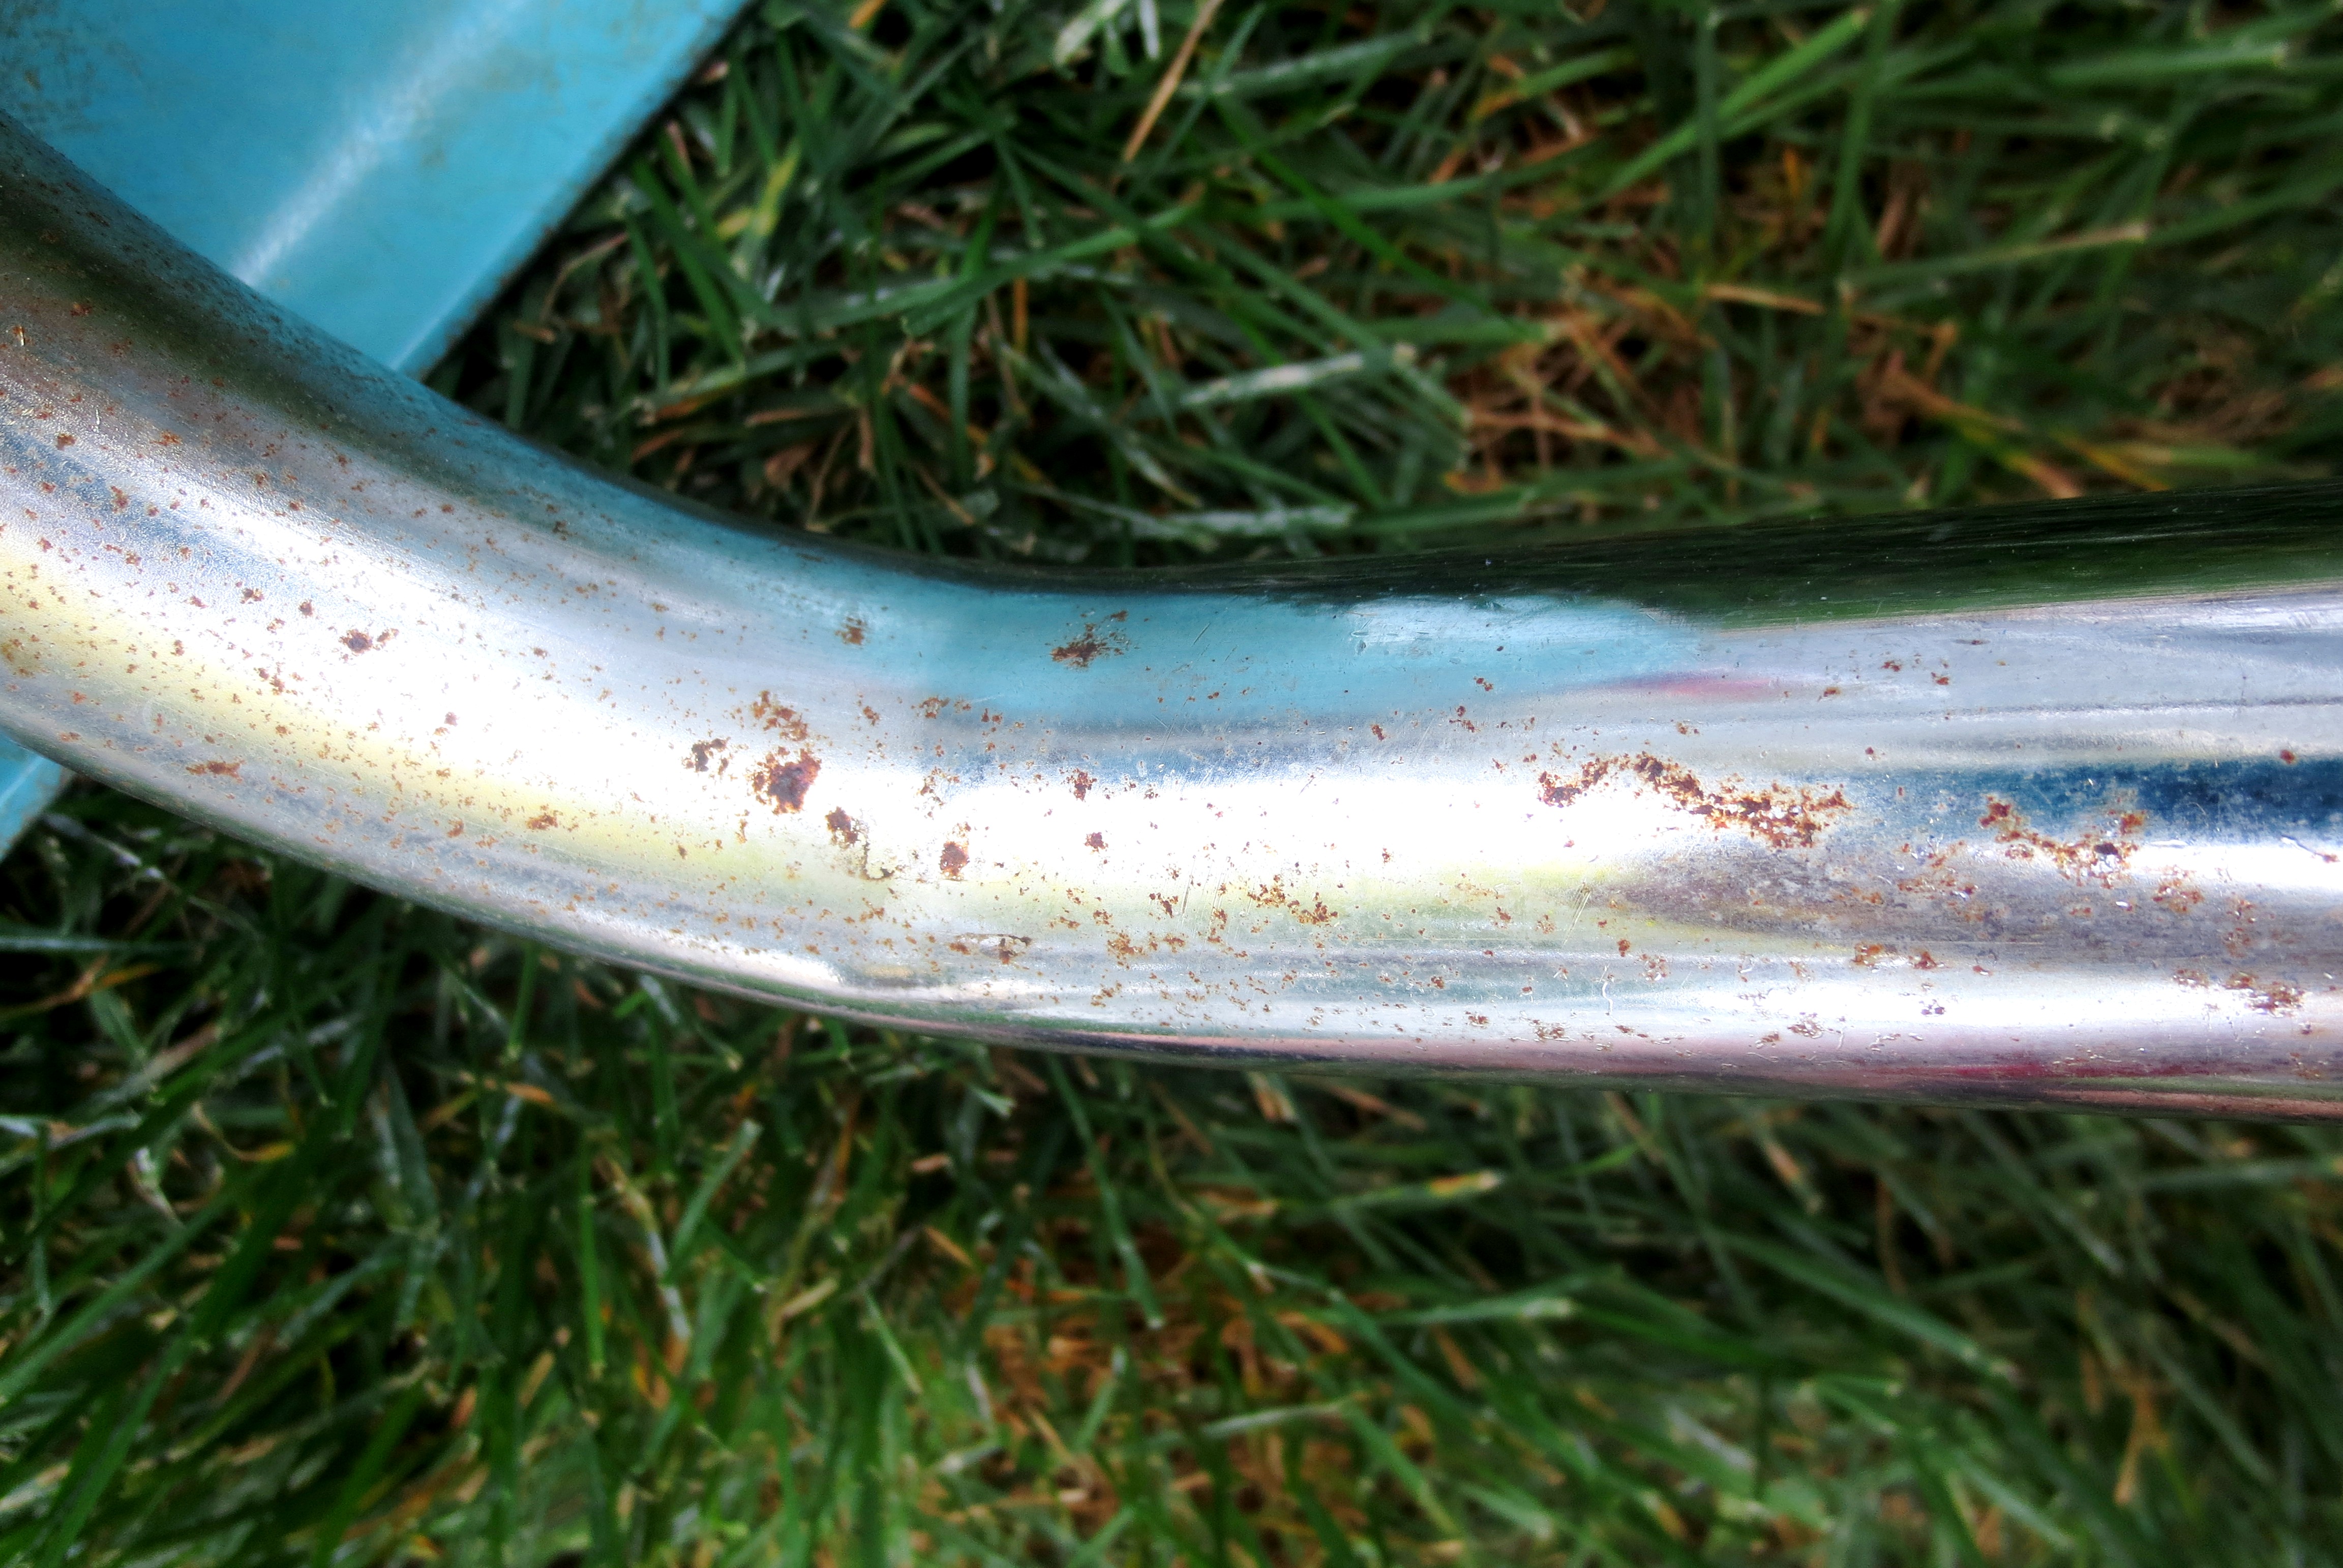
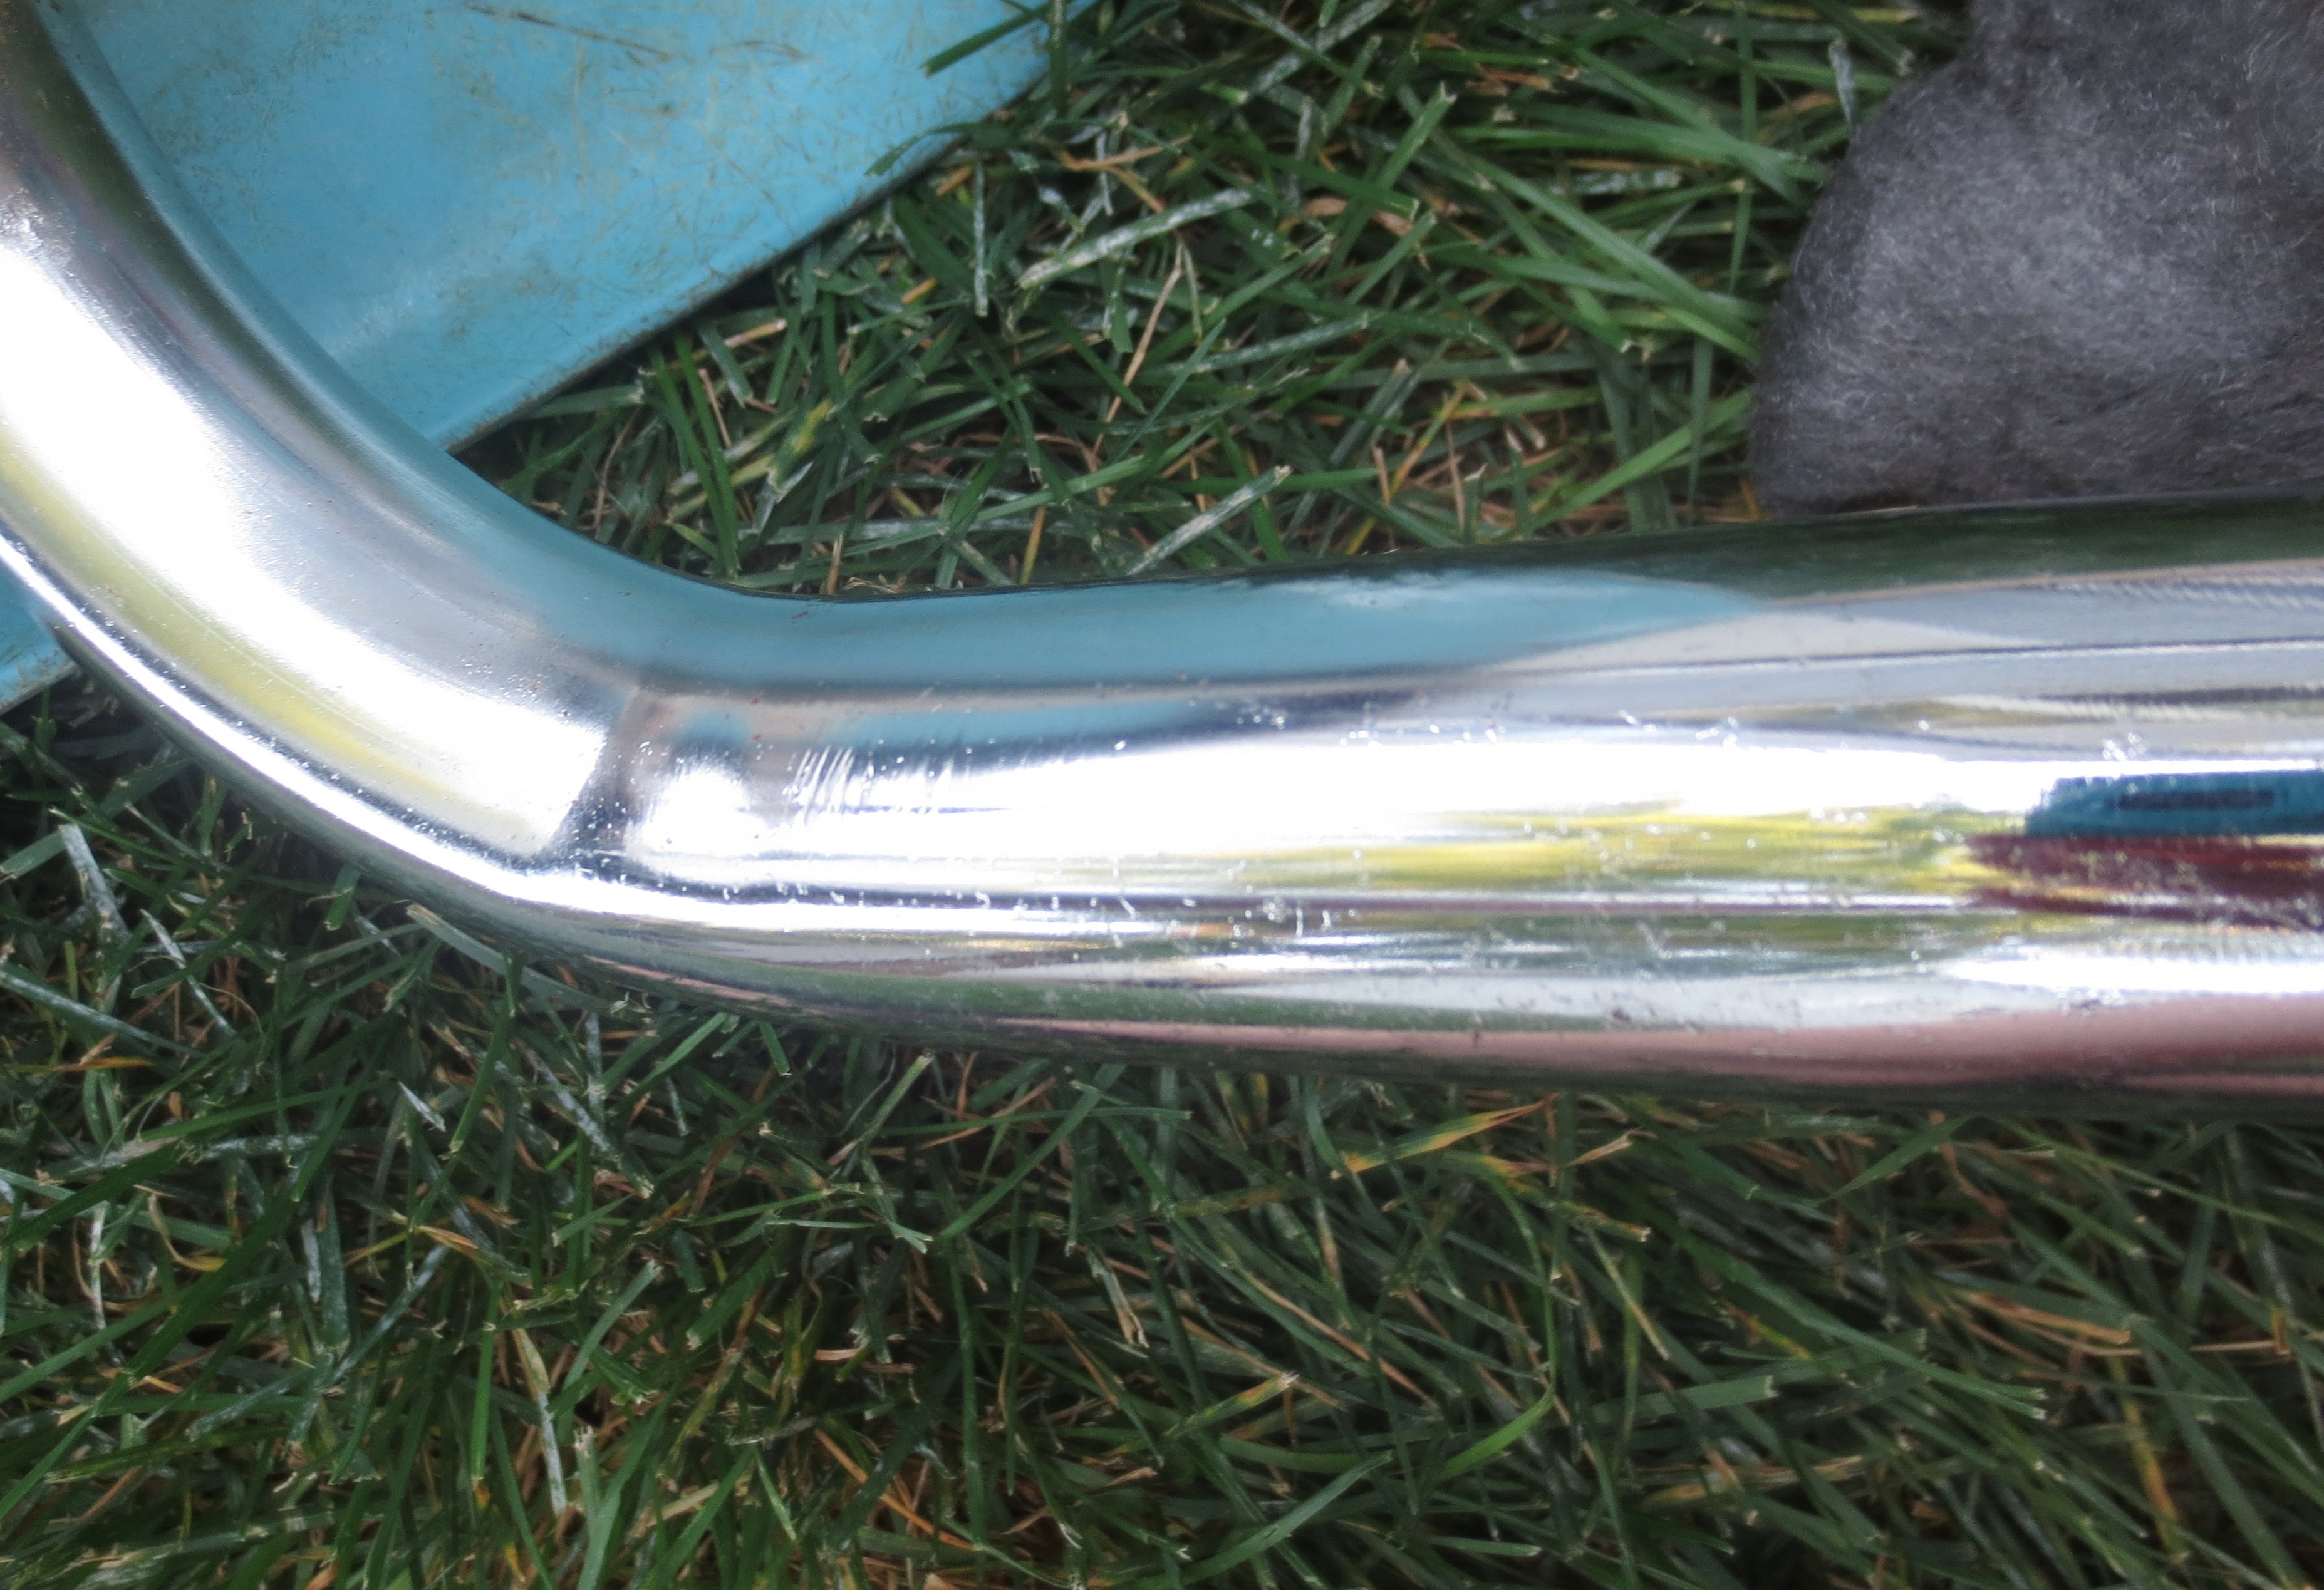
STEP ONE — LEGS: Grab a pack of extra fine steel wool – 000 or 00 grit (the back of the package should explain what works best for chrome or polished metals). Don’t just use whatever is under your sink. It should look like this:  Rub the steel wool over the chrome legs until you’ve removed rust spots and buffed it to a shine. I recommend doing this outdoors since the steel wool will produce tiny steel droppings which will get into everything, including your skin. So maybe wear pants, too. Here’s a Before & After:
 STEP TWO — WASH: Give your chairs a quick bath with mild dish soap, warm water and a regular sponge. You’ll need to wash away the “low-hanging” grime to see what you’re really dealing with.
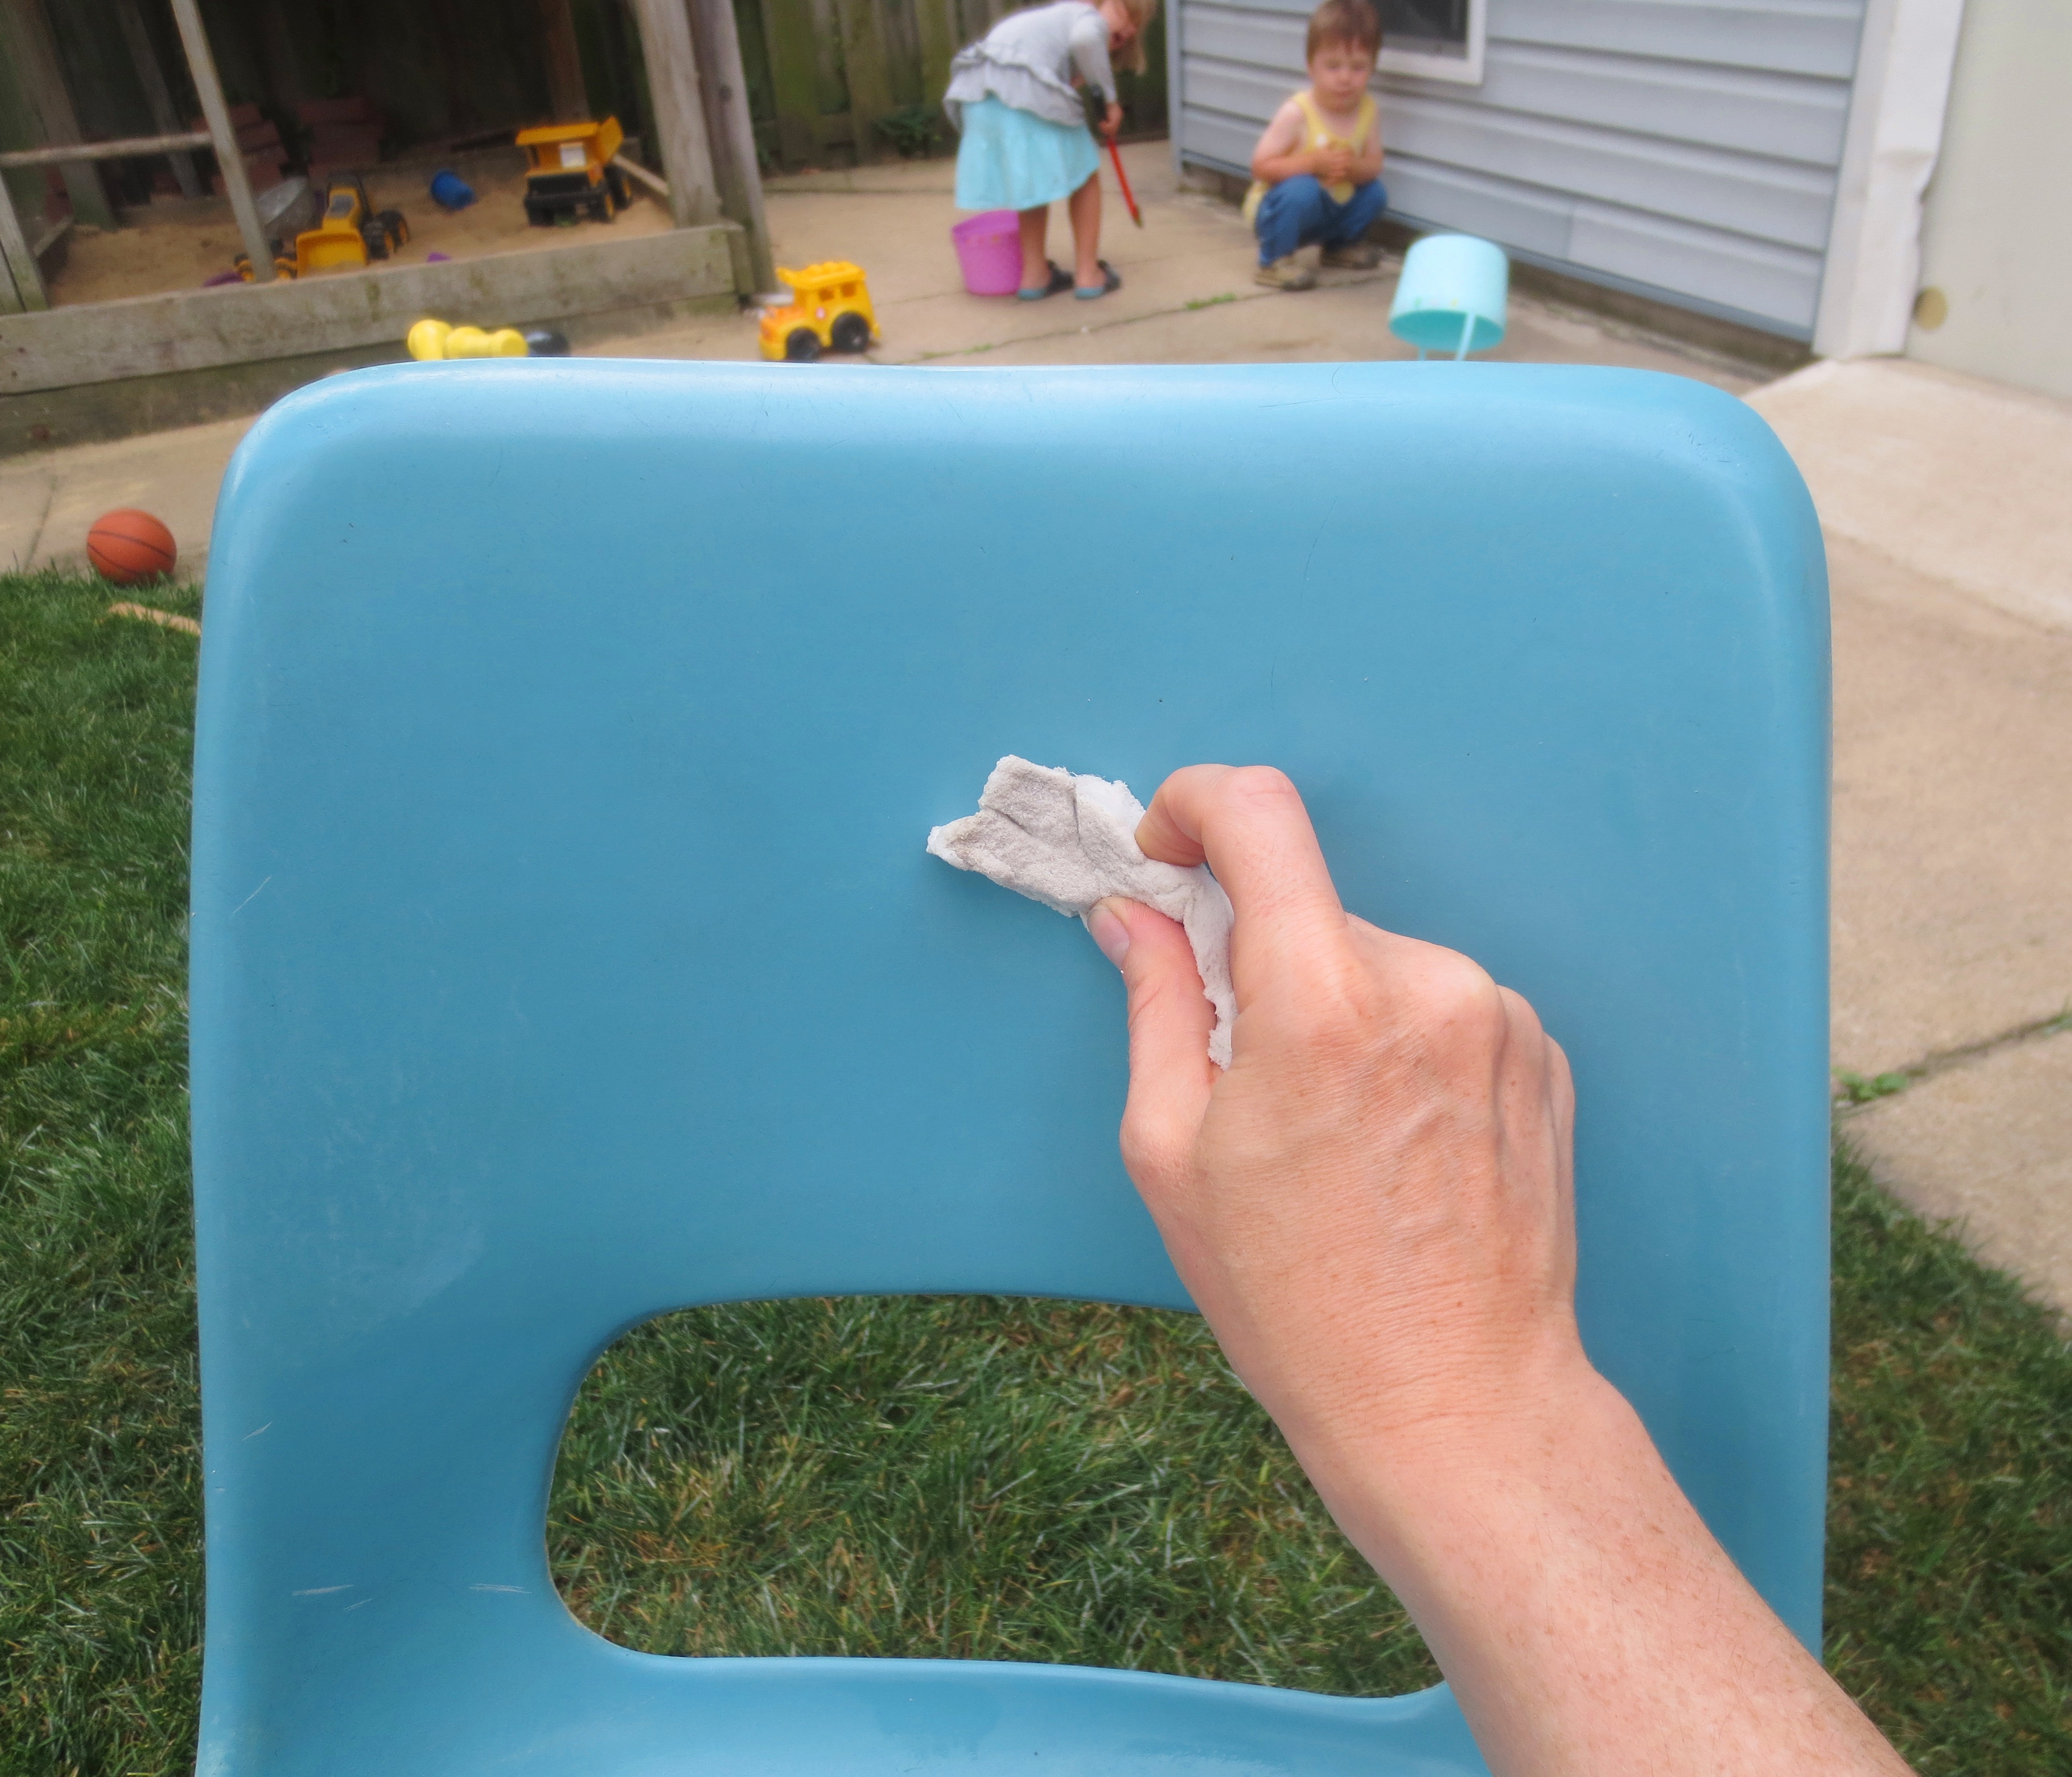
STEP THREE — SCRATCH: Warm up you biceps, cause we’re gonna put some muscle and scratch into it. This is where I had to do some experimenting. While the chair was still wet (and with a spray bottle handy to keep everything damp) I tried several different mild abrasives – the scrubby side of a new sponge, extra fine steel wool, 600-grit sandpaper, 400-grit sandpaper. I didn’t have the nerve to move to a lower grit, so I called on an old friend … Melamine Foam. You know, the Magic Eraser?
Magic Eraser, I can’t quit you. You’re so good at cleaning everything. I would brush my damn teeth with you if the warning on the box wasn’t telling me not to.
Anyway. Slip on rubber gloves and watch the grime magically disappear. Like a kamikaze in sponge form, Magic Eraser will also disappear, selflessly sloughing itself down to a useless nub. Budget about one-half Magic Eraser per chair.
 The Eraser will also remove much of the “shine,” if your chair had any left. Don’t panic, we’ll get it back in the next step.

Look closely — can you see the difference?
Rinse and repeat, and rinse again. Whether you’re using sandpaper or the Magic Eraser, you’ll be left with a funny white residue, so rinse thoroughly and let air dry. Your chair should be clean and slightly rough, but without any big scratches.
PRO TIP!! The level of sanding is really up to you. Unlike a painted surface, fiberglass is the same color inside and out, so don’t be afraid to rub out any unsightly scratches. However, I chose to keep some, both because I was afraid of what heavy sanding might do, and because I wanted to keep a little bit of the chair’s old charm:
Anybody else suddenly feel like ordering Thai food?
STEP FOUR – SHINE: When the chairs are completely dry, move to the outdoors or a well-ventilated area. Saturate a clean rag with Penetrol. This is actually sold as a conditioner for oil-based paints, but resourceful boaters have discovered that it makes a great finish for fiberglass surfaces (I had to spend lot of time on boat forums to figure this out). 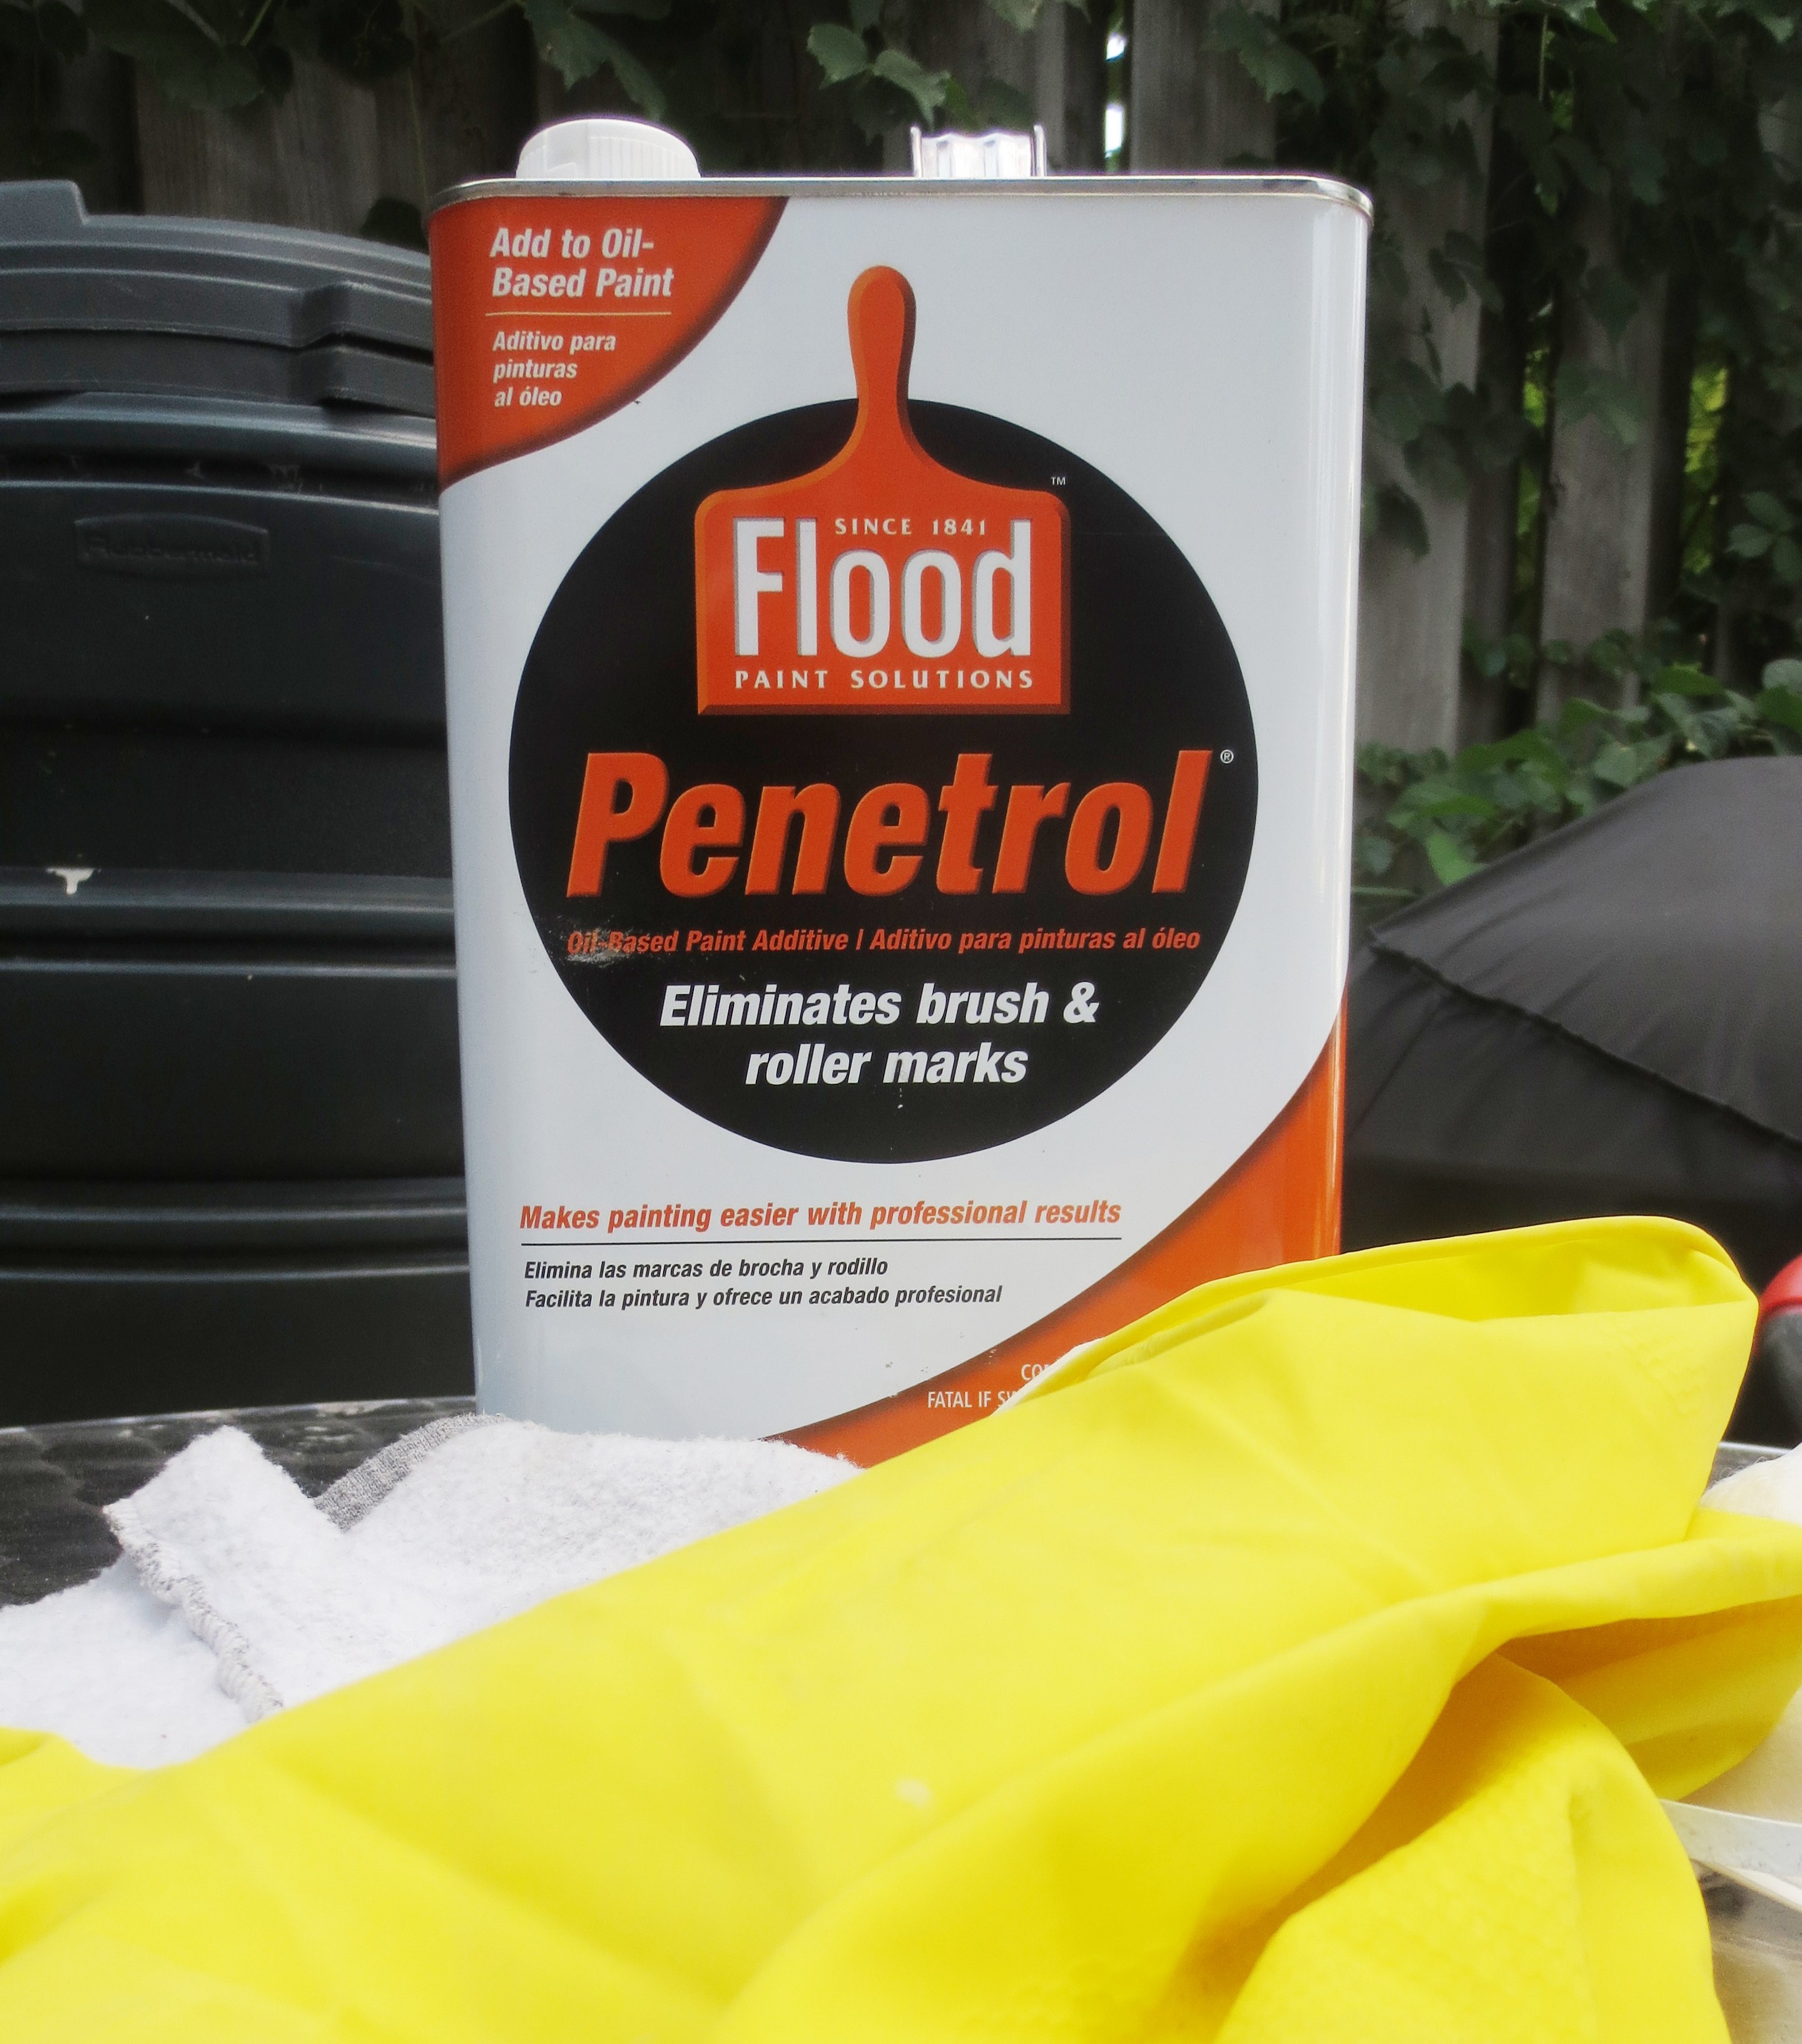 Rub a generous — but not sloppy or drippy – amount of Penetrol on your chair.

It is important to take your sweatpants off completely before soaking them in petroleum distillate. Also, no smoking!
After about 3 minutes, wipe off the excess Penetrol with a dry, soft rag. You don’t want any wet spots left after buffing – this stuff is really weird and sticky. If you leave it outside, don’t be surprised if bugs get stuck to it.
Let the first coat dry for at least a day, and then apply another coat or two for extra shine. There are very limited instructions on the can, so just take my word for it. This requires extreme amounts of patience, but in the meantime you can figure out what to do about those yucky feet.
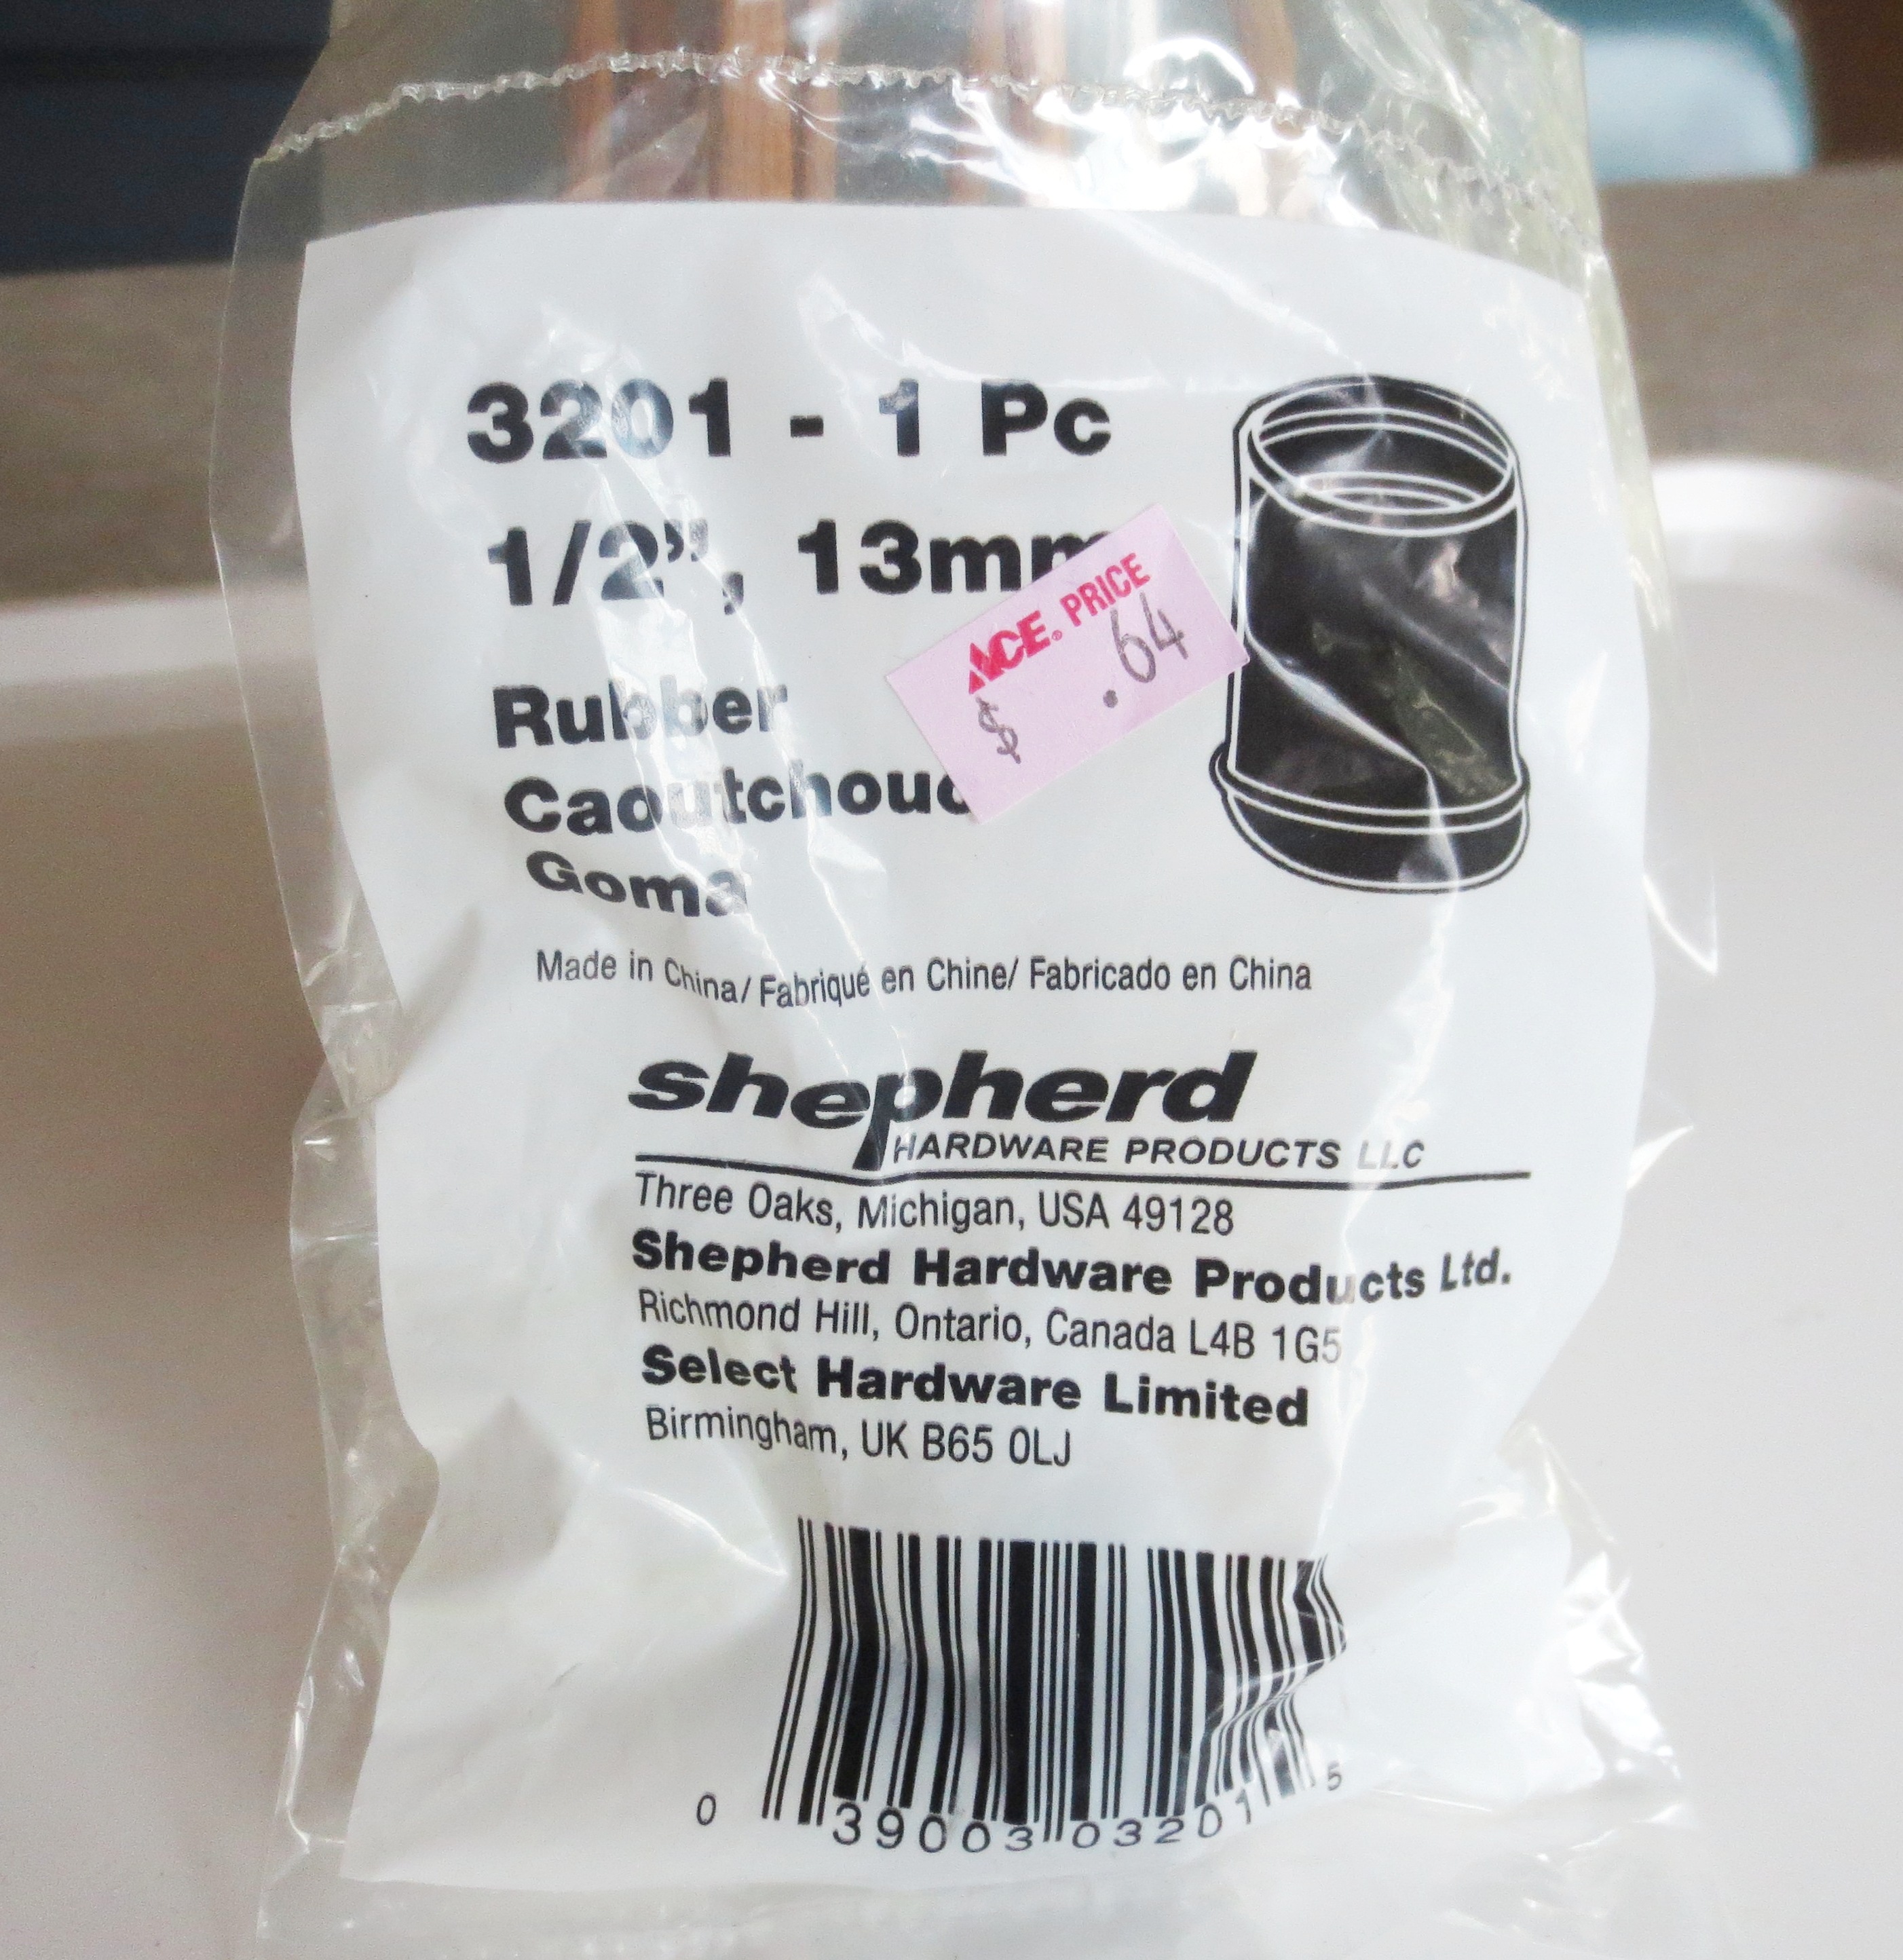
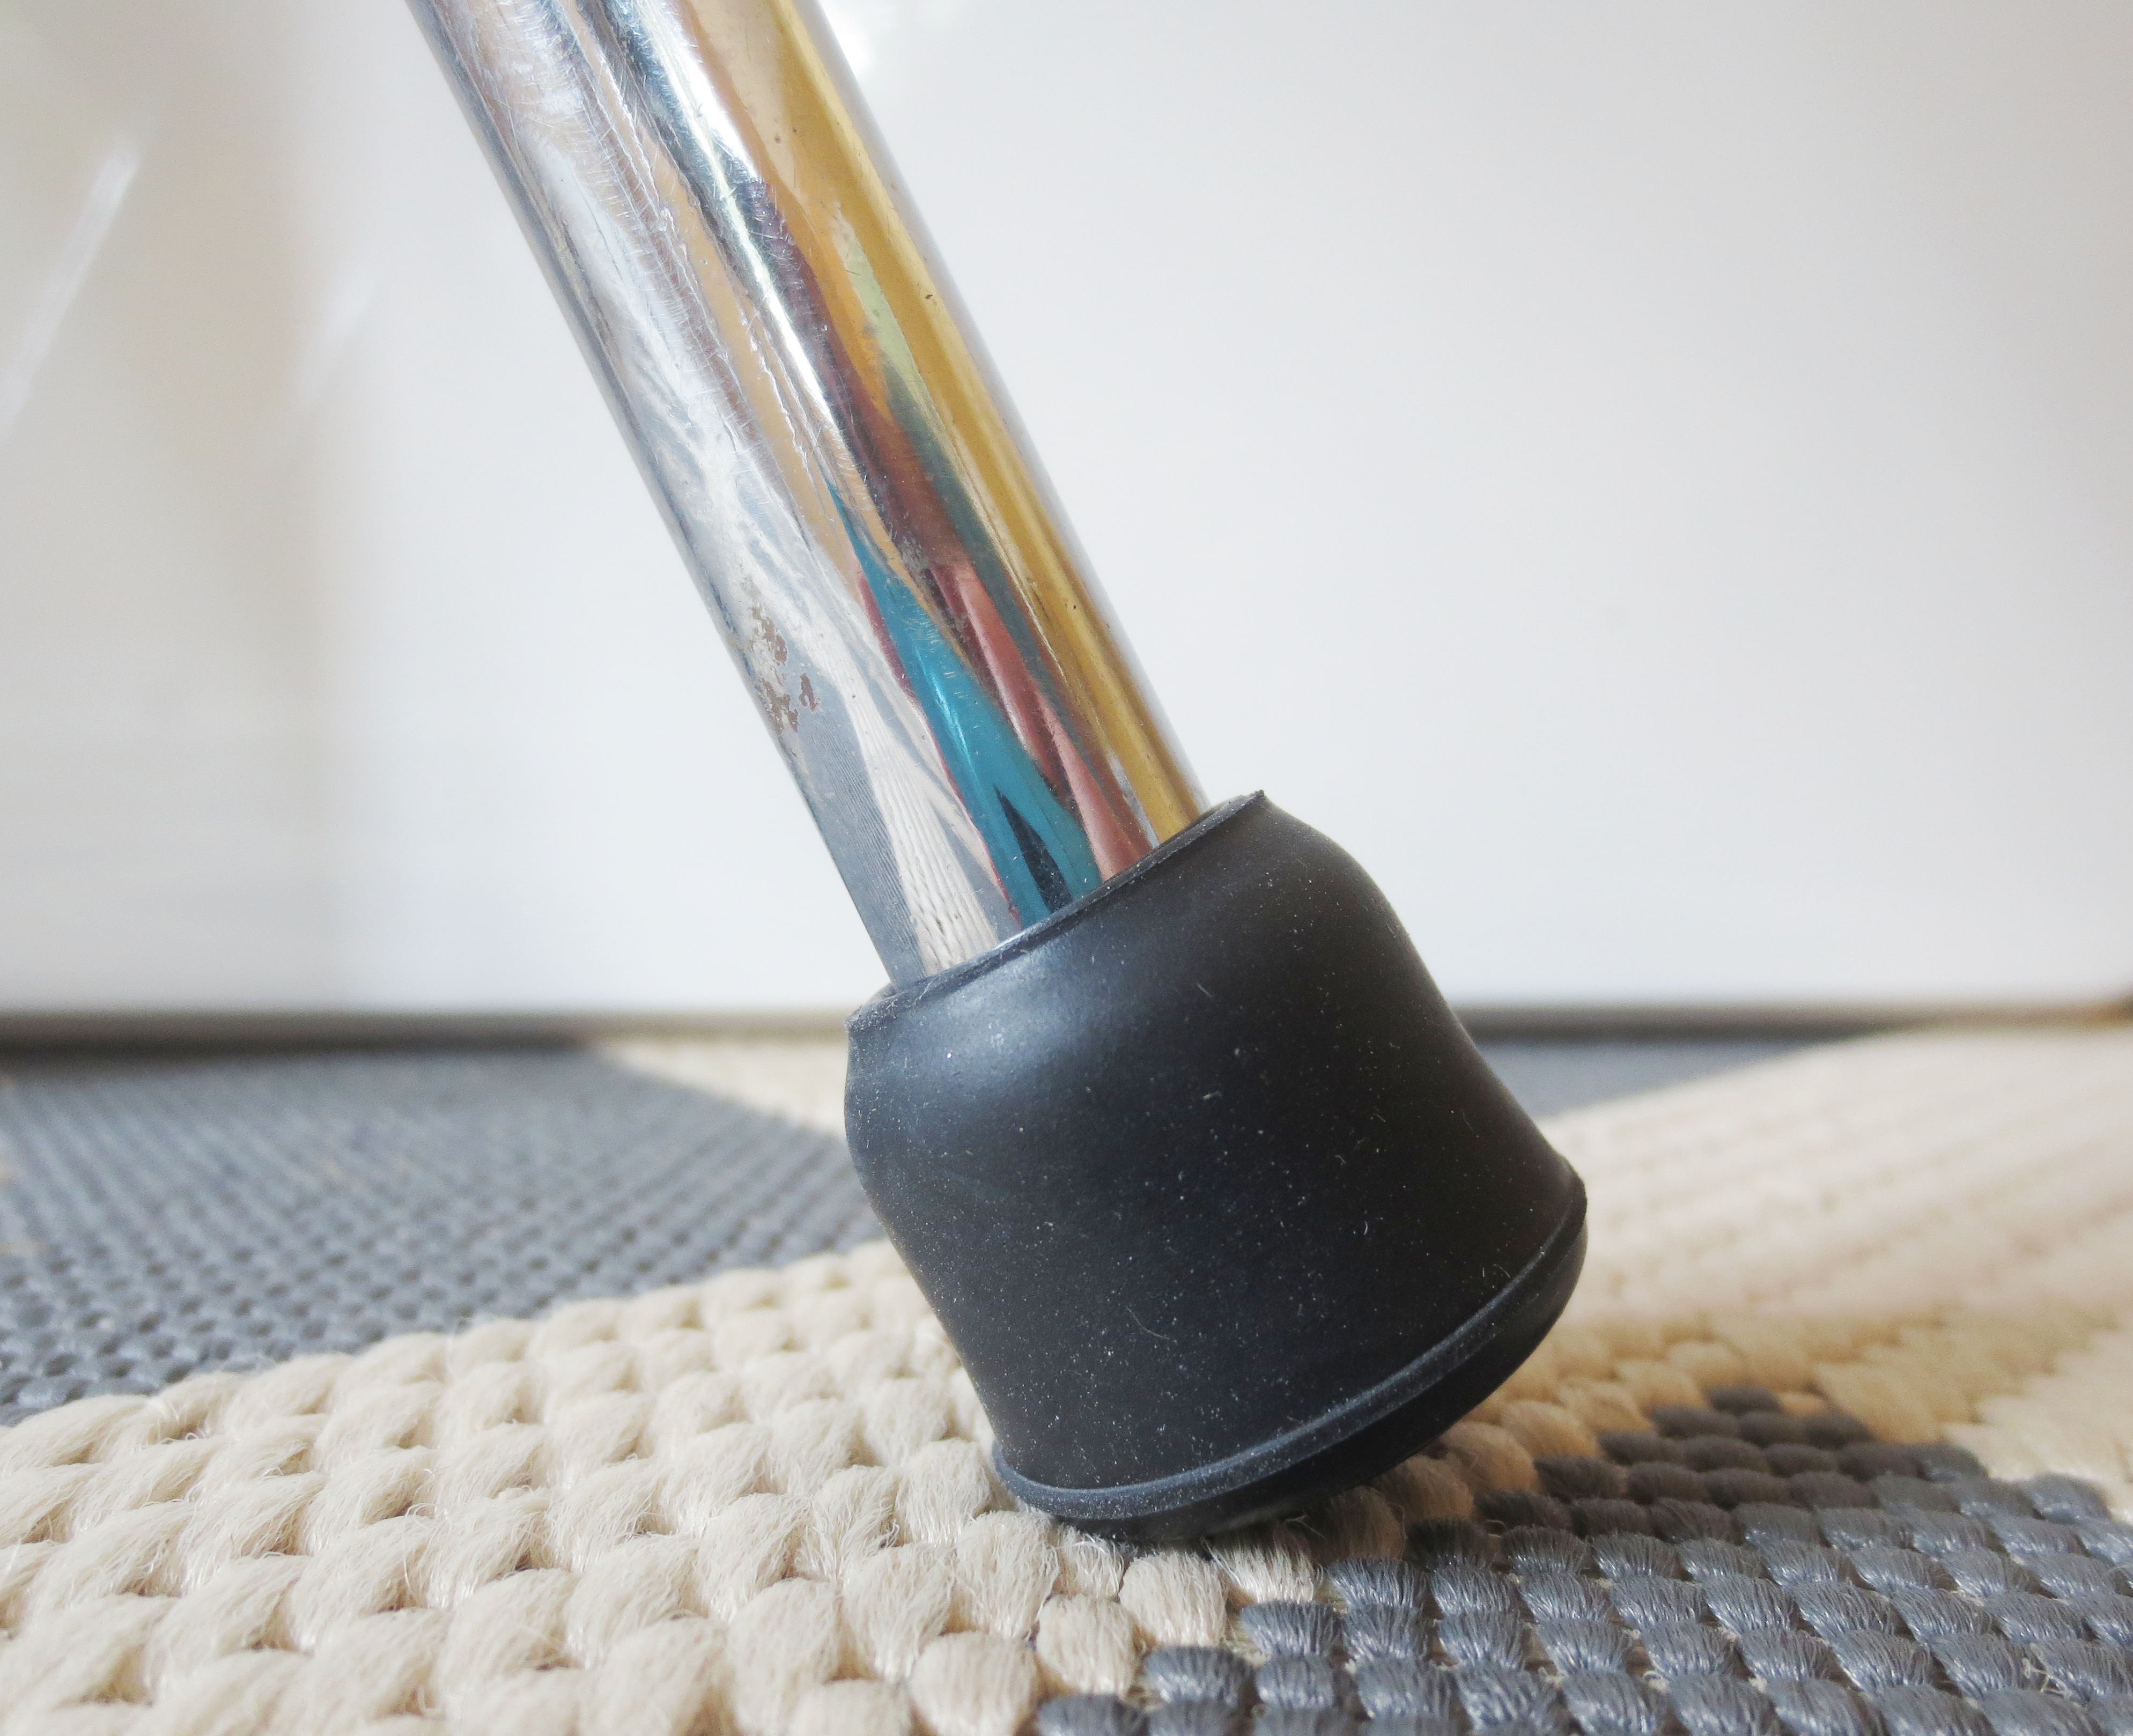
STEP FIVE – FEET: Decide that those rotting rubber feet can no longer be a part of your gorgeous new dining set.  …And leaving them bare seems like an equally bad idea:
 Grab one of the old feet, and head back to your beloved local hardware store. You know, the one where they conveniently display the nails and mousetraps at toddler eye-level.
  The ½ inch rubber feet that I grabbed fit perfectly, so I bought their entire inventory.
STEP SIX — BUILD SOCIAL CAPITAL: And now, Professor Putman, I promise to use these chairs to gather together friends and neighbors as frequently as possible.


 **Hey, don’t blame me, I just went on vacation with 35 other people.

Bravo! looks fab.
LikeLike
Well this is just fantastic!!! Filing away for when I find my chairs. Thanks for the lesson.
Diane
LikeLike
Next time you’re buying chairs from me at a garage sale, tell me that I already read your blog. Then I won’t waste time explaining to you how to fix up these chairs with steel wool. Because I will know that you already know how to do that. In fact, I will be using this blog as a tutorial on how to fix up the other 35 chairs I still have stashed in the garage. Nice damn work! And fast, too.
LikeLike
Hi Katherine — well, that’s the thing. I DIDN’T know how to buff the rust off of chrome until you and Sarah told me to use steel wool. I had no idea. You should see the chrome legs on my dining room table… shameful! But that will have to wait til tomorrow.
And as you probably know, there’s not a lot of info out there on how to deal with fiberglass chairs. Most fiberglass care tutorials are on boat forums… not quite the same thing. I saw one from ChairFag that’s been going around — he uses sandpaper but doesn’t say what # grit.
Did you sell any more of those chairs?
LikeLike
They’re perfect! Well, they’re not perfect, but that’s what makes them perfect.
LikeLike
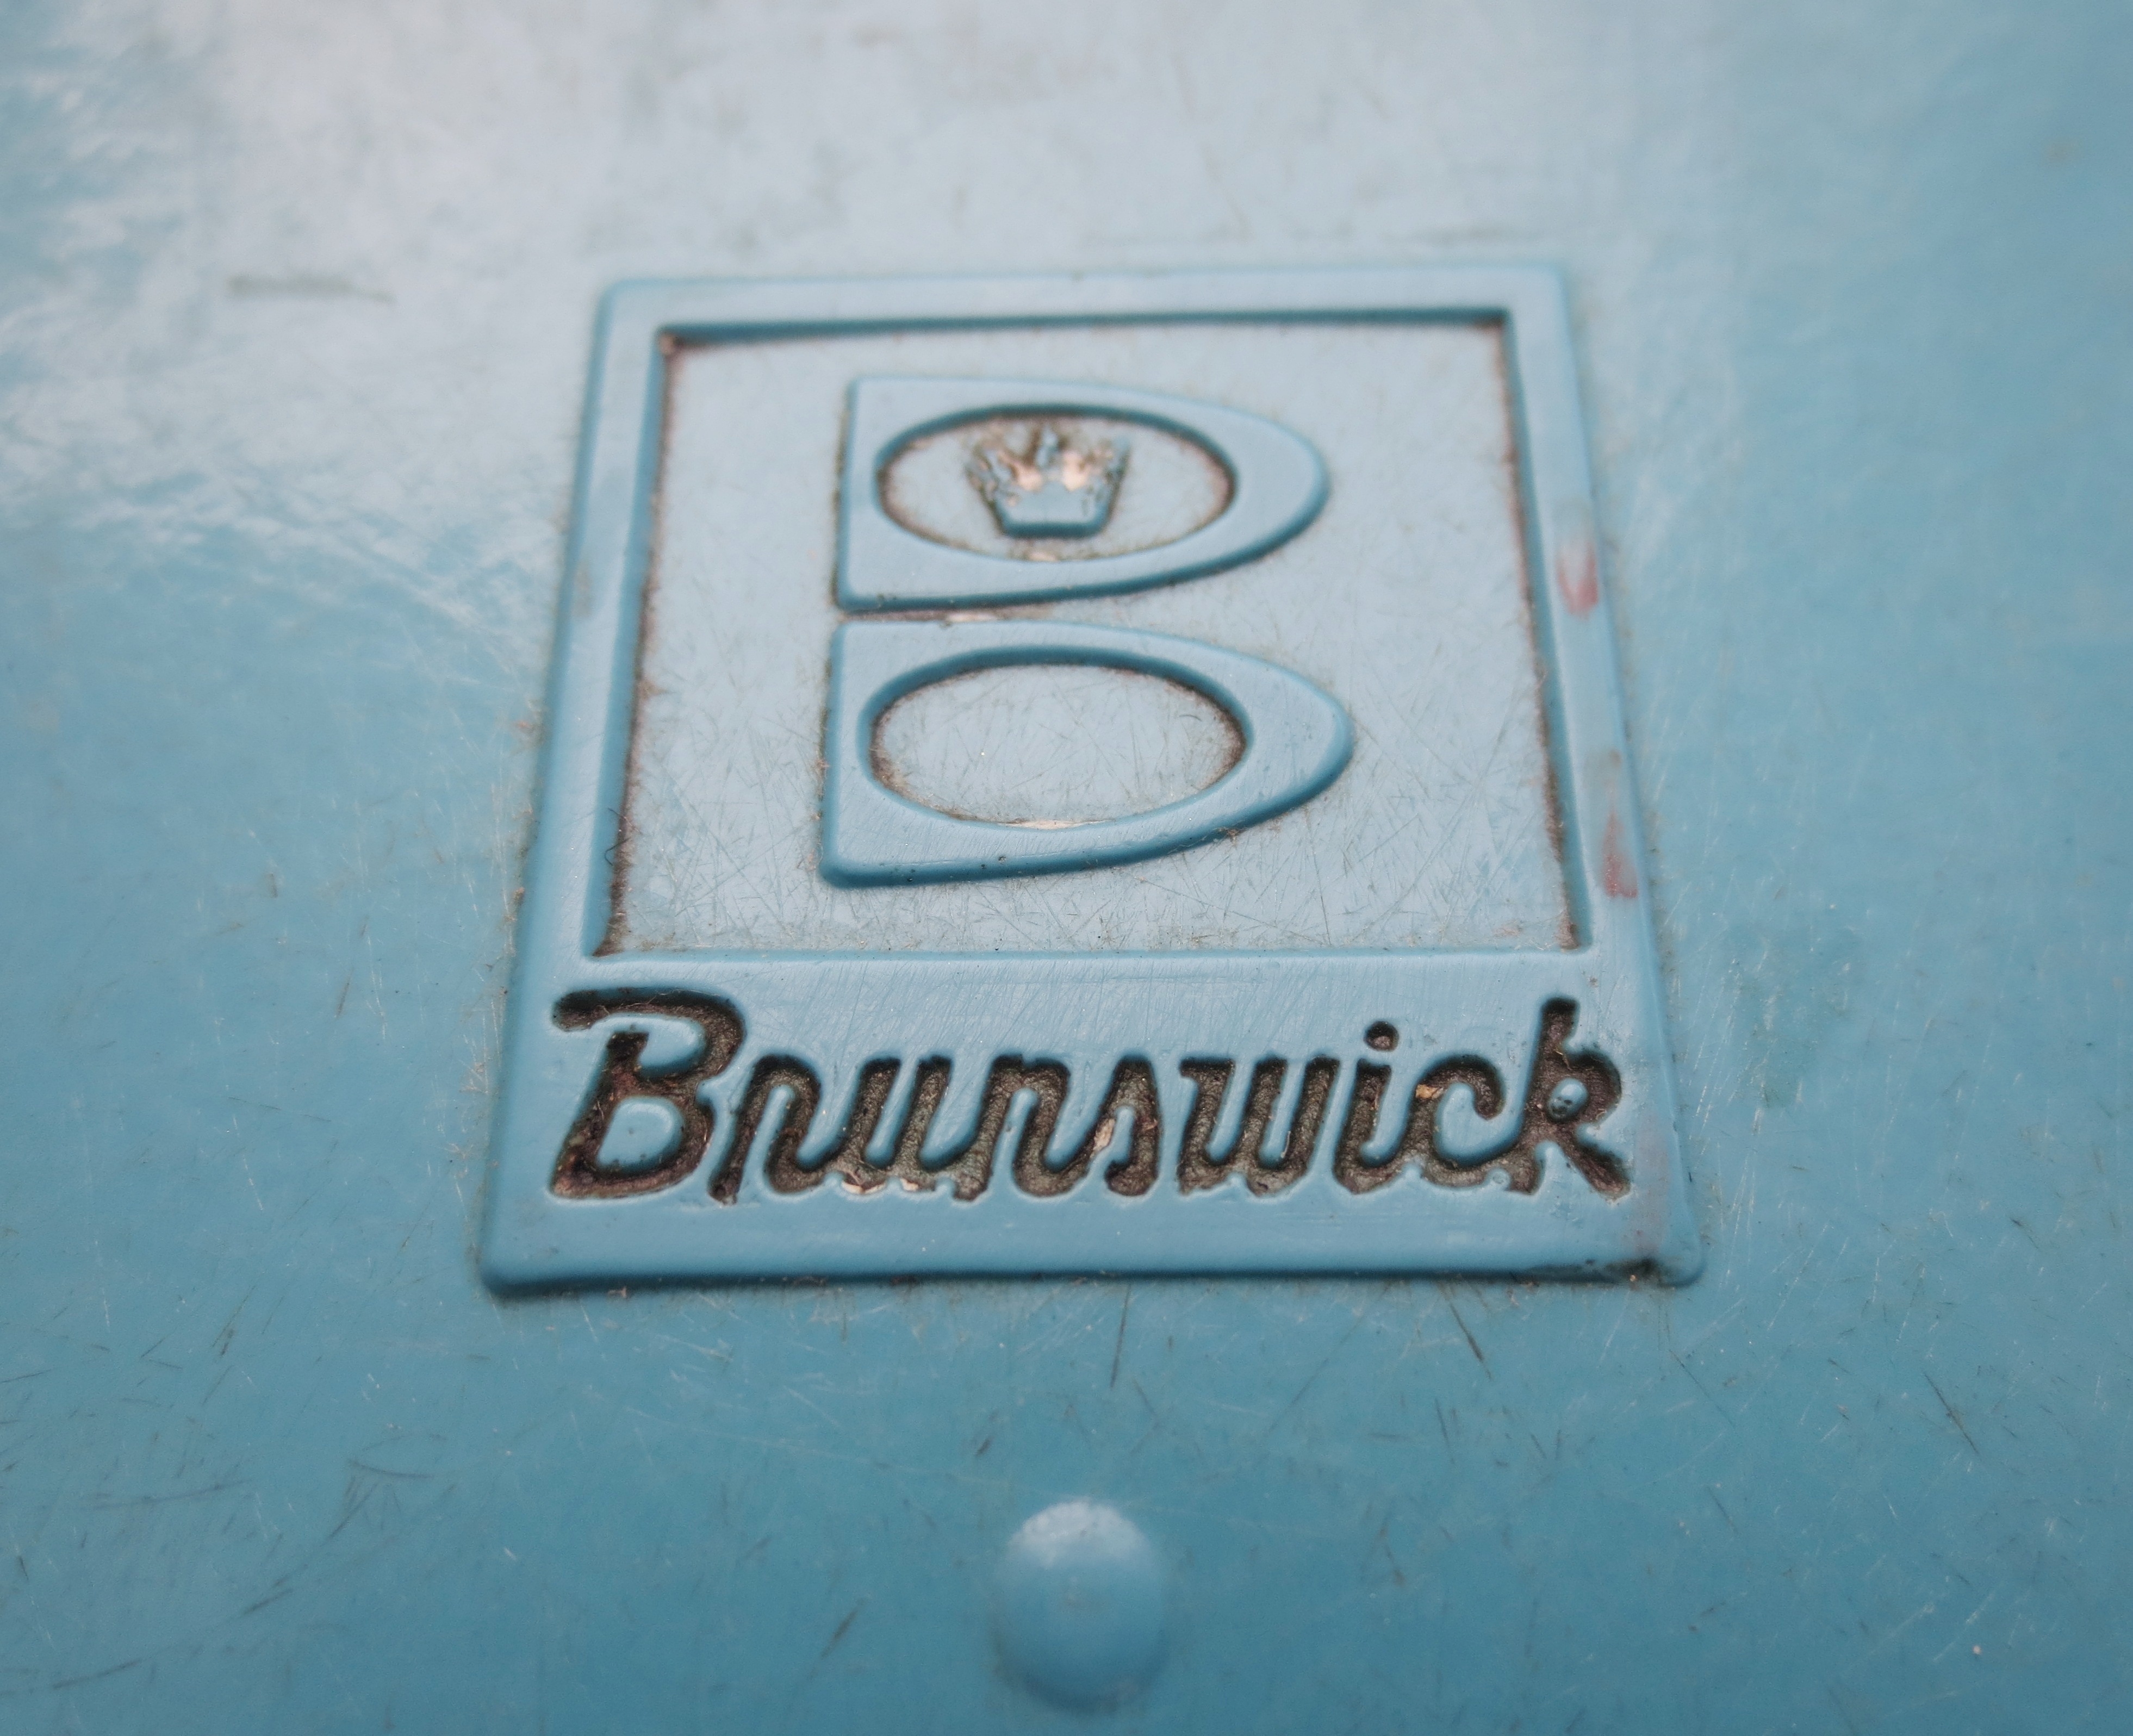
I did the same thing with brunswick chairs I inherited from an old roommate, except I spray painted them. Turned out great! BTW, you can buy replacement feet at Robert Brooke & Assoc: http://www.robertbrooke.com/brunswick-rubber-chair-tip-glide-front-leg.html
Just be sure that order both the front and back leg glides, they are angled differently. Only ~1$ a piece.
LikeLike
That’s great to know. I should have edited this post later to say that after I put new rubber feet on these chairs, quickly realized what a pain it was to scoot them around on the floor — they don’t budge! I actually ended up just leaving the bottoms of the legs “bare” as they don’t seem to be scratching up my floor at all. But at $1 a piece, it wouldn’t hurt have the originals back on.
Tell me — how did the spray painting go? Did you have to do anything special to prime it or otherwise get it ready for the paint?
LikeLike
Pingback: D.I.Y. Door Curtains for a Clothing-Optional Kitchen | projectophile
Thanks so much! Just picked up a tiny version (also Brunswick) for my kiddo. Can’t wait to restore it. 🙂
LikeLike
Did you have any issues with the penetrol yellowing over time?
LikeLike
Nope! Everything still looks great even now.
LikeLike
is there anything i can use besides penetrol… that is comparable? california has outlawed the sale of penetrol. cannot find it anywhere
LikeLike