
…If your last name begins with the letter K
While strolling through the cornucopia of our neighborhood’s alleys, I recently eyed something both shiny-metallic and wooden – always a sign of a quality treasure.

And despite what the growing pile of junk on my back porch would suggest, I don’t grab everything shiny thing I see in the alley. To me, this looked like a happy pair of the letter “K.”

So what’s the deal with K?, you ask.
Scott’s last name starts with K. Although, in what experts agree is the biggest blow to the patriarchy since the invention of Bloomers, I did not take Scott’s last name when I married him.*

The comfort and practicality of Bloomer pants allows this Victorian-era lady to ride effortlessly through a garden of Giant Mutant Roses.
No, really — this was quite a bold move on my part. My own last name has proven to be unpronounceable and un-spellable even by those who have known me for years. But to spare my own children the lifetime of pain that comes with having an inconveniently difficult last name, they did get Scott’s easy name. Same number of letters, but with half the syllables and 90% less misunderstanding.
On top of that, Scott proudly claims that his last name means “King” in Polish, even though approximately 72% of Americans believe that their surnames mean “King” in whatever land they or their ancestors came from.

Sigismund the Old King of Poland.

This gentleman claims to be the New King of Poland
When I proudly revealed my alley treasures to Scott, he flipped them horizontally and declared that they were, in fact, just olde-timey clothes hangers.

Scott and I have gotten pretty good at crushing each other’s dreams.
In my heart, I knew they were still Ks with an important K-related mission.
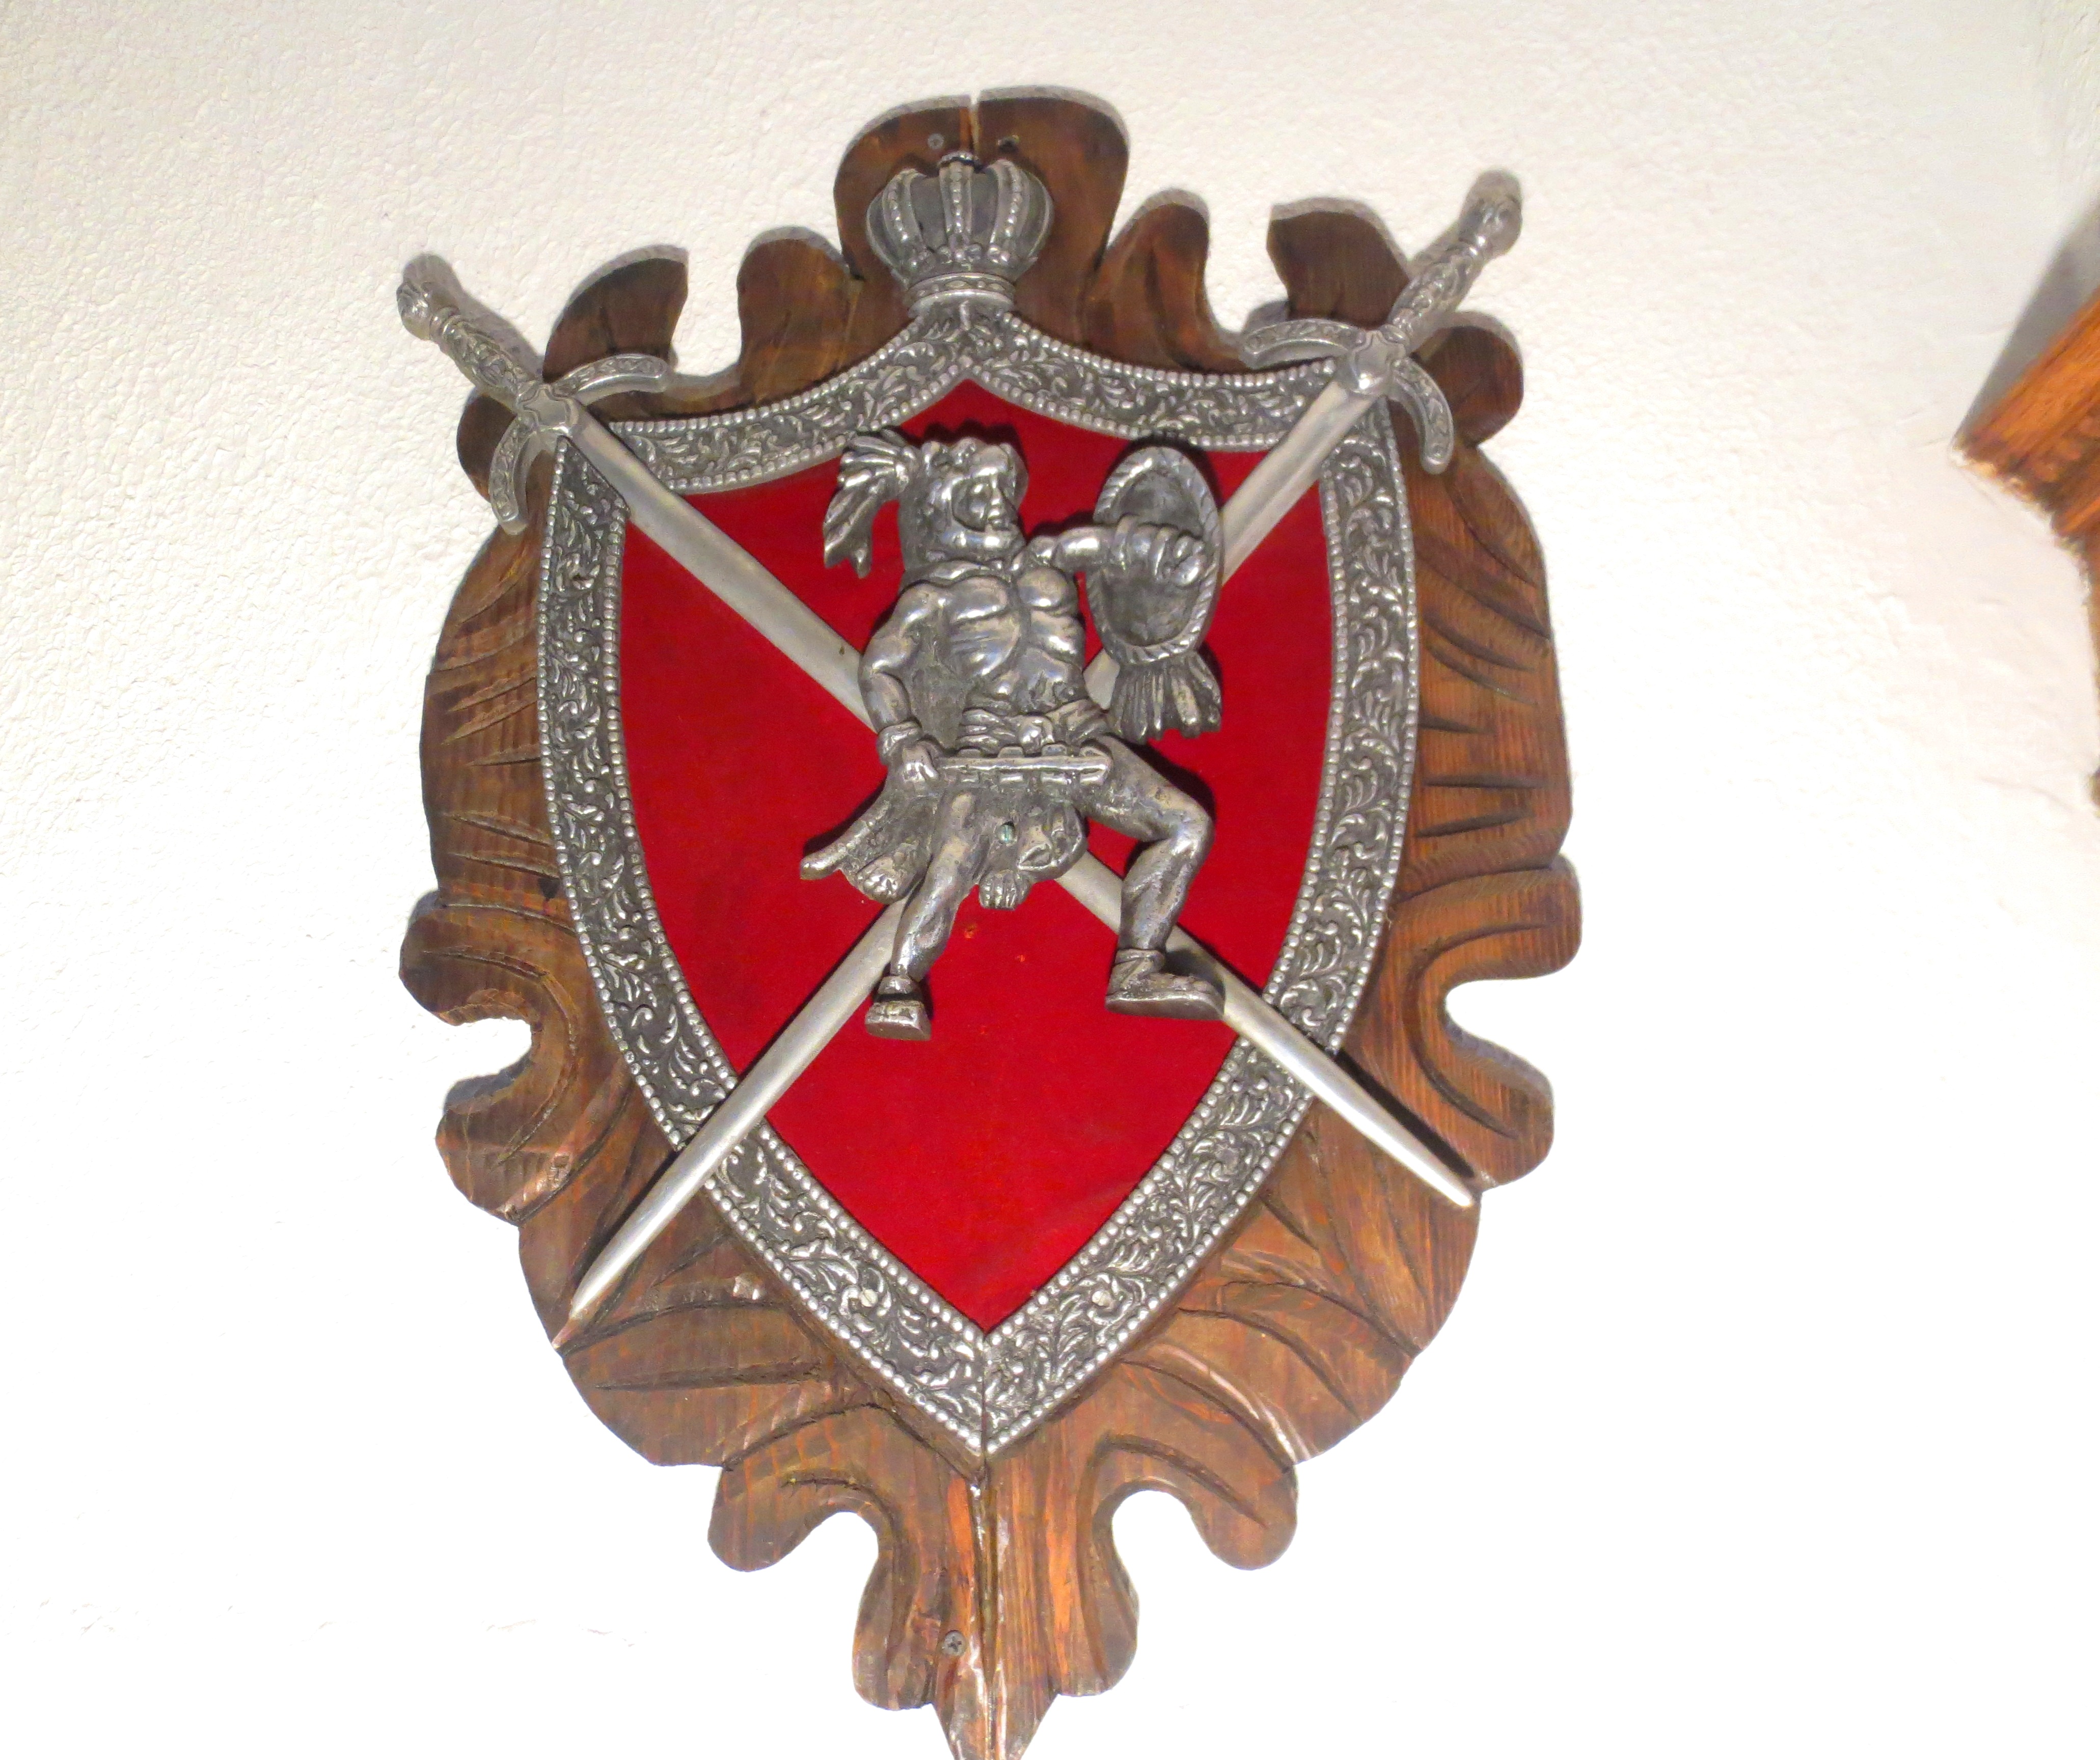
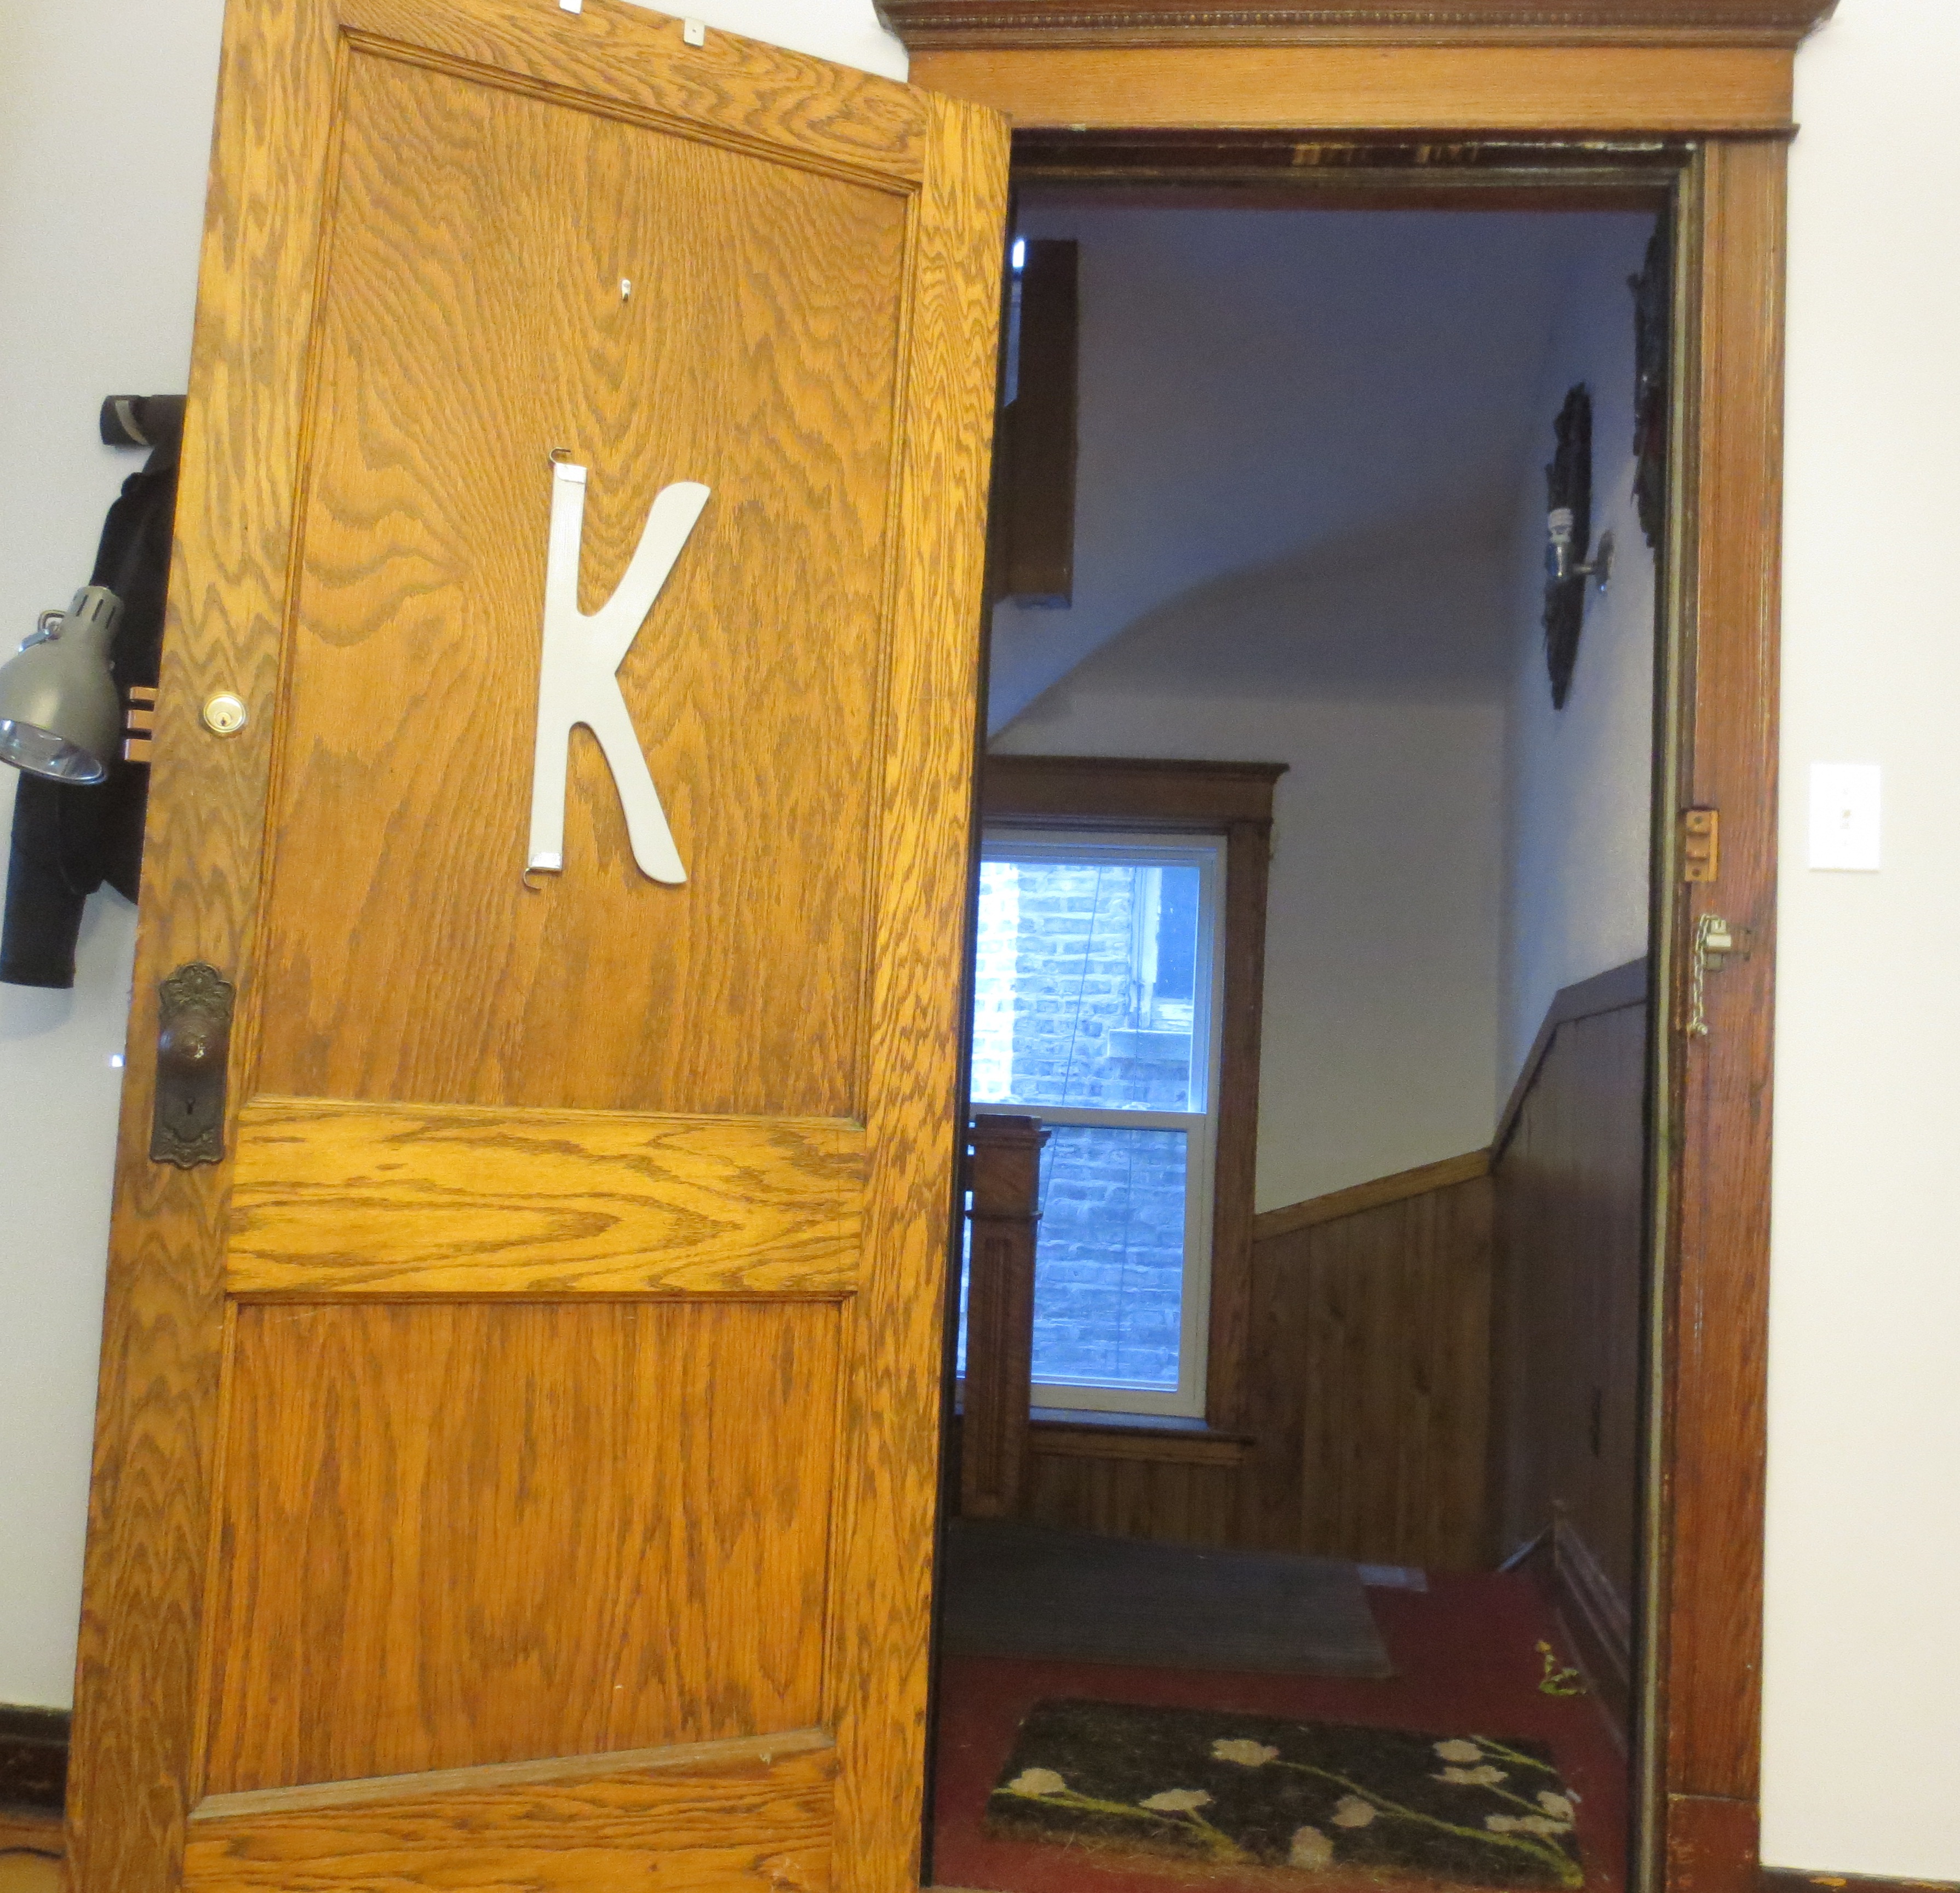
See, we live on the second floor of a three-unit apartment building. Without proper signifiers, visitors often go knocking at our neighbors’ doors, walking away confused, but with a handful of cheese crackers (downstairs) or Oreo cookies (upstairs). The only signage in our hallway are these culturally confusing crests our landlord hung up years ago right outside what is now our front door:

Can we get a close-up of the one on the right — the mostly naked Aztec warrior?
 We’re not the type of family that’s always got some seasonal cluster of crap hanging on our door. So a simple K was just what we needed to mark our territory and add a hint of style to the hallway.
HOW TO MAKE YOUR OWN DOOR SIGNIFIER OUT OF OLD WOODEN HANGERS IF YOUR LAST NAME BEGINS WITH K
You’ll need:
- Olde-timey two-pronged wooden clothes hangers from the alley
- Steel Wool + Sand Paper
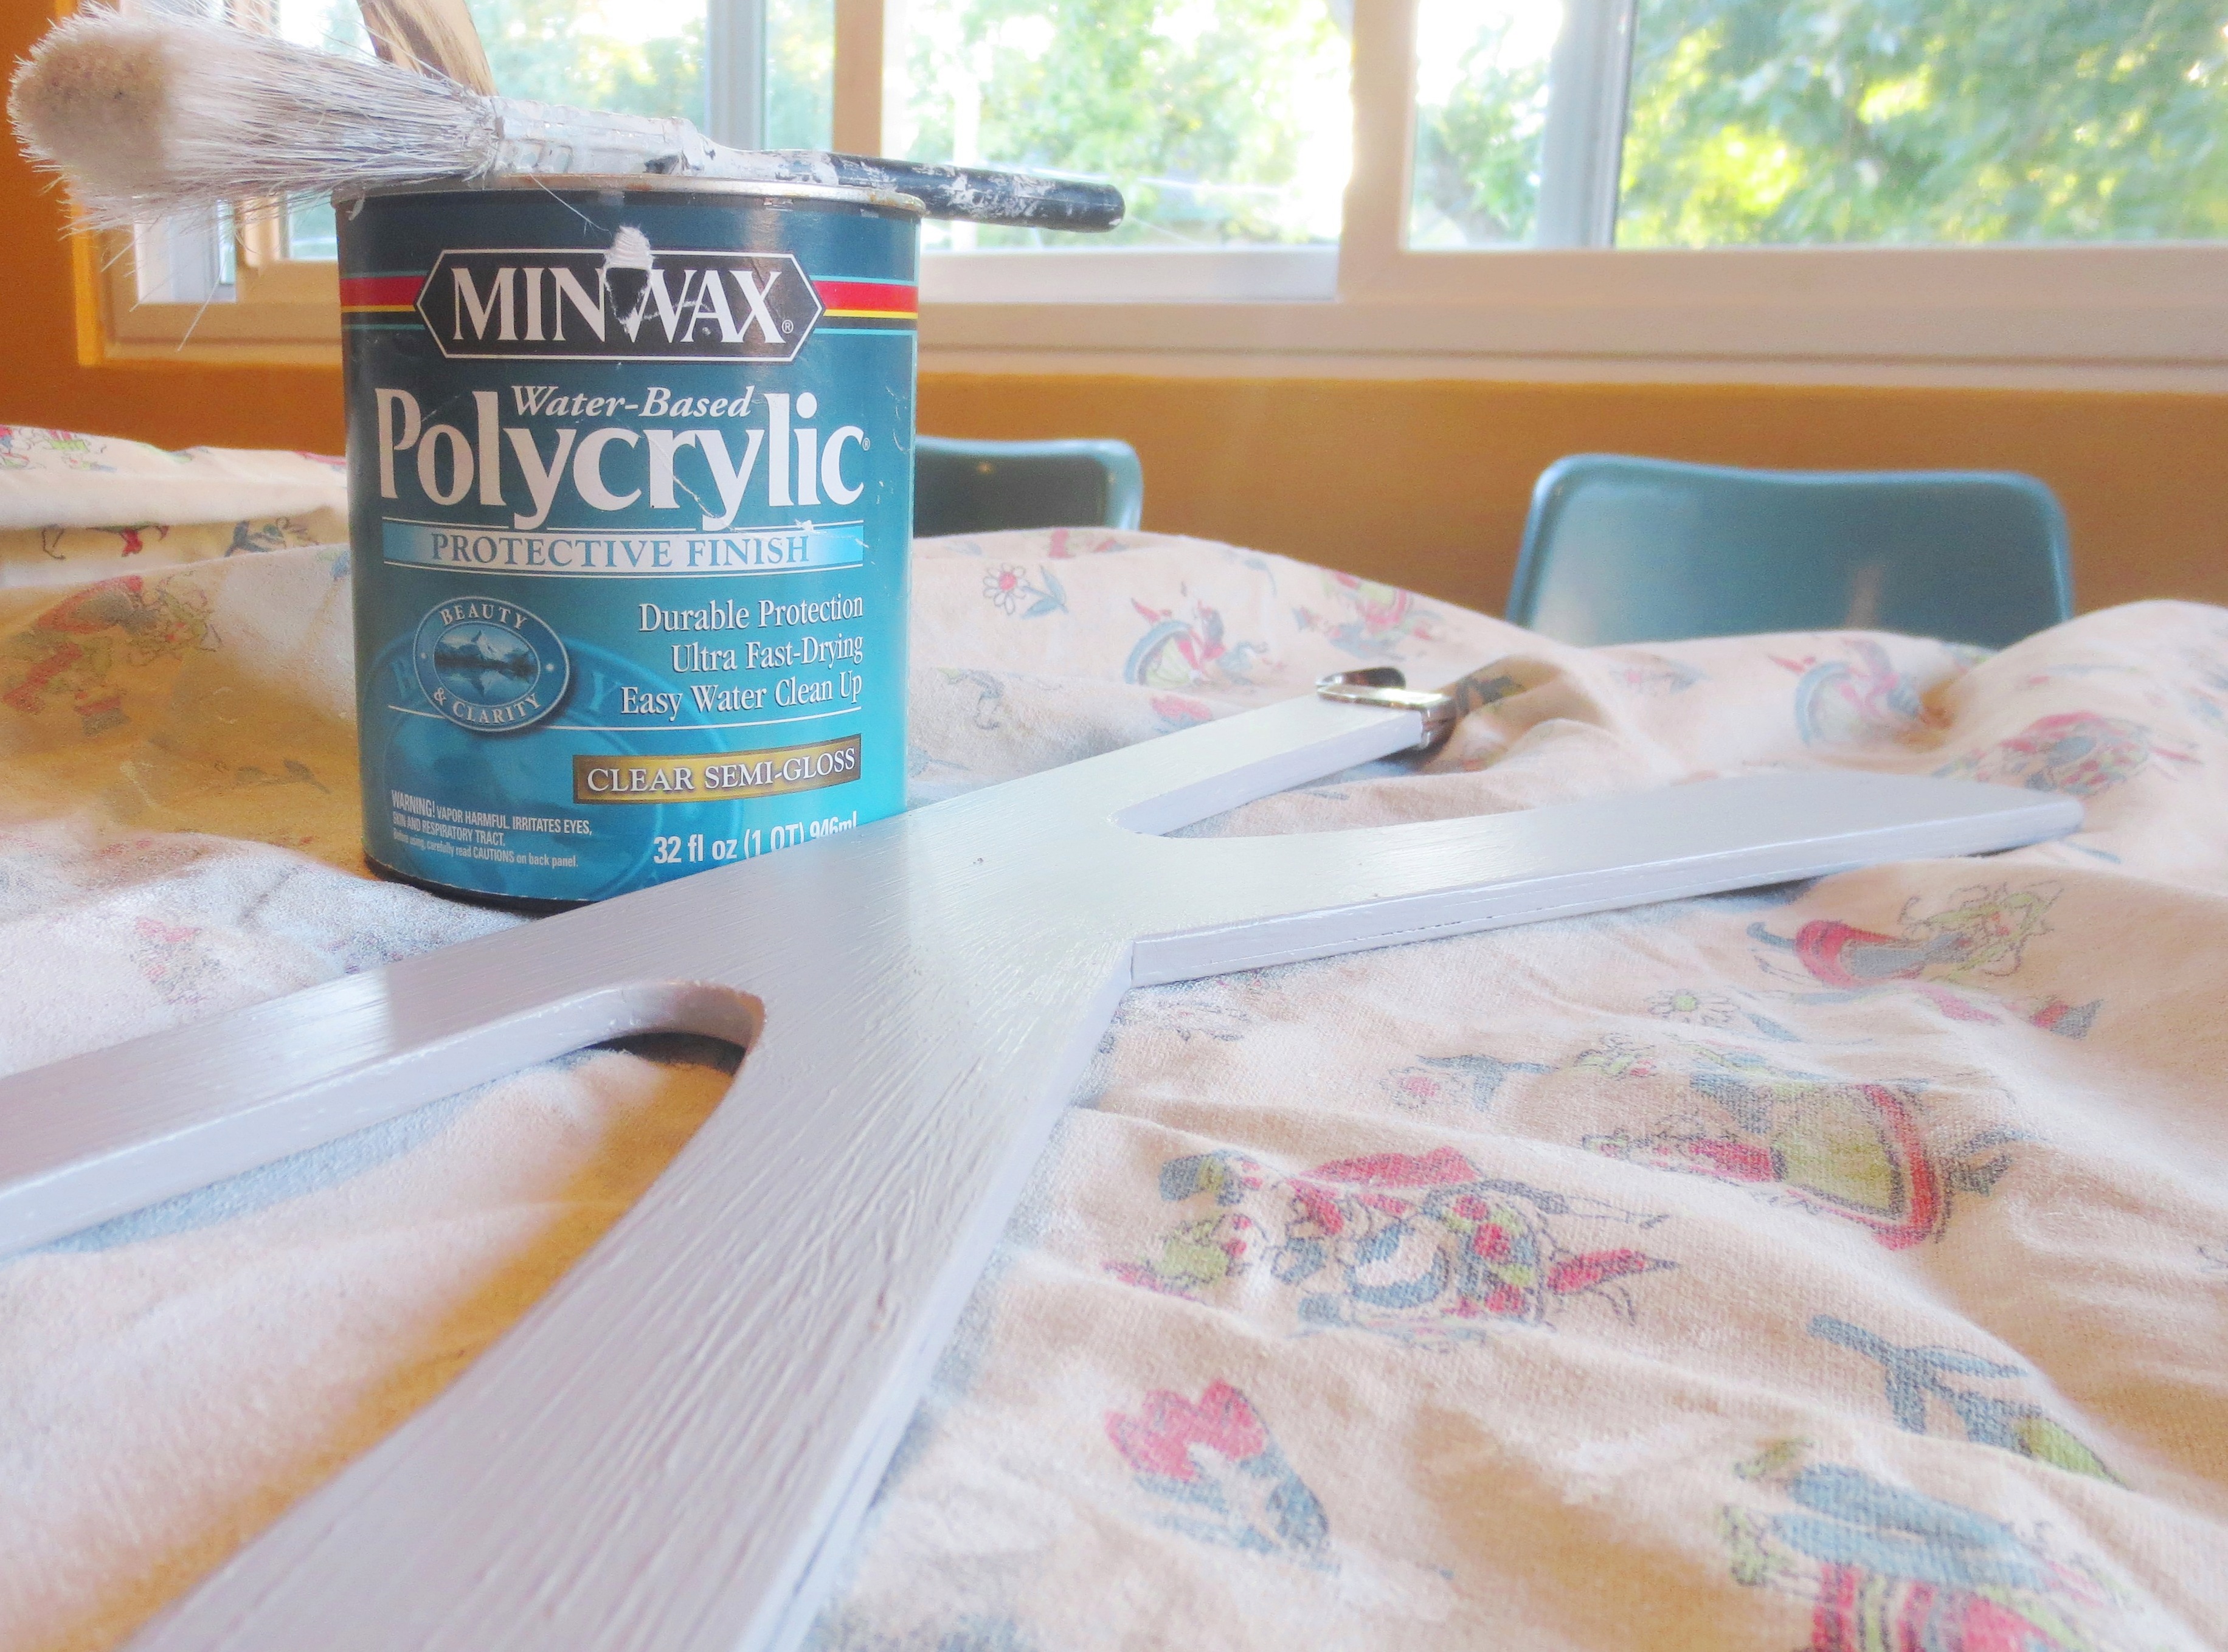
- Oil-based Primer
- Latex Paint in a pleasing shade
- Polyeurethane
- Paint brushes
Like most Alley Treasures, these two needed some tough love. The wood was dull, stained and scratched: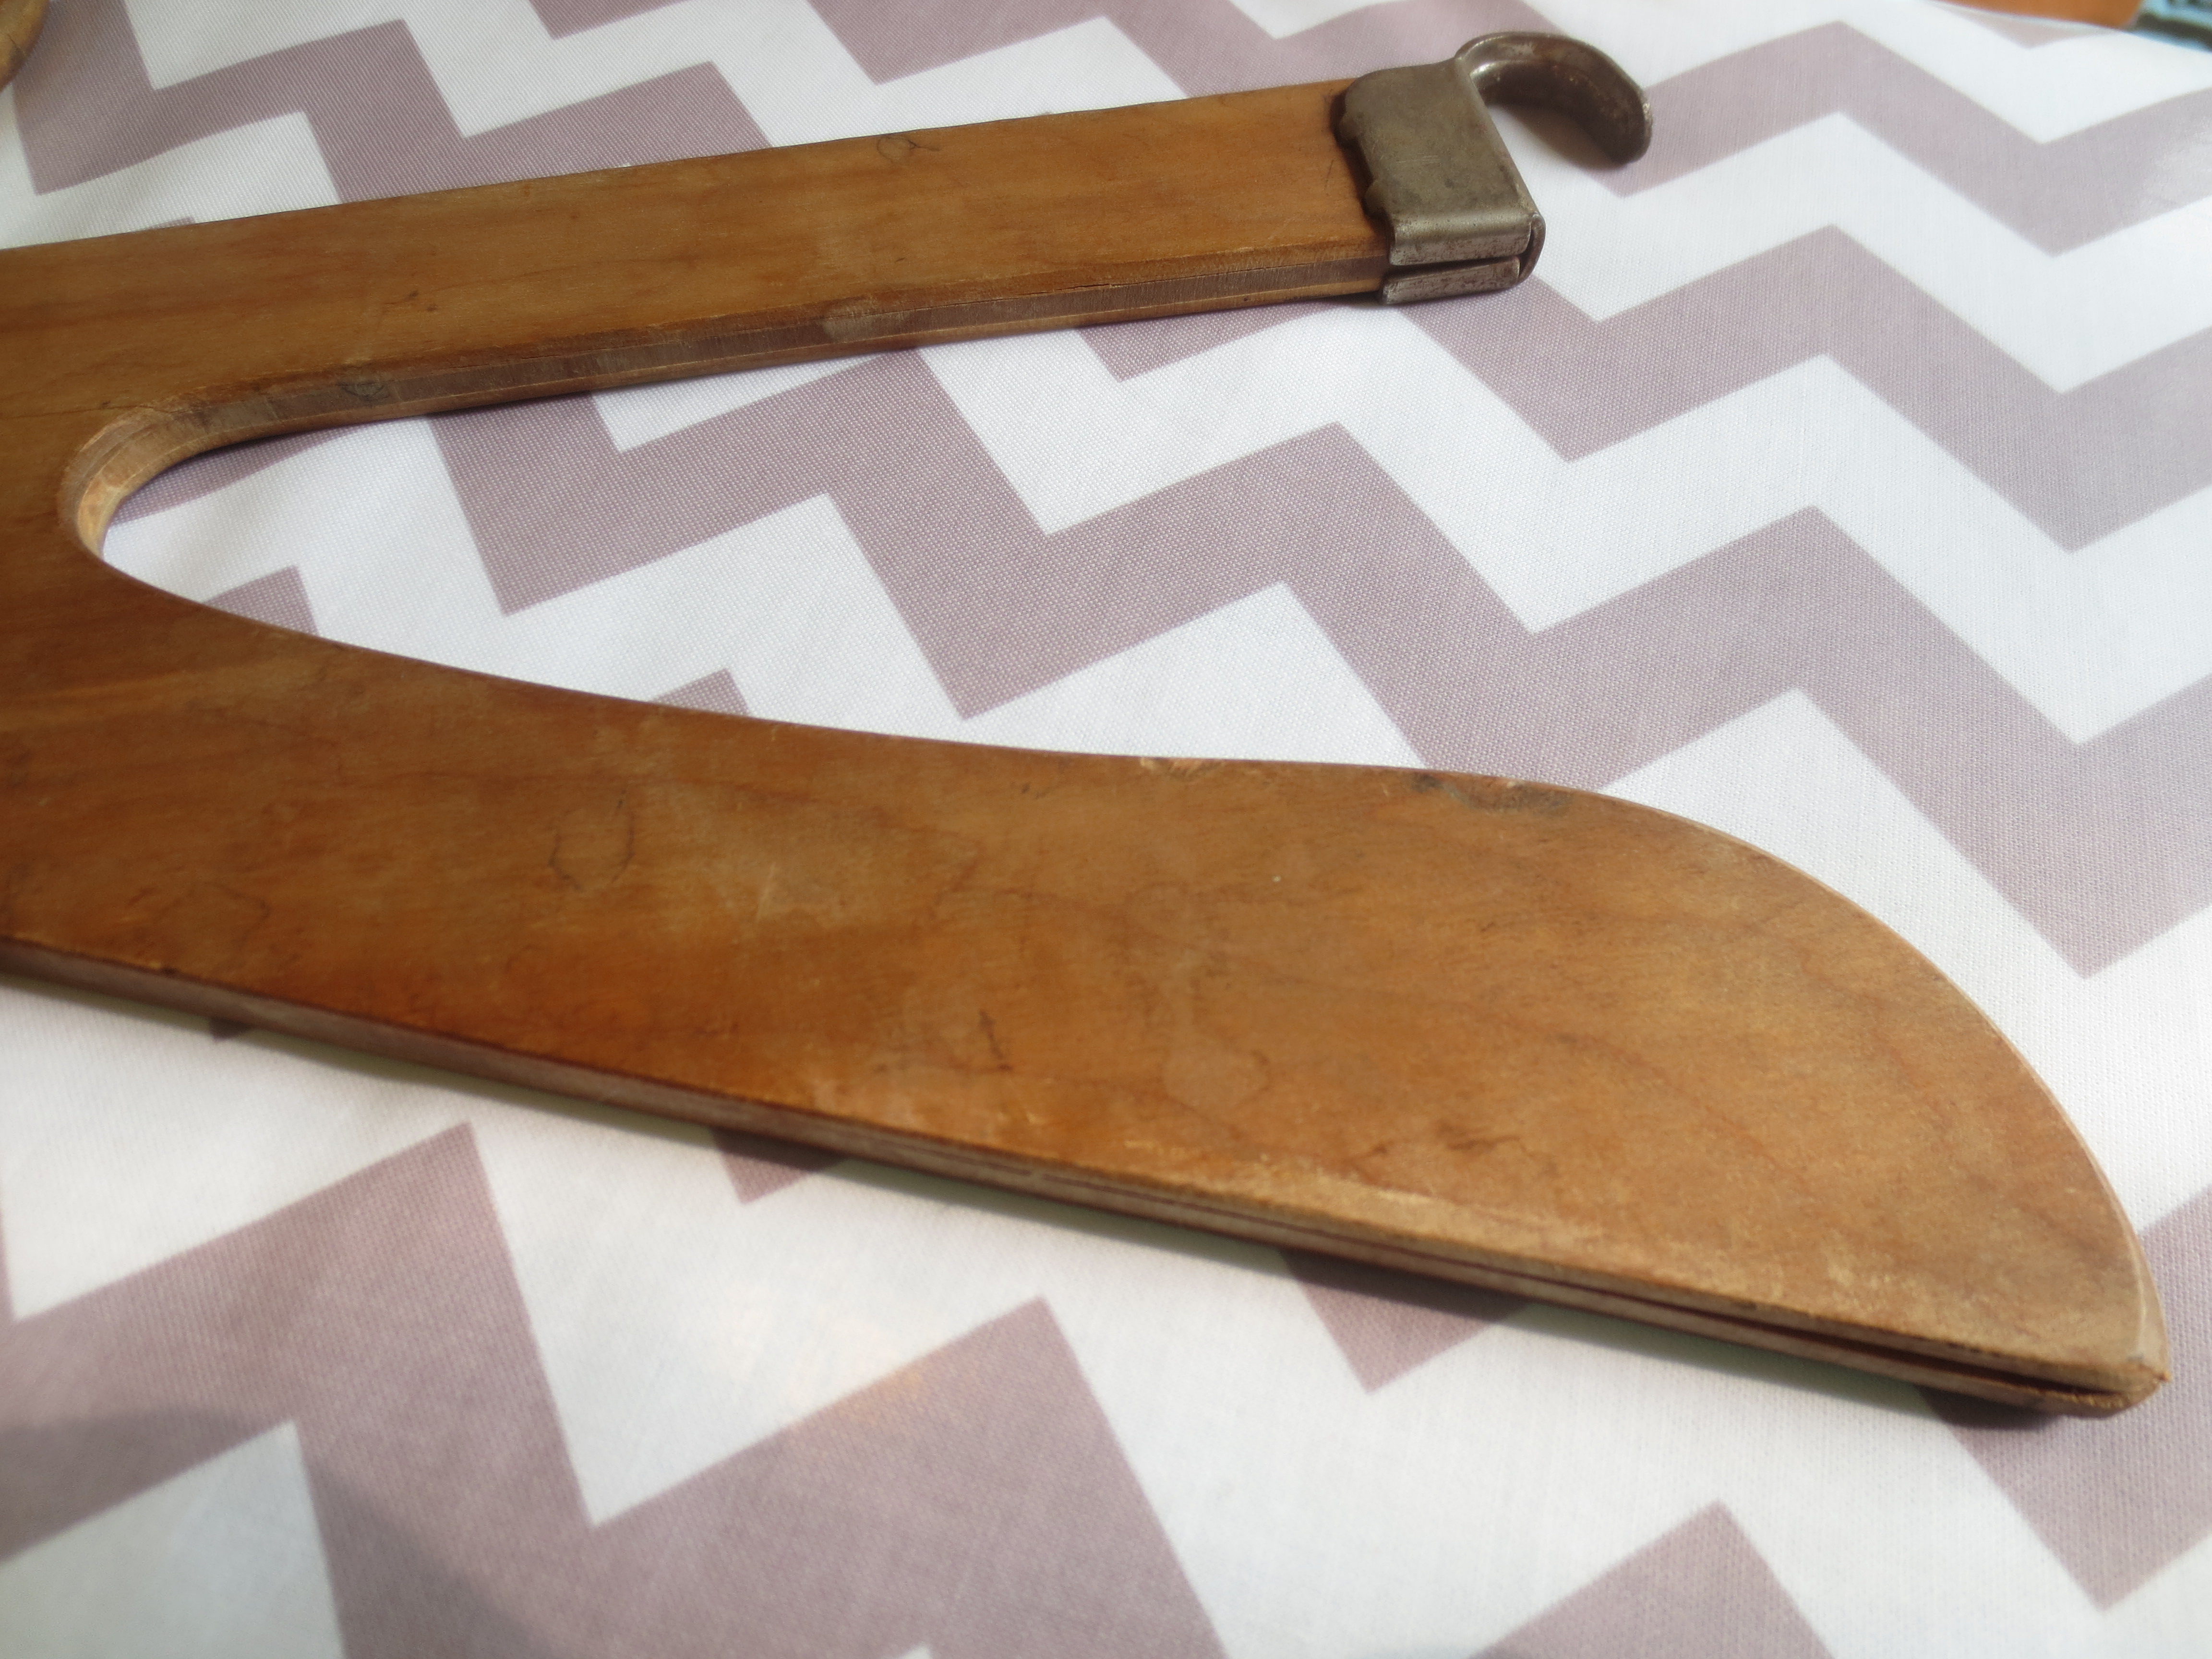
And the hardware was scarred with rust:
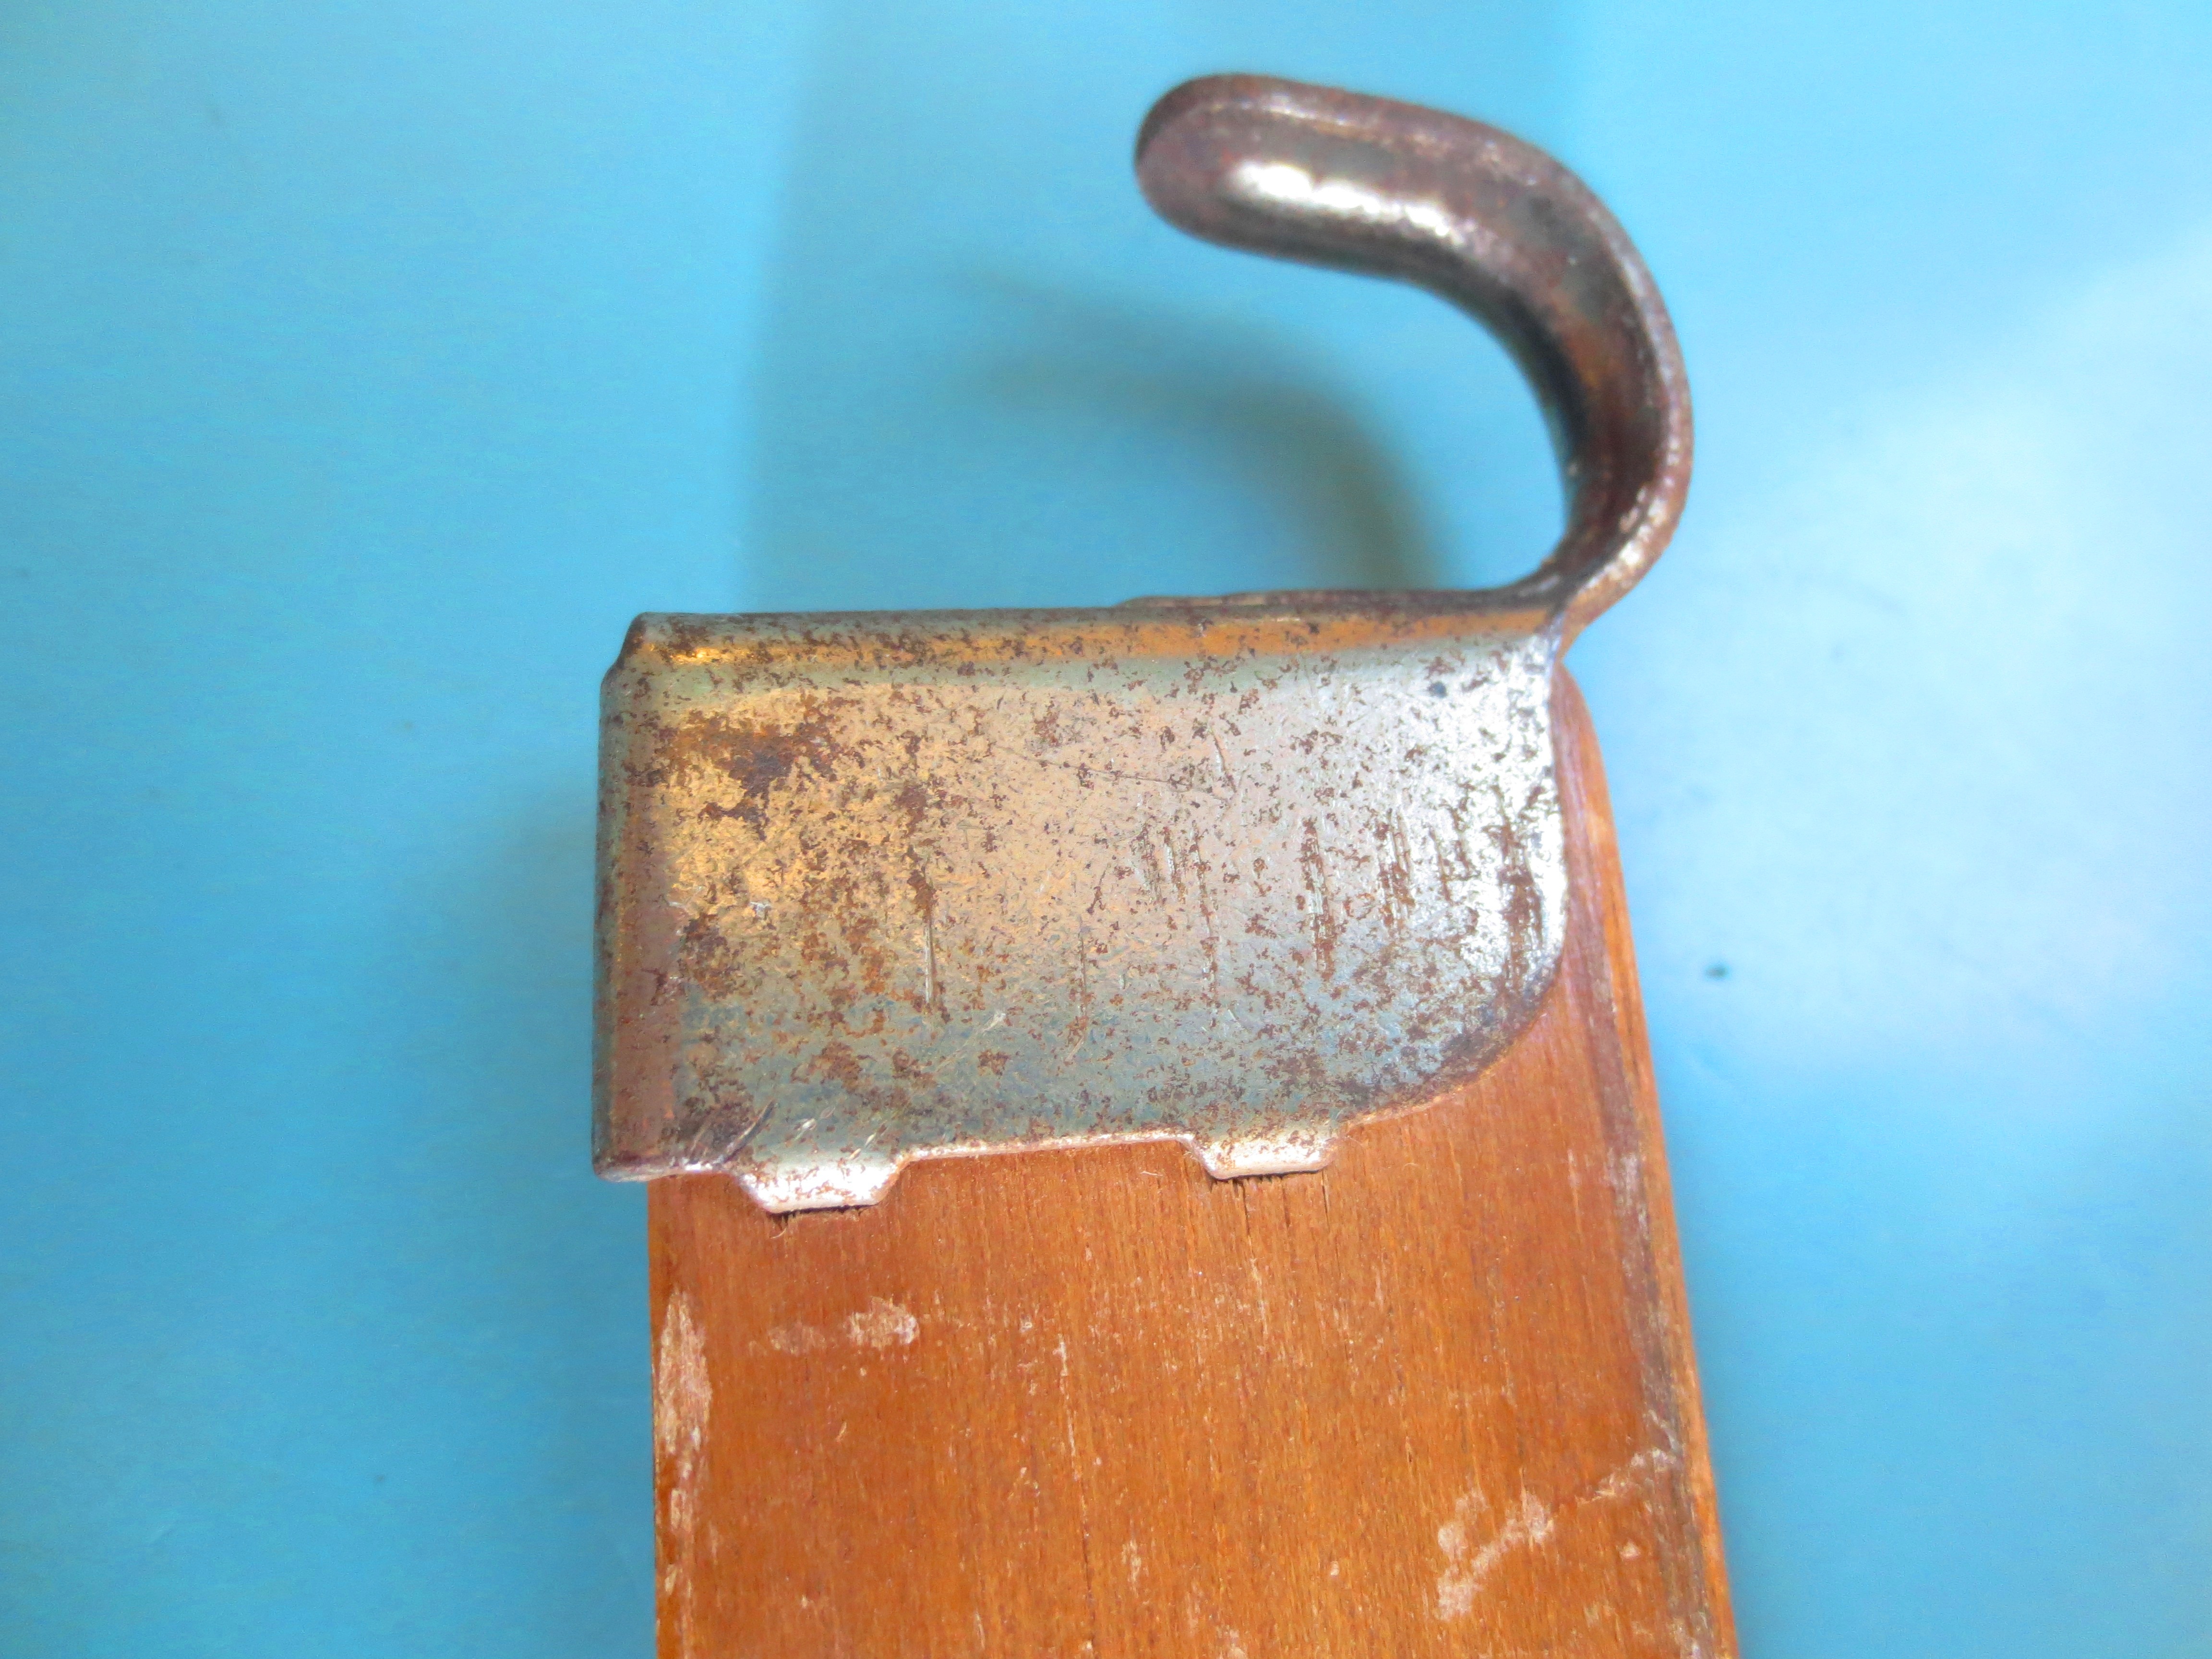
I suppose I could have pried the hardware off, but I felt that it was an essential piece of its vintage charm. I needed to restore all of it.
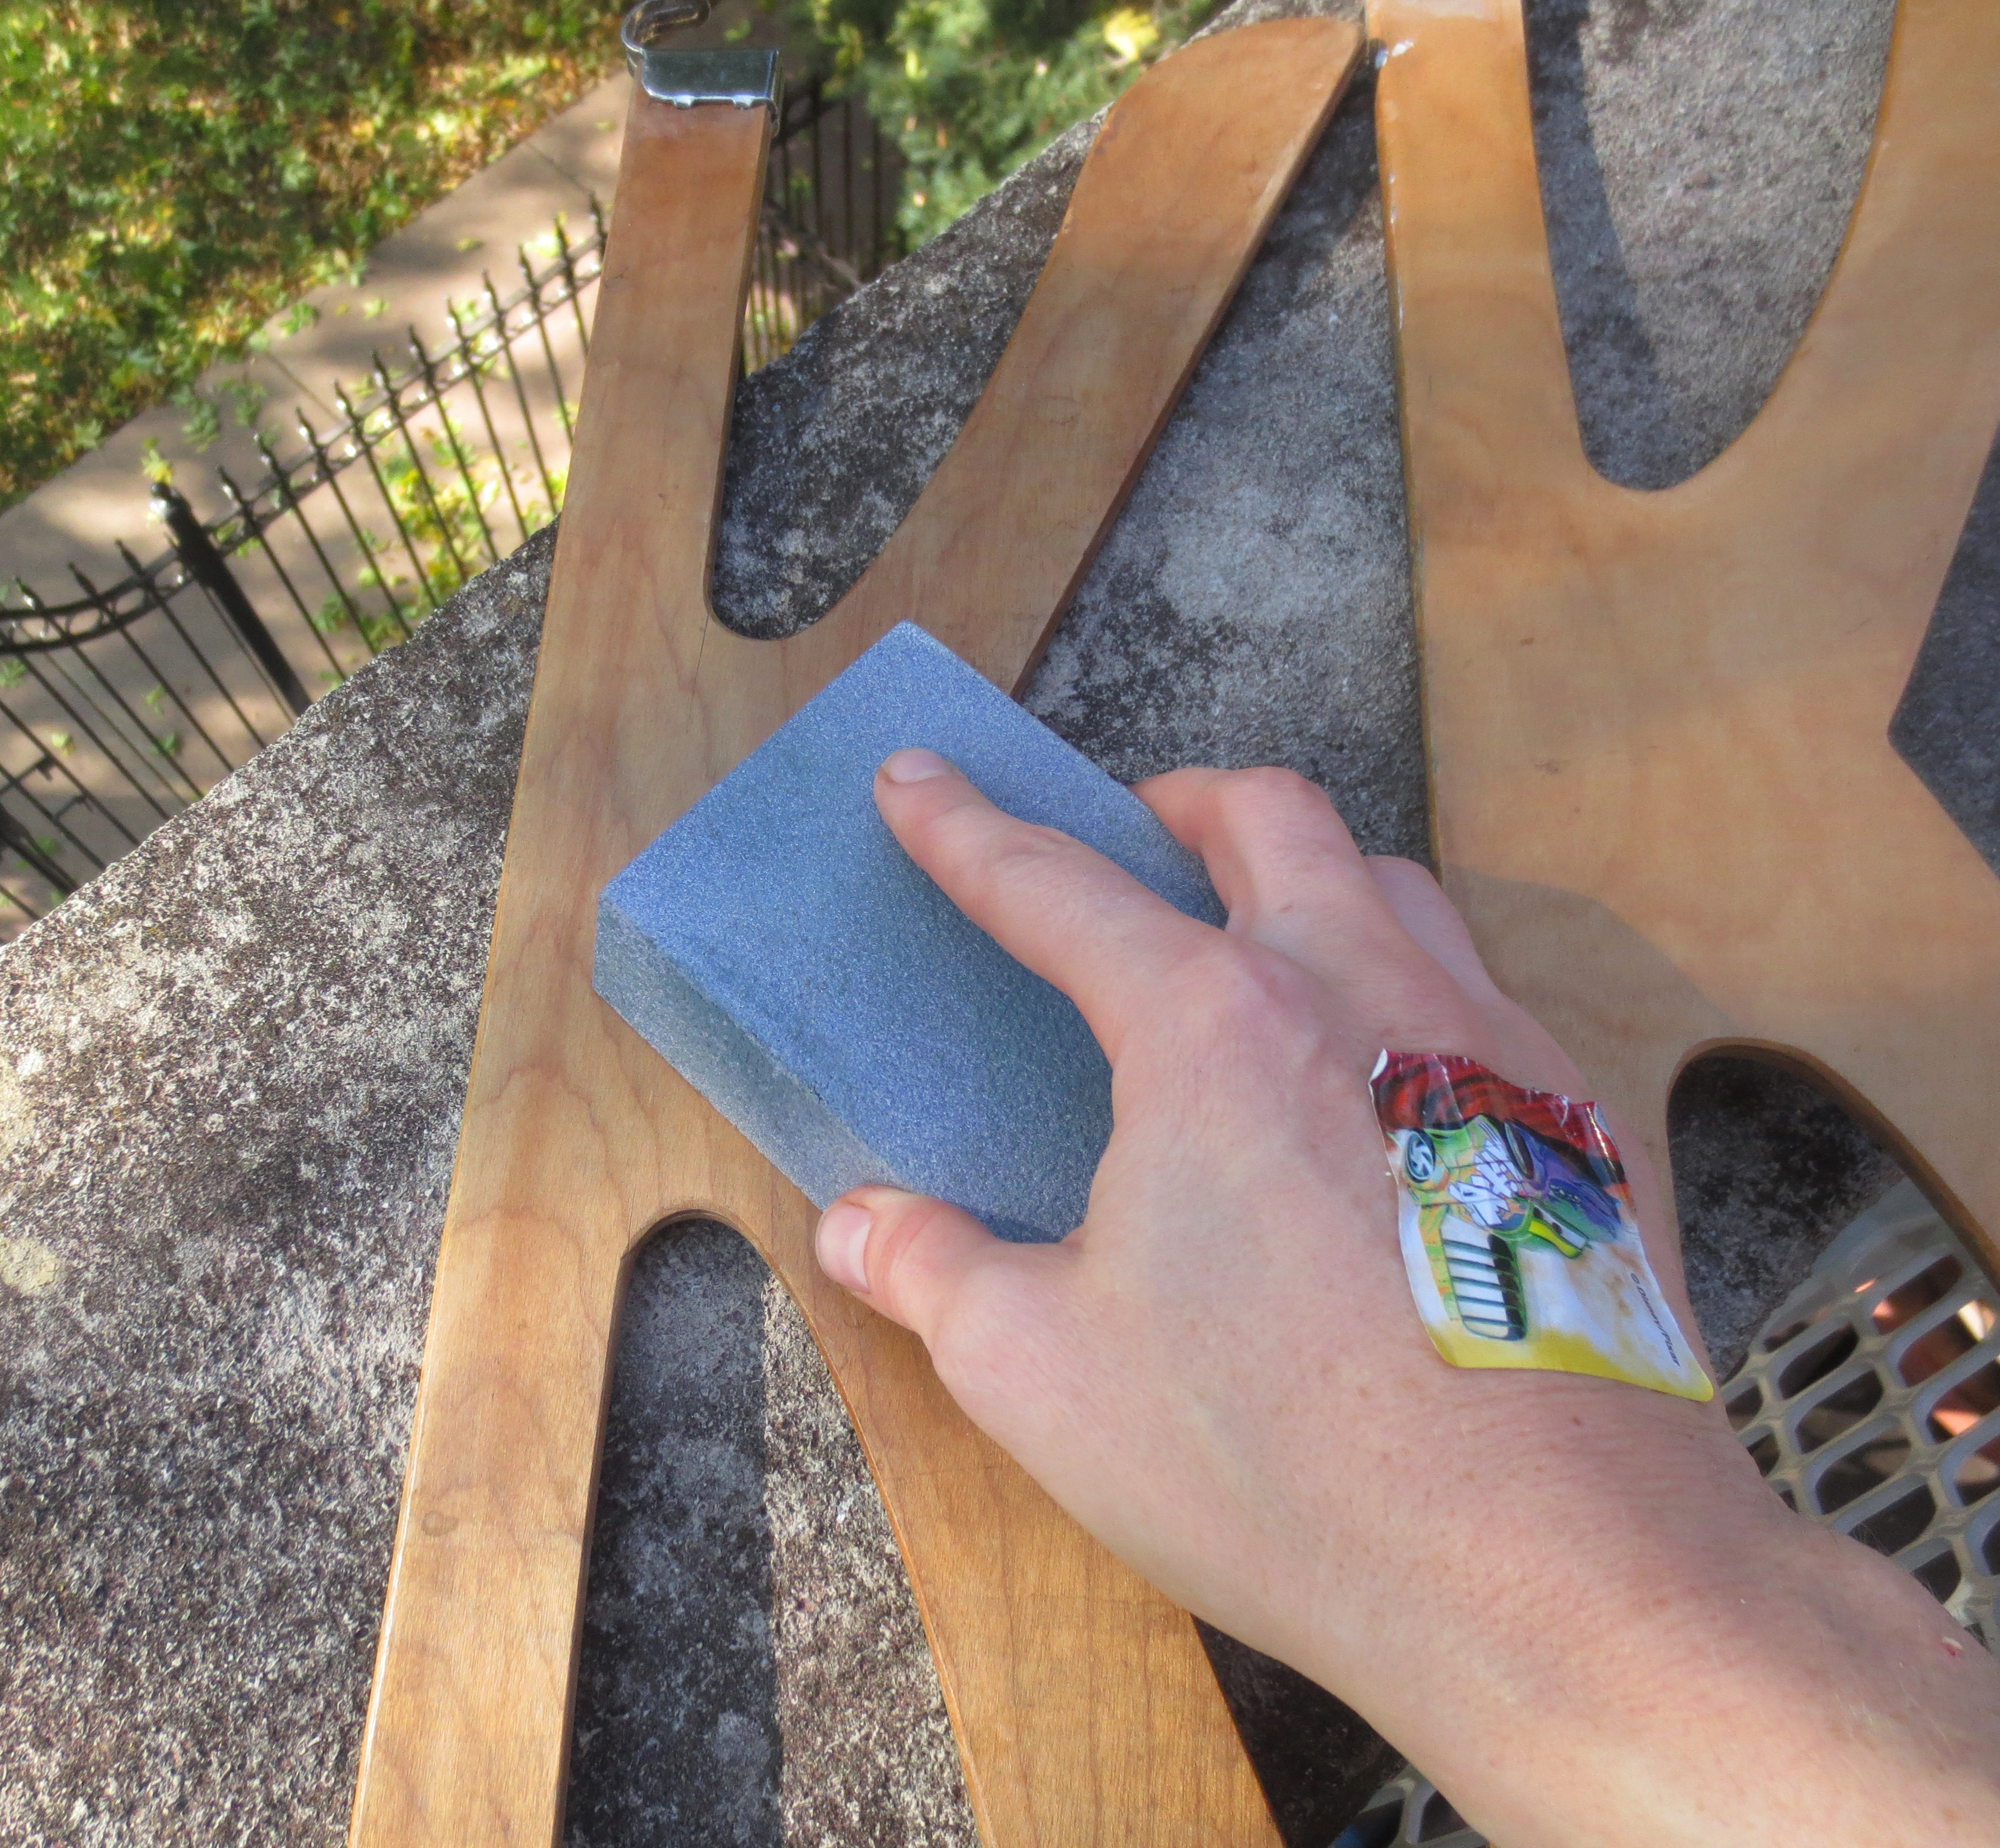
STEP 1: SCRAPE + SAND – Use a ball of fine or extra fine steel wool to buff the rust and dullness off the hardware.

Next, lightly sand the wood with 150 or higher grit sandpaper or sanding block, moving in the direction of the grain. The goal here is twofold: 1) to sand any glossy finish off the surface in order to apply a new finish, and 2) smooth down any imperfections in the wood. Wipe with a damp rag and air dry.
STEP 2: PRIME AND PAINT – After sanding, the wood looked fantastic. I was tempted to just stain the wood with my never-ending quart of dark walnut stain that I used on my Credenza Makeover and Mid-Century Modern Standing Desk. However, I planned to hang this on my already dark wooden front door, and there just wasn’t enough contrast for my tastes. So I went digging around my pantry for some half-used buckets of paint.
Stop right there! Any time you are painting over wood you’ll need to prime. Priming serves as both a “glue” for the final coat of paint and a protective layer to keep anything lurking in the wood from seeping through to your topcoat. Apply one coat of oil-based primer with a disposable brush (otherwise you’ll need paint thinner to clean). Be sure to pull the stray hairs out of your cheap-ass brush before you dip it in the primer so you don’t have to pull them out later. Cover with primer and wait at air dry for at least two hours.

I found what’s left of the bucket of paint I used in the bedroom, called “Sparrow” by Behr. Sparrow is the most extraordinary shade of grey I’ve ever used. Soothing without being depressing, calming without a hint of gloom. Light grey with a sweet, playful kiss of lavender.
Since I was using the leftover sludge at the bottom of the bucket, I made sure to mix in a paint conditioner called Floetrol to even out the paint’s texture and eliminate those unsightly brush strokes that old paint sometimes leaves behind.

Apply two thin coats of paint, letting it dry for at least a couple of hours between coats.

PRO-TIP: You may notice that I didn’t tape over the metal hardware before painting. When it comes to shiny and hard things like metal, glass and mirrors, my motto is Scrape It, Don’t Tape It! It just isn’t worth the trouble since you can scrape any wayward paint off the metal in seconds with your fingernail. This rule does not apply to soft or porous materials like wood, fabric or skin.
STEP 3: VARNISH – While I insist on three coats of varnish to seal and protect furniture, it’s not really necessary for a piece that will only be hanging on a door. However, I did want a bit of dazzle, so I gave it one coat of polyurethane finish after a very light sanding. For extra shine, keep adding coats of varnish, lightly sanding with 220+ grit sandpaper between rounds.
STEP 4: HANG – At first I thought I could hang my K from its top “hook,” but it tilted awkwardly to one side. So I hammered a tiny nail into the non-hooked side, then used a needle to thread some string through the tiny crevice under the existing hook thing.
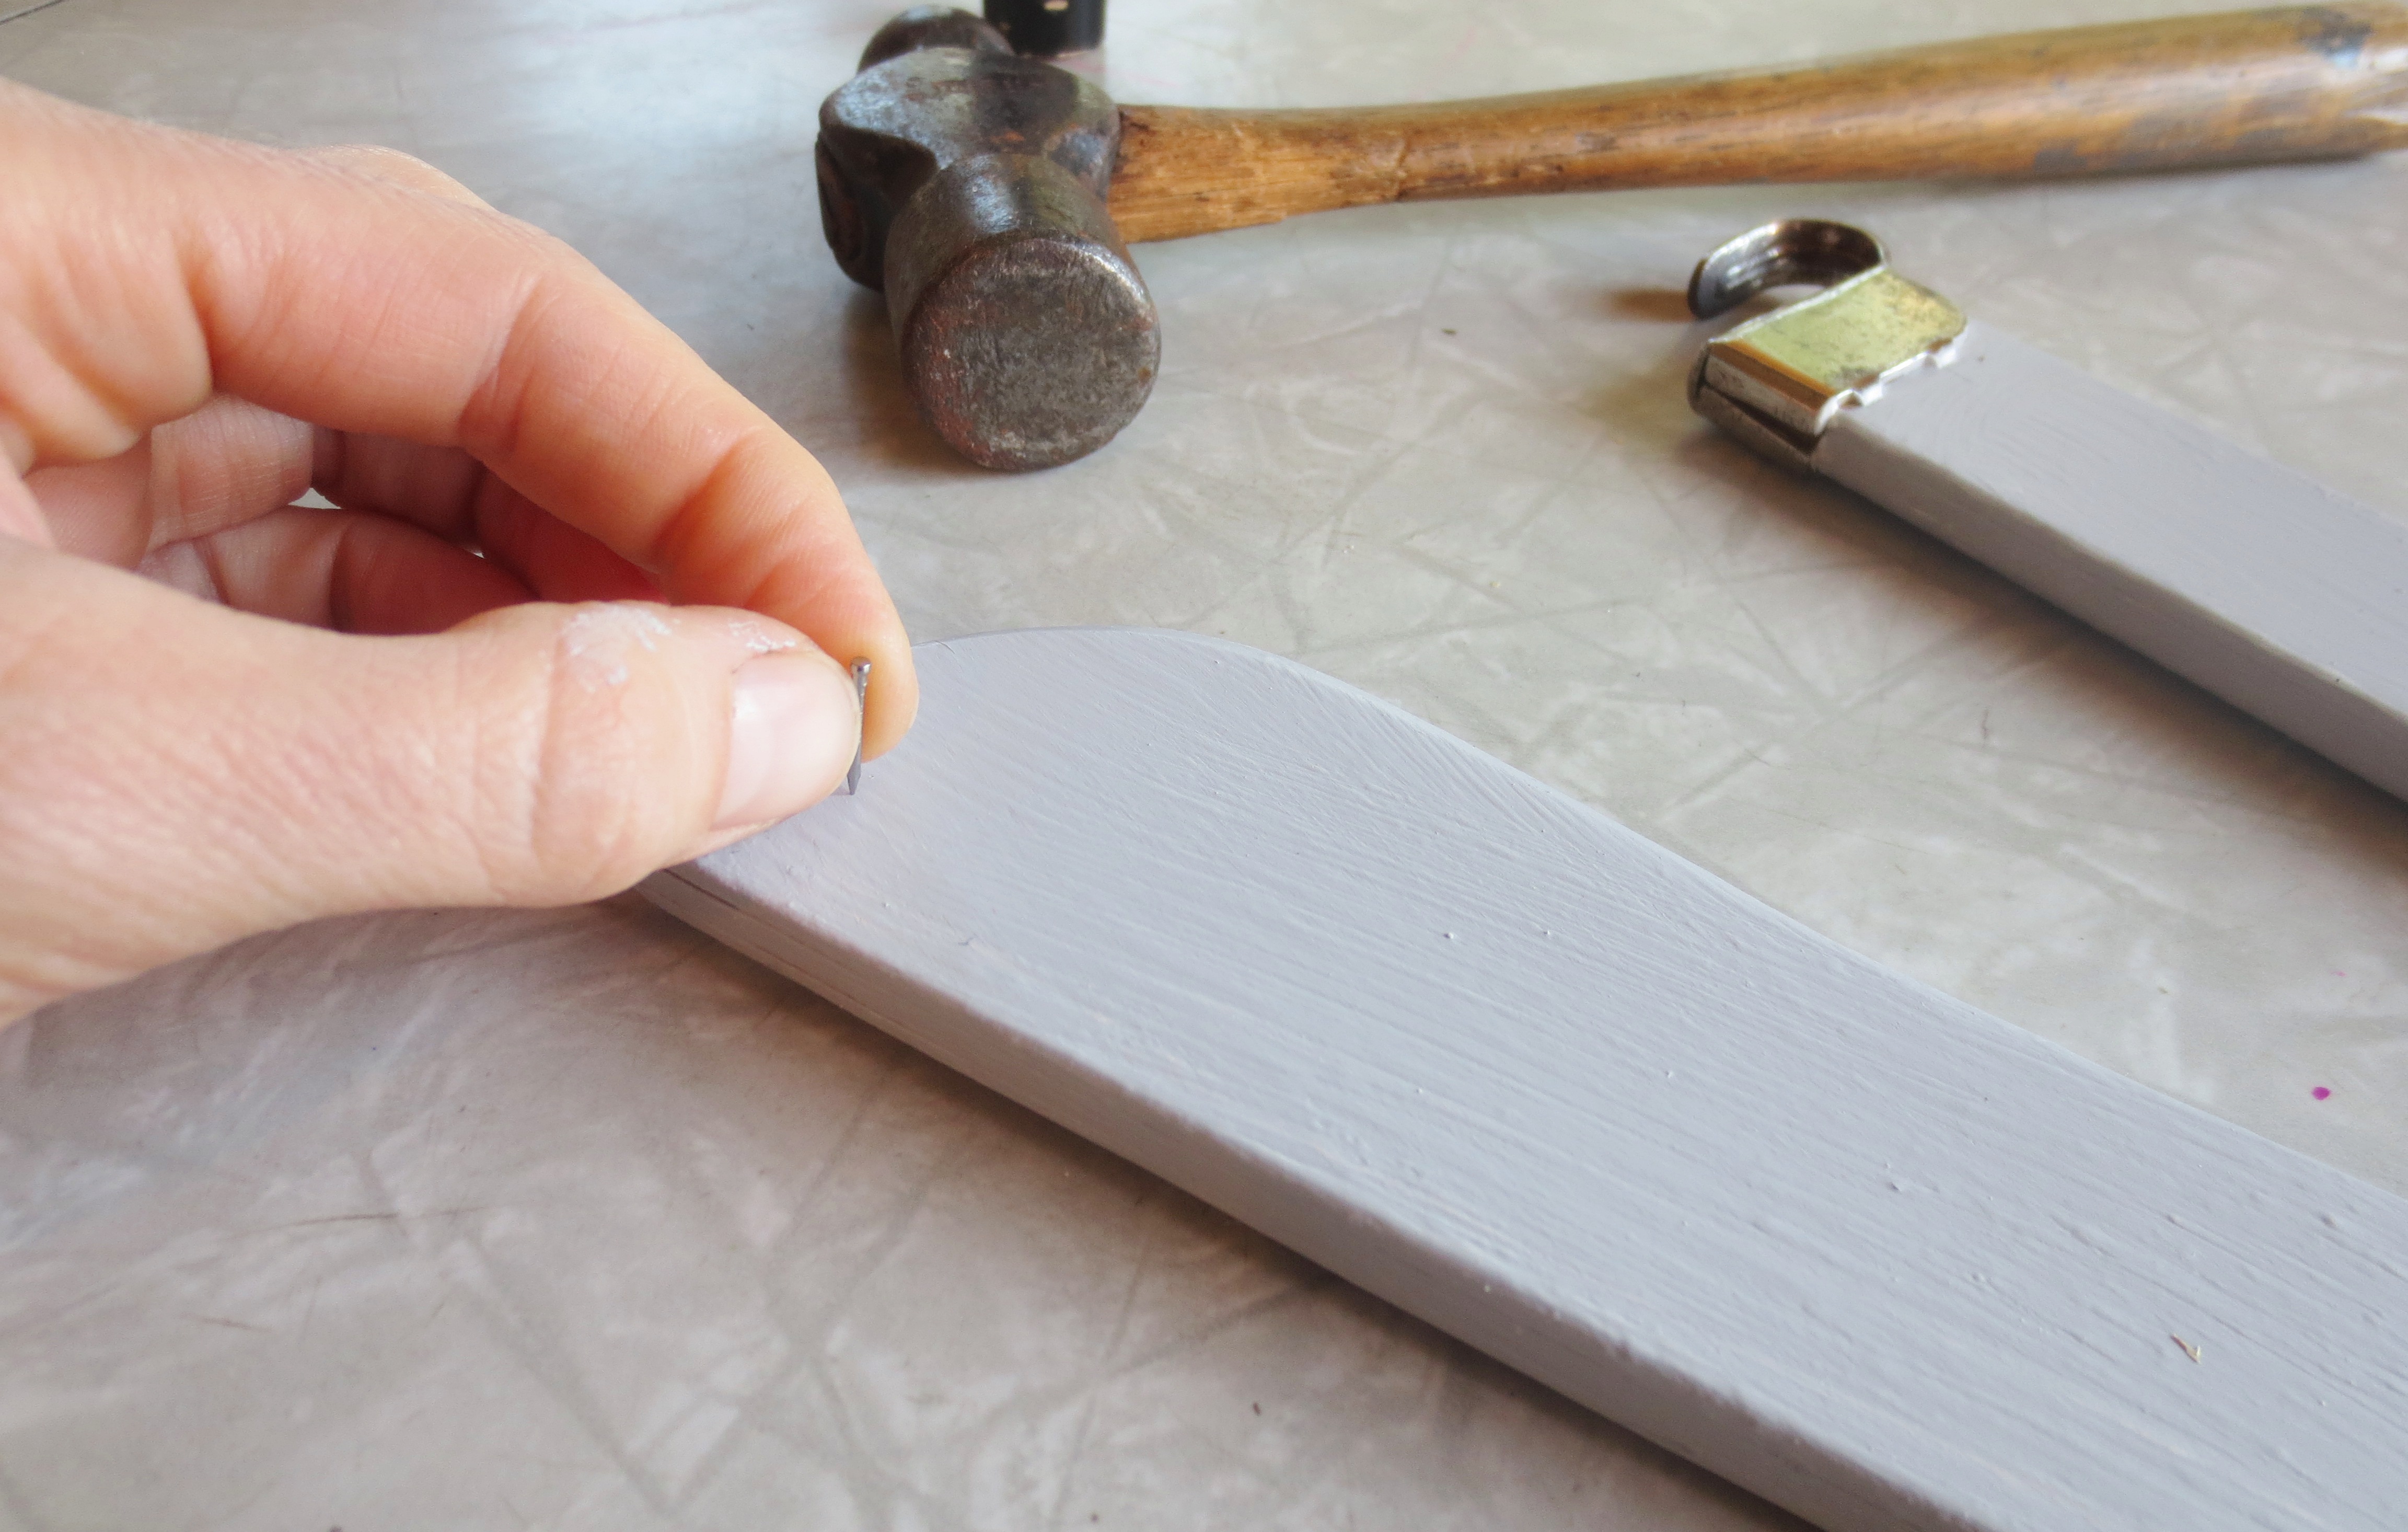

Finally, I pulled the string around the little nail, tying it together at the top. I then hung the whole thing on a picture hanger in the middle of the door. Now you’ll always know where to find the next King and Queen of Poland:
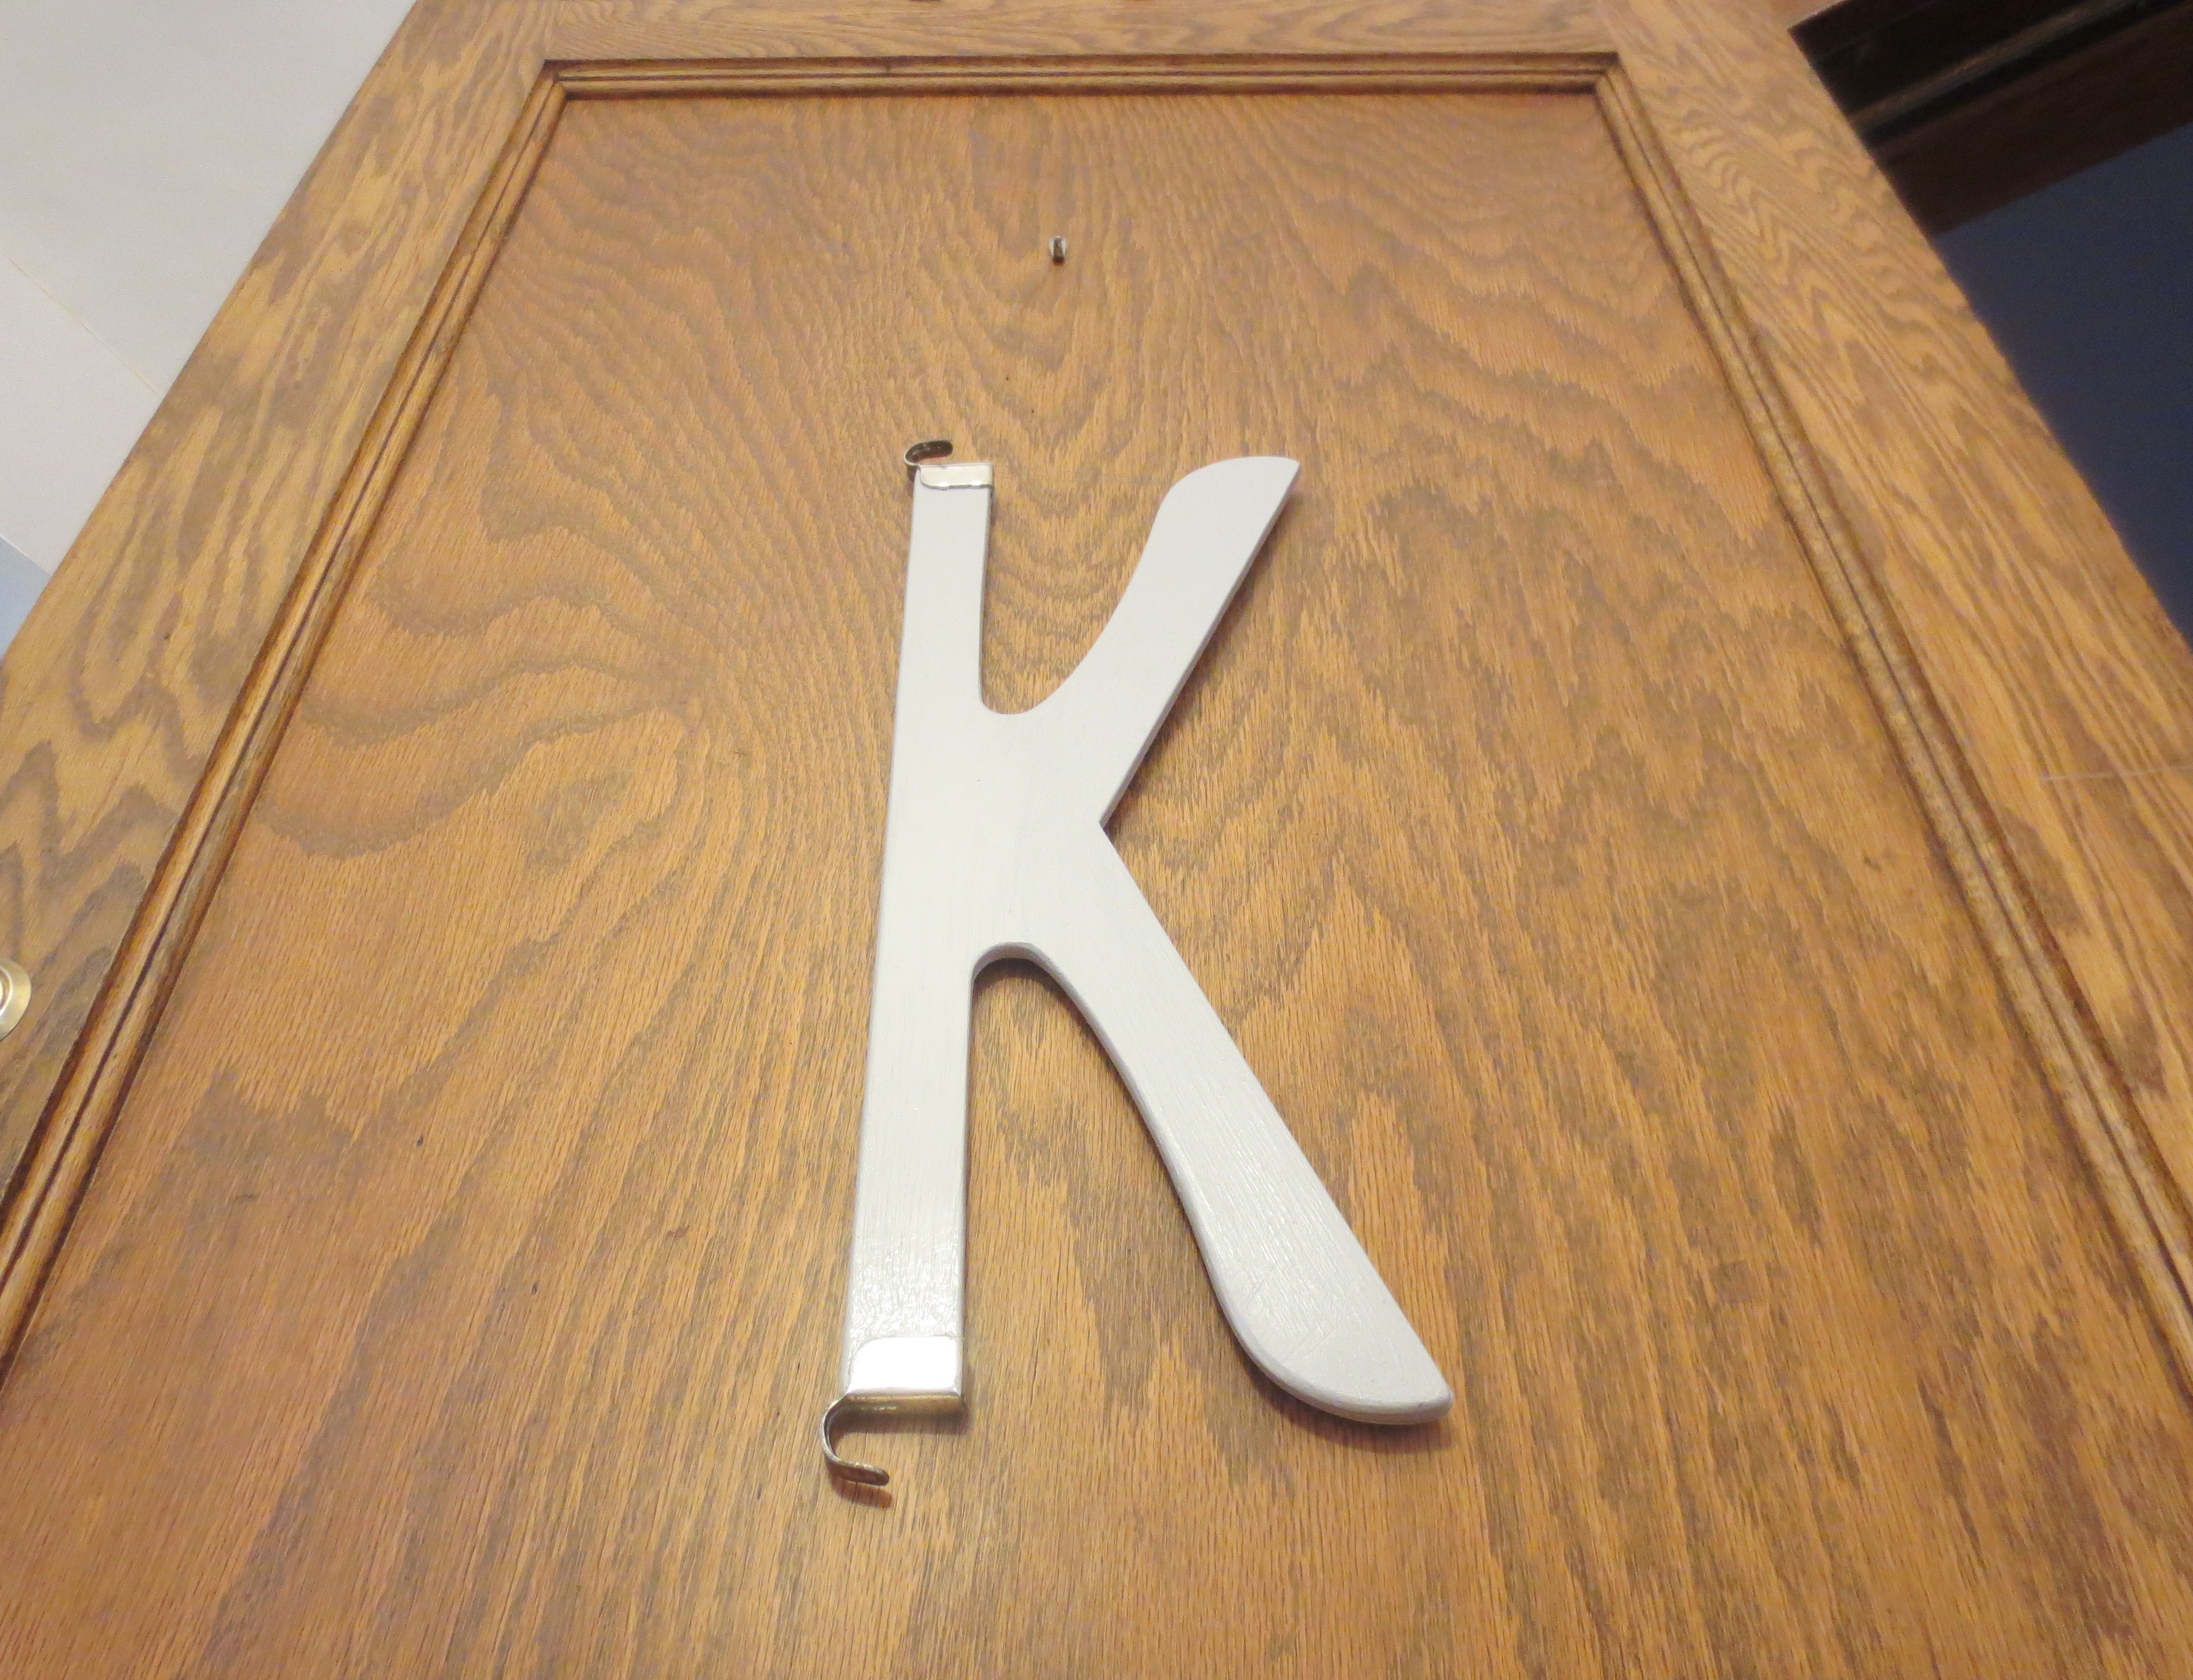

Also stands for, “Welcome to our Krappy, Kluttered home!”
* I love decisions where standing up for what you believe also requires you to do absolutely nothing.

Pingback: This One Weird Trick Will Make Your EXPEDIT Less IKEA-looking! | projectophile