 On a bright, blisteringly hot afternoon in July, a sweaty delivery man lugged a giant cardboard box onto our front lawn. After attacking every seam with my best kitchen knife, I finally got to test ride our family’s new Madsen Cargo bike. And I’ve ridden almost every day since, usually with two kids (and maybe a week’s worth of groceries) in tow.
Today it is 11 degrees outside, with two inches of snow on the ground. But we’re all still riding, thanks to the cargo bike cover that we just built. I’m excited to share how we made it with other Madsen owners and cargo bike enthusiasts.
By the way, my name is Clare. I live in a wonderful, walkable Chicago neighborhood called Logan Square. I have a drivers’ license but have never owned a car – I’m way too cheap and not nearly responsible enough. My husband Scott and I have three kids in all: my 1-year-old son, my 3-year-old daughter, and my 12-year-old stepson. Our family travels just about everywhere by bike. After a few years of hauling kids and groceries with a Burley trailer, we were in the market for a cargo bike; a mini-van on two wheels.
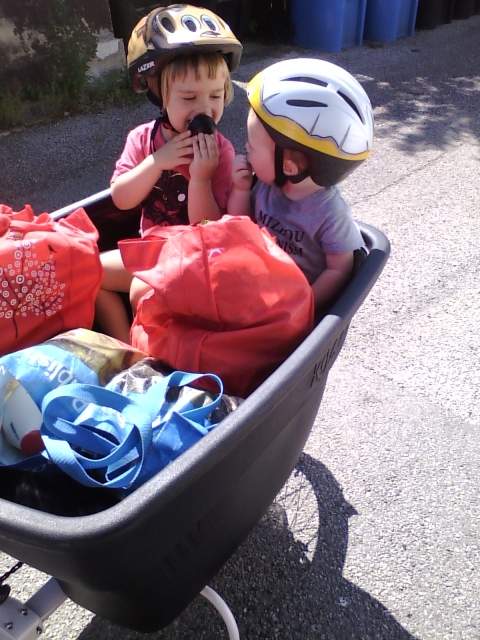
Babies eating groceries in the back of the Madsen
Why the Madsen? It was about $2,000 cheaper than most other models of “bucket” cargo bikes, and the pink model was on sale (did I mention I was cheap?). The bike comes fully assembled and ready to ride. The bucket is equipped with two removable, padded benches and four seat belts. But, aside from the optional front rack, Mr. Madsen offers no other accessories. Not even a cover to protect the little ones from sun, rain and snow.
The kids survived the summer and fall fully exposed. But as December blew in, it was finally time to roll up our DIY sleeves and make the cover ourselves. Internet searches turned up visual evidence of other DIY Madsen covers, but no instructions. Through trial-and-error, we designed a cover that works for us, and I’m excited to share our plans with the growing community of Madsen owners. I hope others will do the same.
THE FRAME:
We store our bikes in the crawl space under our landlord’s back porch, and needed a frame that was lightweight, a bit flexible, and could easily pop on and off, like a tent dome. Scott constructed this domed X-shaped frame out of a few basic ingredients:
• Two sizes of PVC pipe (one fits into the other, though they both say ½ inch?)
• Clamps: four 2″ spring clamps, and four hose clamps
• Screws and nuts
1). Scott began by cutting the larger PVC pipes in half to make four 18″ sections. He then connected them to the four spring clamps with the hose clamps, producing four upright posts – one at each corner of the bucket.
2). Next, he inserted the two long pieces of the narrow PVC into the larger PVC “posts,” crossing at the top to create a dome shape, like a tent. We were surprised and a little peeved to discover that the inside diameter of the pipe is not uniform throughout: while the first pair of pipes fit together perfectly, the second pair wouldn’t cooperate. Scott fixed this by cutting a grove into the lip of the smaller pipe so that it would collapse slightly and slip into the bigger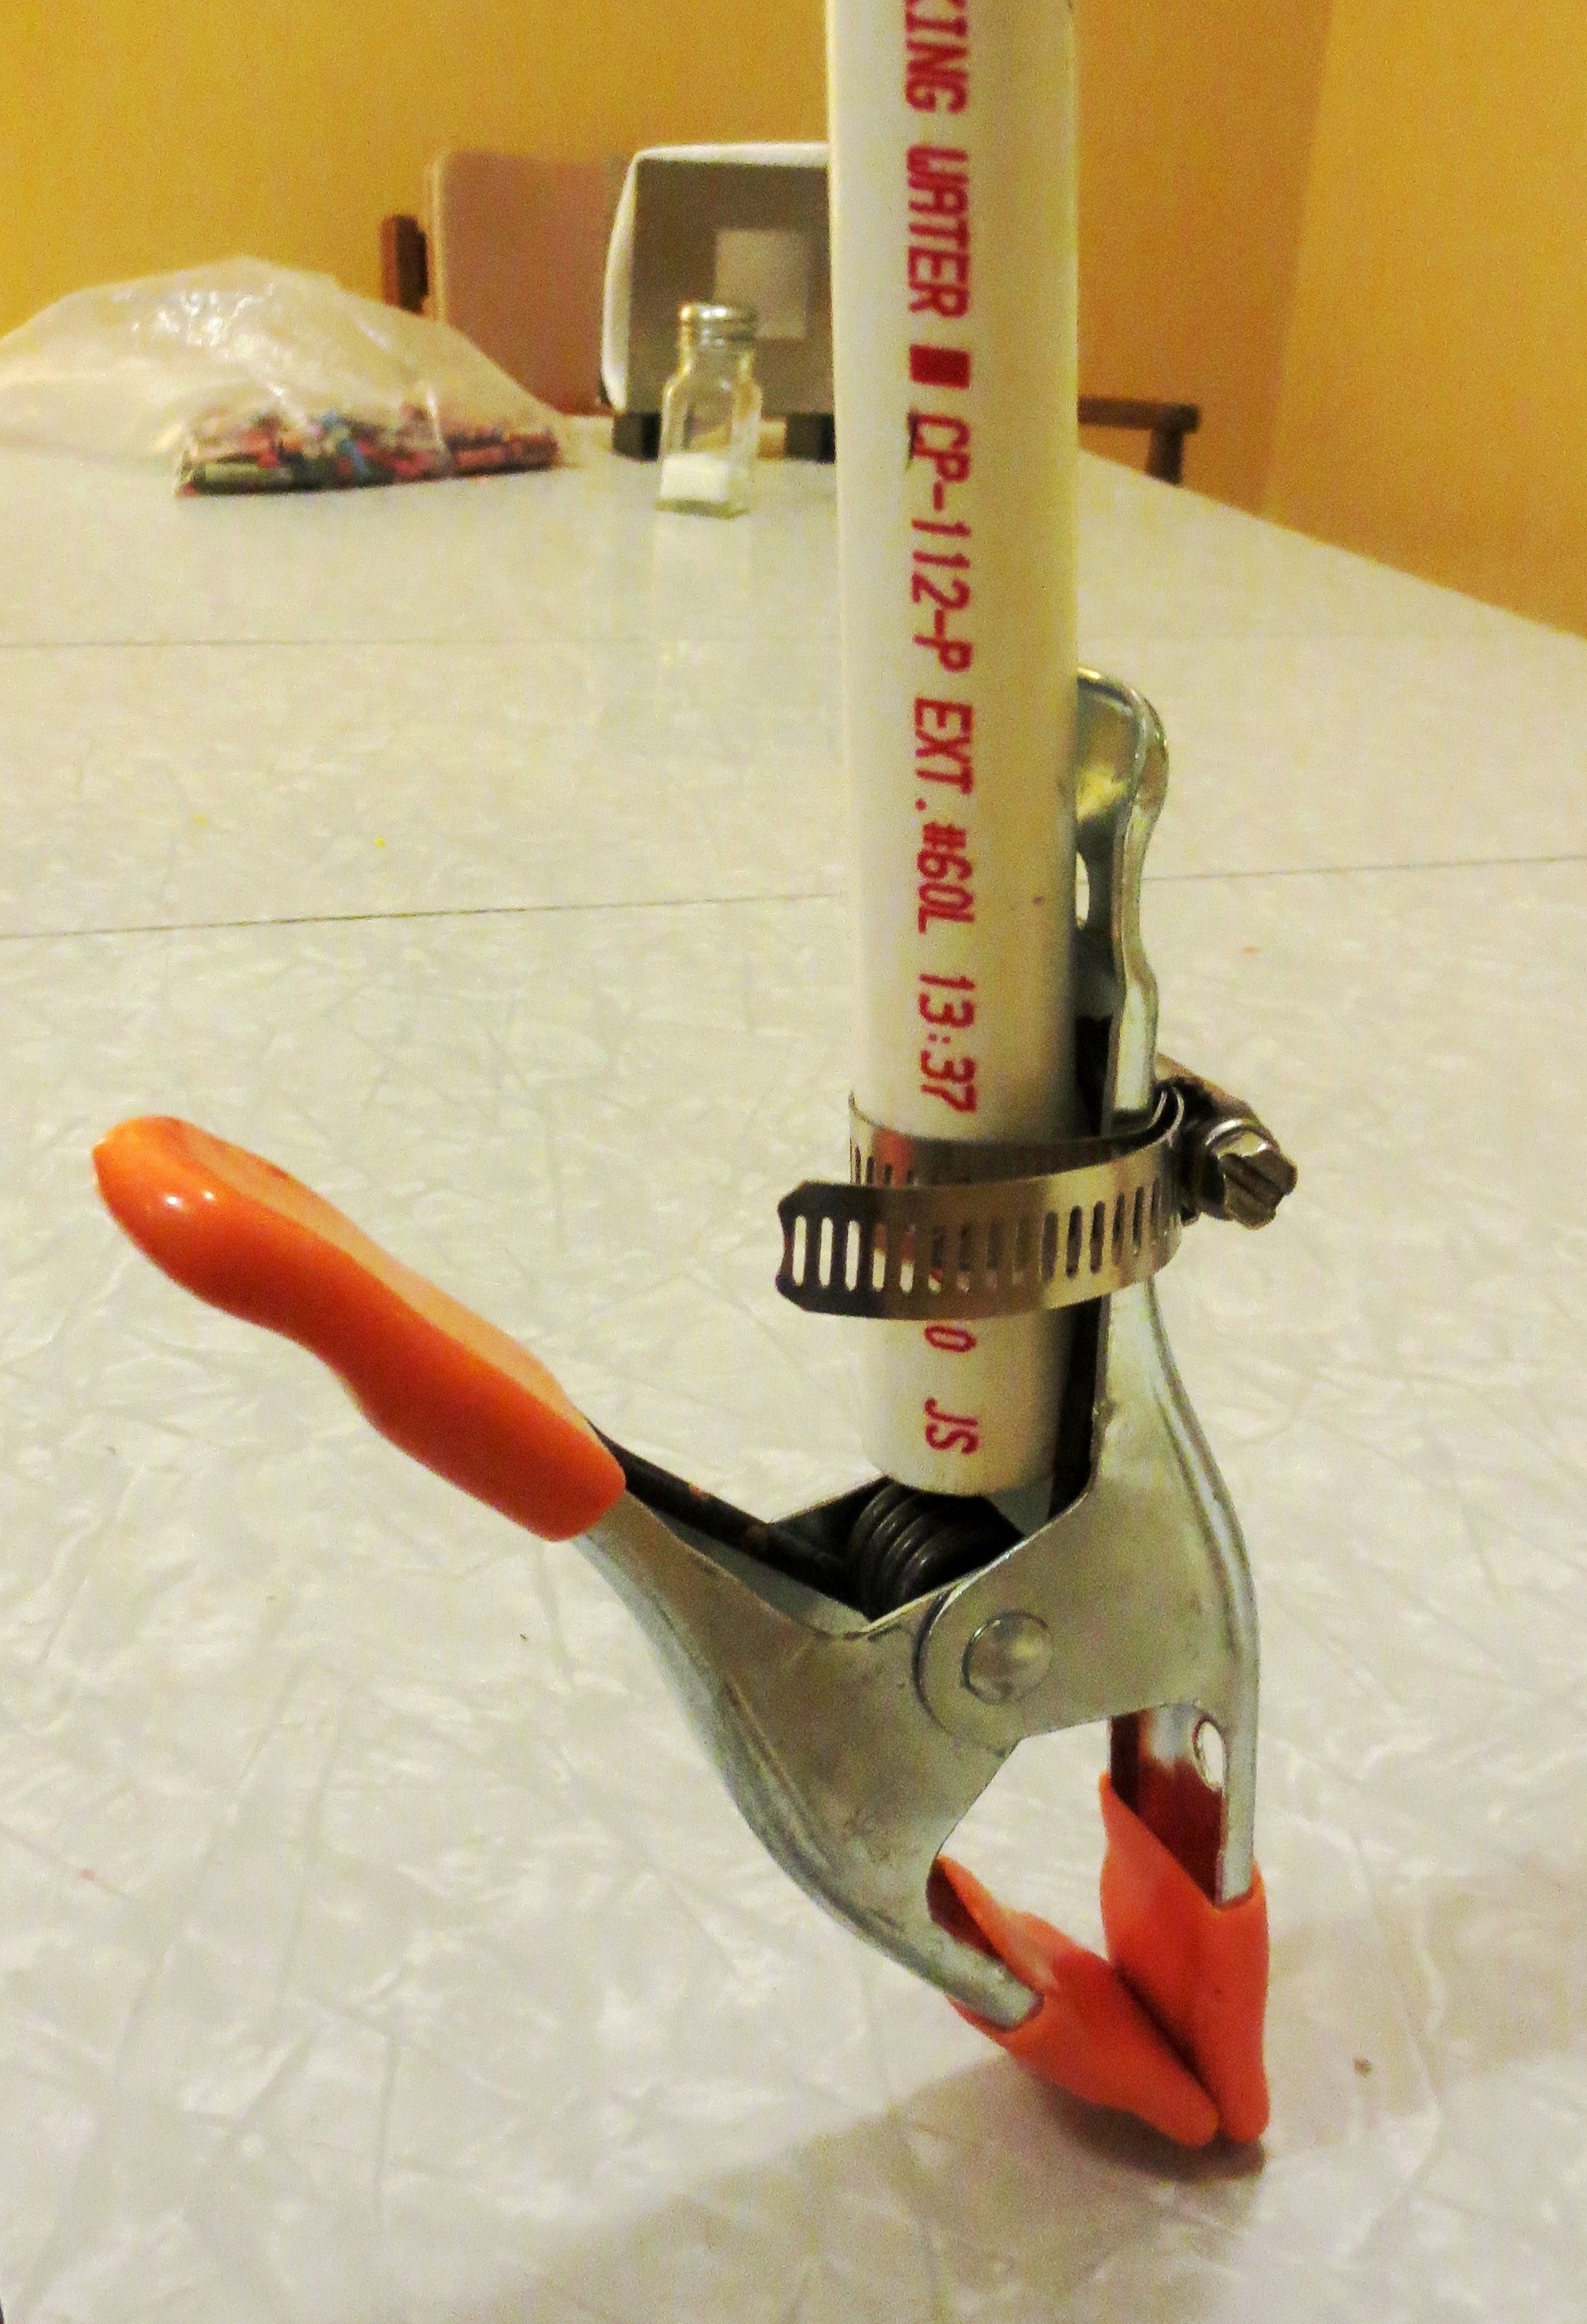 pipe.
pipe.
3). Then, he drilled a hole and inserted a screw and nut through each of the 4 overlapping pipes. TIP! Use an awl make a pilot hole through the pipe before you drill to help the drill go straight.
4). Finally, he drilled a hole and bolted together the point at the top of the dome where the two pipes cross each other.
THE COVER:
1). I bought the fabric – black oilcloth with white polka dots – on a spontaneous weekday trip to IKEA with my friend Brian. We grabbed two yards, which was my best guess at the moment as to how much I would need.
2). Next, I made a pattern for the fabric by draping an old bed sheet over the frame and tracing the outlines of the four panels on the fabric with marker. Because of the dome shape of the frame, it was beyond my mathematical abilities to calculate accurate measurements for each panel (my previous sewing feats have been limited to more two-dimensional projects like curtains, pillows, and toddler Halloween costumes). I decided to use five panels – one for each side, one for the front, and two twin panels for the back “door.”
2). After cuttin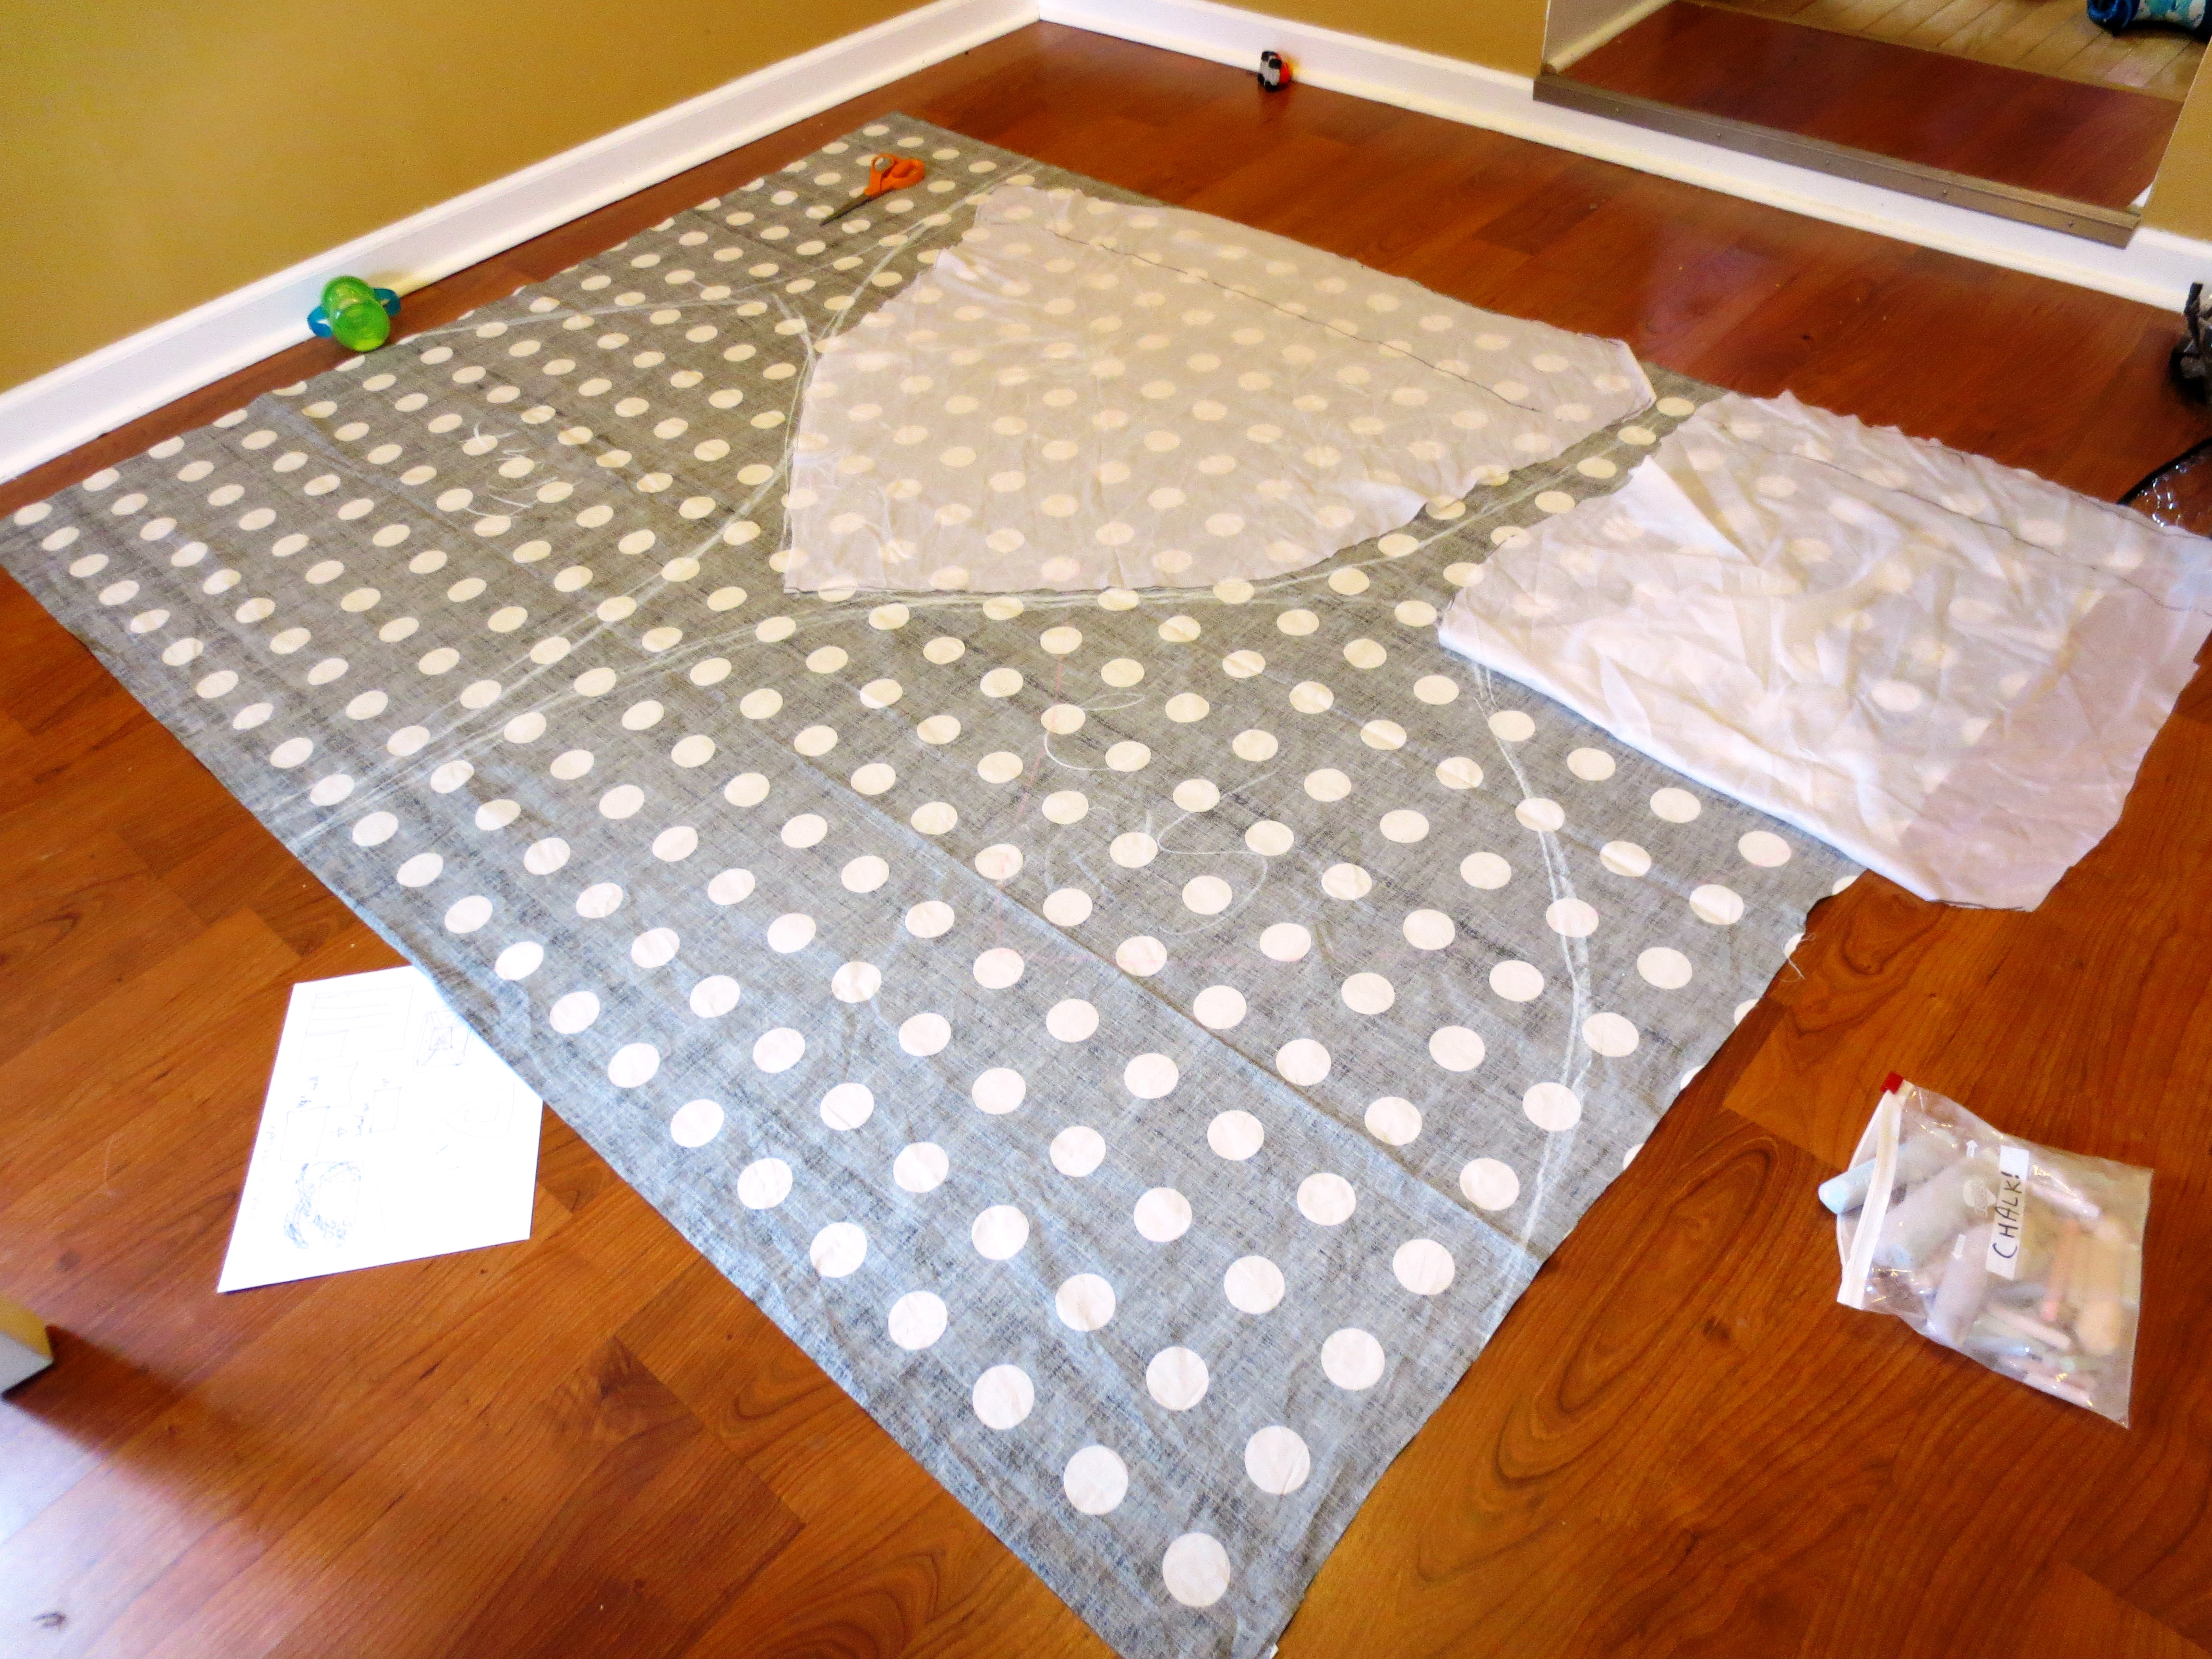 g the pattern out of the bed sheet, I placed the panels up on my oilcloth and cut out the shapes.
3). To make the “windows,” I traced two squares of somewhat arbitrary size onto a large piece of clear vinyl – an old stroller cover passed on by the Avery family. Then, I drew the window outline in chalk on the wrong side of the oilcloth, allowing about an extra inch around for the vinyl to overlap the oilcloth. I cut a window hole by folding the fabric in half and cutting half a square (a trick I learned from making pa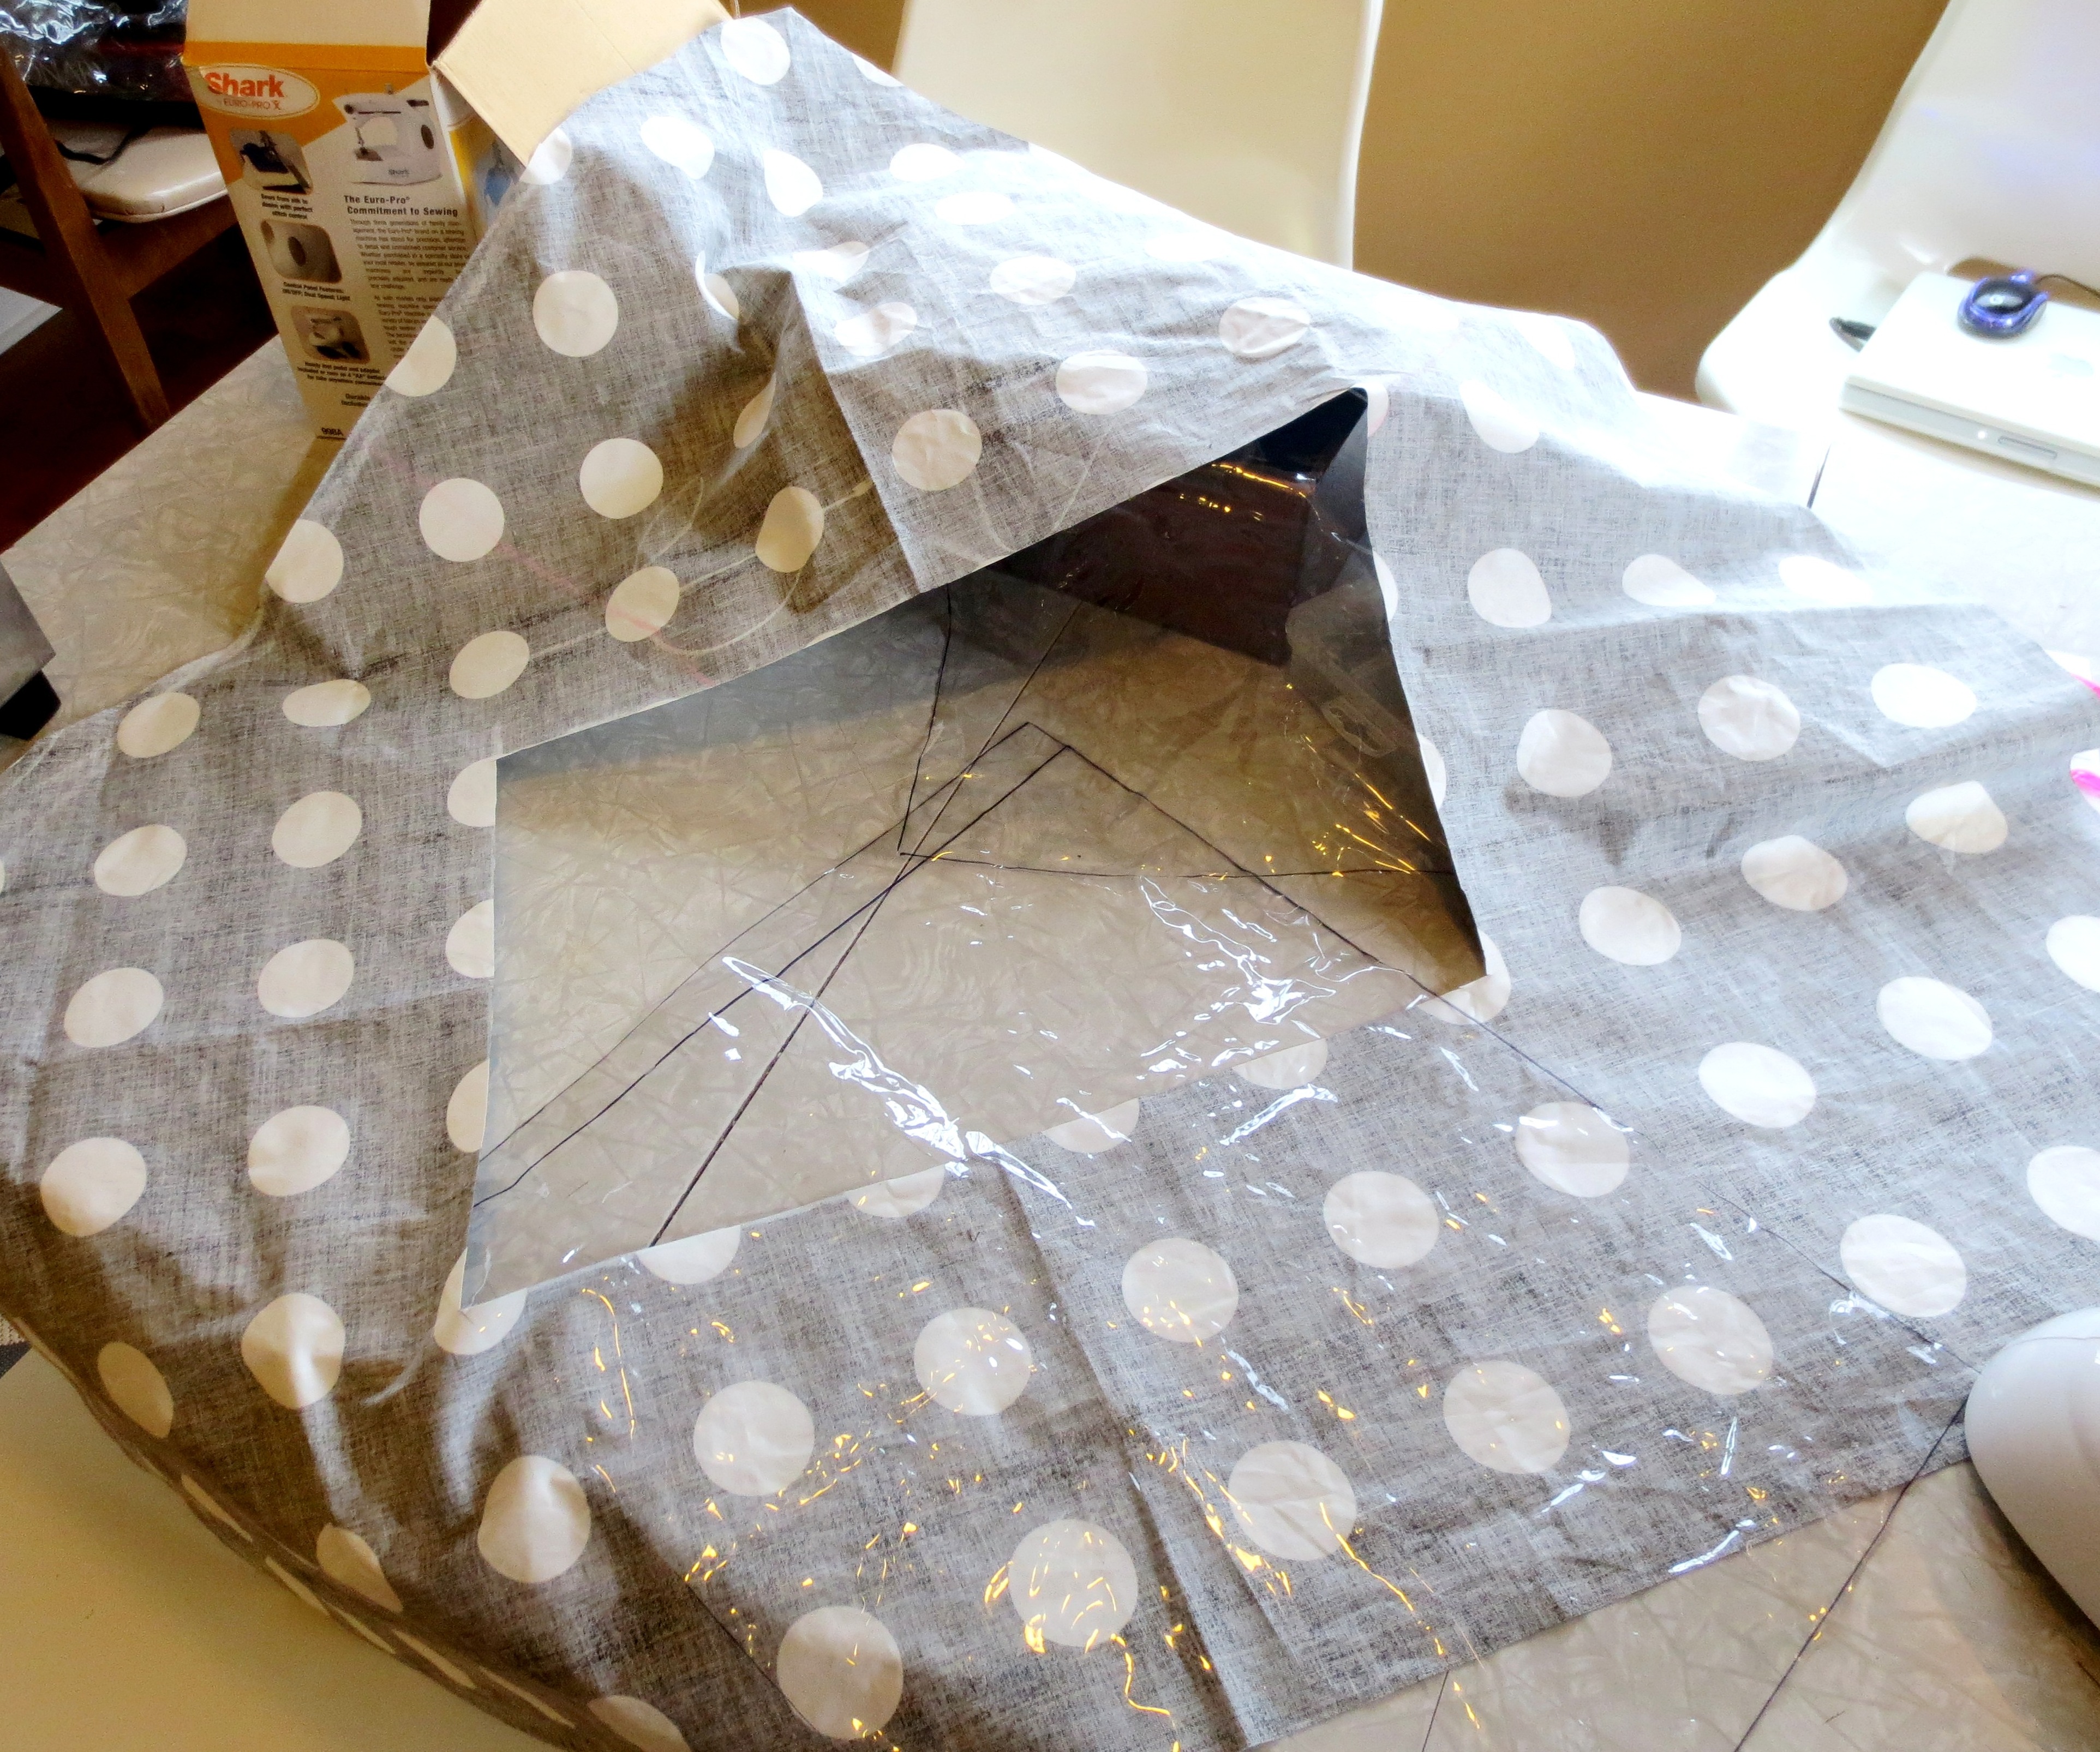 per snowflakes in 2nd grade). By some miracle, my tiny sewing machine was happy to sew the vinyl on the oilcloth.
4). And here’s where we come to our first happy screw up: After pinning the main panels together over the frame, I realized we didn’t cut enough oilcloth for the front panel. Oops. But, I happened to have a large piece of clear vinyl from a trip to Jo-Anne’s, which became the new front panel. Let me pause here to say that this was the best mistake I’d made so far — being able to see what’s going on inside that little bubble is absolutely essential. You’d surprised at what my babies will toss out the side of the bike when I’m not looking, or how much of our groceries they’ll eat on the trip home from the store.
5). At this point, it was all about the machine. I simply sewed all the panels together at their edges, with the back panel open.
6). Since I’m no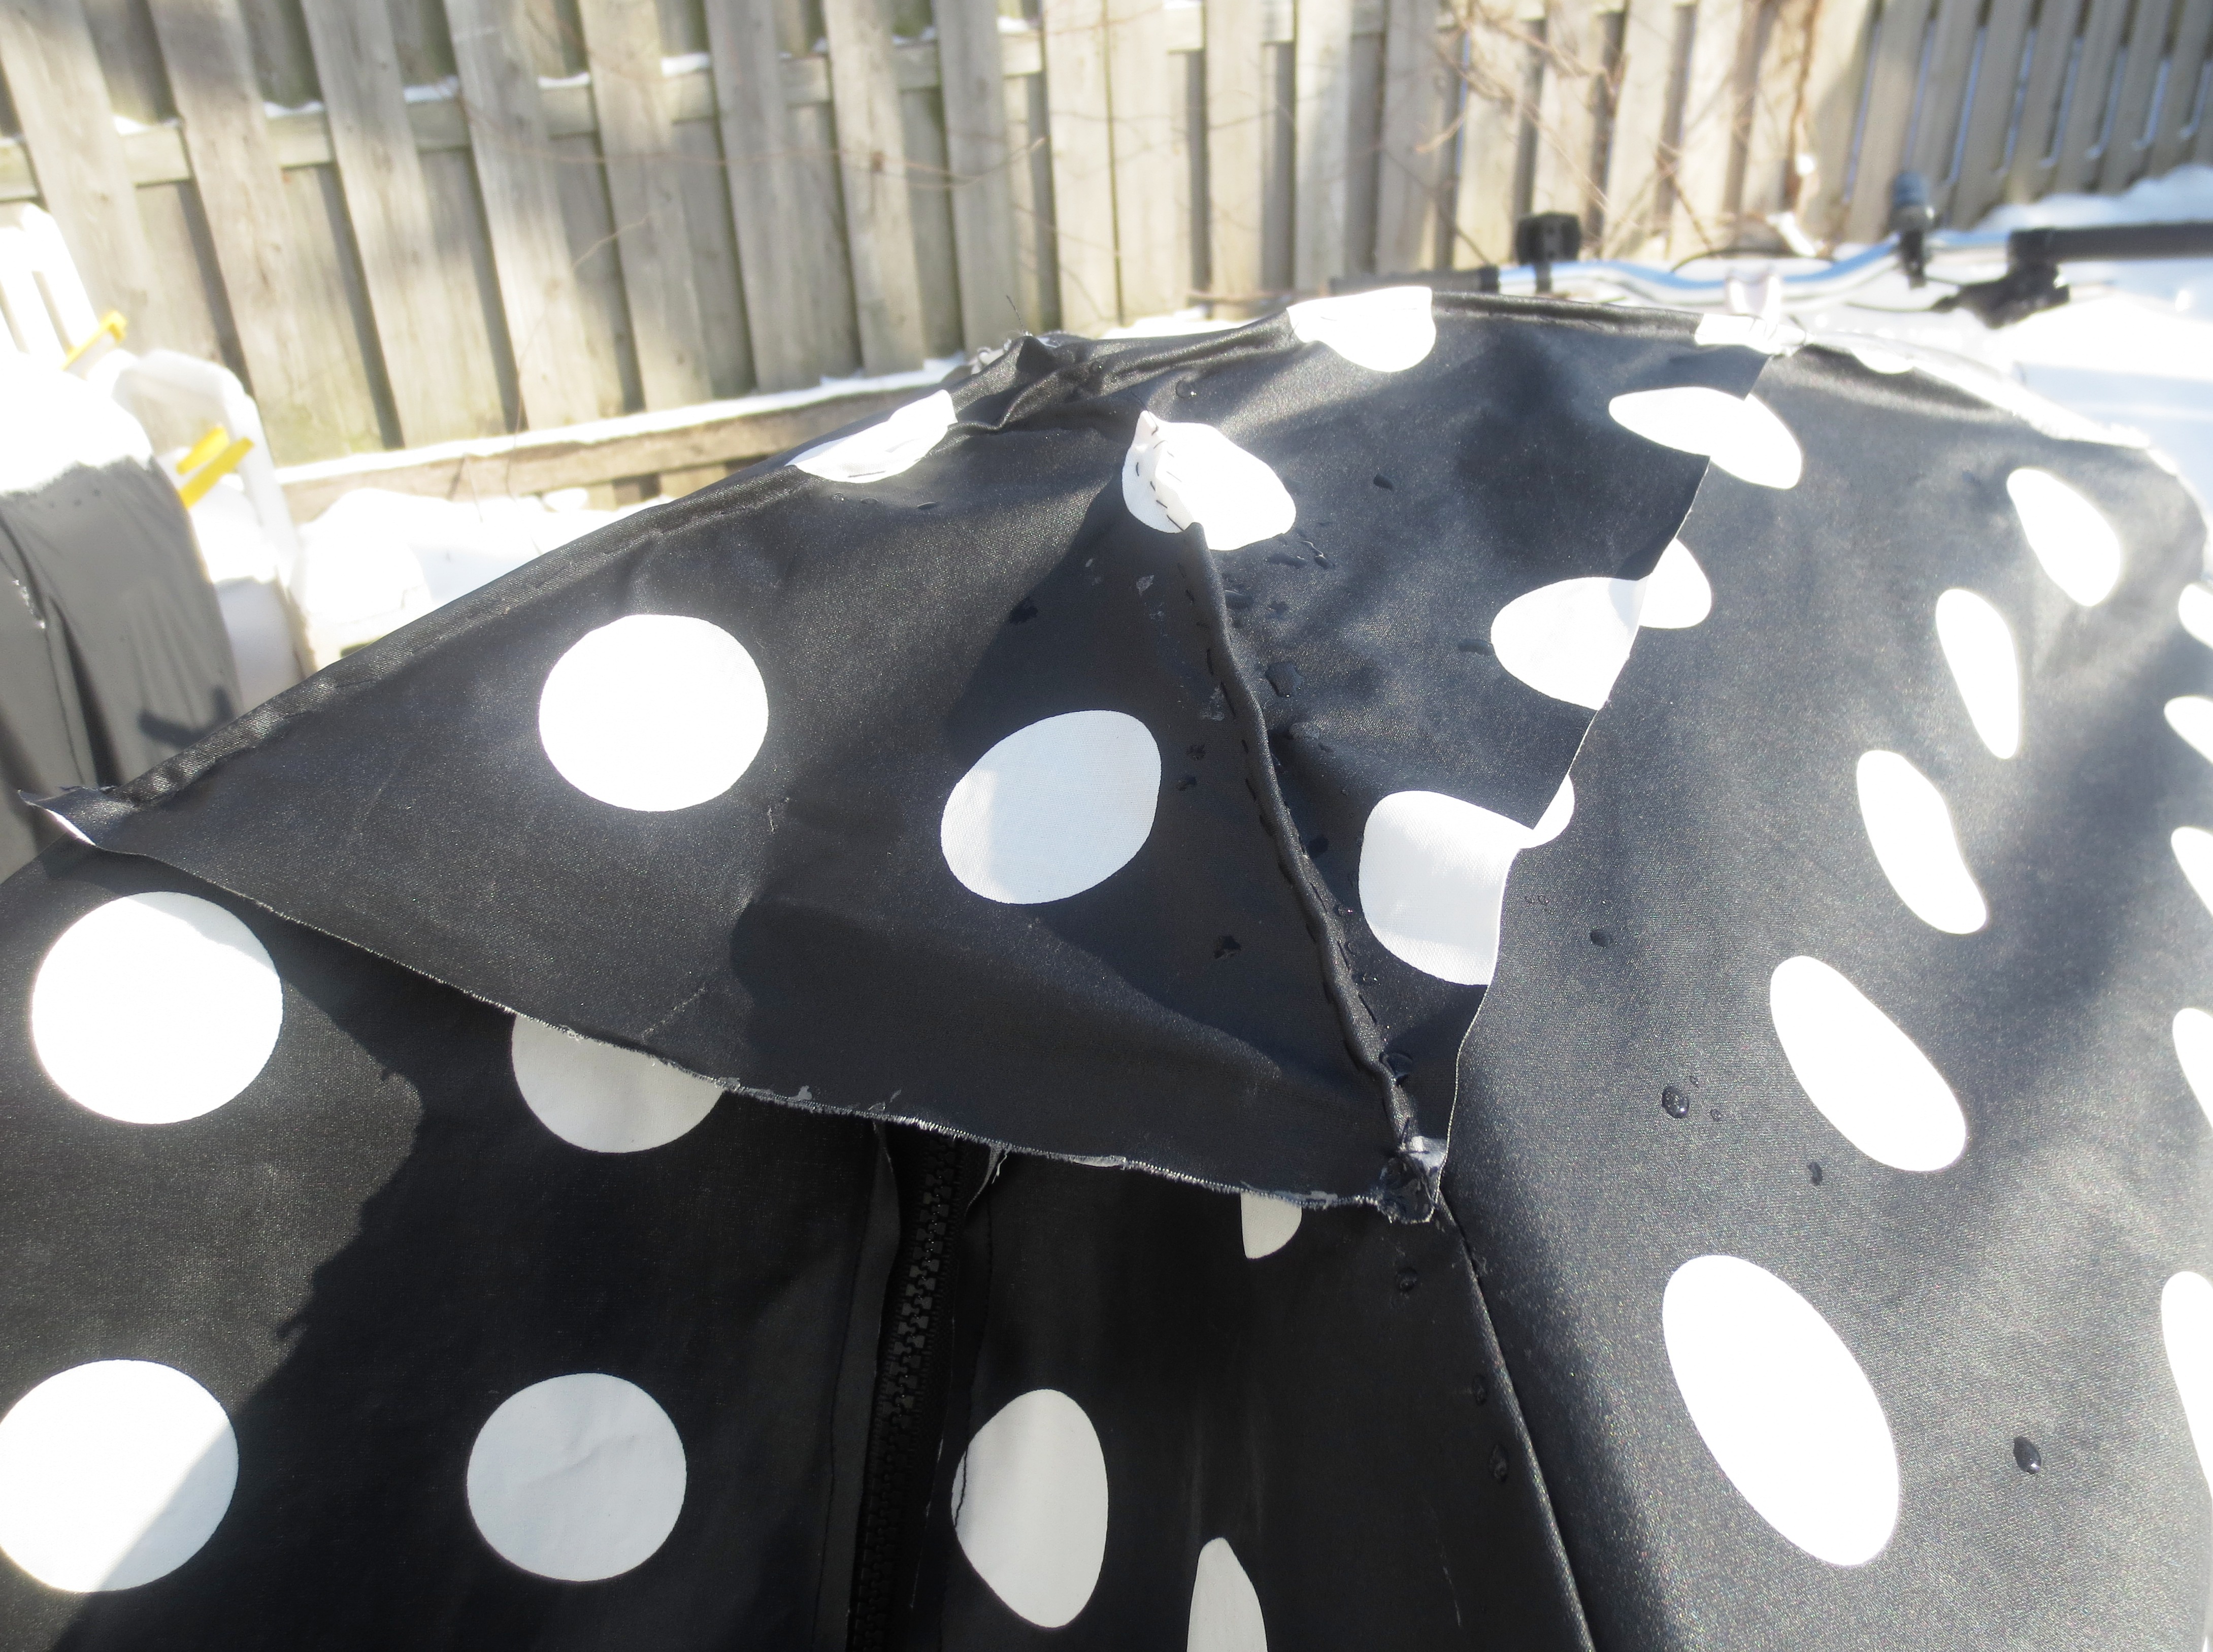 t skilled enough to make all my panels meet together in a perfect apex at the top, I had to sew an extra square of oilcloth on the peak of the dome to block out the rain, and cover up my mistakes. However, my Little Machine refused to stitch over that much oilcloth, and I had to do that panel by hand (and oh, boy, can you tell).
7). The next challenge was securing the bottom of the cover to the bucket, which has a gently sloping lip. I sewed a bottom hem just wide enough to hold a roll of elastic, which I carefully threaded through the hem as I sewed it.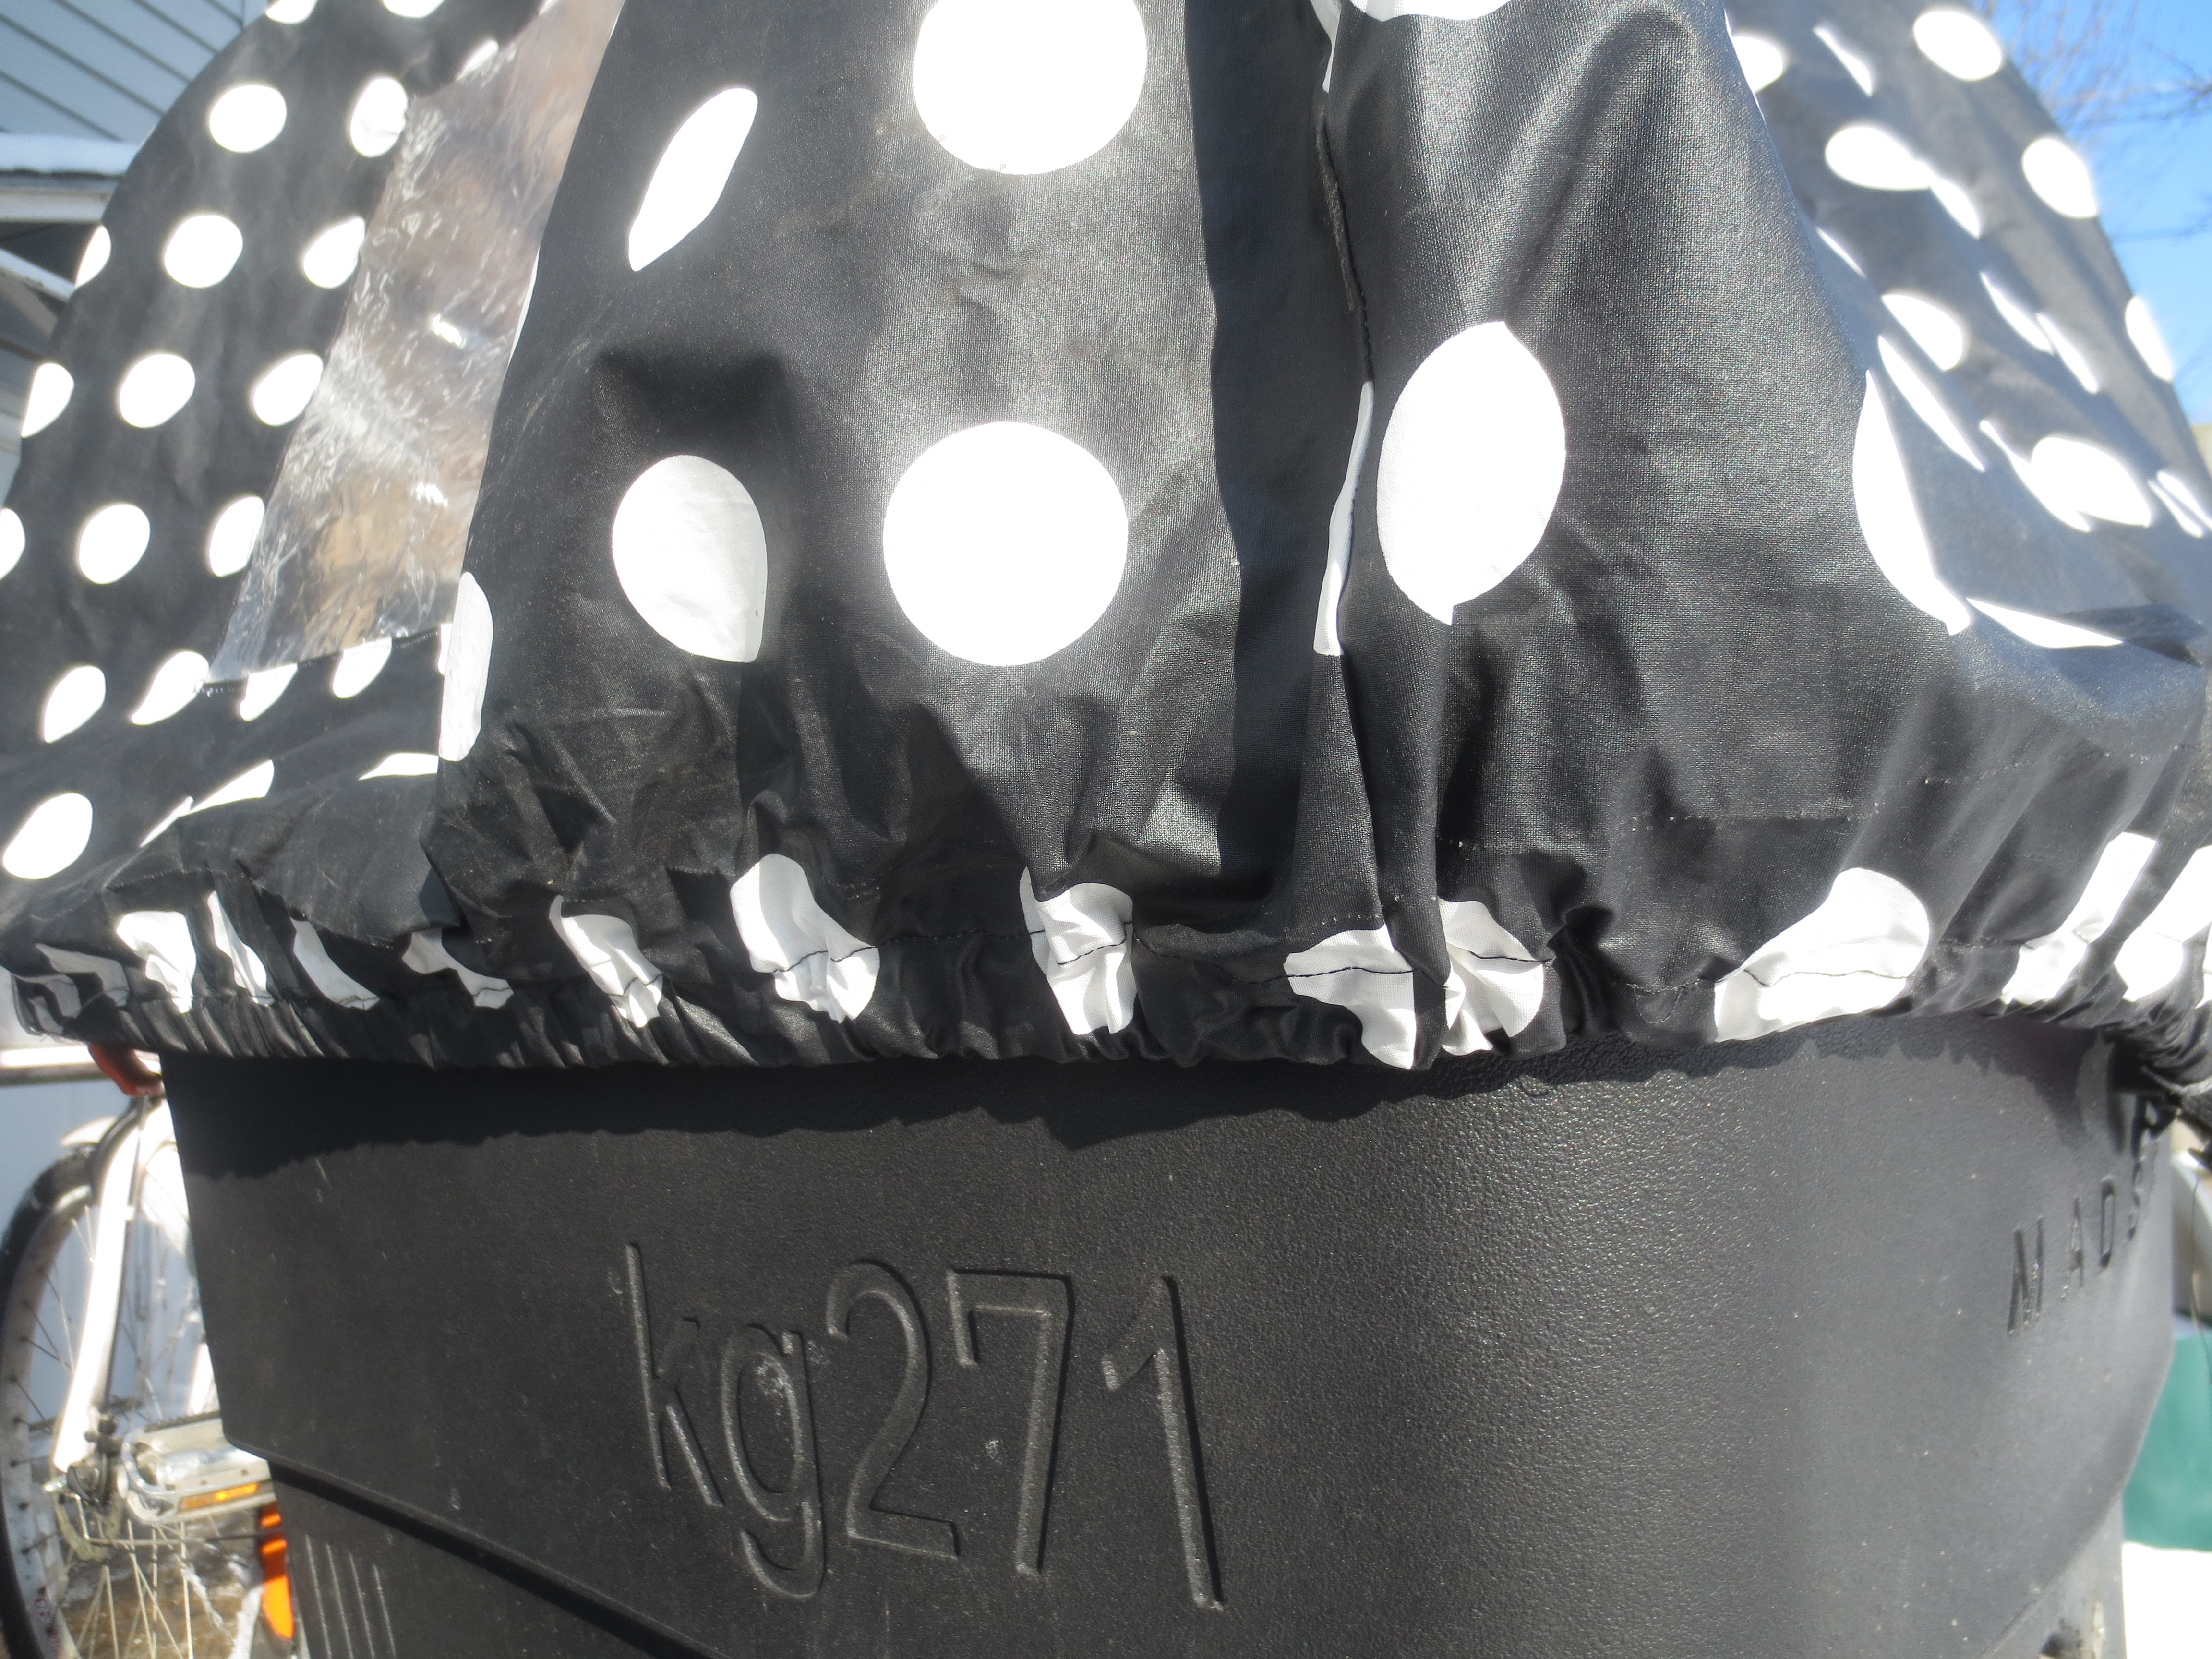
8). Next, I liberated a “side release” buckle off an old bag, and hand-sewed it to the ends of the elastic. It took some trial-and-error to get the tension right.

9). The last big decision—how to close up the back door? Since beginner sewers like me are famously terrified of zippers, my gut was to go with Velcro. Which brings us to Serendipitous Screw Up #2. I happened to have some industrial strength adhesive Velcro lying around (who doesn’t?), and stuck it right on, declaring the project Finished. The next day, Scott took the cover out for its inaugur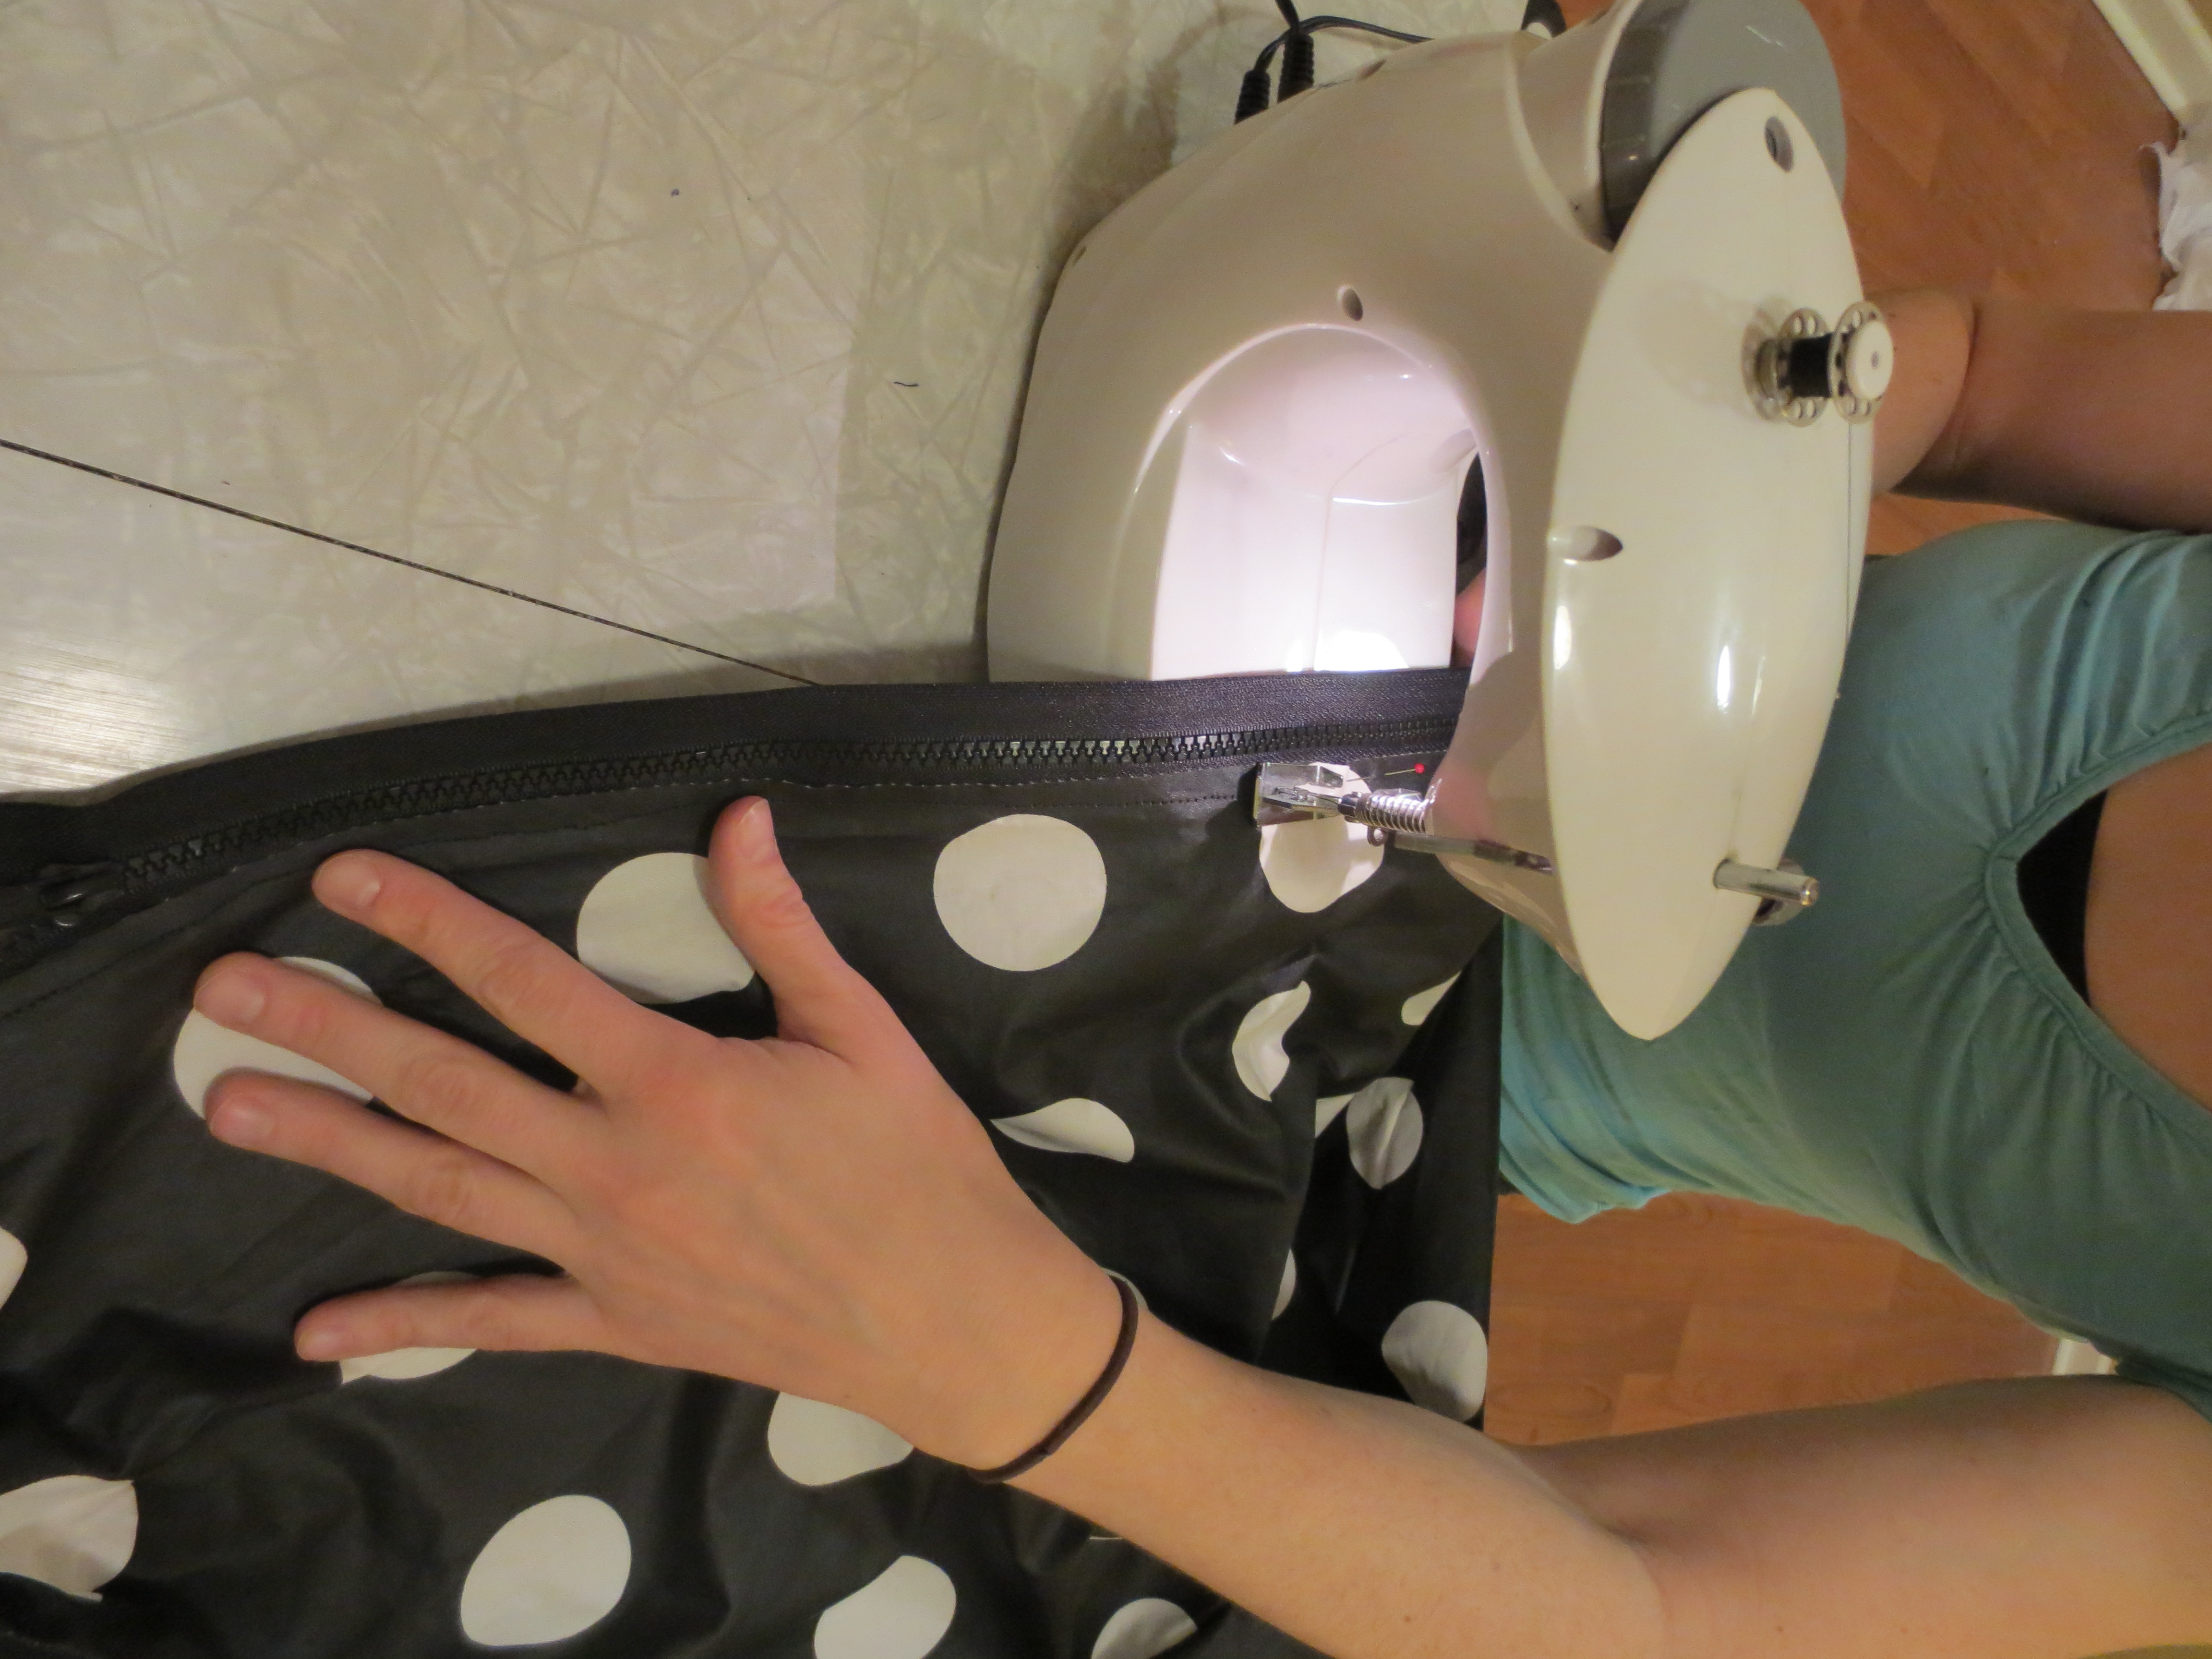 al ride and the @#$%* Velcro falls right off the cover on the way to school. Didn’t even last 15 minutes. I knew in my heart I had to Face the Zipper. So I went back to Jo-Anne and snatched one for about a dollar (but I secretly bought some sew-on Velcro in case things got ugly with the zipper). I made sure to get plastic instead of metal, so it wouldn’t freeze. I carefully pinned the zipper to the edges of the back panels, and sewed it up in a matter of minutes. It zips top to bottom and looks great. There’s nothing like stuffing your kiddo inside the bubble and zipping him up tight!
So, it’s been about a month, and the cover has kept our kiddos warm, dry and dare I say… stylish?


Your family is amazing!!! You two are really cool. It shows how we need to do more for ourselves instead of relying or becoming dependent on big box stores for everything we need.
LikeLike
This is super helpful! I modified my Madsen top cover for my dog, but am looking to do something like this for the summer. Can you share a photo of the final closure with the zipper?
LikeLike