
My husband’s birthday is today. Yes, I know today is Halloween, and that he has to share his special day with a world full of Spidermen and Naughty Nurses and canines dressed as encased meat.
But enough about him. Let’s talk about me, and how hard it is to for ME to celebrate my husband’s birthday. We’ve been married for five years and financially interdependent for eight. The most exciting thing I can give him is my permission to buy something for himself with money from the Joint Checking Account.
Thankfully, Scott and I also have a tradition of making each other gifts that have no real value other than their expressions of love and creativity – the two building blocks of a happy life. Last year I made Scott a “scratch-n-sniff” card with real smells that I concocted in my home laboratory. He made me a board game about my life:
 But even the most innovative birthday cards eventually end up forgotten in a box or drawer. This year, I wanted to make Scott a gift that was both a written expression of my love, and a practical item that would be looked at again and again.
Like me, Scott has a day job that pays the bills, but his real passion is making comics. He’s almost never caught without a sketchbook and a stash of pens. And what is a sketchbook but a really, really long birthday card?
Since it’s his 38th birthday, I made the theme of the book “38 Things That I Love About You.” I’ve spent the last few days researching basic book-building techniques. Since I had to do this all in secret, we’re gonna keep it Especially Basic. Here goes!
HOW TO MAKE YOUR HUSBAND A BIRTHDAY CARD SKETCHBOOK FOR HIS 38TH BIRTHDAY!
YOU WILL NEED:
— Blank Paper and “Bone Folder,” hahaha!
— Empty Cereal or Cracker Box.
— Scissors and Awl
— Needle and thick thread or twine
— Glue
— Fabric or Contact Paper
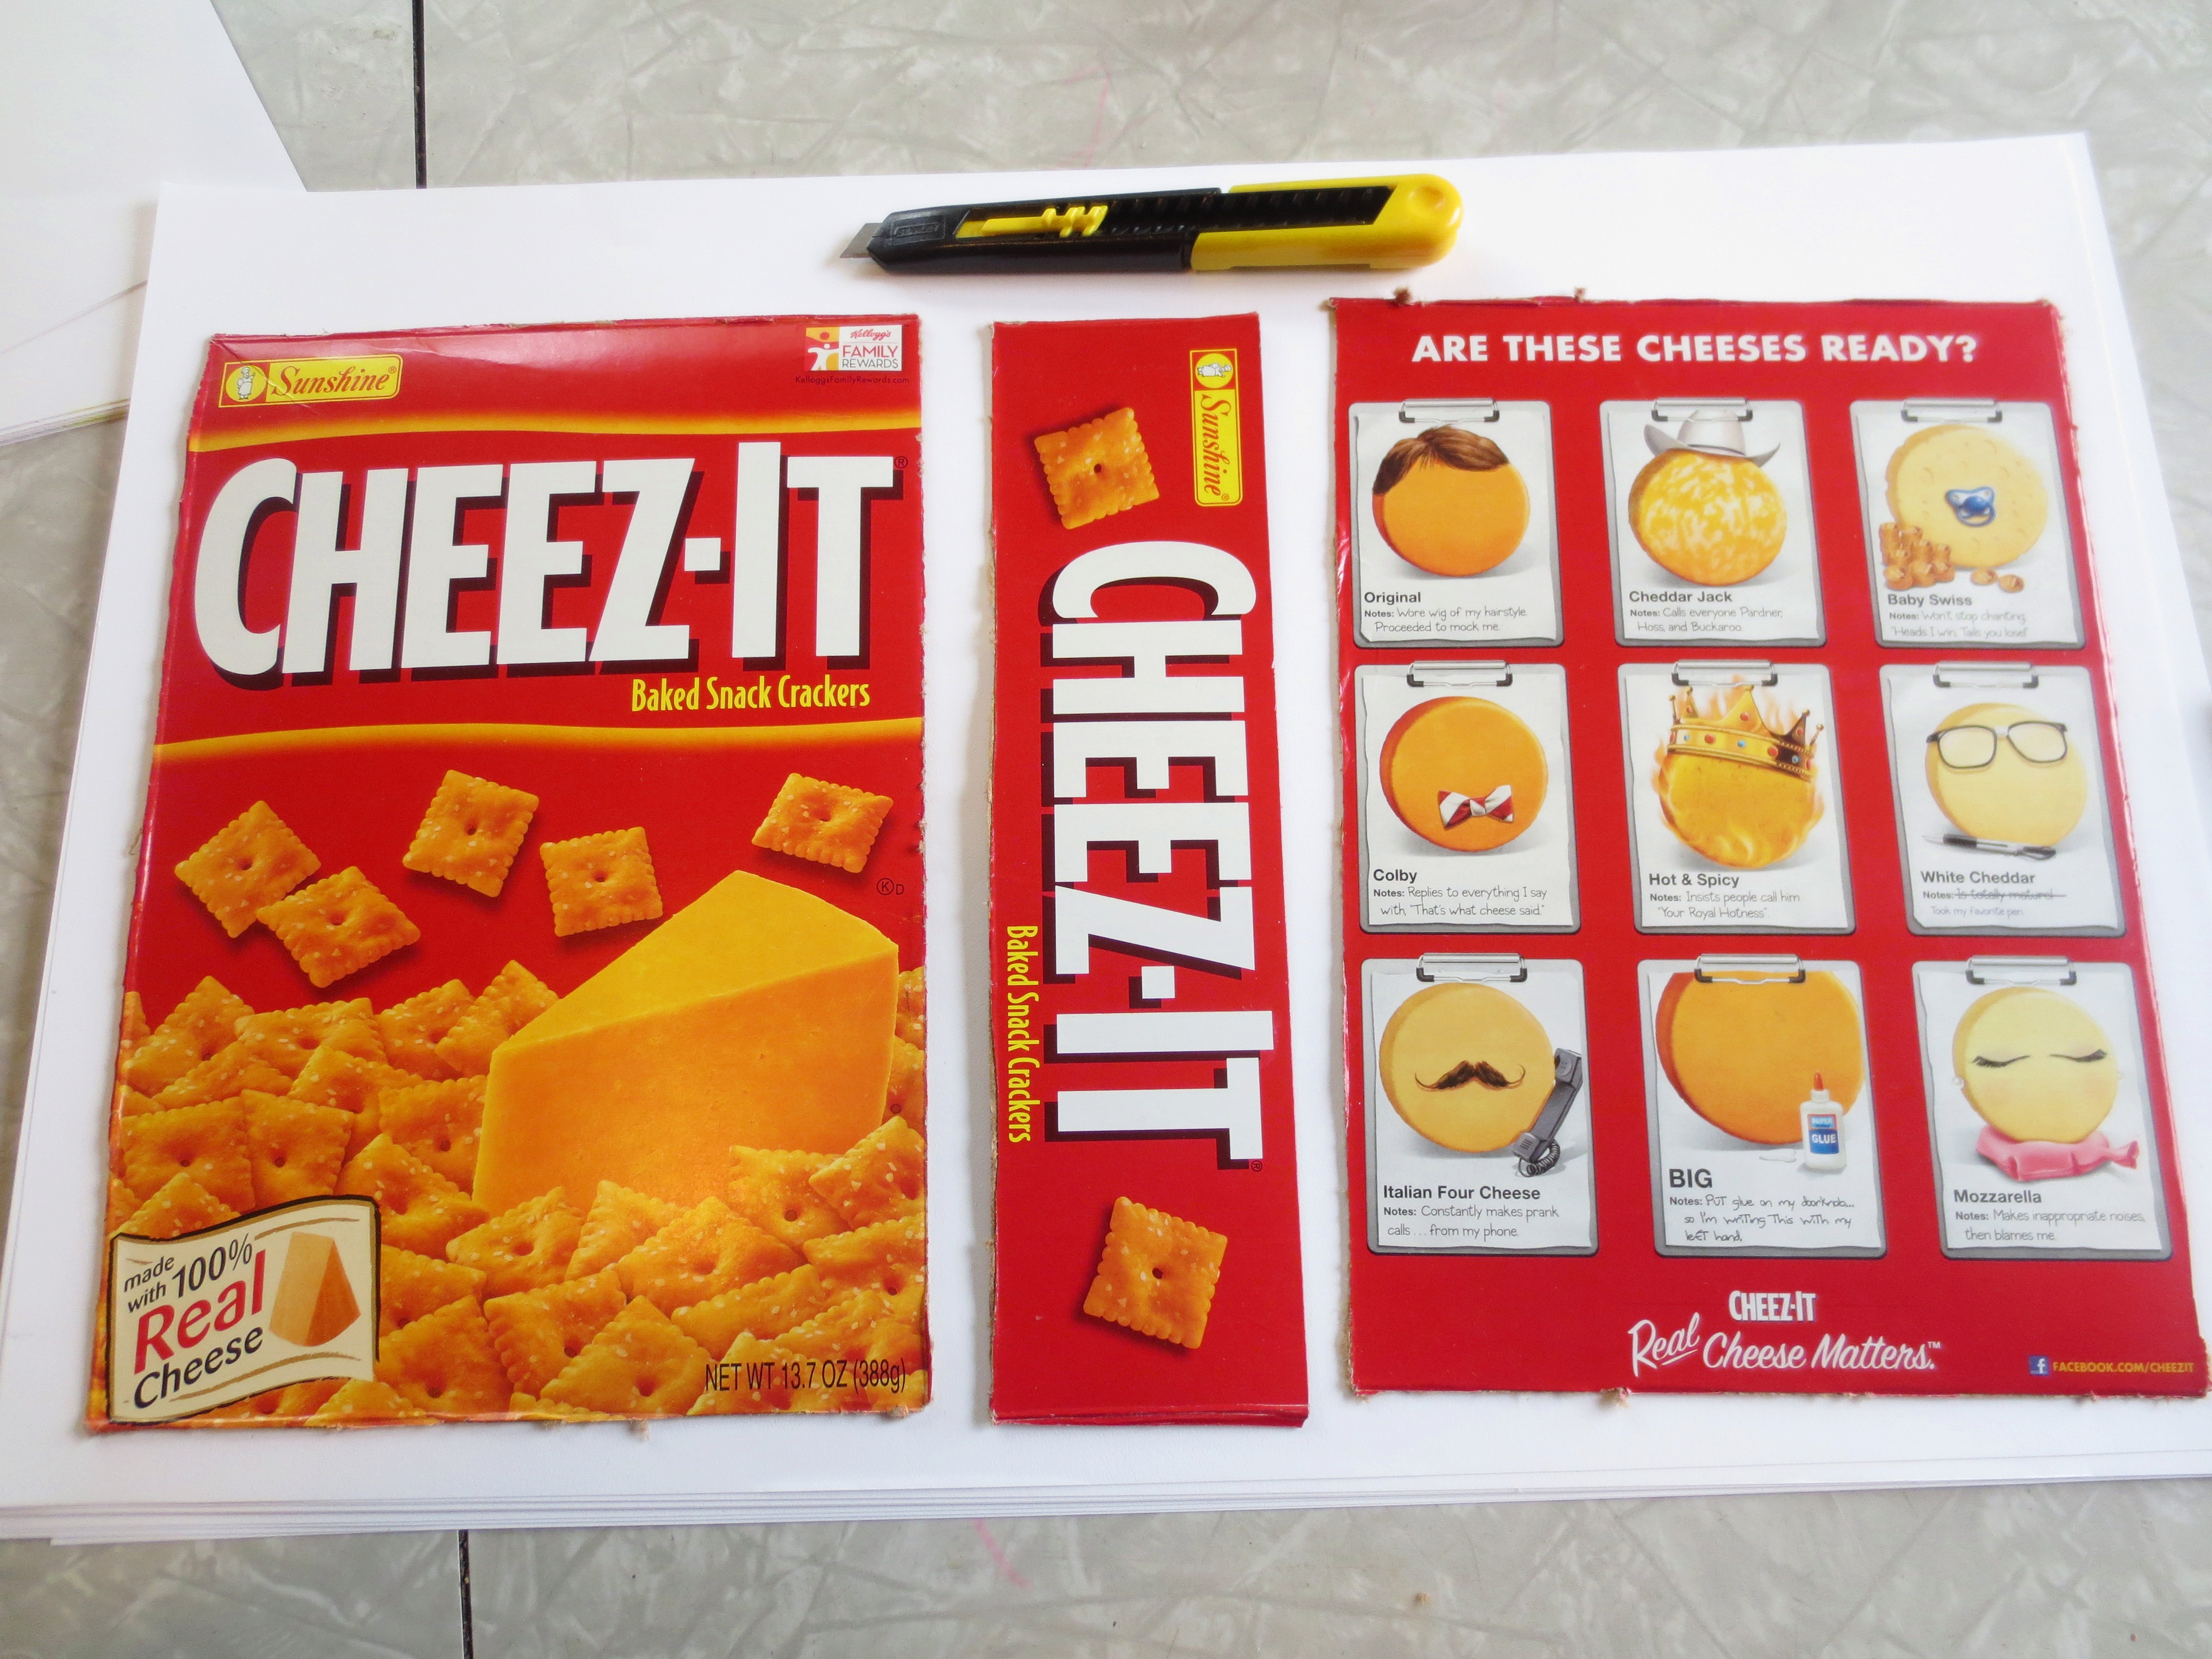
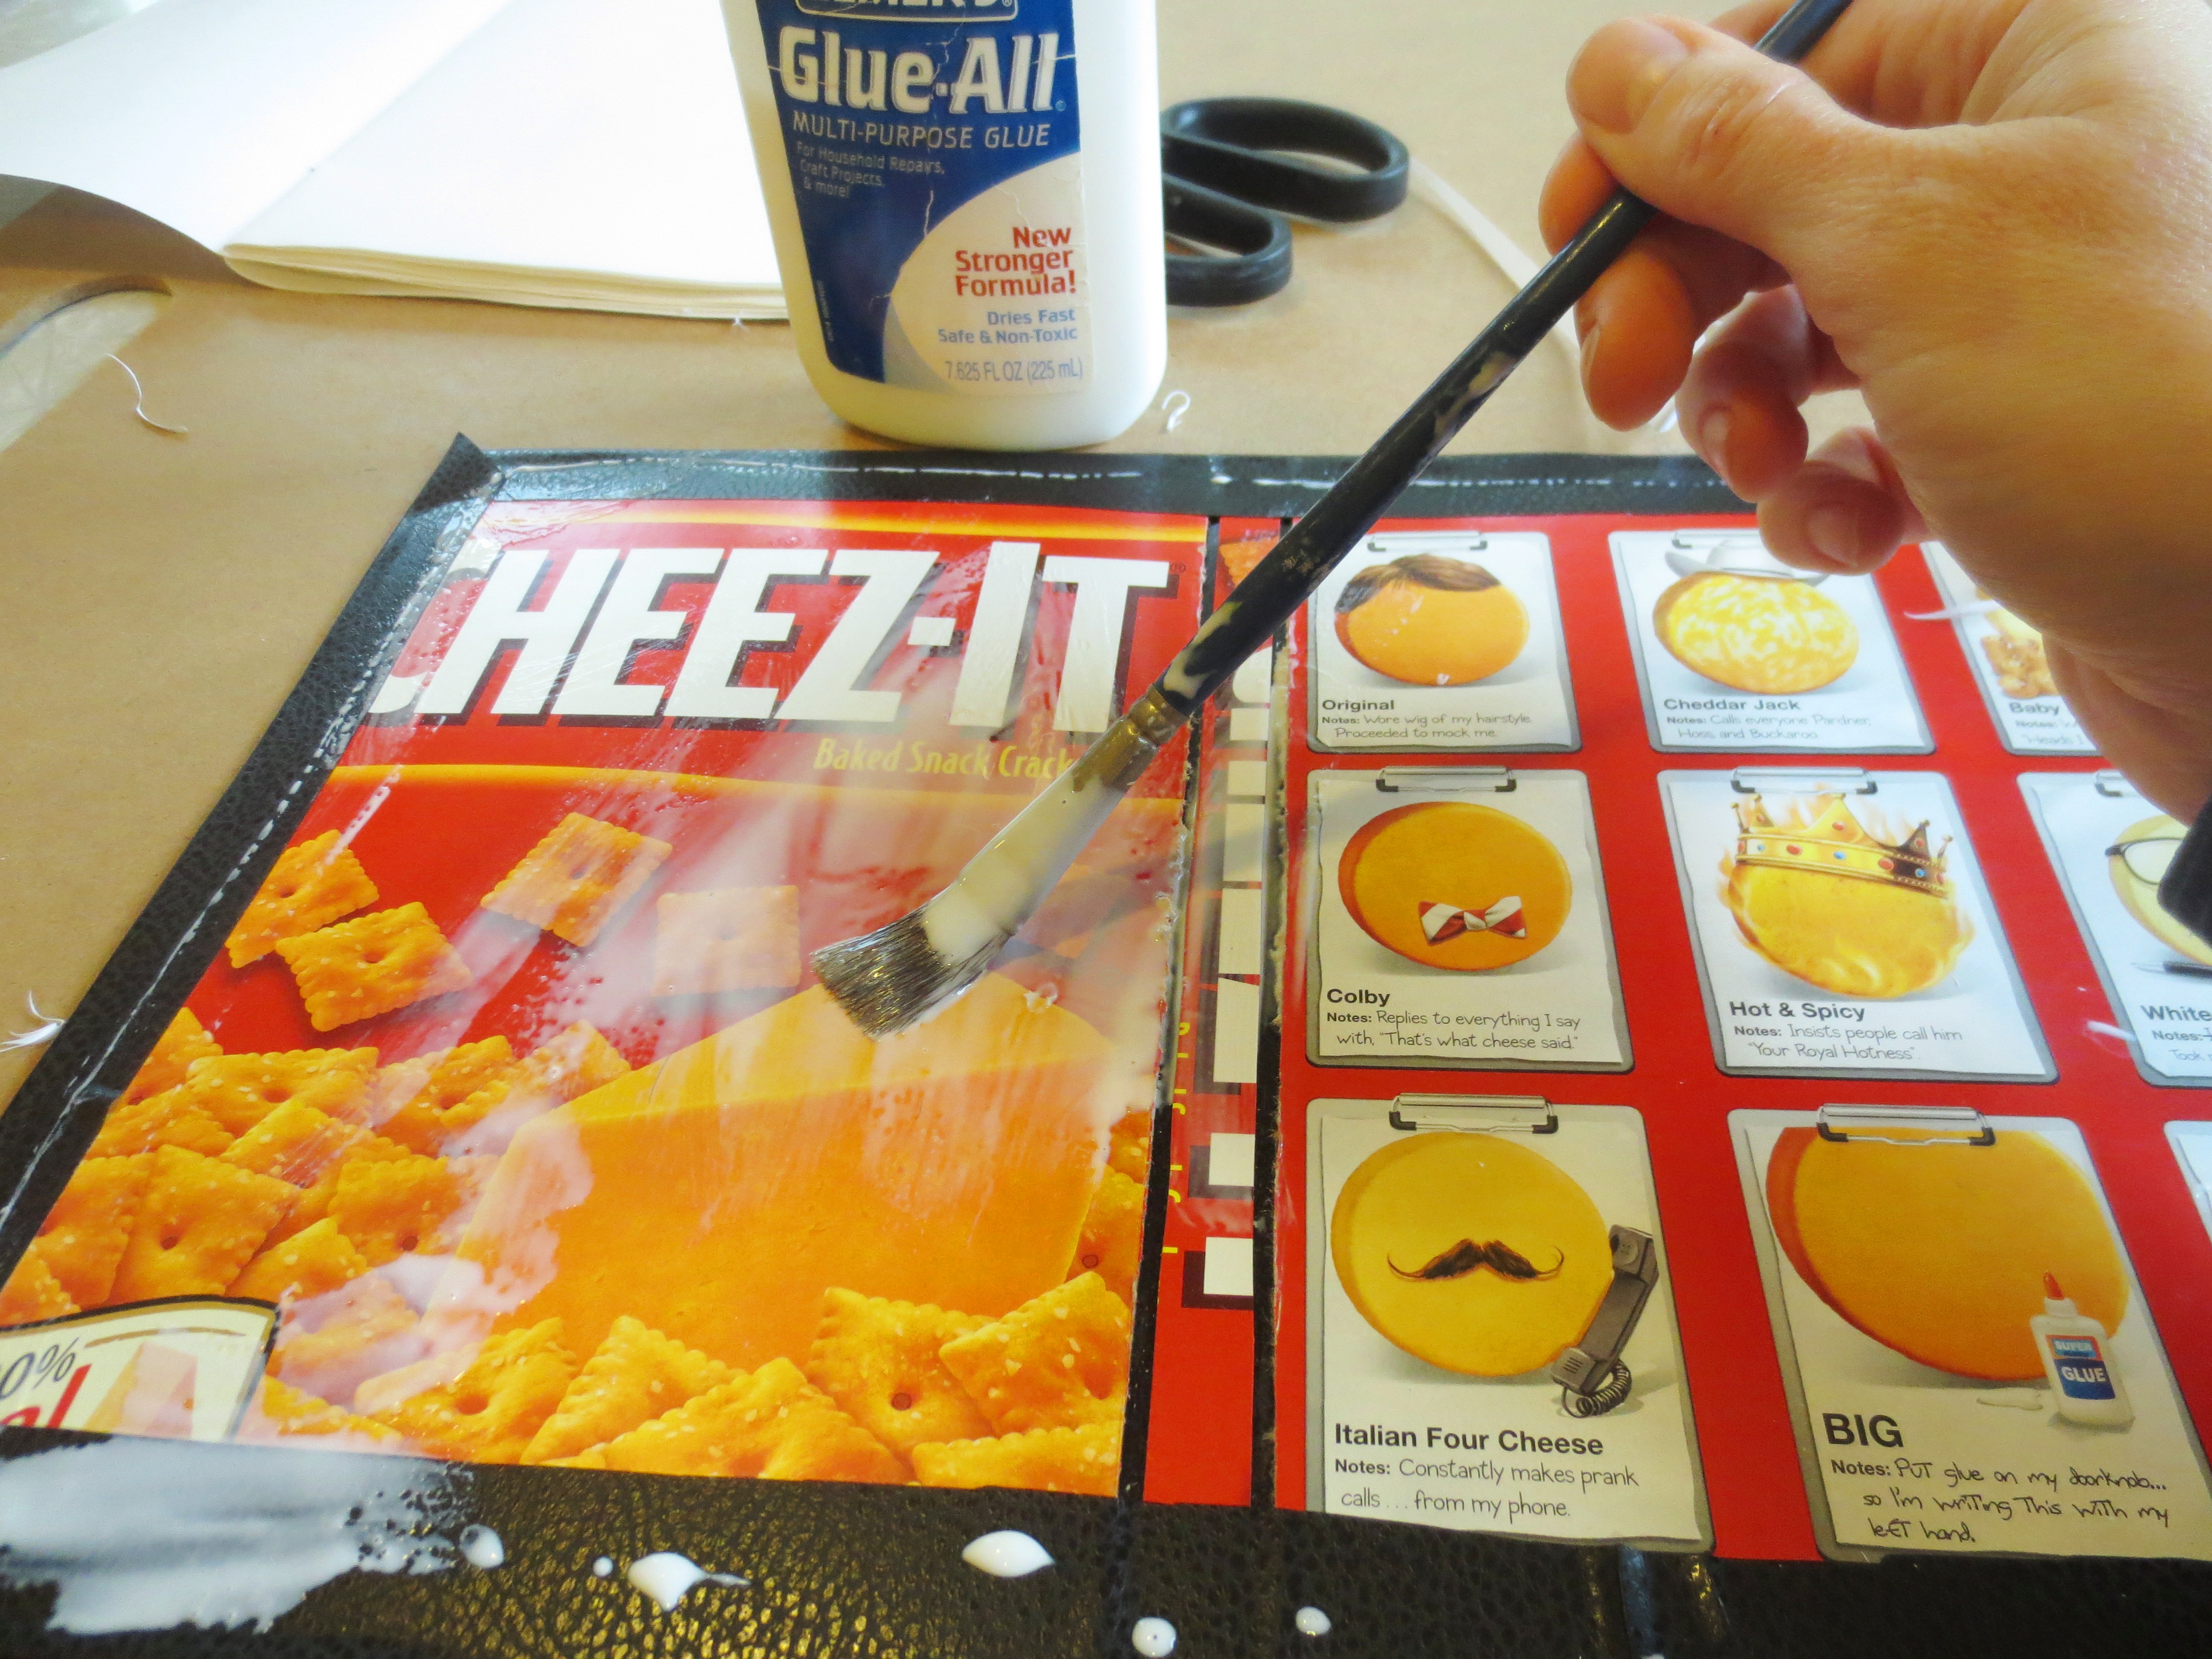
STEP ONE – CUT YOUR PAPER AND COVER: I found it was easier to determine the cover size first, and then cut the paper down to match. Find a source of cardboard in your house. A cereal box might work. I used this box of Cheez-Its that my mom brought on her last visit: Take the Cheez-Its out of the box and place in your mouth, 3 or 4 at a time, until there are no Cheez-Its left in the box. Lay the box flat and cut out the main front and back box panels (keep one of the side panels to use as a spine).
 Decide how many pages you want. Due to its birthday theme, my book had to be at least 38 pages. Since each piece of paper will equal four pages in book form, I grabbed 11 pieces of paper for 44 pages total (38 of which will be written on.)
Measure your cover panels and cut your paper down to size – using the same length but double the width of your cover (since you’ll be folding them in half). My covers were each 9 inches long by 6.25 inches wide. Therefore, my unfolded pages needed to be 9 inches long by 12.5 inches wide.
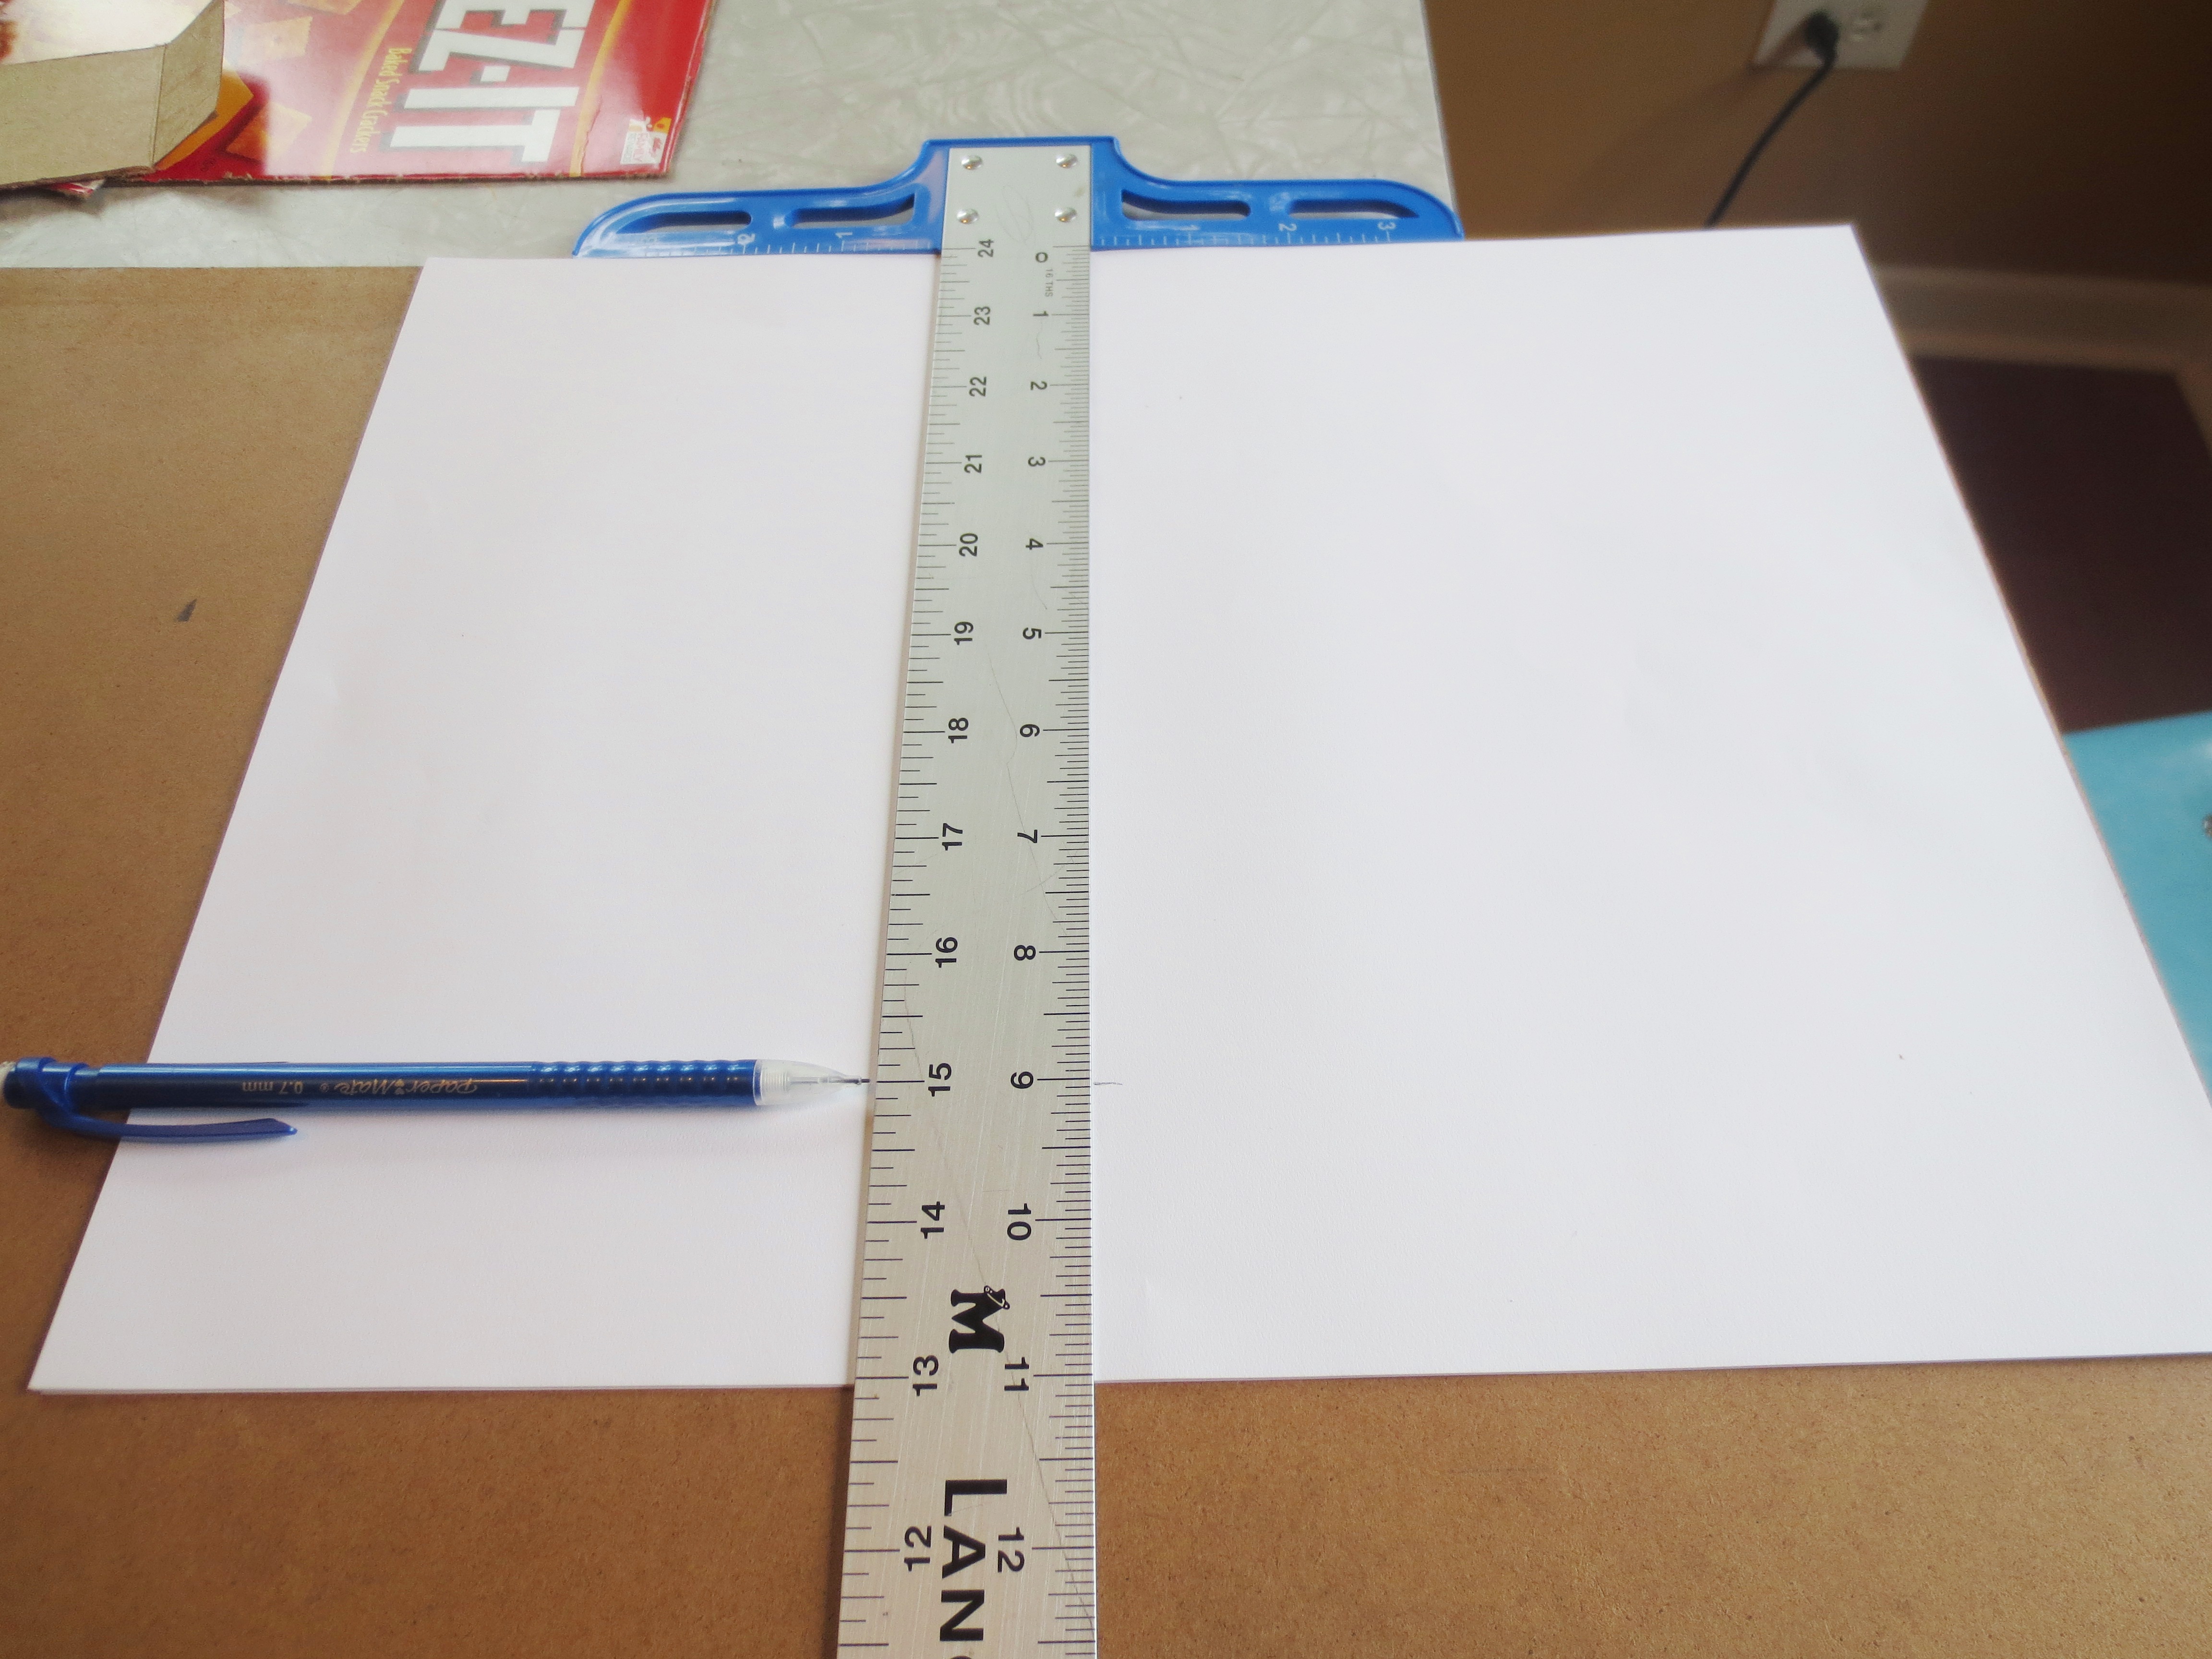 Separate your 11 pages into two groups (of 5 and 6, respectively). In book-making parlance, these groups of paper are called “signatures.” Fold each signature in half.
PRO-TIP: Apparently, there is a tool called a “bone folder” that can give you paper-folding superpowers. Because folding paper is really difficult, especially if you are a Tyrannosaurus Rex.

Fossil records show that the T-Rex was really bad at making both books and birthday cards.
We actually own a bone folder, but I couldn’t find it, and since I was doing this all in secret, I couldn’t ask Scott where it was.
STEP TWO – SEW YOUR BOOK: Lay the two signatures on top of one another and mark four spots on each spine. It doesn’t matter exactly where the spots are, as long as they are the same on both signatures. Use your best judgment.
Take an awl or something else sharp and pointy (like a tack or thick needle), lay your signatures flat, and poke holes through the paper where you made your marks.
Grab your thread or twine, and cut it as long as the length of your spine times the number of signatures, (9 inches long x 2 signatures = 18 inches of string).
Thread the string through the needle and grab your first signature. Starting from the “outside” of the signature, thread the string all the way through the first hole, leaving a couple inches of string behind.
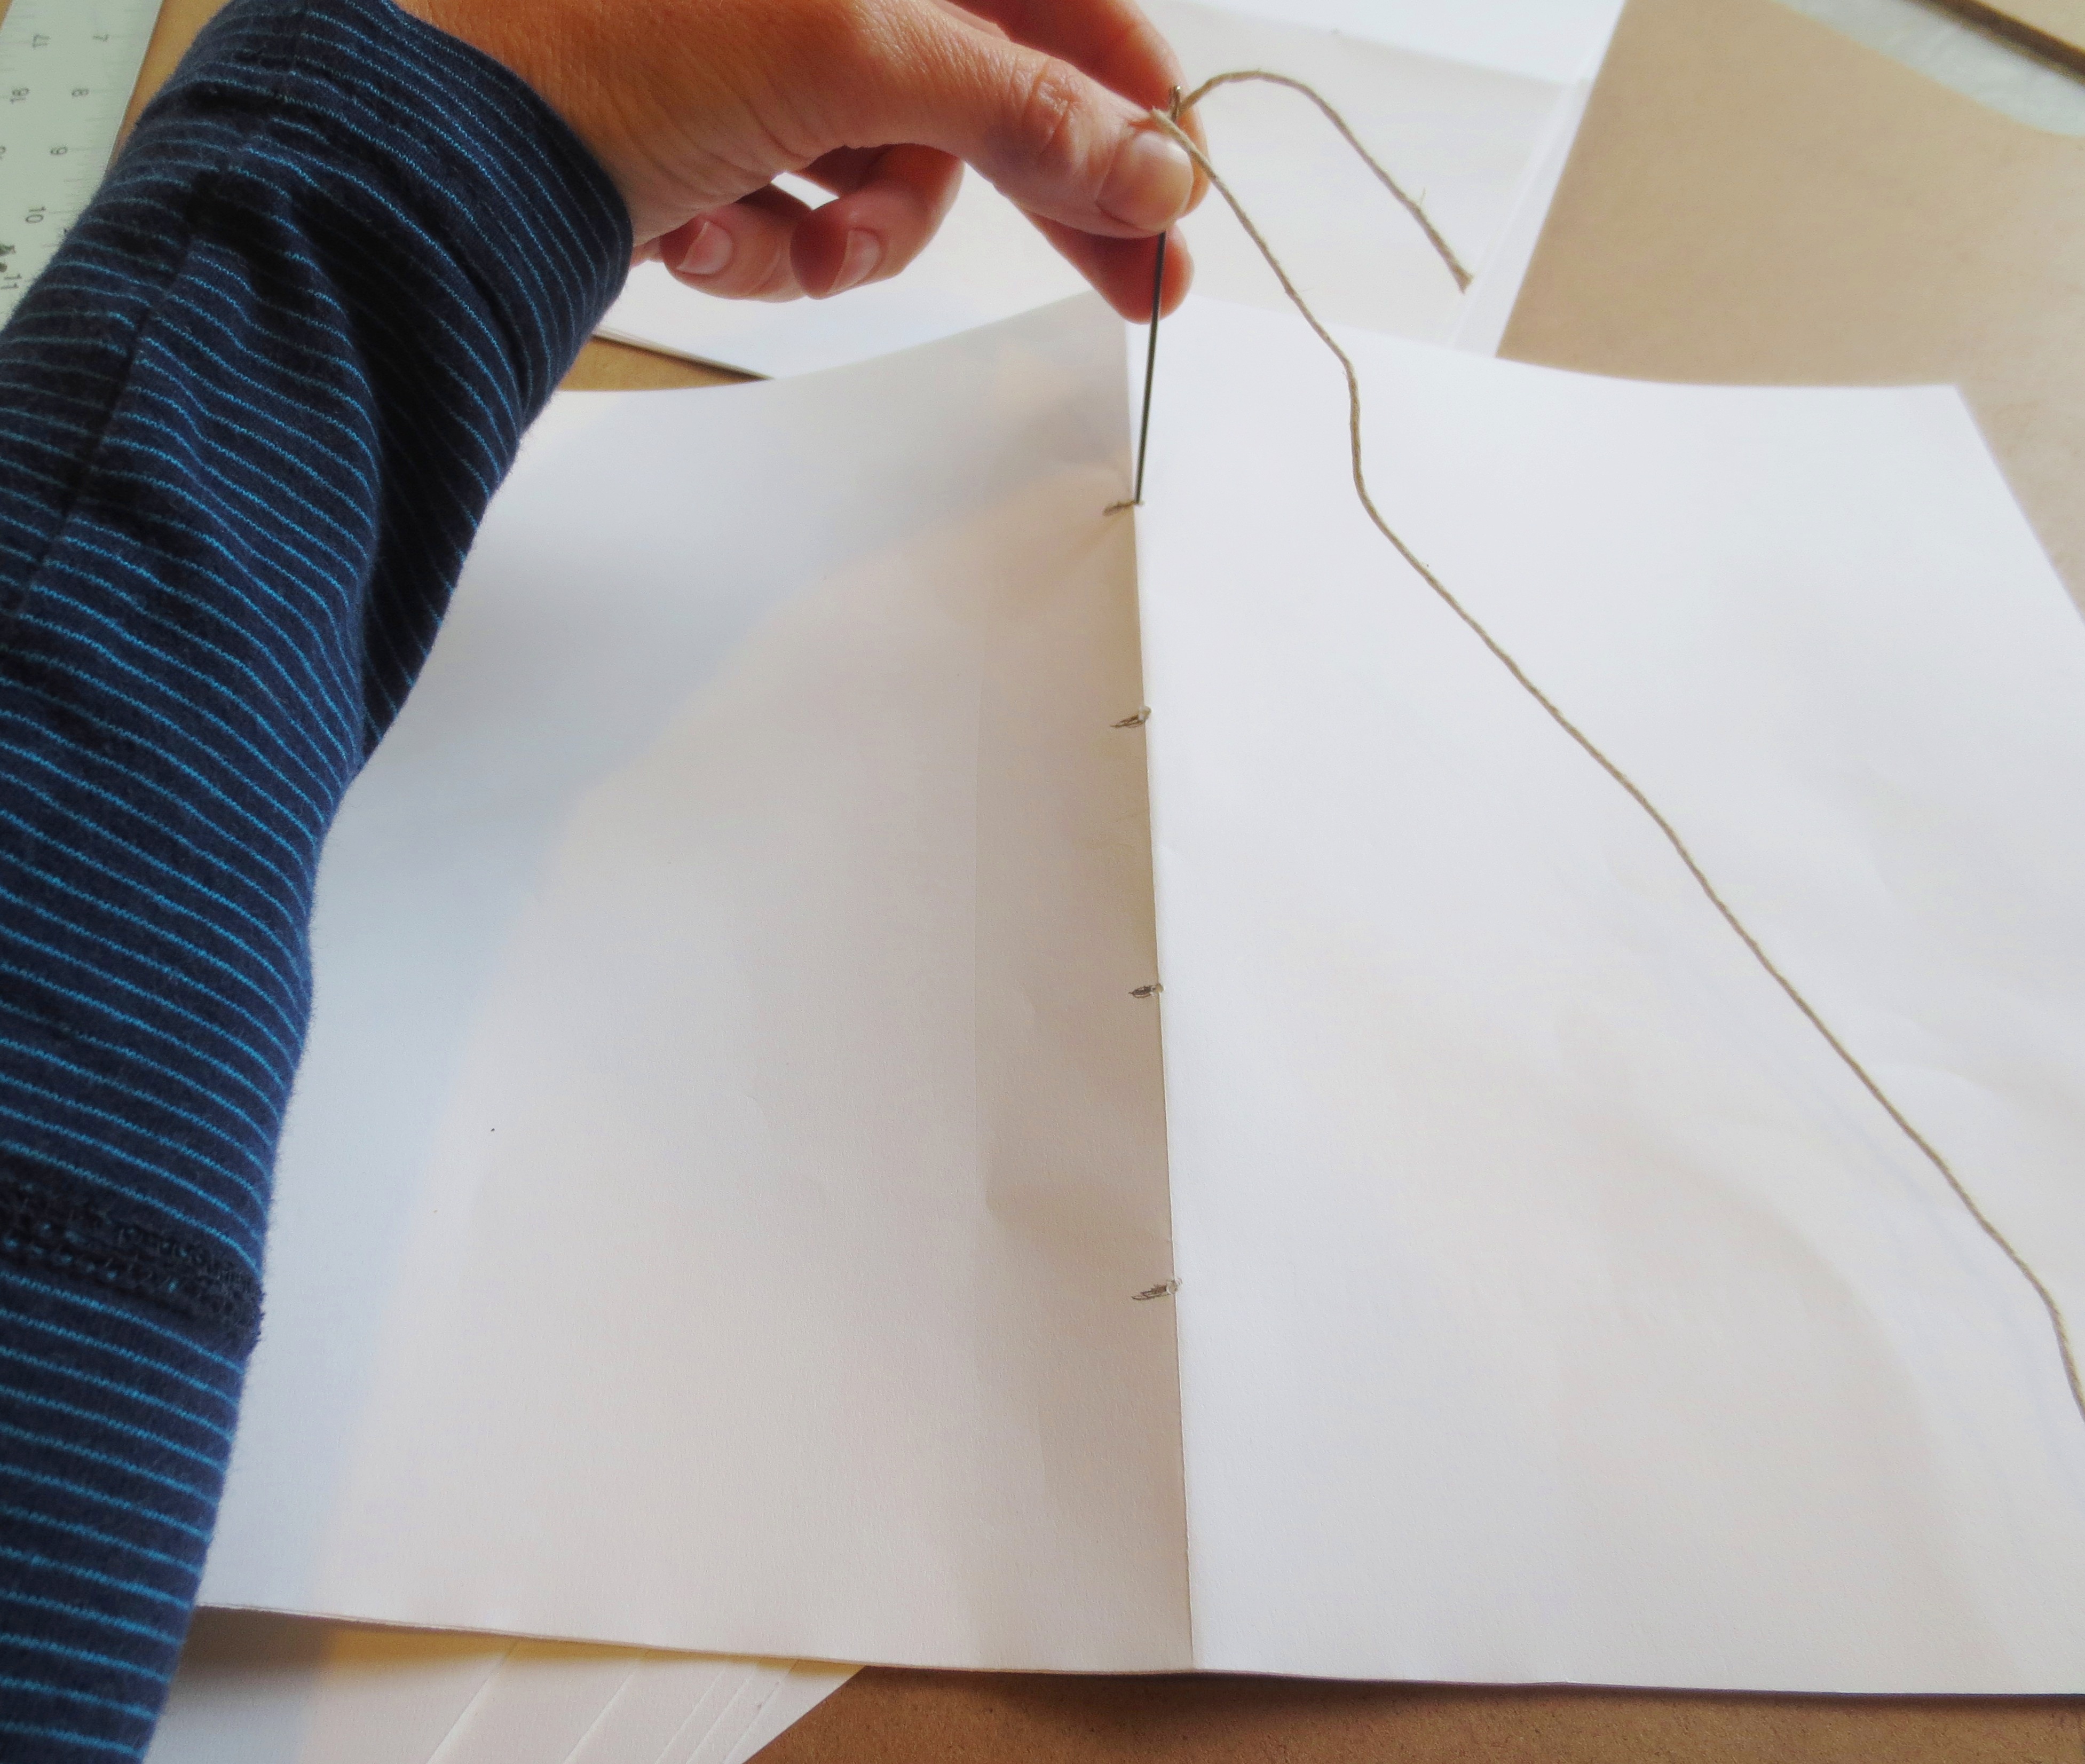
 Pull it back towards you through the second hole, then the third, and then the fourth, alternating in and out.
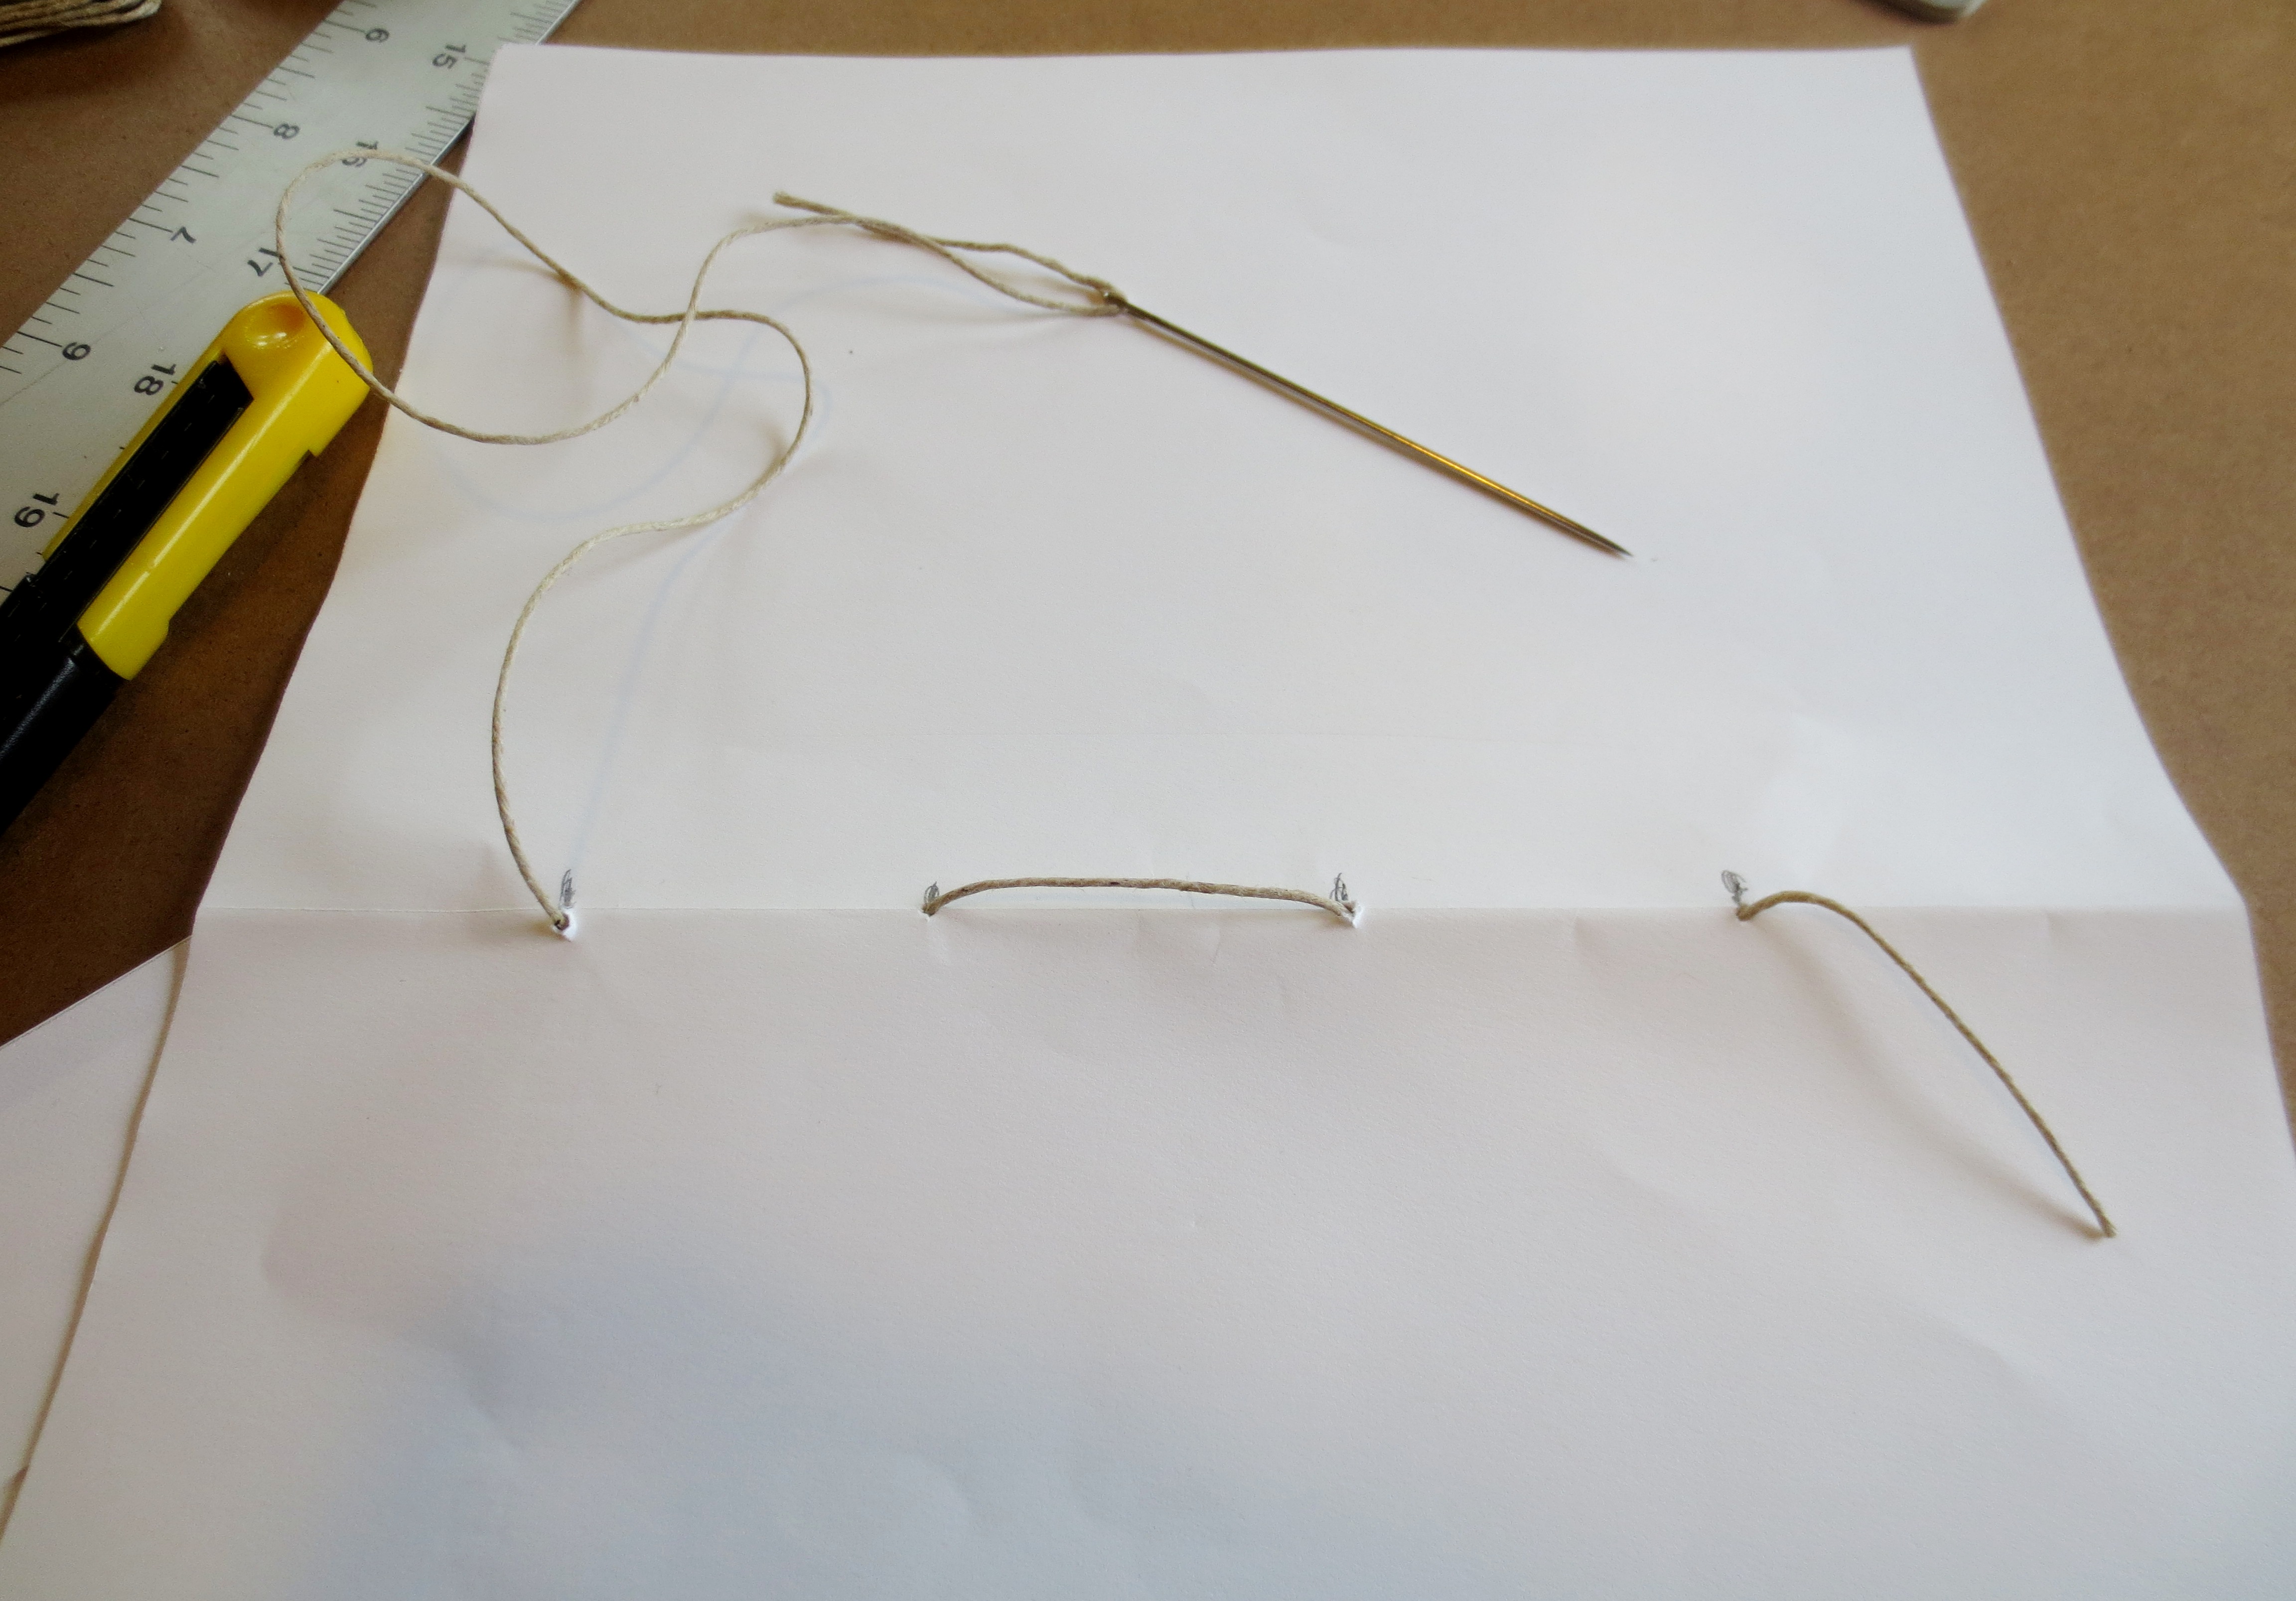 When you come out of the last hole in your first signature, line up your second signature and pull the needle through the corresponding hole in the second signature. Pull your thread tight! You are now binding the two signatures together.
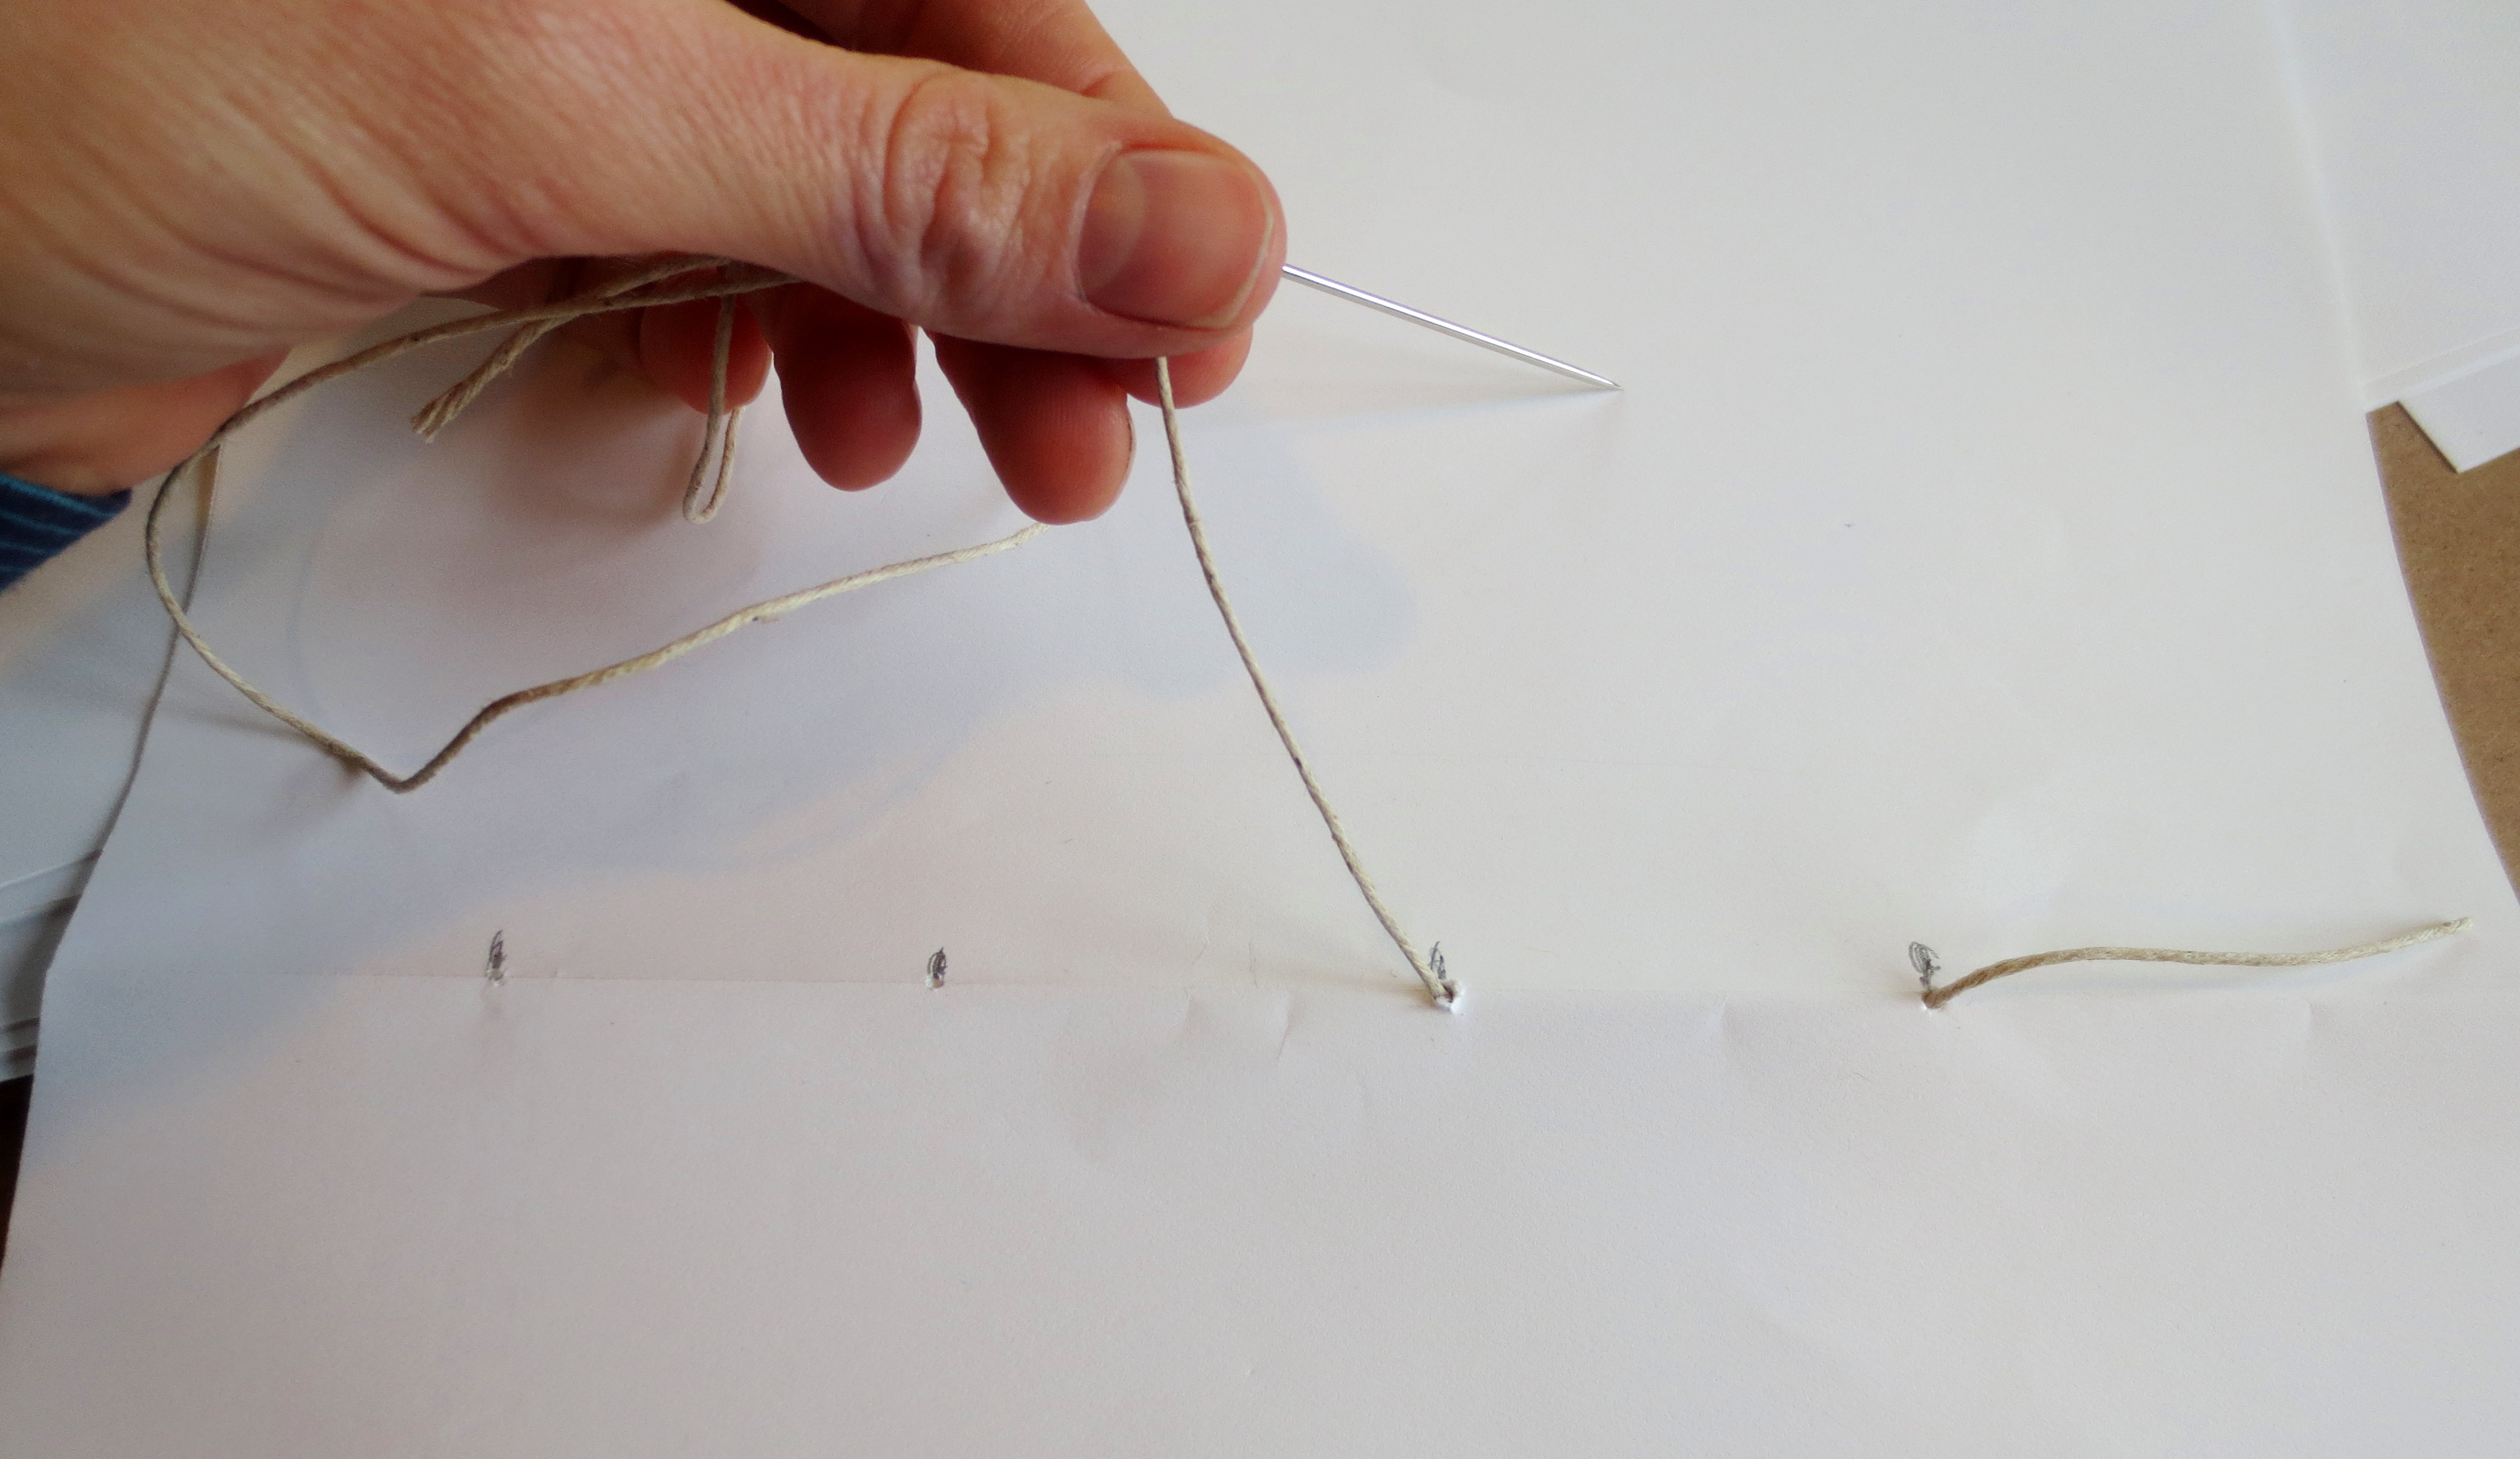
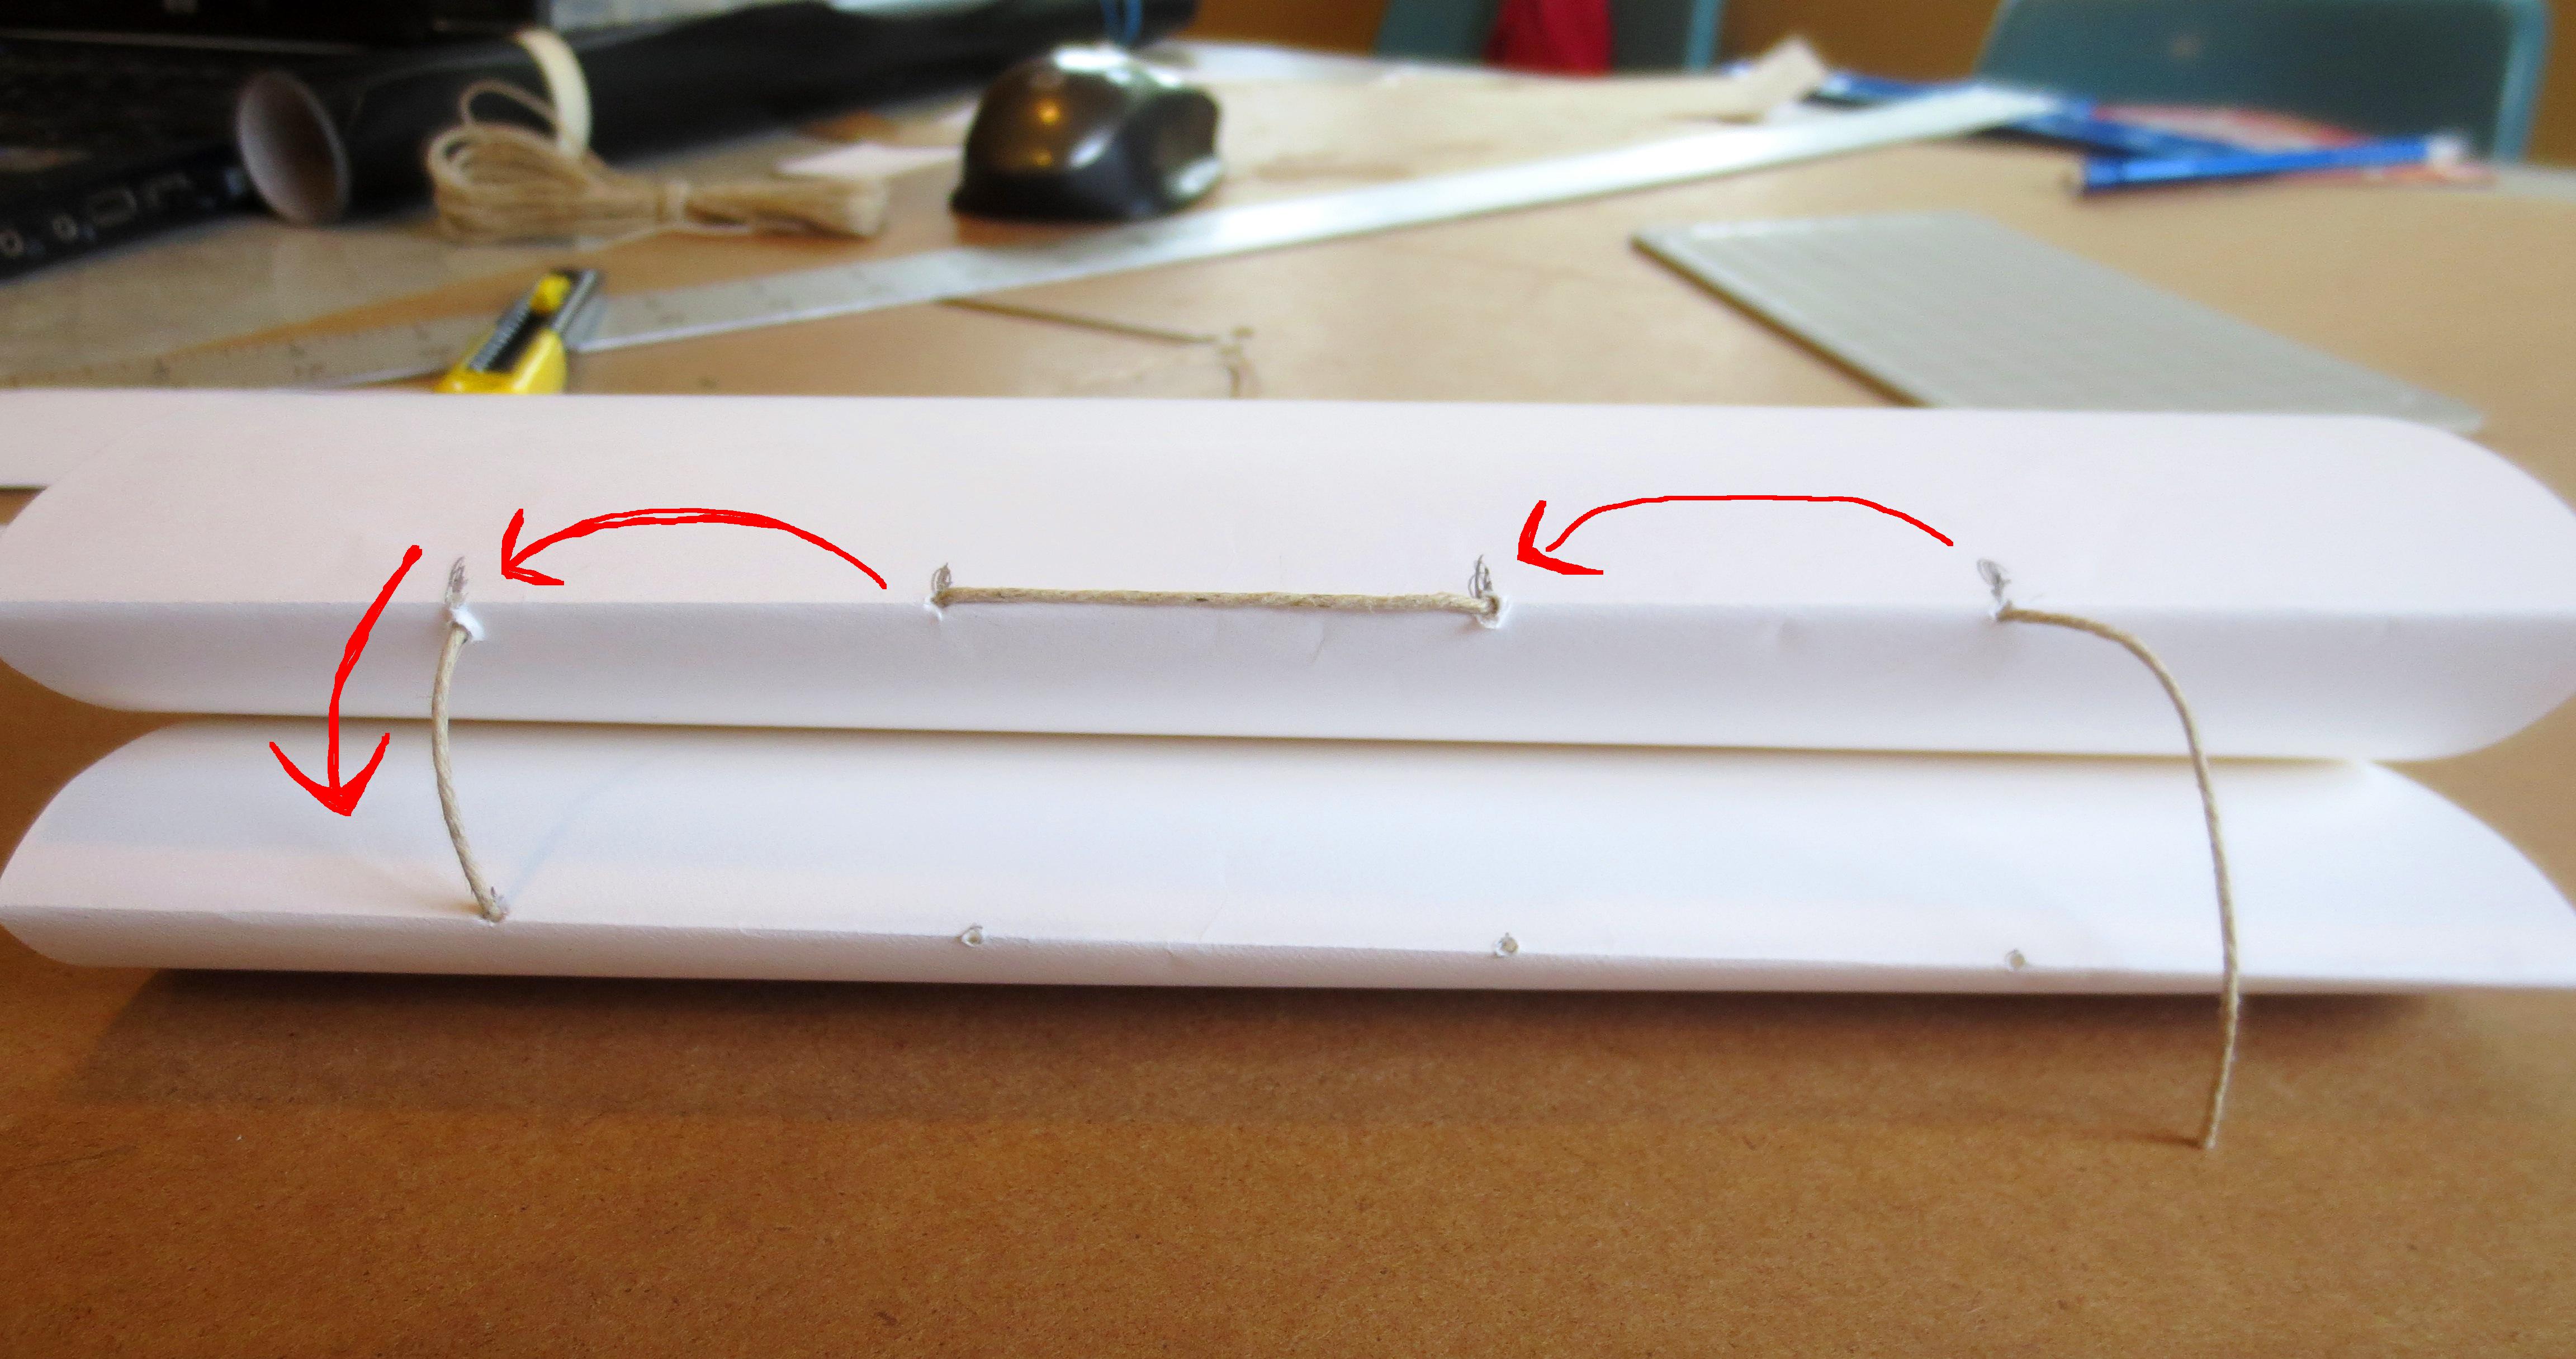 Now pull the thread through the second hole in the second signature, and then through the corresponding hole in the first signature. Next, pull the thread around and through the next hole in the first signature, then back through the corresponding hole in the second signature. Back through the first signature, and then to the last hole in the second signature. If you did it right, the two ends of the thread should be hanging out of the two signatures ‘ holes on the same end, like this:
  Pull the two ends of the strings tight, knot them together and cut off the excess.
I realize these instructions are horrible, and it took me forever to figure out what is actually a simple process. So I whipped up this little graphic to show you the order of threading. Always alternate in and out!
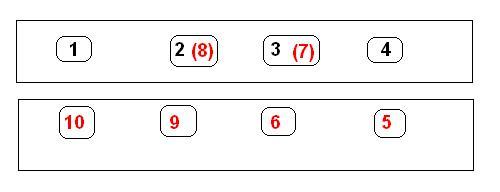
Oops! This is actually the mirror image of how I did it. Both ways are fine.
STEP THREE –COVER: Congratulations for getting this far! The worst part of this project is over. To make your book spine, measure your stack of bound paper, and cut a slice of cardboard that is the same length of your cover and the width of your bound paper.
 I briefly thought about keeping the raw Cheez-It box for the cover of Scott’s sketch book/love letter, but them I remembered my personal goal of trying to “keep it classy” whenever possible. So, I grabbed roll of faux black leather contact paper that I used to recover the bottom of this Chocolate Brown Vinyl Ottoman I recently found in the alley.
Cut a piece of contact paper that is the length and width of your covers + spine, and add about an inch on all sides.
 For ease of folding, cut the corners off each edge.
 Remove the contact paper backing and fold carefully fold over your cardboard cover (if you use fabric, you’ll have to glue the side that adheres to the cardboard).
 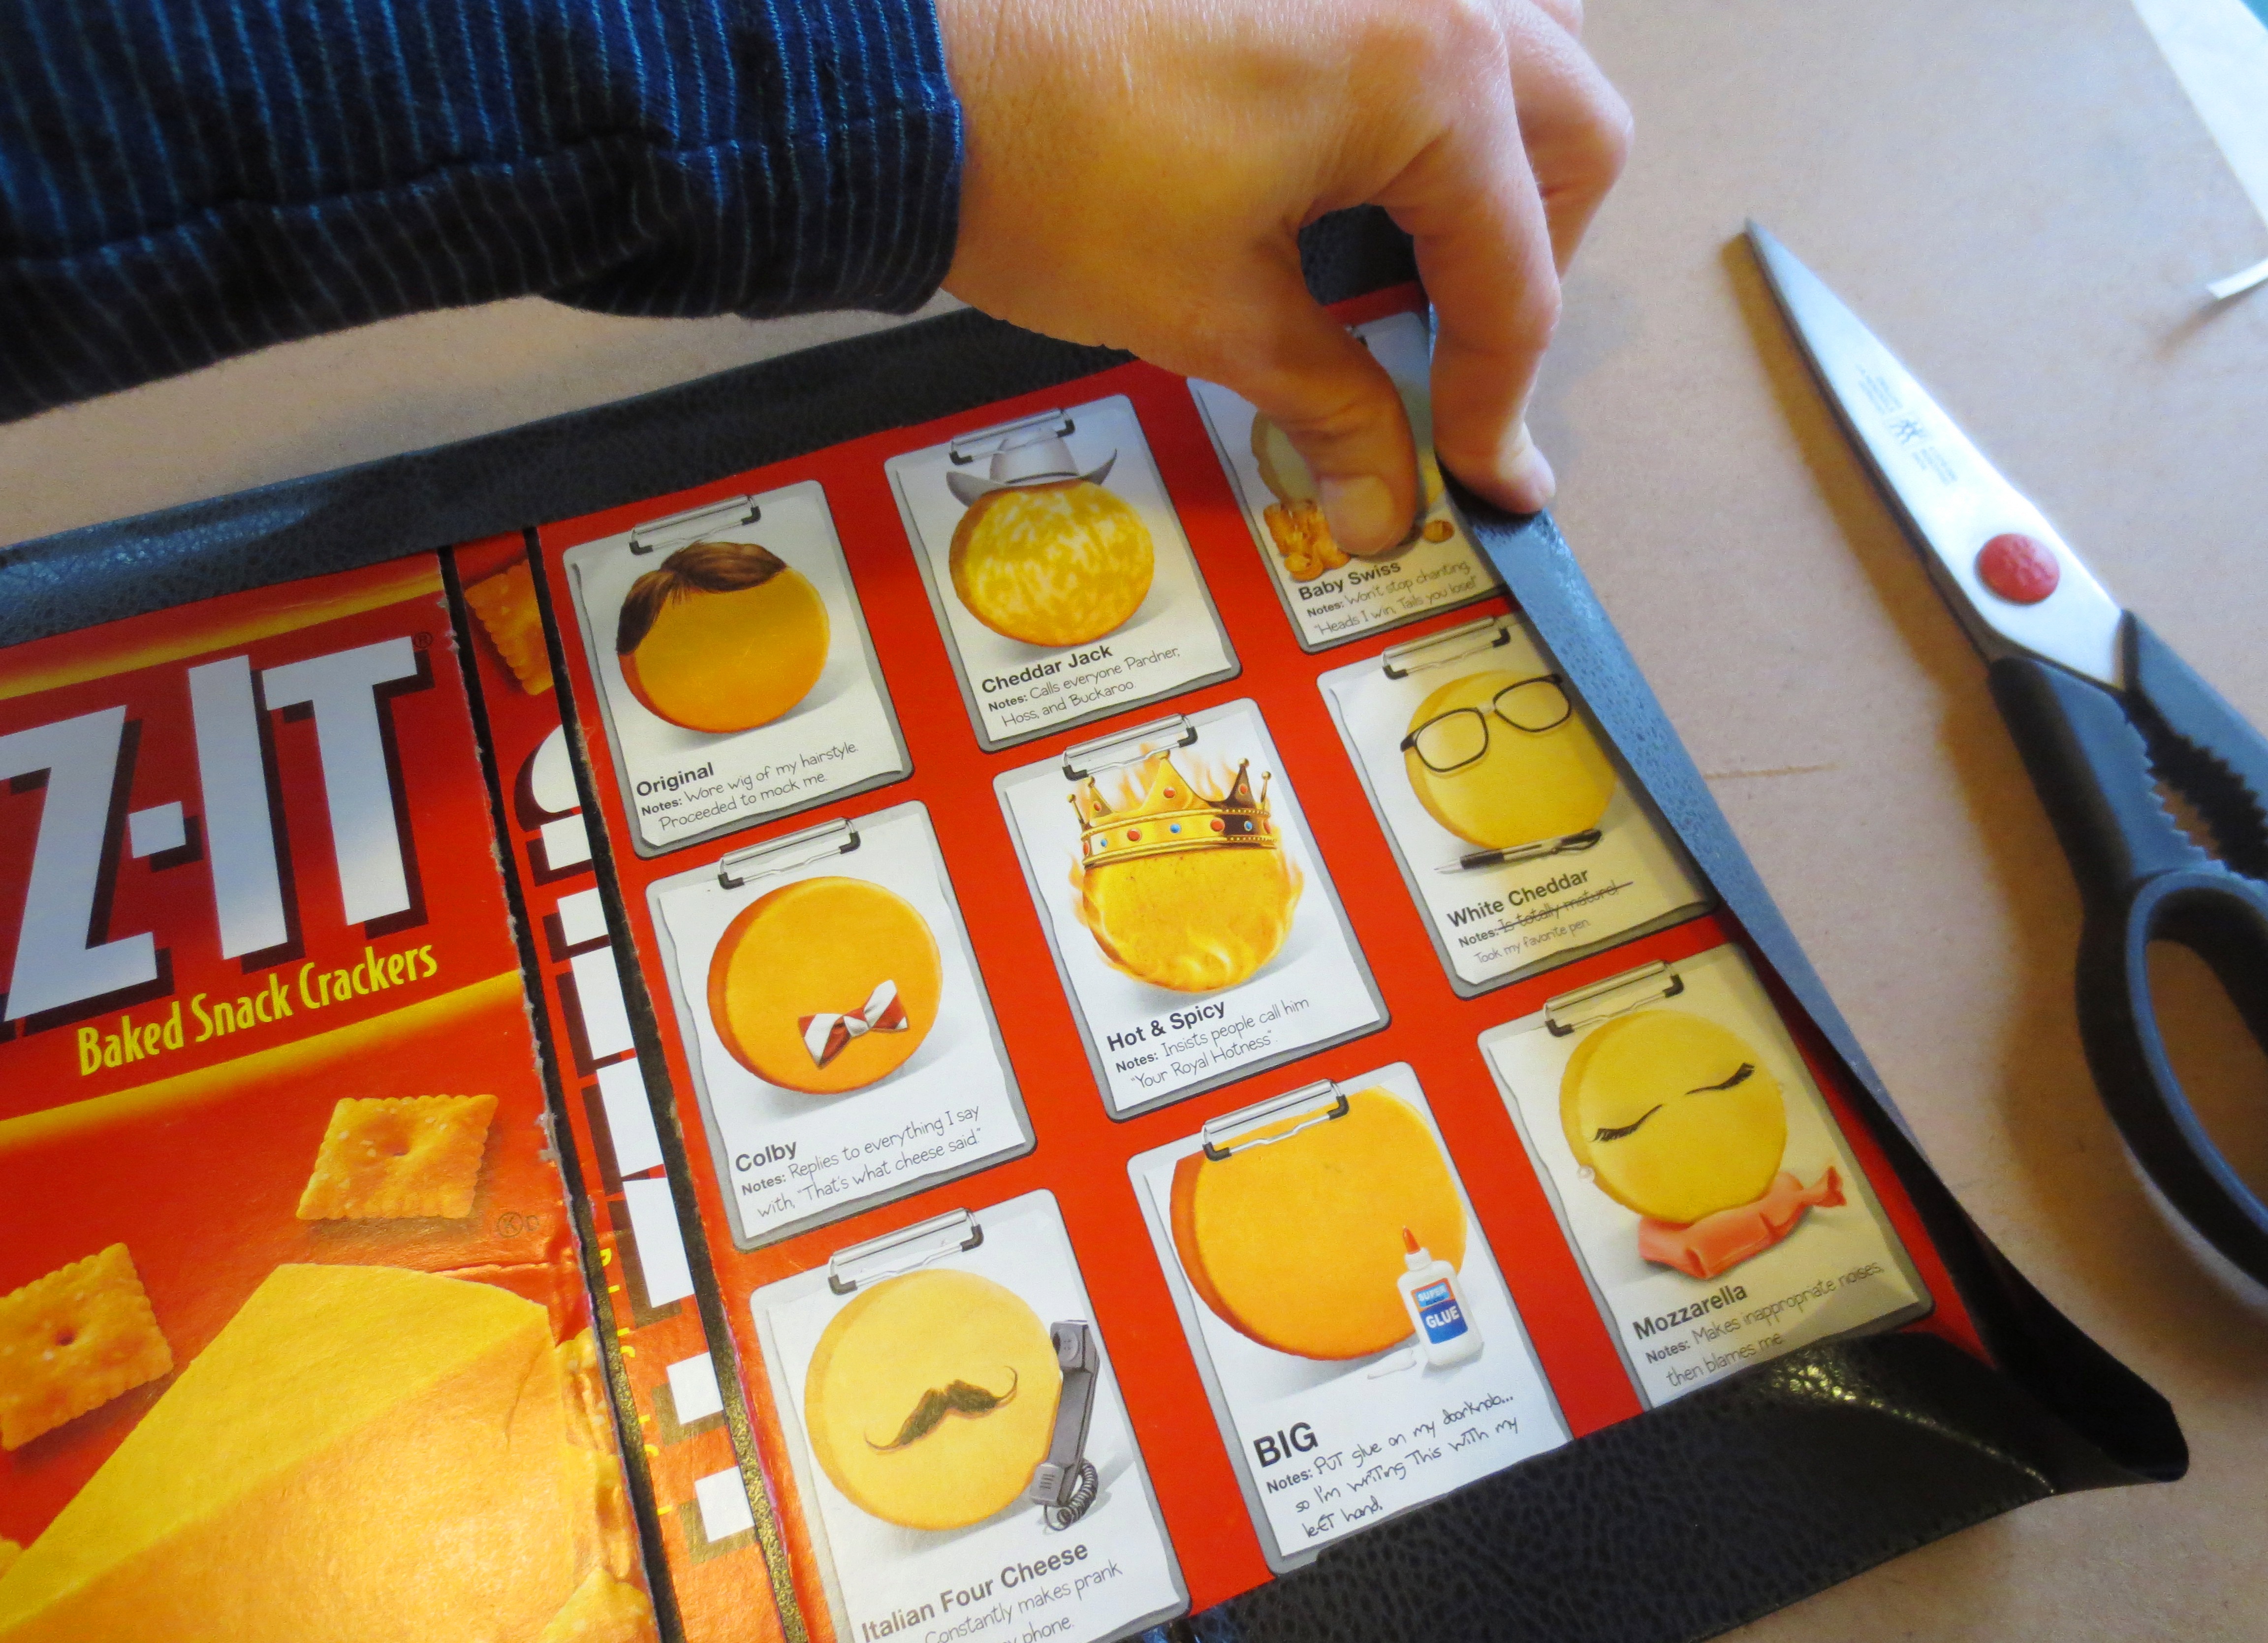 STEP FOUR – PUT IT ALL TOGETHER: Smear the entire inside of the cover with glue. I found it easier to “paint” the glue on with a brush, since I don’t have the fist strength to squeeze a bottle for that long.
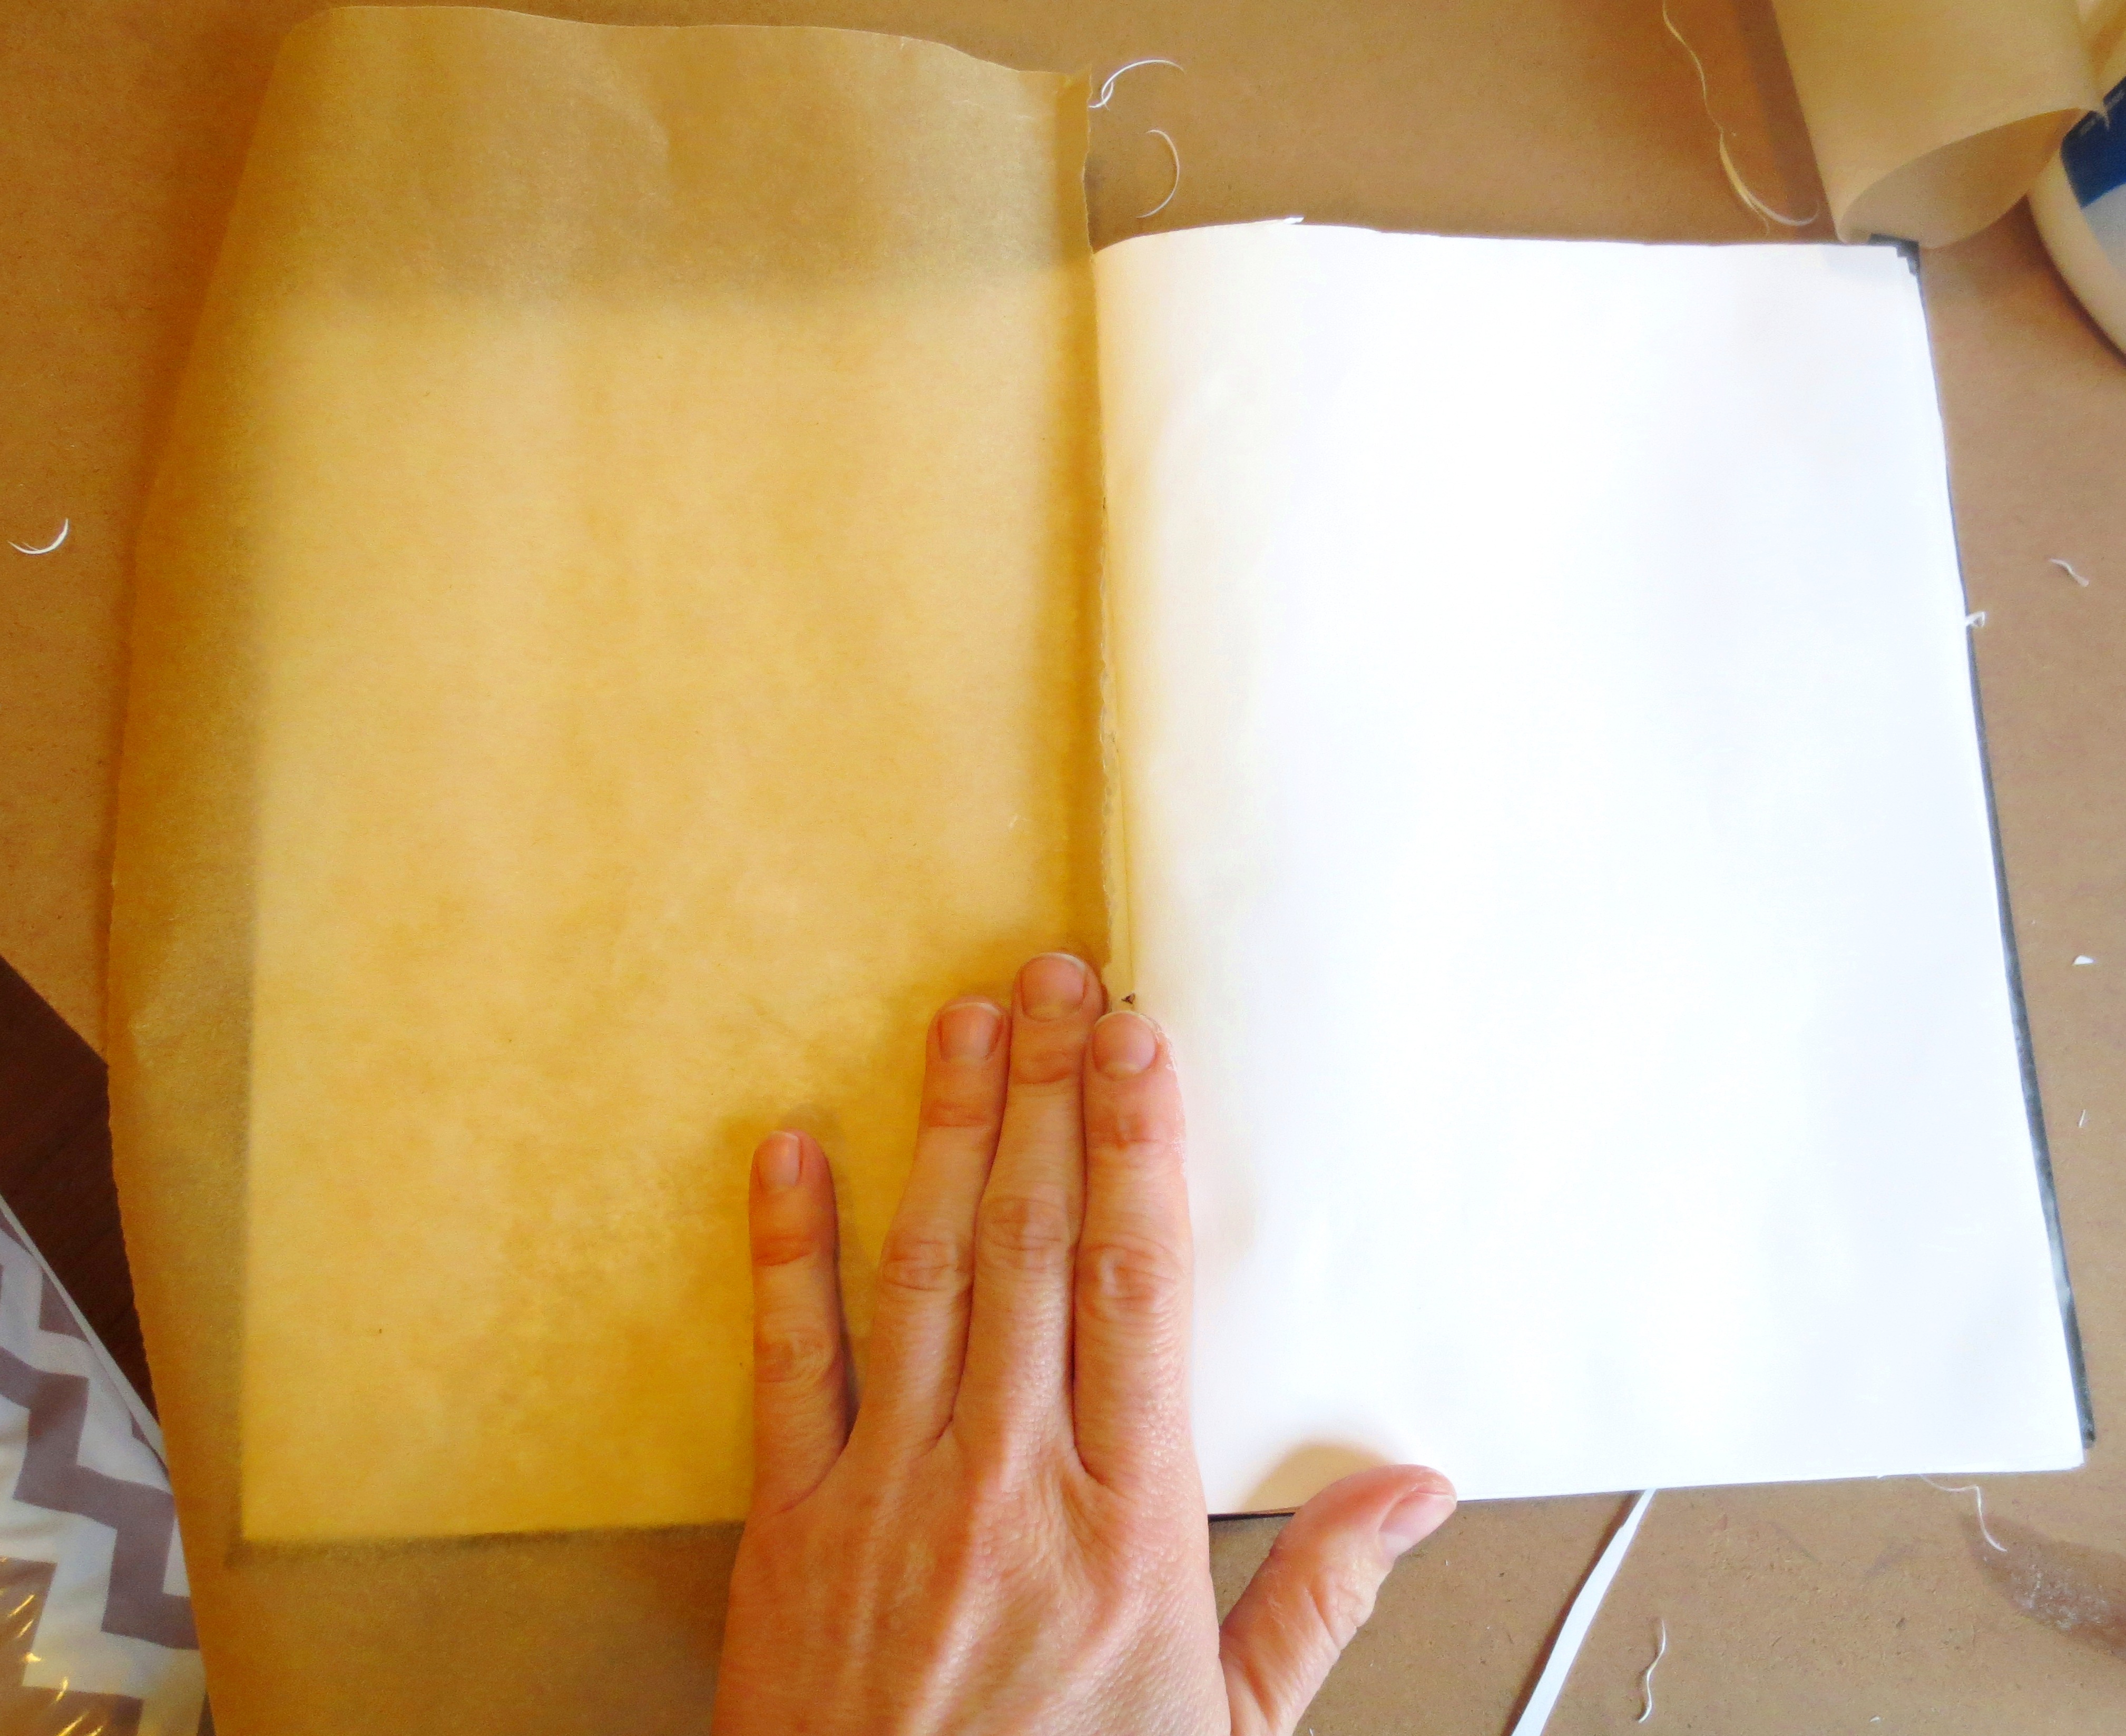
 Smooth out the first and last page of your page block onto the gluey insides of the front and back covers.
 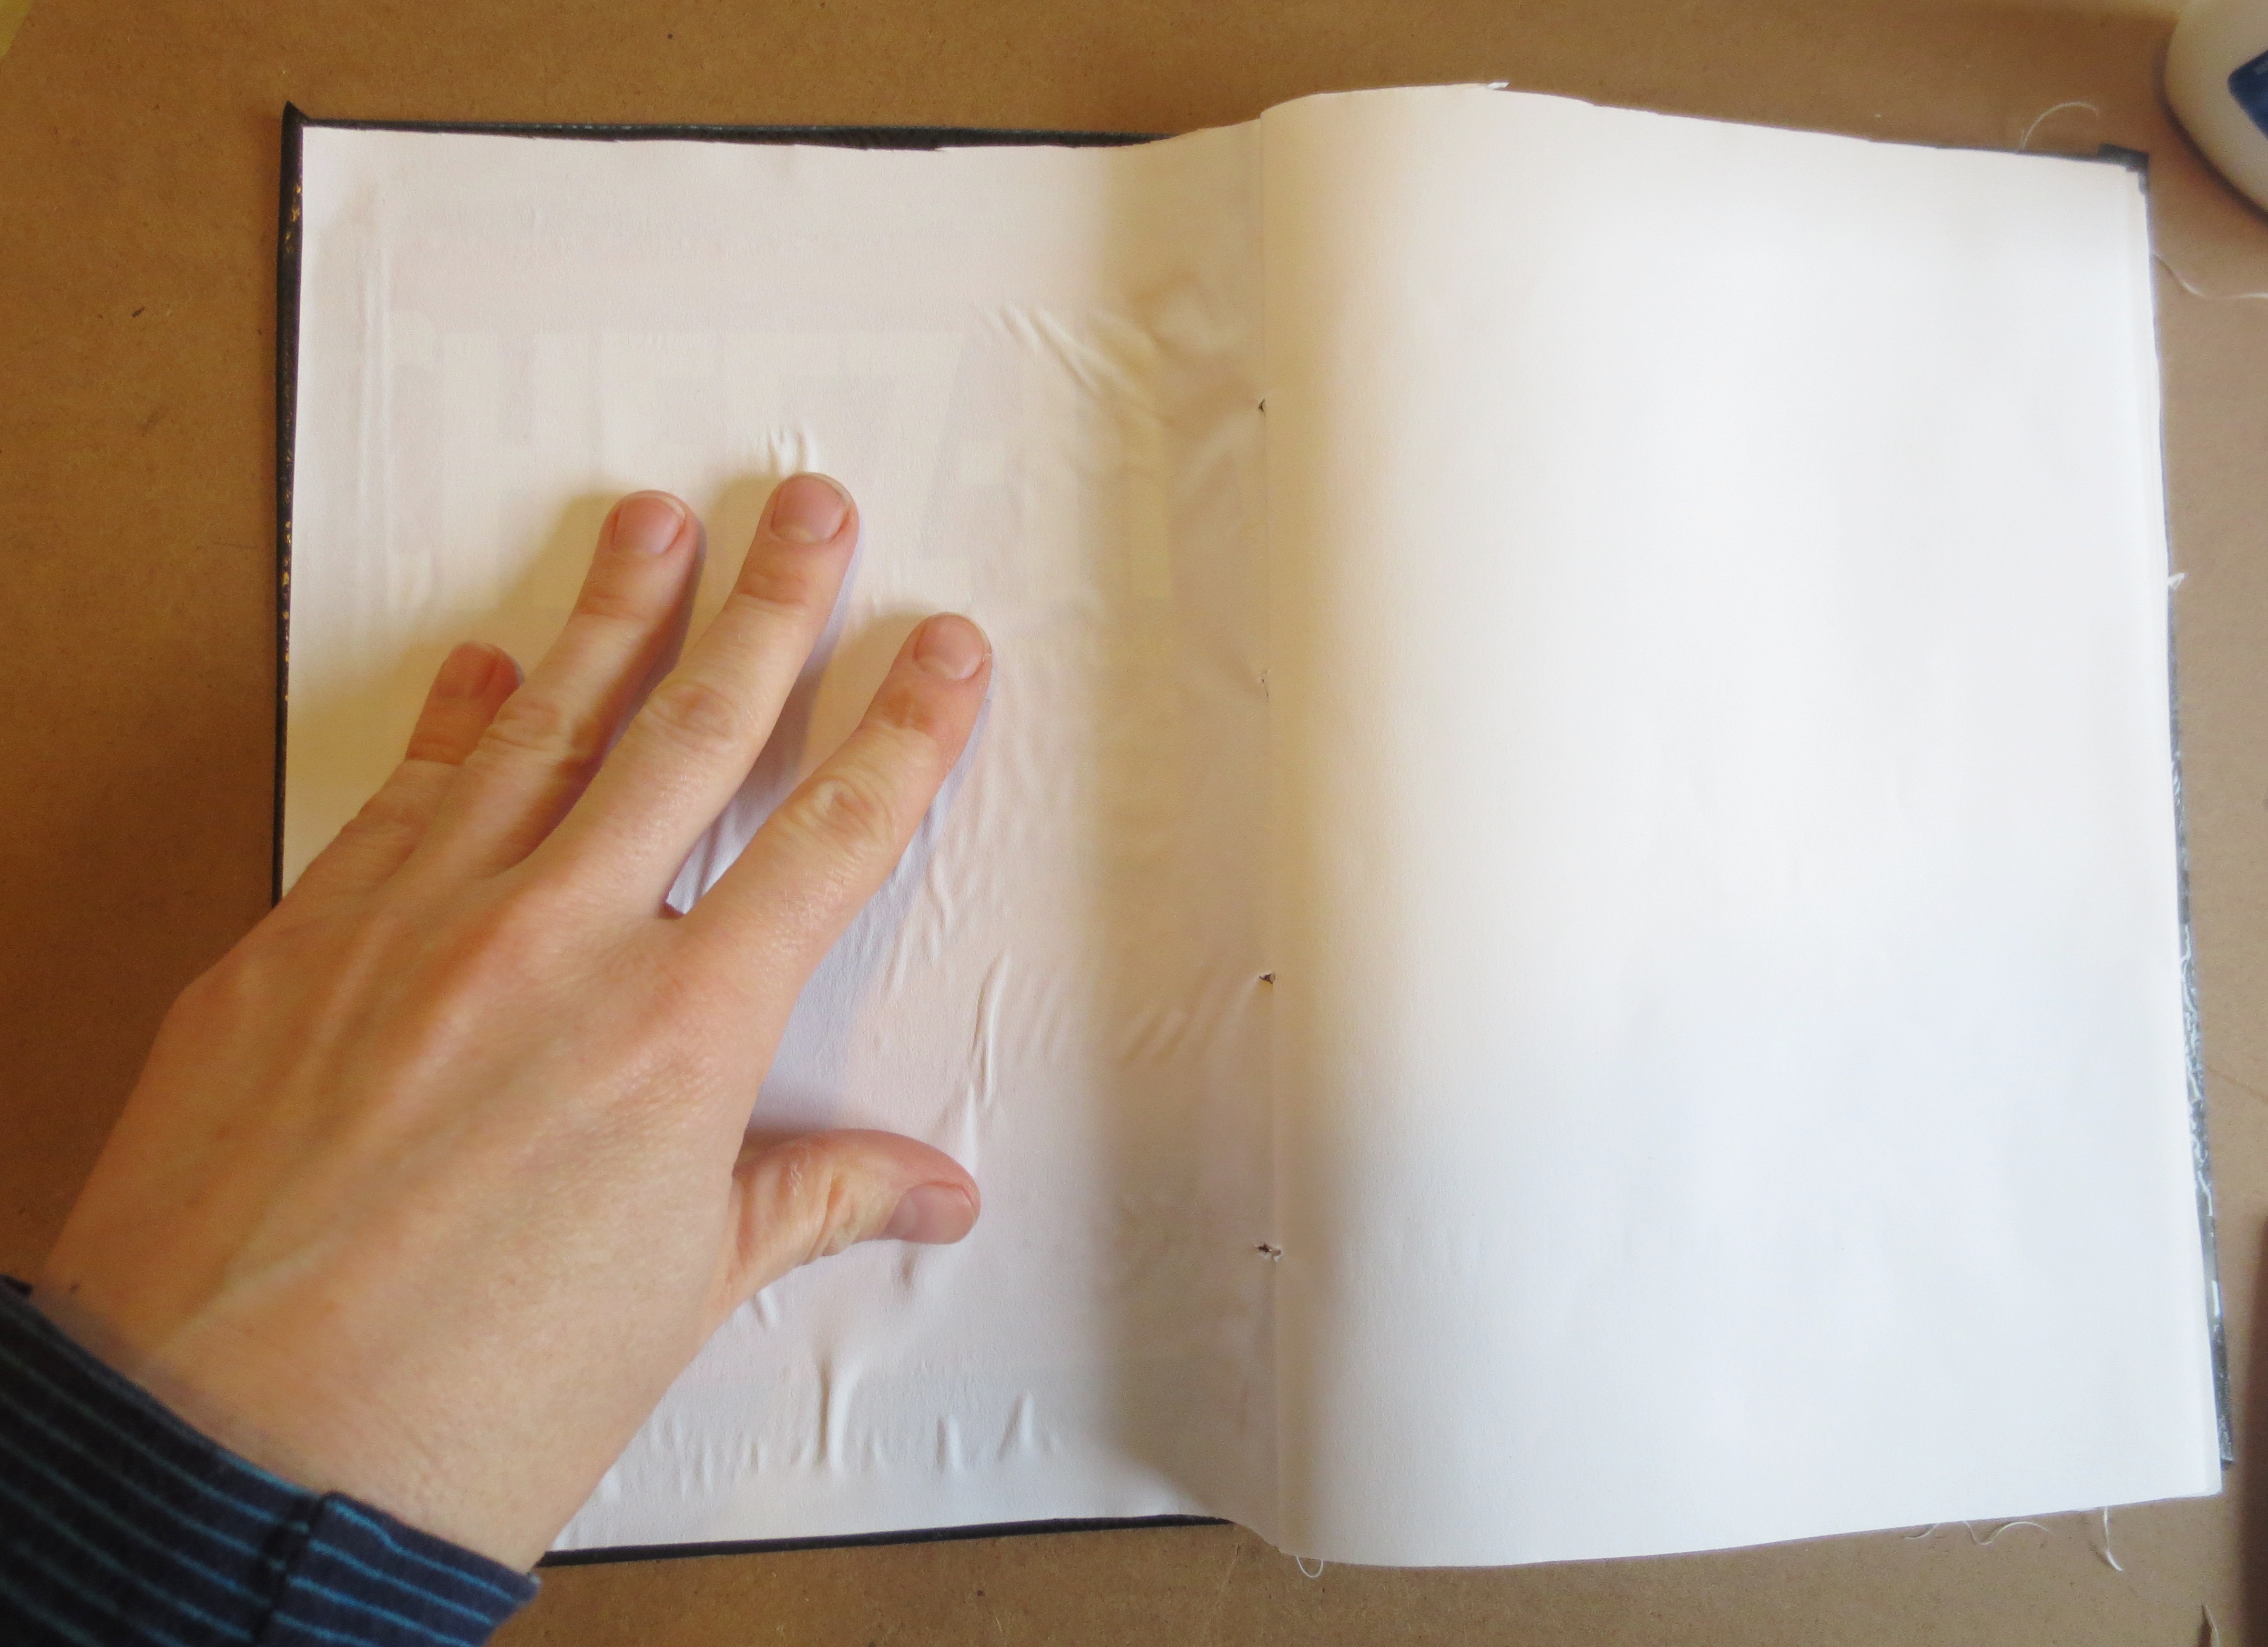 Insert a piece of wax paper between the glued page and the next page in the book (front and back covers) so that the glue doesn’t soak through to the next inside page while it’s drying:
 Tuck the book under something heavy while it dries. For added excitement, hide it in plain sight on your bedroom dresser, right in front of the unsuspecting husband!
![]()
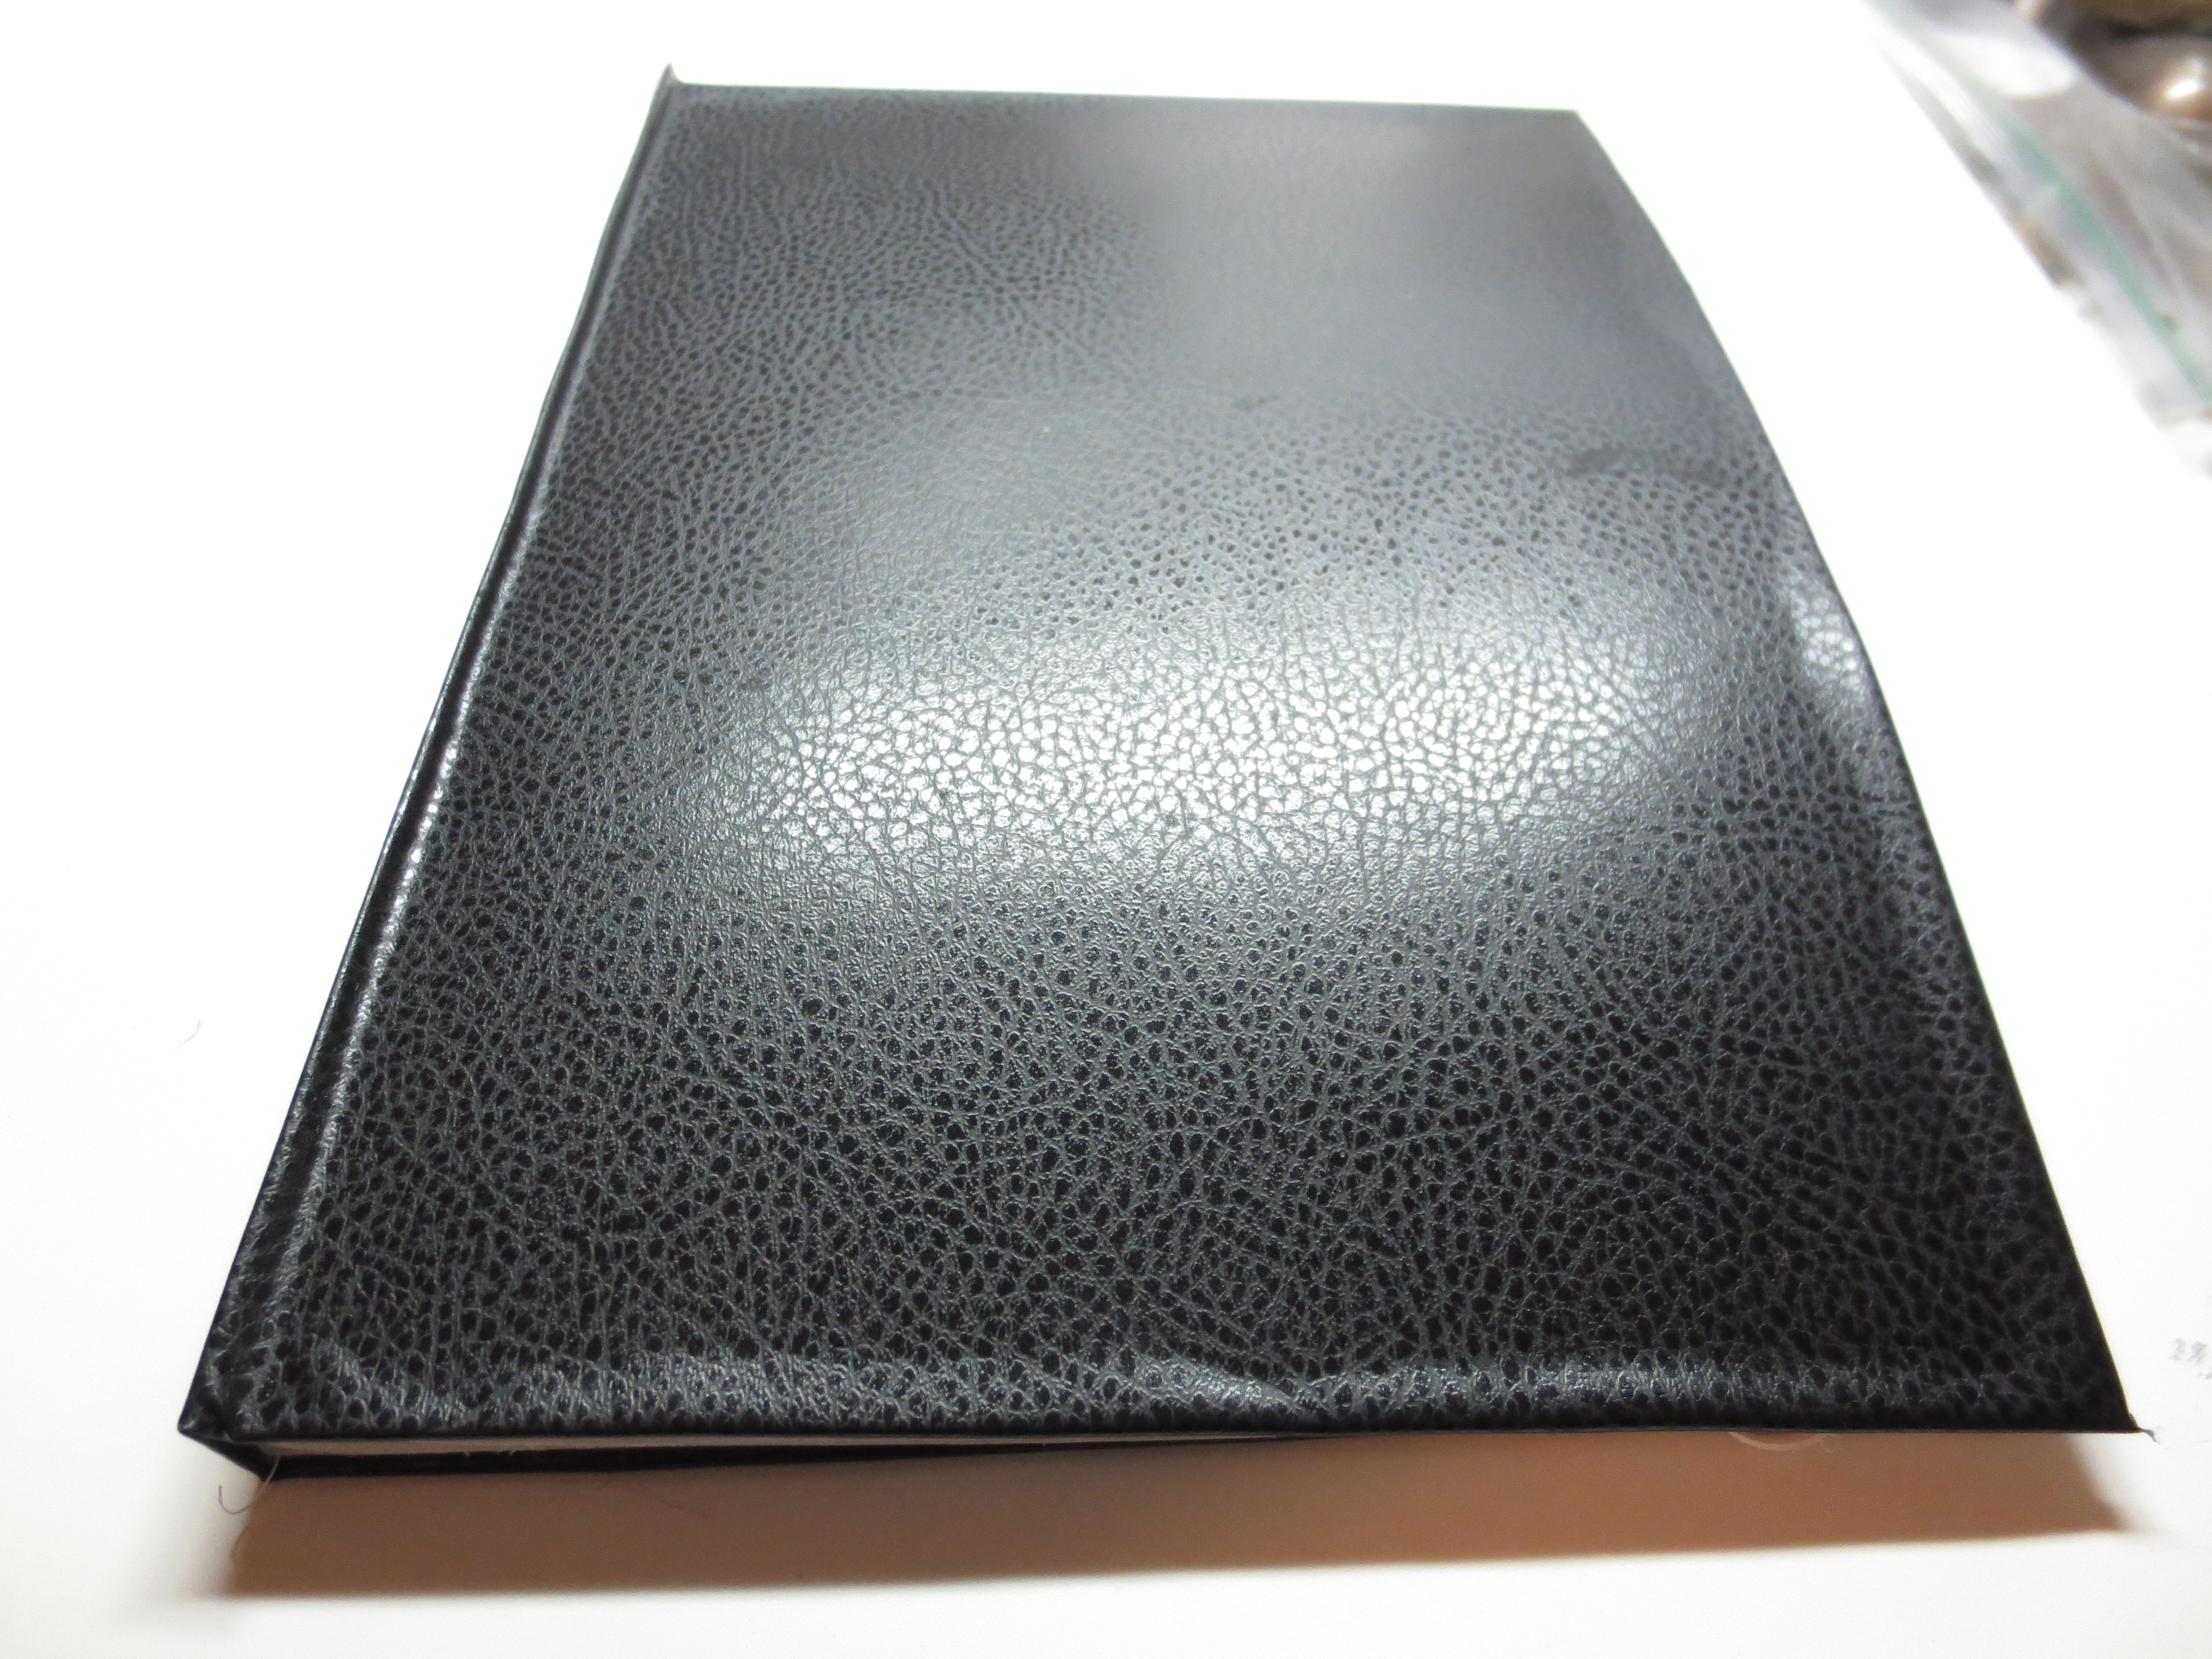
See! Much classier than a Cheez-Its box.
STEP FIVE – BRAINSTORM & WRITE: Brainstorm a list of 38 things that you love about your husband. If you can’t think of that many, then maybe you need a new husband. Feel free to steal some of mine. If your husband is older than 70, you’ve got a very long list to make. Perhaps this project is really a young wife’s game.
Then, when your husband’s not looking, pull out the book and on each page, write one reason why you love him.


 Now, some of these 38 things are a little too personal for the internet. But here’s a few highlights to give you an idea of why I love him:
4. You have just the right amount of body hair.
7. Your eyelashes are blond at the base and black at the tips, like a bunch of tiny arrows pointing to your piercing blue eyes.
13. You always let me sleep five minutes later than you.
15. You know a lot about outer space.
20. You forgive and forget.
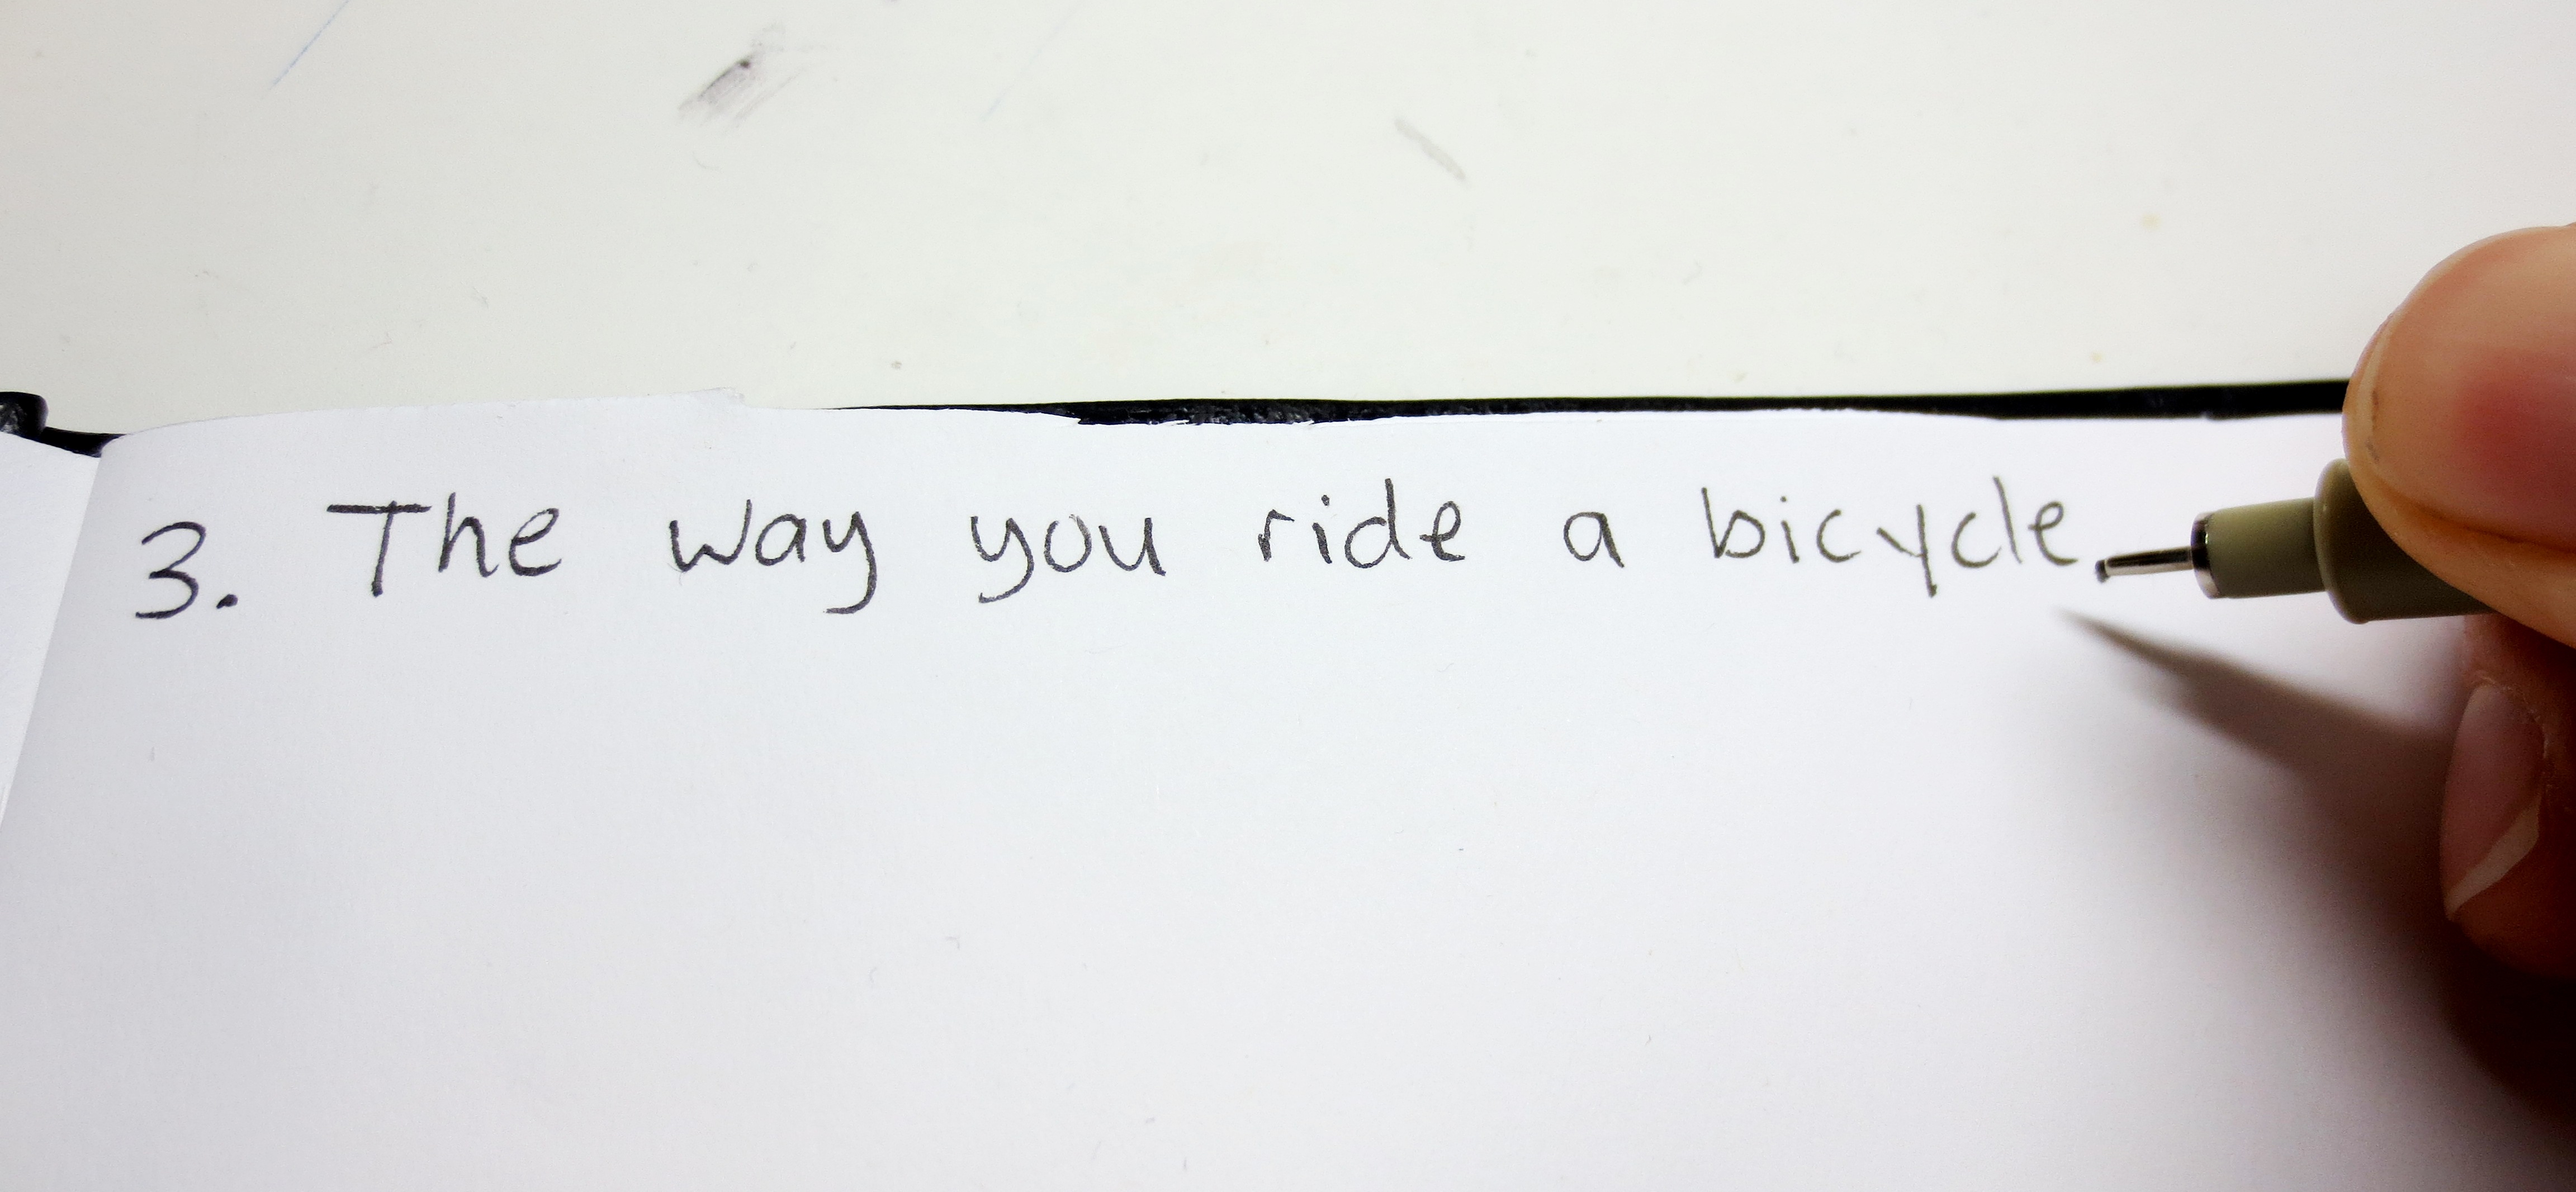
27. The way you draw dinosaurs, robots and monsters perfectly, on command.
29. You keep getting promotions at work.
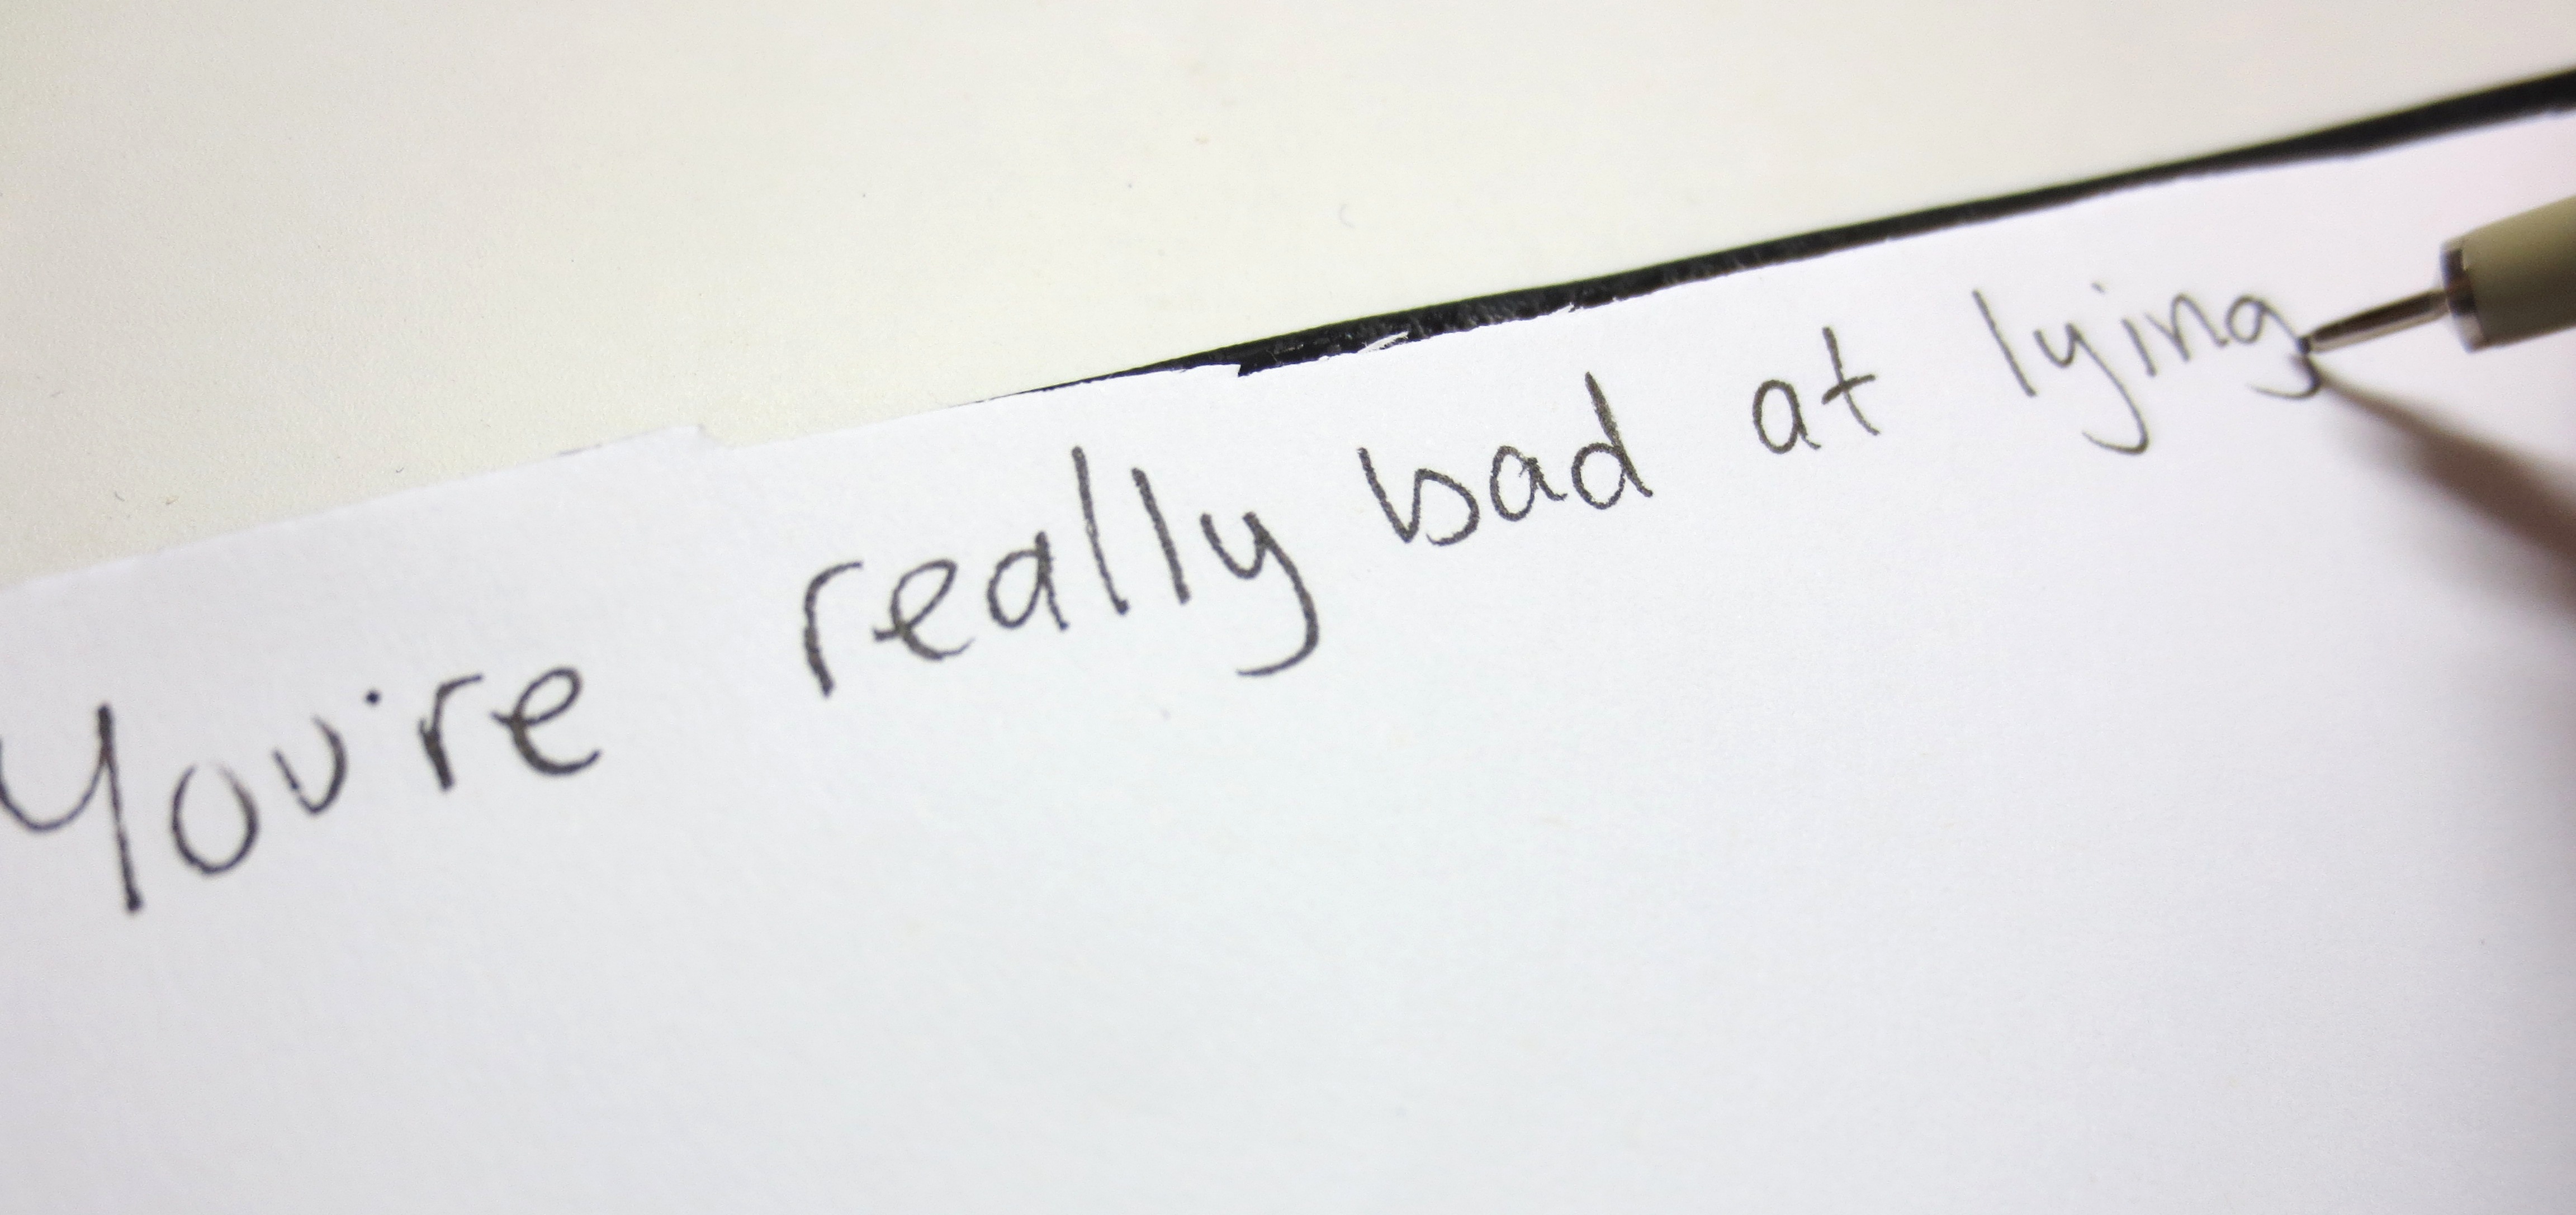
31. Your smile really does light up the room, and I promise not to say that when you’re dead.
33. When I get stuck, you get me unstuck.
34. You always hold my hand when we’re walking.
38. I can’t believe our children have a father as wonderful as you.

That is the sweetest and coolest idea! Love it 🎃🎃
LikeLike
Not only a sweet idea, but beautifully executed, with a built in excuse for snacking… Plus you say really nice things to your husband, always endearing after 5 years of marriage…
LikeLike
On a serious note — yes, making a list of all the things you love about someone is a very nice reminder of why you married him or her. On a silly note — yes, I really did eat half that box of Cheez-Its while I made the sketchbook… (tummy grumble)…
LikeLike
its an awesome, great, lovable and many-more adjectives I have to say for this idea. Thanks for sharing your thought; it has really made my day and memories with my husband.
LikeLike