
Scott recently declared a moratorium on chairs. Specially, a ban on anyone (me) hauling more junk chairs into our apartment. Our front room is a halfway house for furniture that’s been rehabilitated, but ain’t quite ready for the outside world. Our dining room (slash studio) is a no-kill shelter for my favorite four-legged friends, the alley chairs.
But a few weeks after the moratorium was announced, on the way home from grocery shopping, I spotted this fuzzy four-legged fellow wimpering behind a row of trash cans:
 He was tattered, dirty, and soaking wet from an overnight storm. Awwww! There was just enough room in the bucket bike to haul him home:
 I stashed him in the crawl space under my landlord’s back porch (technically not our apartment) and checked out every book the library had on upholstery – for some reason, all written in England in the late 1980s. I was ready to test out my new academic understanding of (British) upholstery, which I thought would mean simply tearing off and replacing the fabric. But like all good projects, it got complicated, fast:
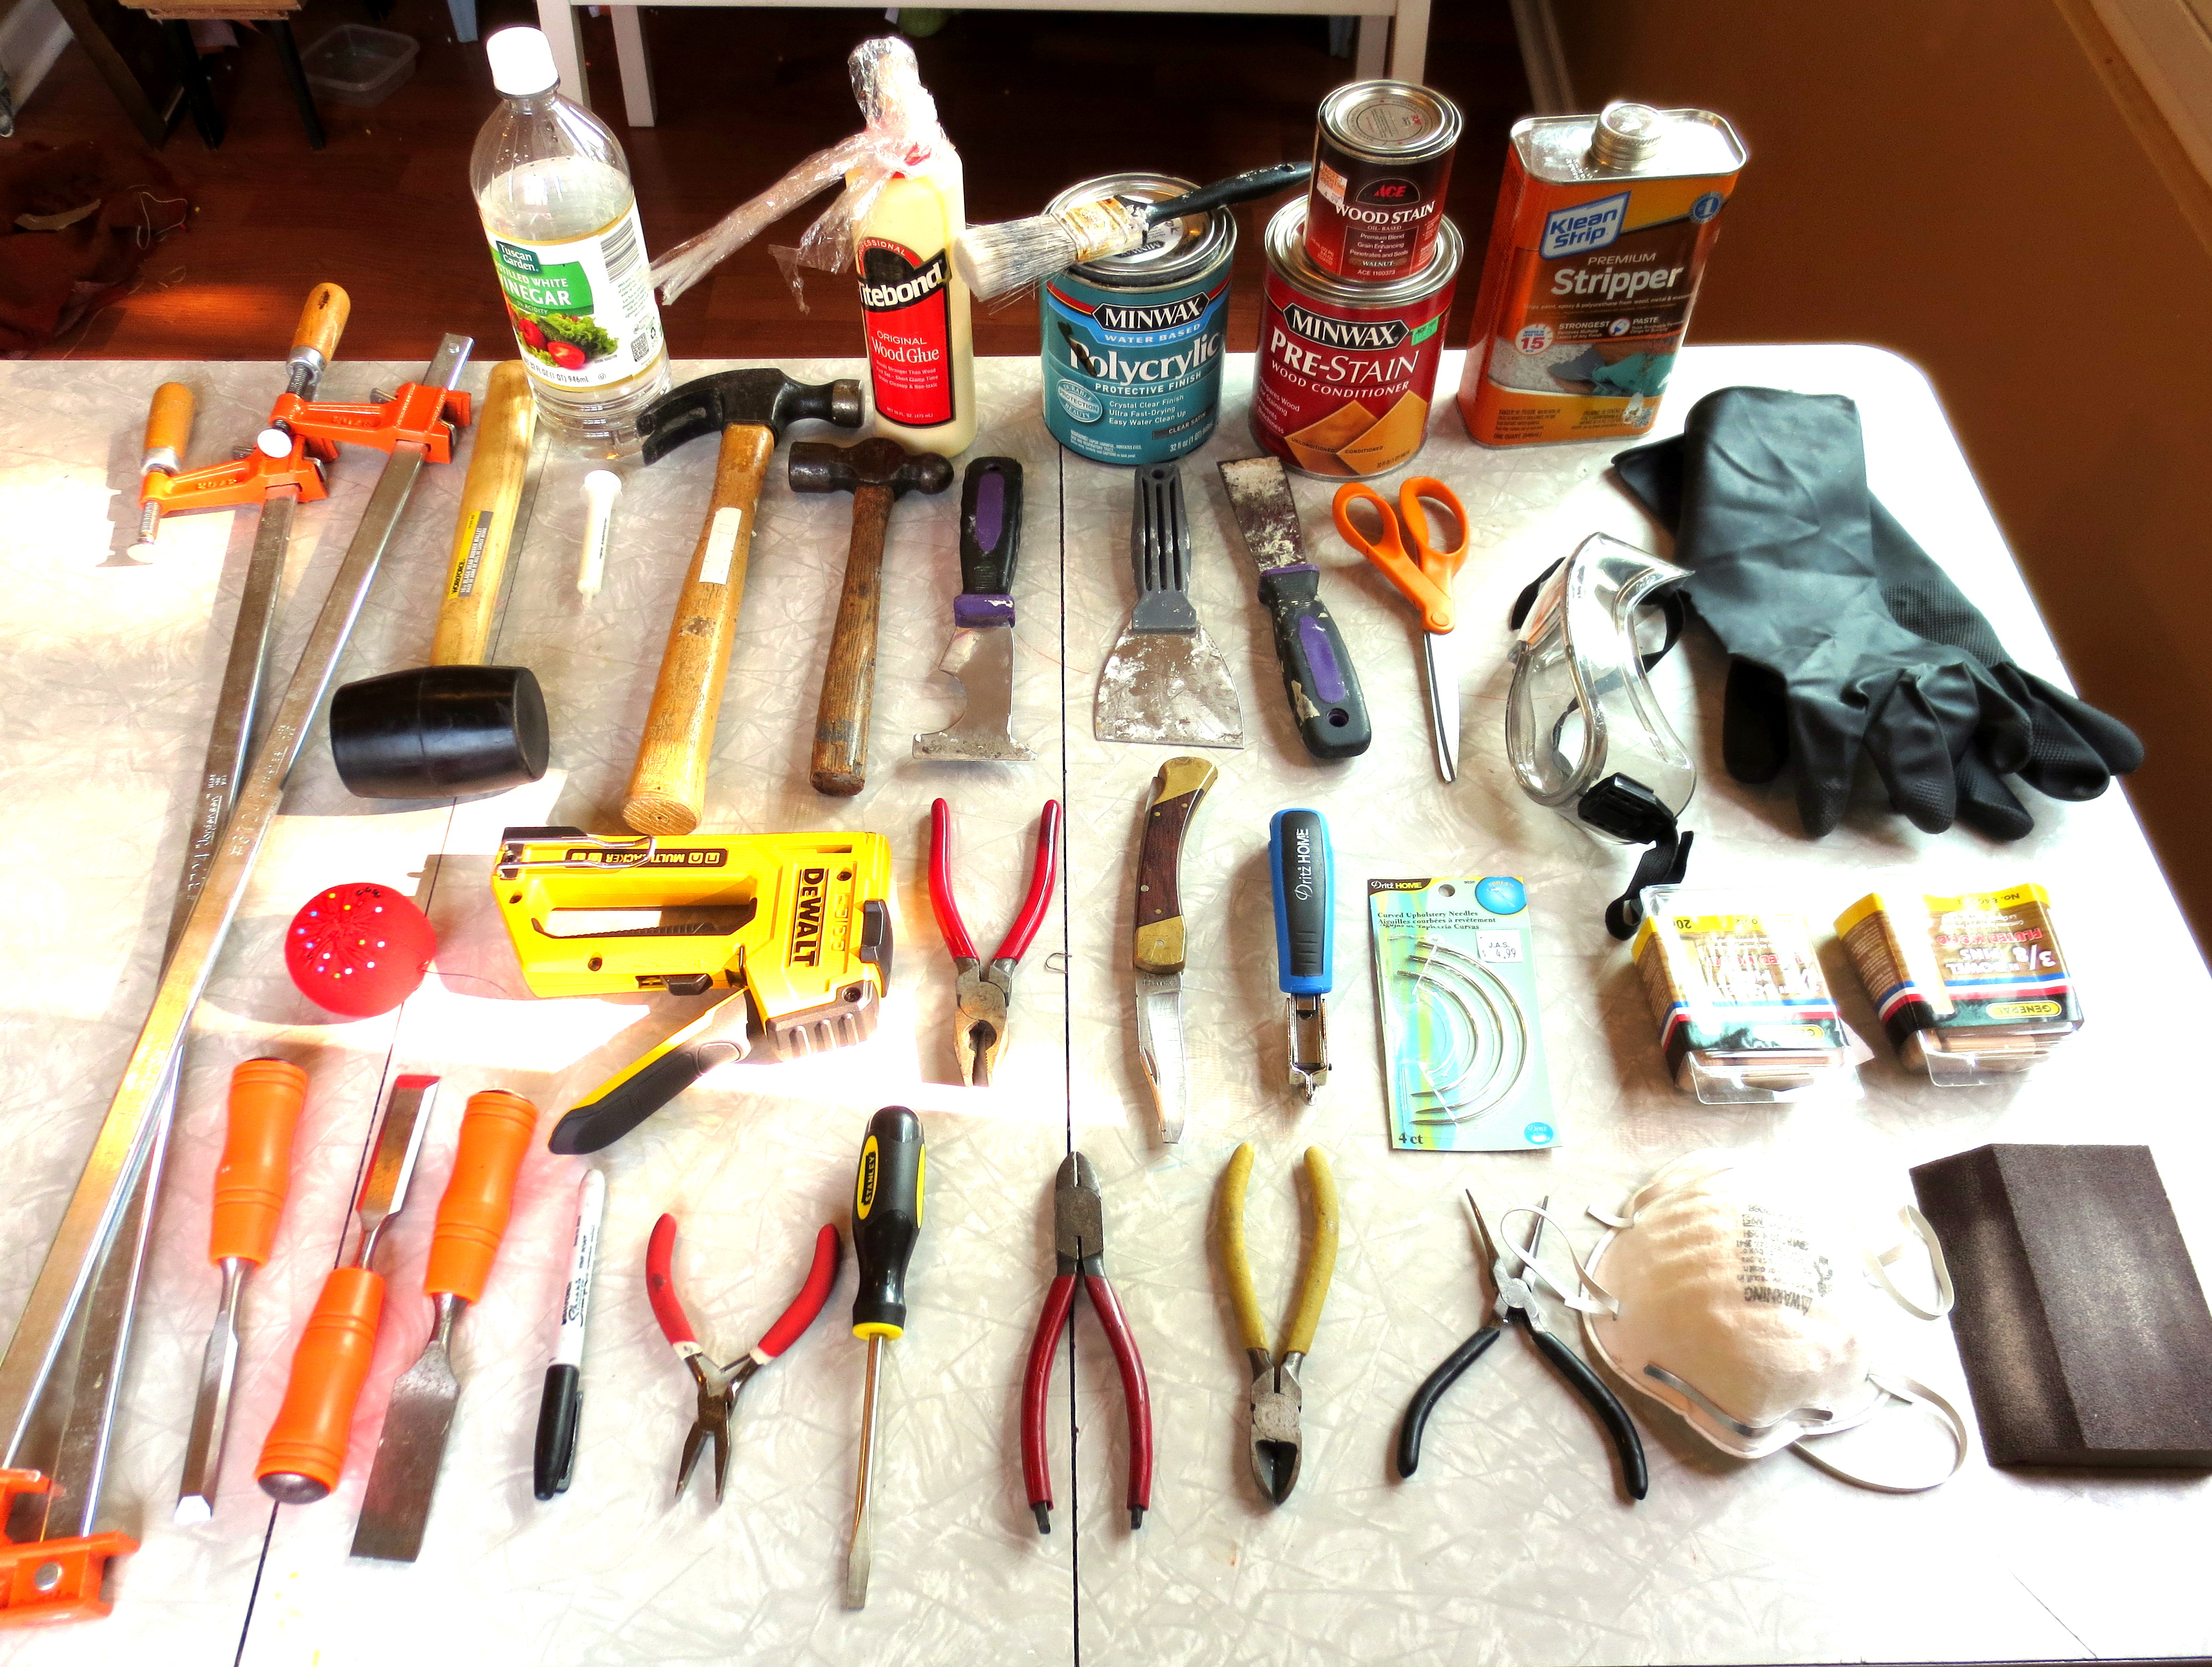
A few of the supplies you will need for this project. Not pictured: Power drill, electric sander, tea kettle, flask of bourbon and marriage counselor.
Even though this project caused me to ignore my wifely duties for days on end, Scott became quite attached to the chair, and finally, welcomed him into our home.
STEP ONE – DISMANTLE: My favorite part of any project! Especially during the summer when I can do it in the backyard while “supervising” my children. First, I flipped the chair over and pulled out all the staples from the bottom rails.

Screw this. The next day I bought a dedicated staple remover.
Two hours and 1,031 staples later, I still couldn’t get the fabric up from under the arms. But I did get a peek under the fabric — cotton padding over rubberized hair (yes, that’s a thing). It makes me itchy just to show you this picture:
 I desperately wanted to play Romance Novel, recklessly tearing the fabric off the carcass* in a frenzy of passion. However, I needed each panel intact in order to create a pattern for the new fabric. Which meant patiently, lovingly, and tenderly removing each and every @#$%* staple on this chair.
PRO-TIP! It’s summertime! Be sure to lather yourself in a thick, creamy layer of sunscreen while dismantling old furniture. Then all the dust, rotting fabric and decades of snack food crumbs will stick right to your skin. Like all this stuff in the crevice of the seat cushion:
 Scribble notes and snap pictures of your chair at every step to remember how you took it apart. Rehabbing takes many days, and your mental trail of bread crumbs will vanish minutes after you walk away. Try writing clues like “front of seat cushion” on the fabric with marker. You’d be surprised at how stupid you are, especially after using paint stripper.
Once all the bottom staples were removed, I unthreaded the back cover, which was slip-stitched up the sides of the back cushion. Then I pulled the staples from the tack cushion to remove the entire back panel.
 The fabric had been liberated from staples, but the arms and legs were holding the fabric in place, even though it wasn’t clear how the legs were attached to the main carcass.
Time to amputate. First, I removed the only two visible screws from the bottom back. It loosened the back legs a little, but not enough to free the fabric.
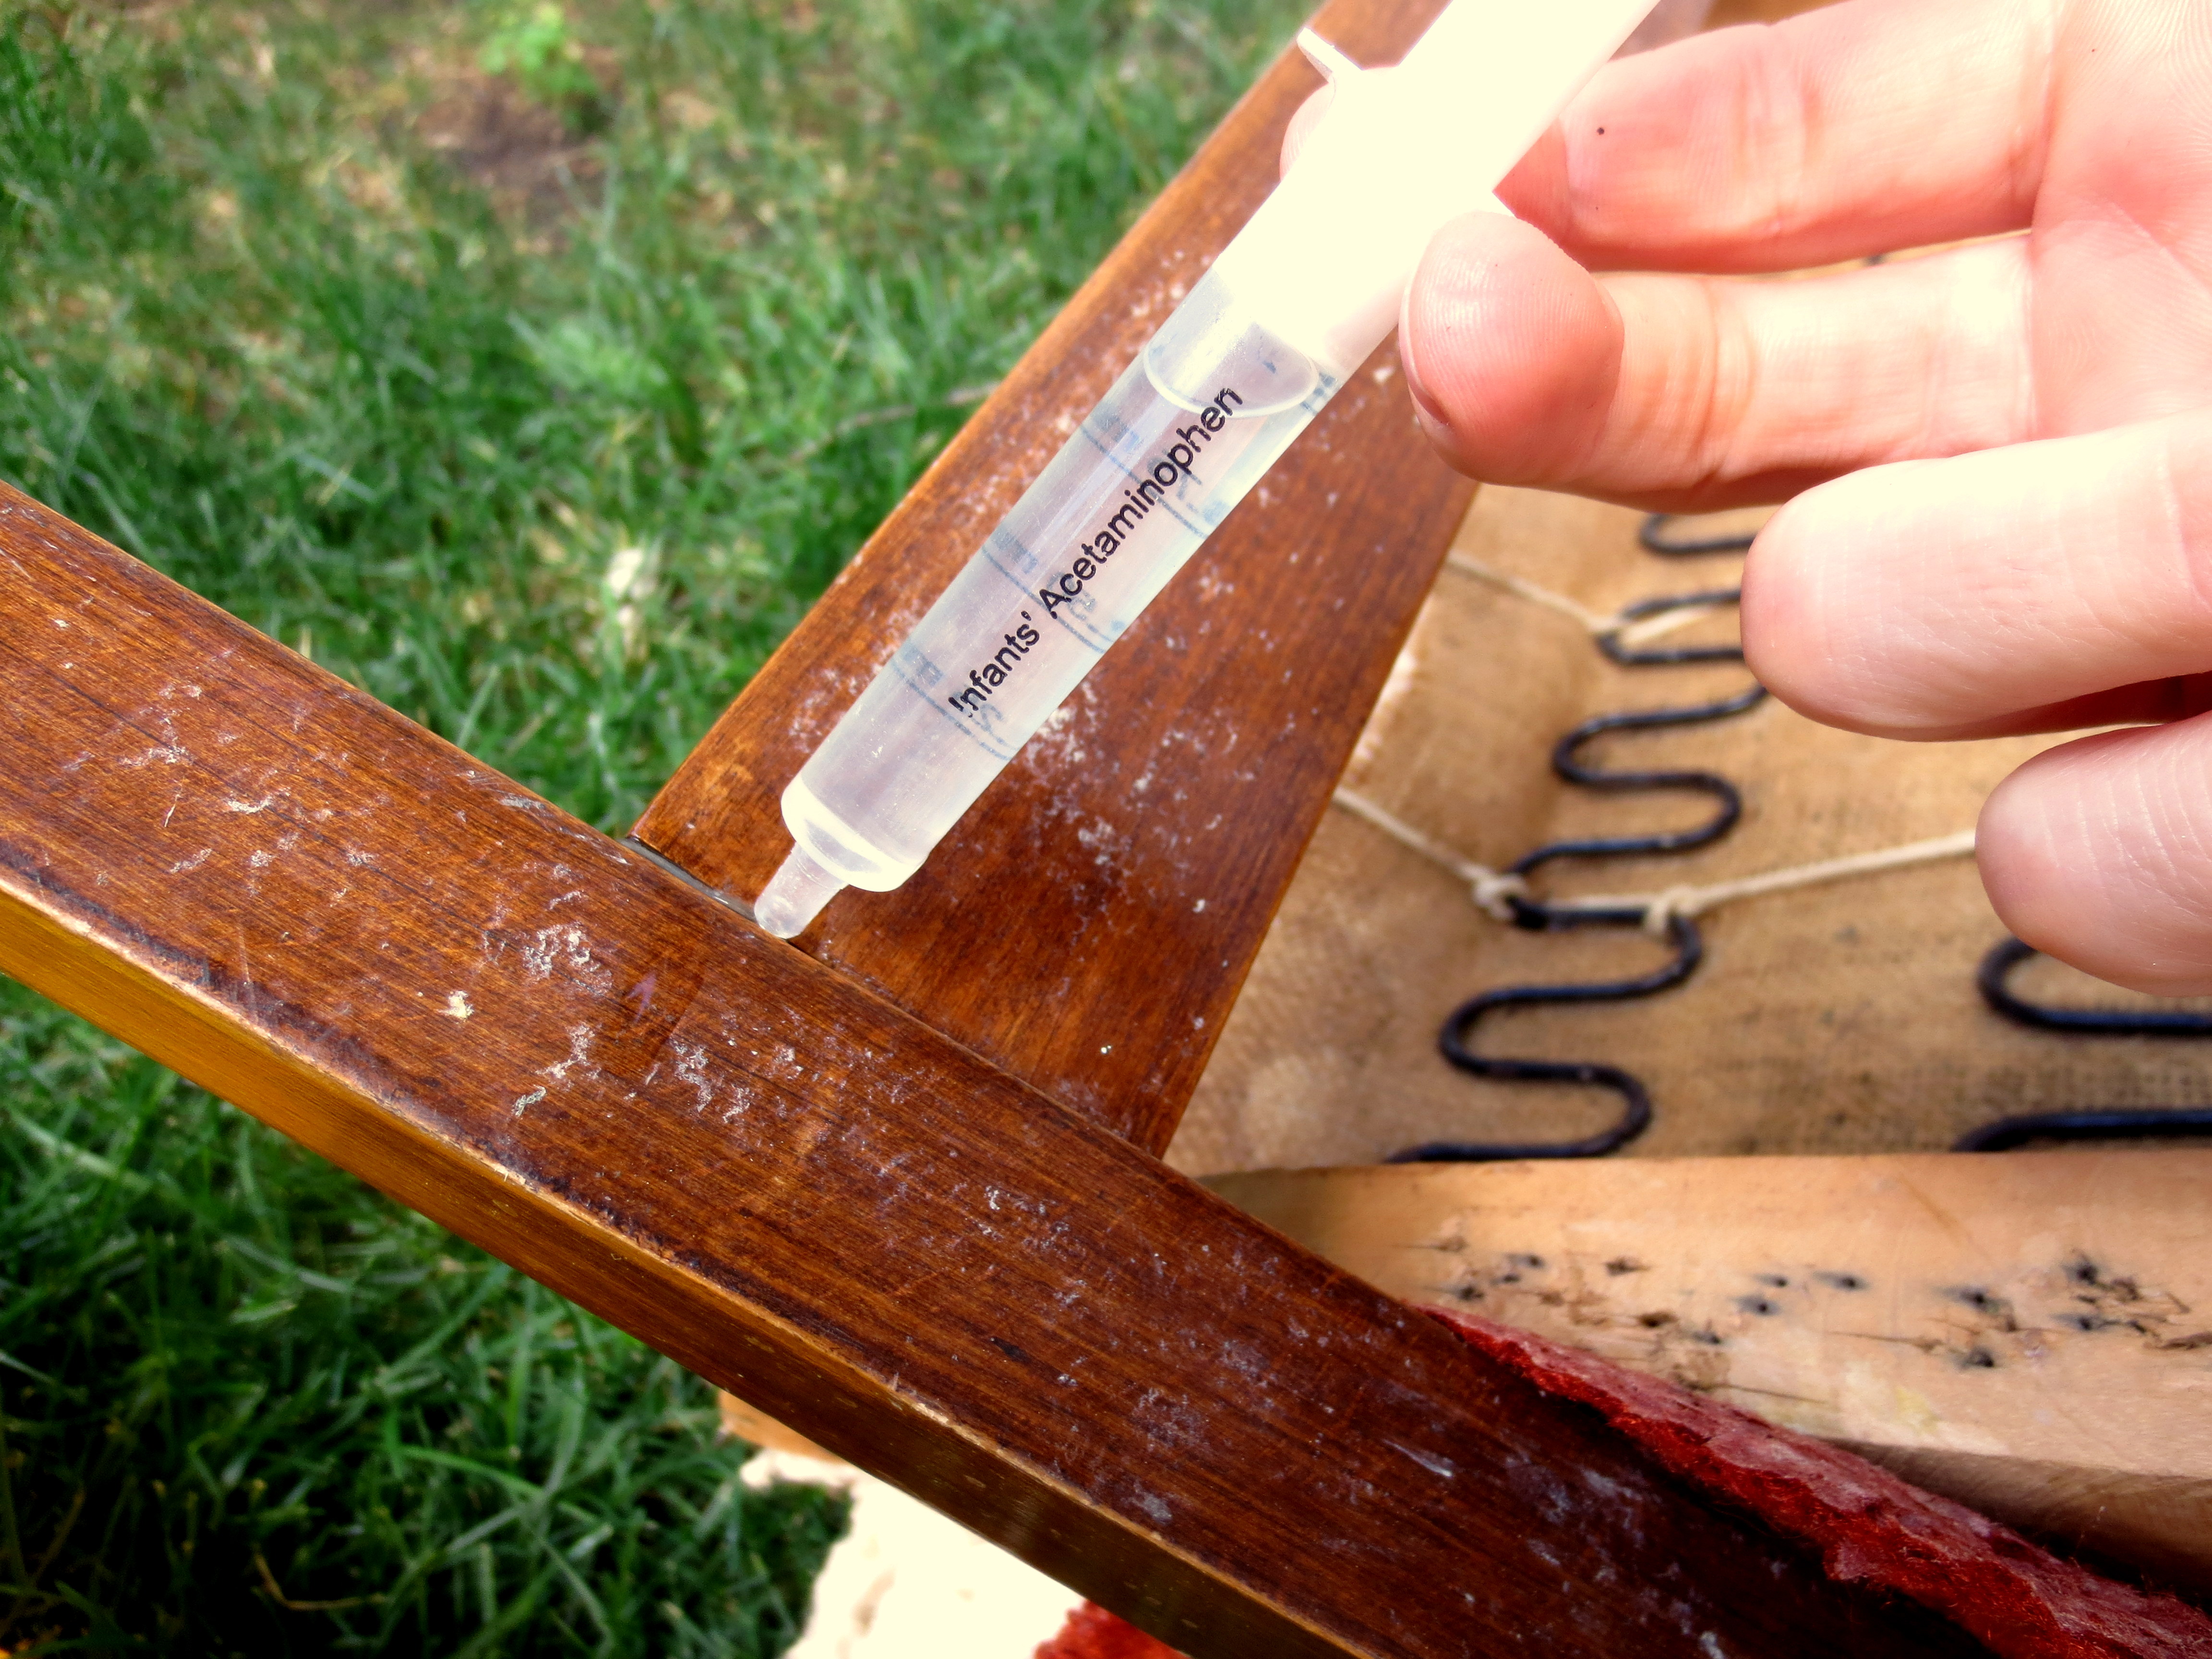
Then, I used a syringe to inject HOT VINEGAR into every joint I could find, in order to dissolve all the wood glue. If you share a home with small children, diabetics or IV drug users, then you probably have at least one syringe in your medicine cabinet or purse. If your lifestyle veers towards meat and firearms, try a turkey baster or water gun.
 Now that you’ve softened the glue and smell like pickles, it’s time to get angry. Use a large chisel or the back of a hammer to pry the joints apart:
 OK, now just start banging on stuff with a rubber mallet. There’s no other way to do it. You will cuss and spit and your husband will take unflattering pictures. And you will let him.
 Whew! The effort paid off. We now have three intact pieces of fabric – 1) the seat cover, and the 2) front and 3) back cover of the back rest. And now now you can refinish the wood in convenient, bite-sized pieces, if you can get your kids to stop hitting each other with them.
 STEP TWO – REFINISH LEGS AND ARMS: First, use toxic chemicals to strip off the old orange varnish.
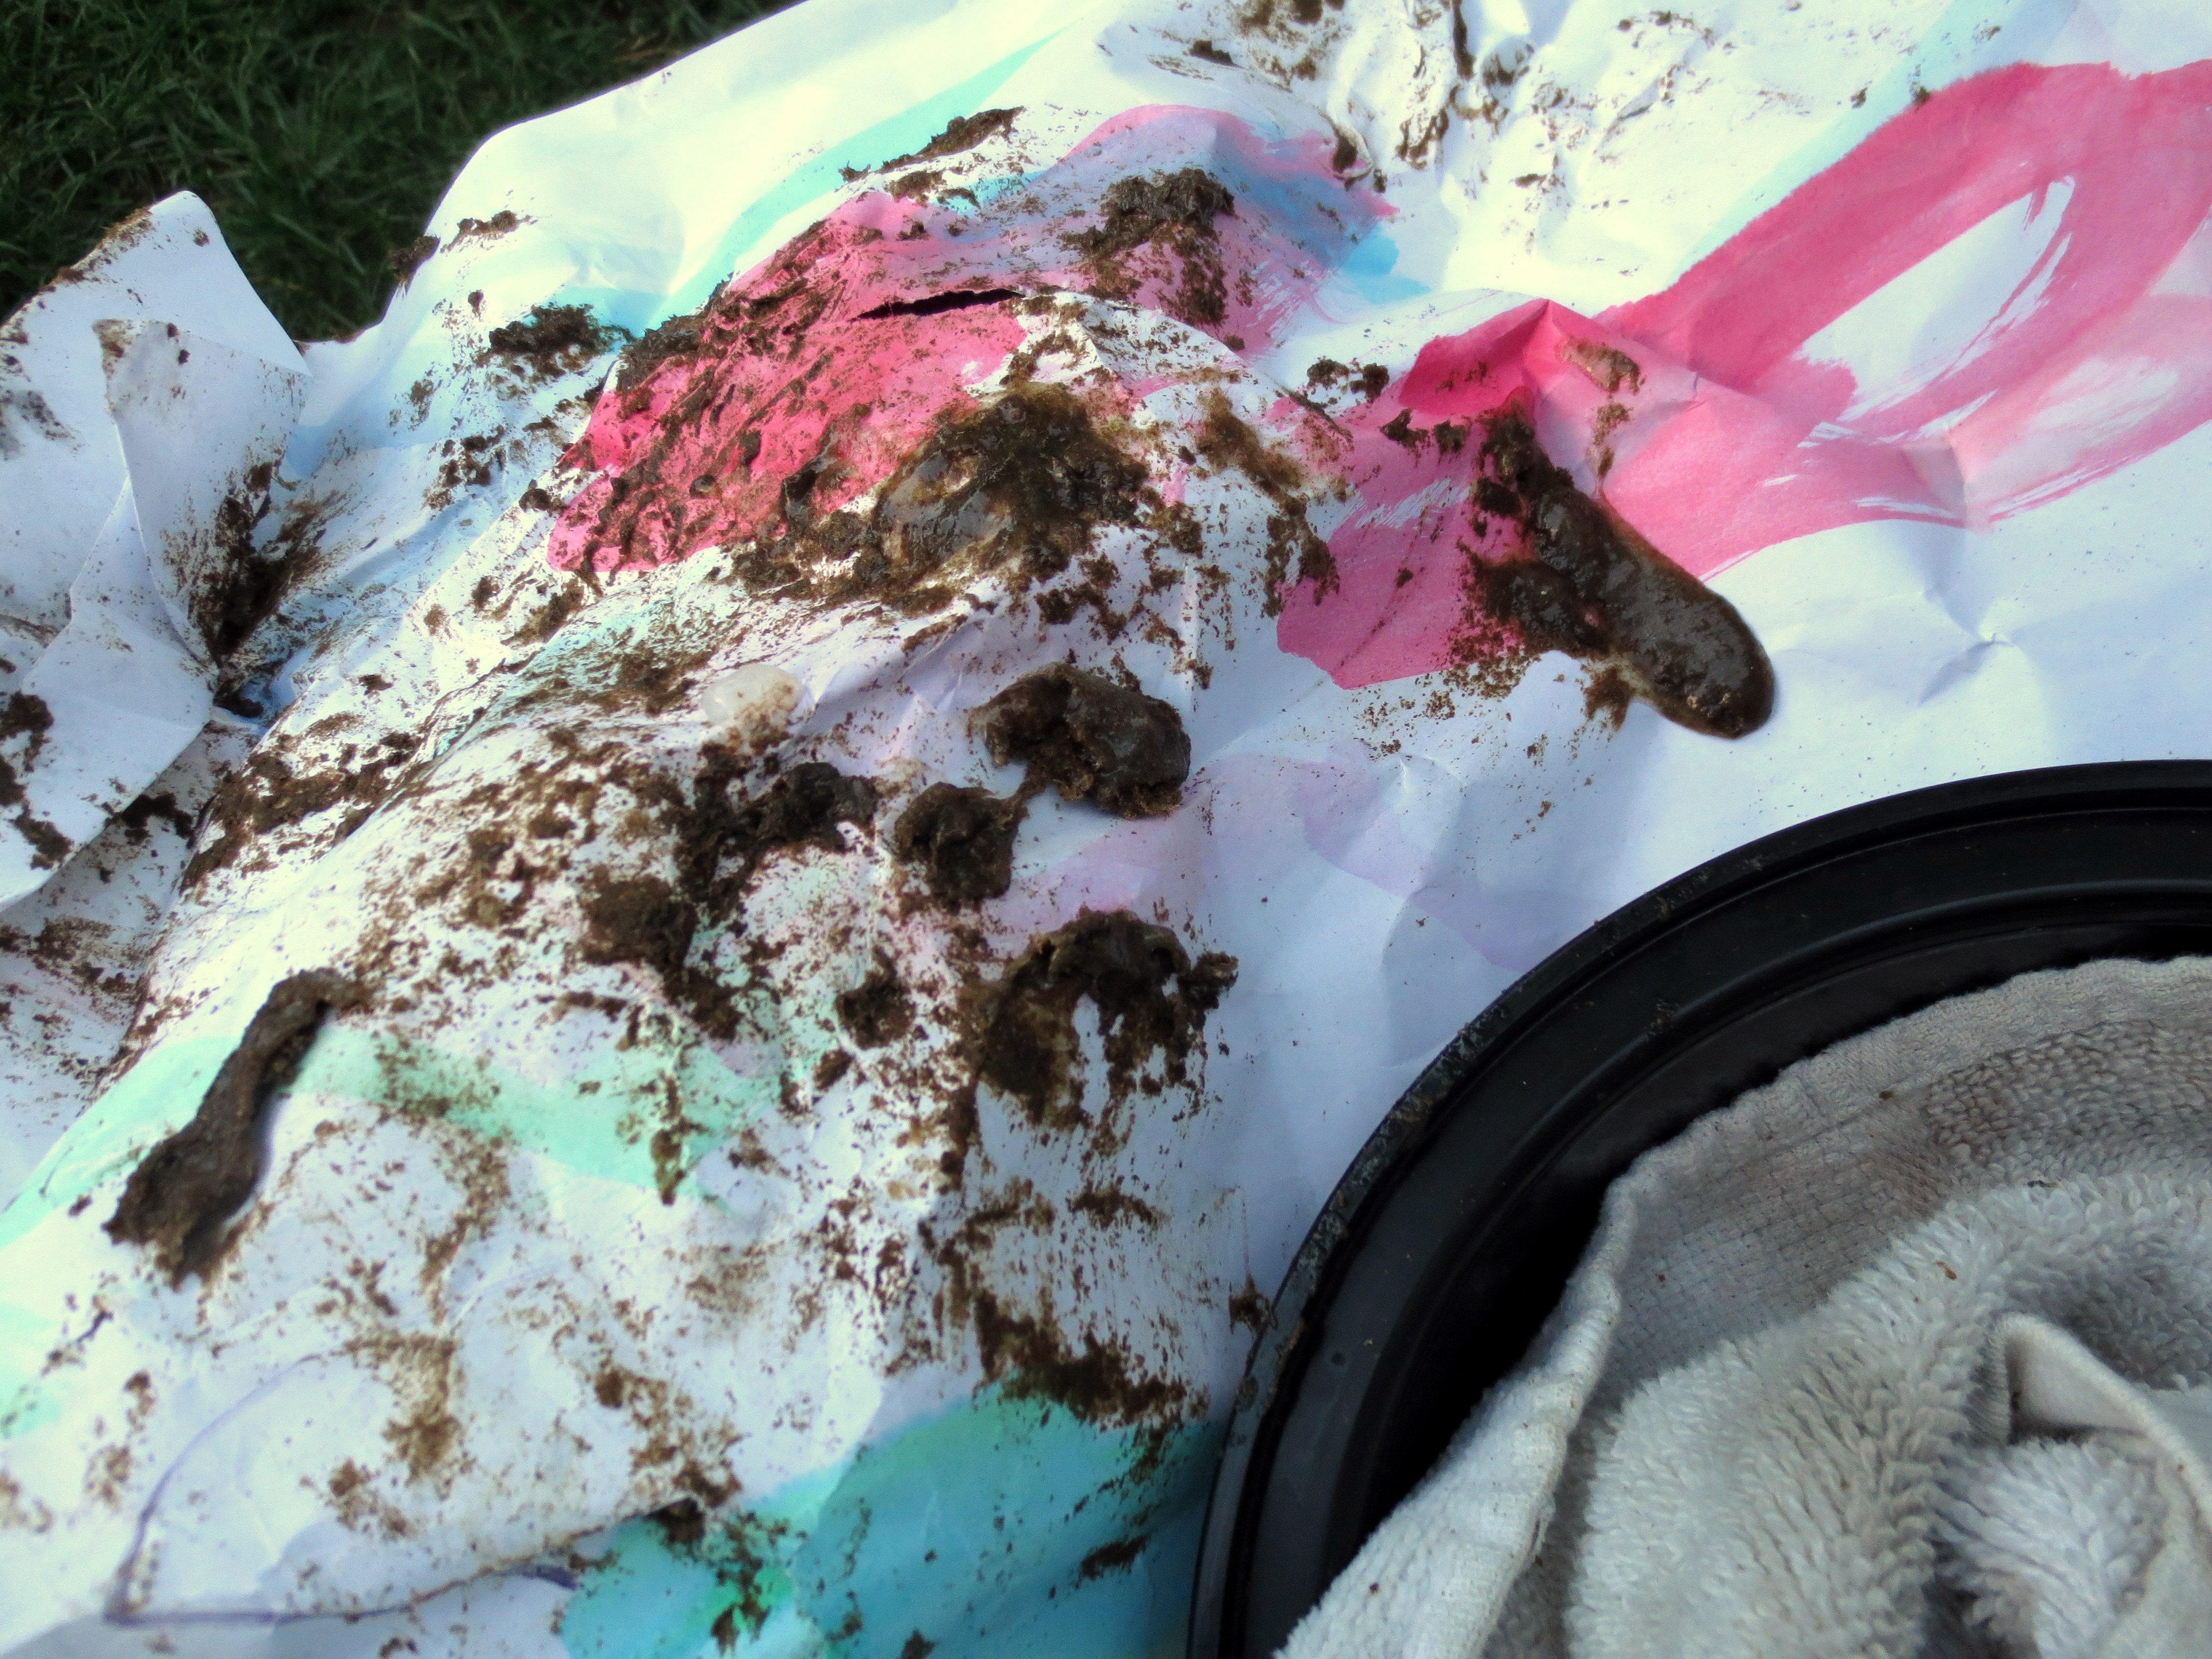
  Apply with a disposable brush and scrape off the resulting goo with a plastic scraper. If you did it right, you should have a pile of what looks like baby poo. Wipe it on one of your kids’ rejected paintings for full effect:
 With the finish off, smooth off any scratches with a power sander.
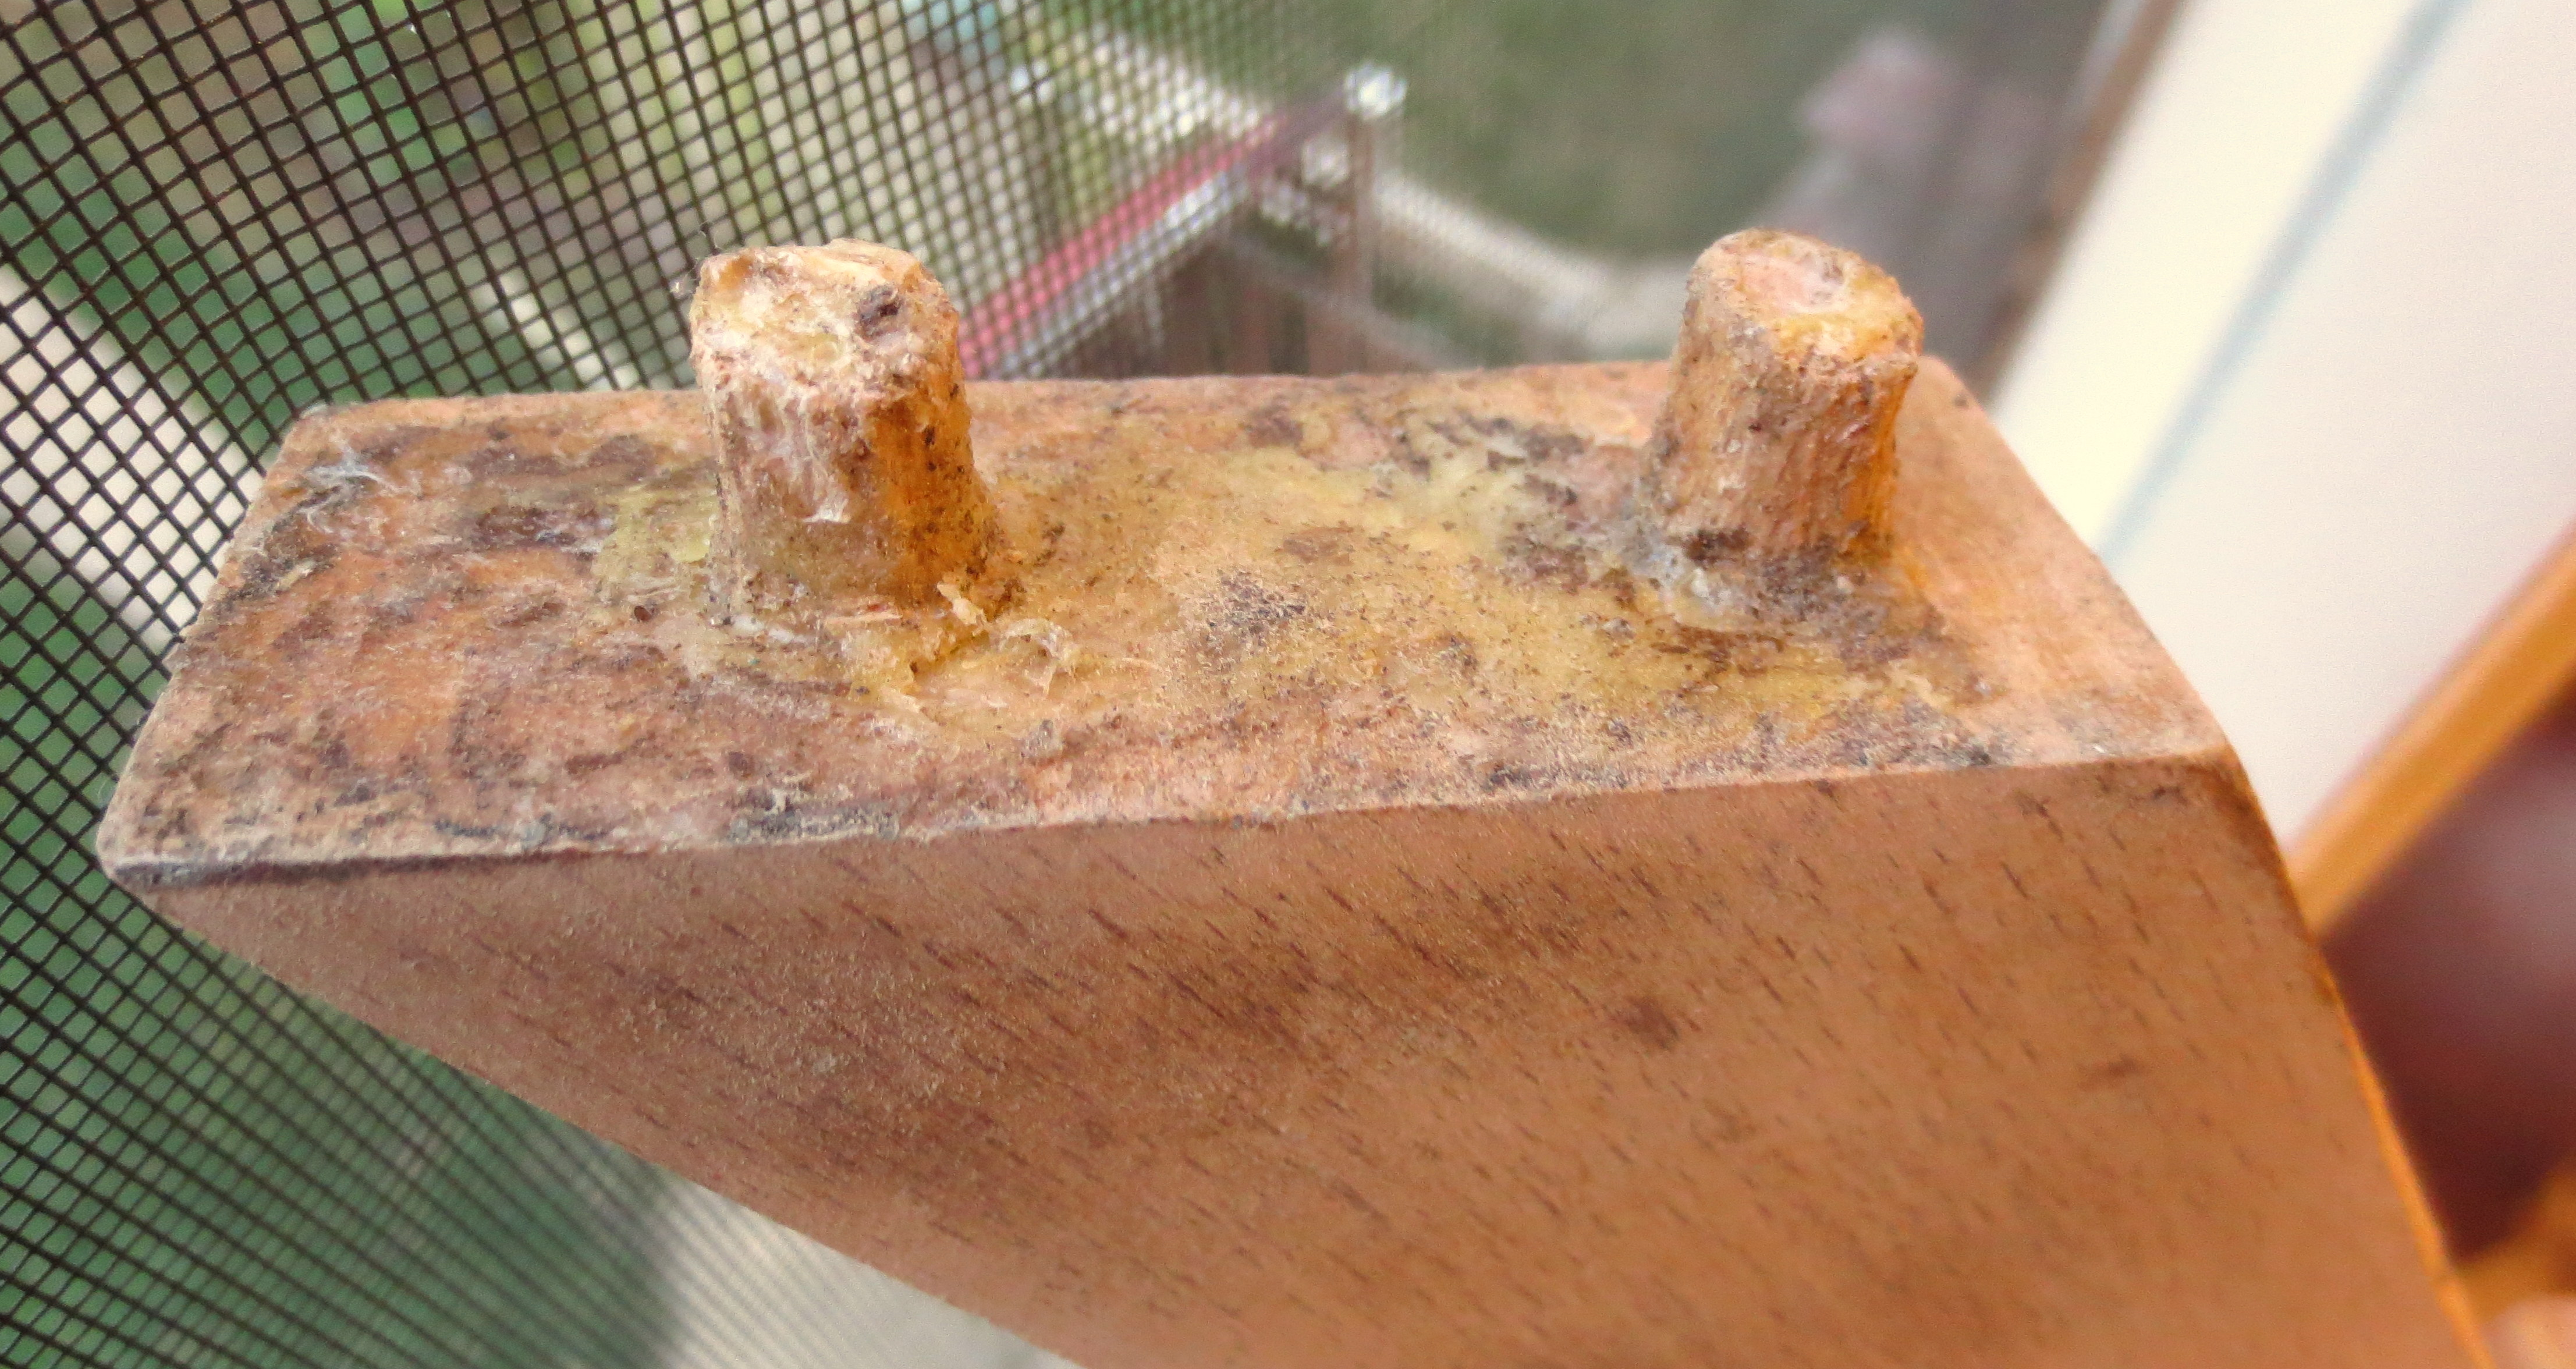
Before you apply a new finish, you have to remove all this dried wood glue from the dowels and joints so that the new glue will work. This might be an even bigger pain-in-the-ass than those staples.
 You can chisel off the dry glue, or wrap it for a few minutes in a rag soaked in hot vinegar to soften it first. If you’re really desperate, use your kettle to steam it off.
 All my joints were held together with dowels, and a couple had cracked off. I had to drill out the pieces and locate fresh replacement dowels. Apparently, 3/8 and ½ inches were not standard dowel sizes in 1962, so I had to chisel my own 2/5-inch dowels.
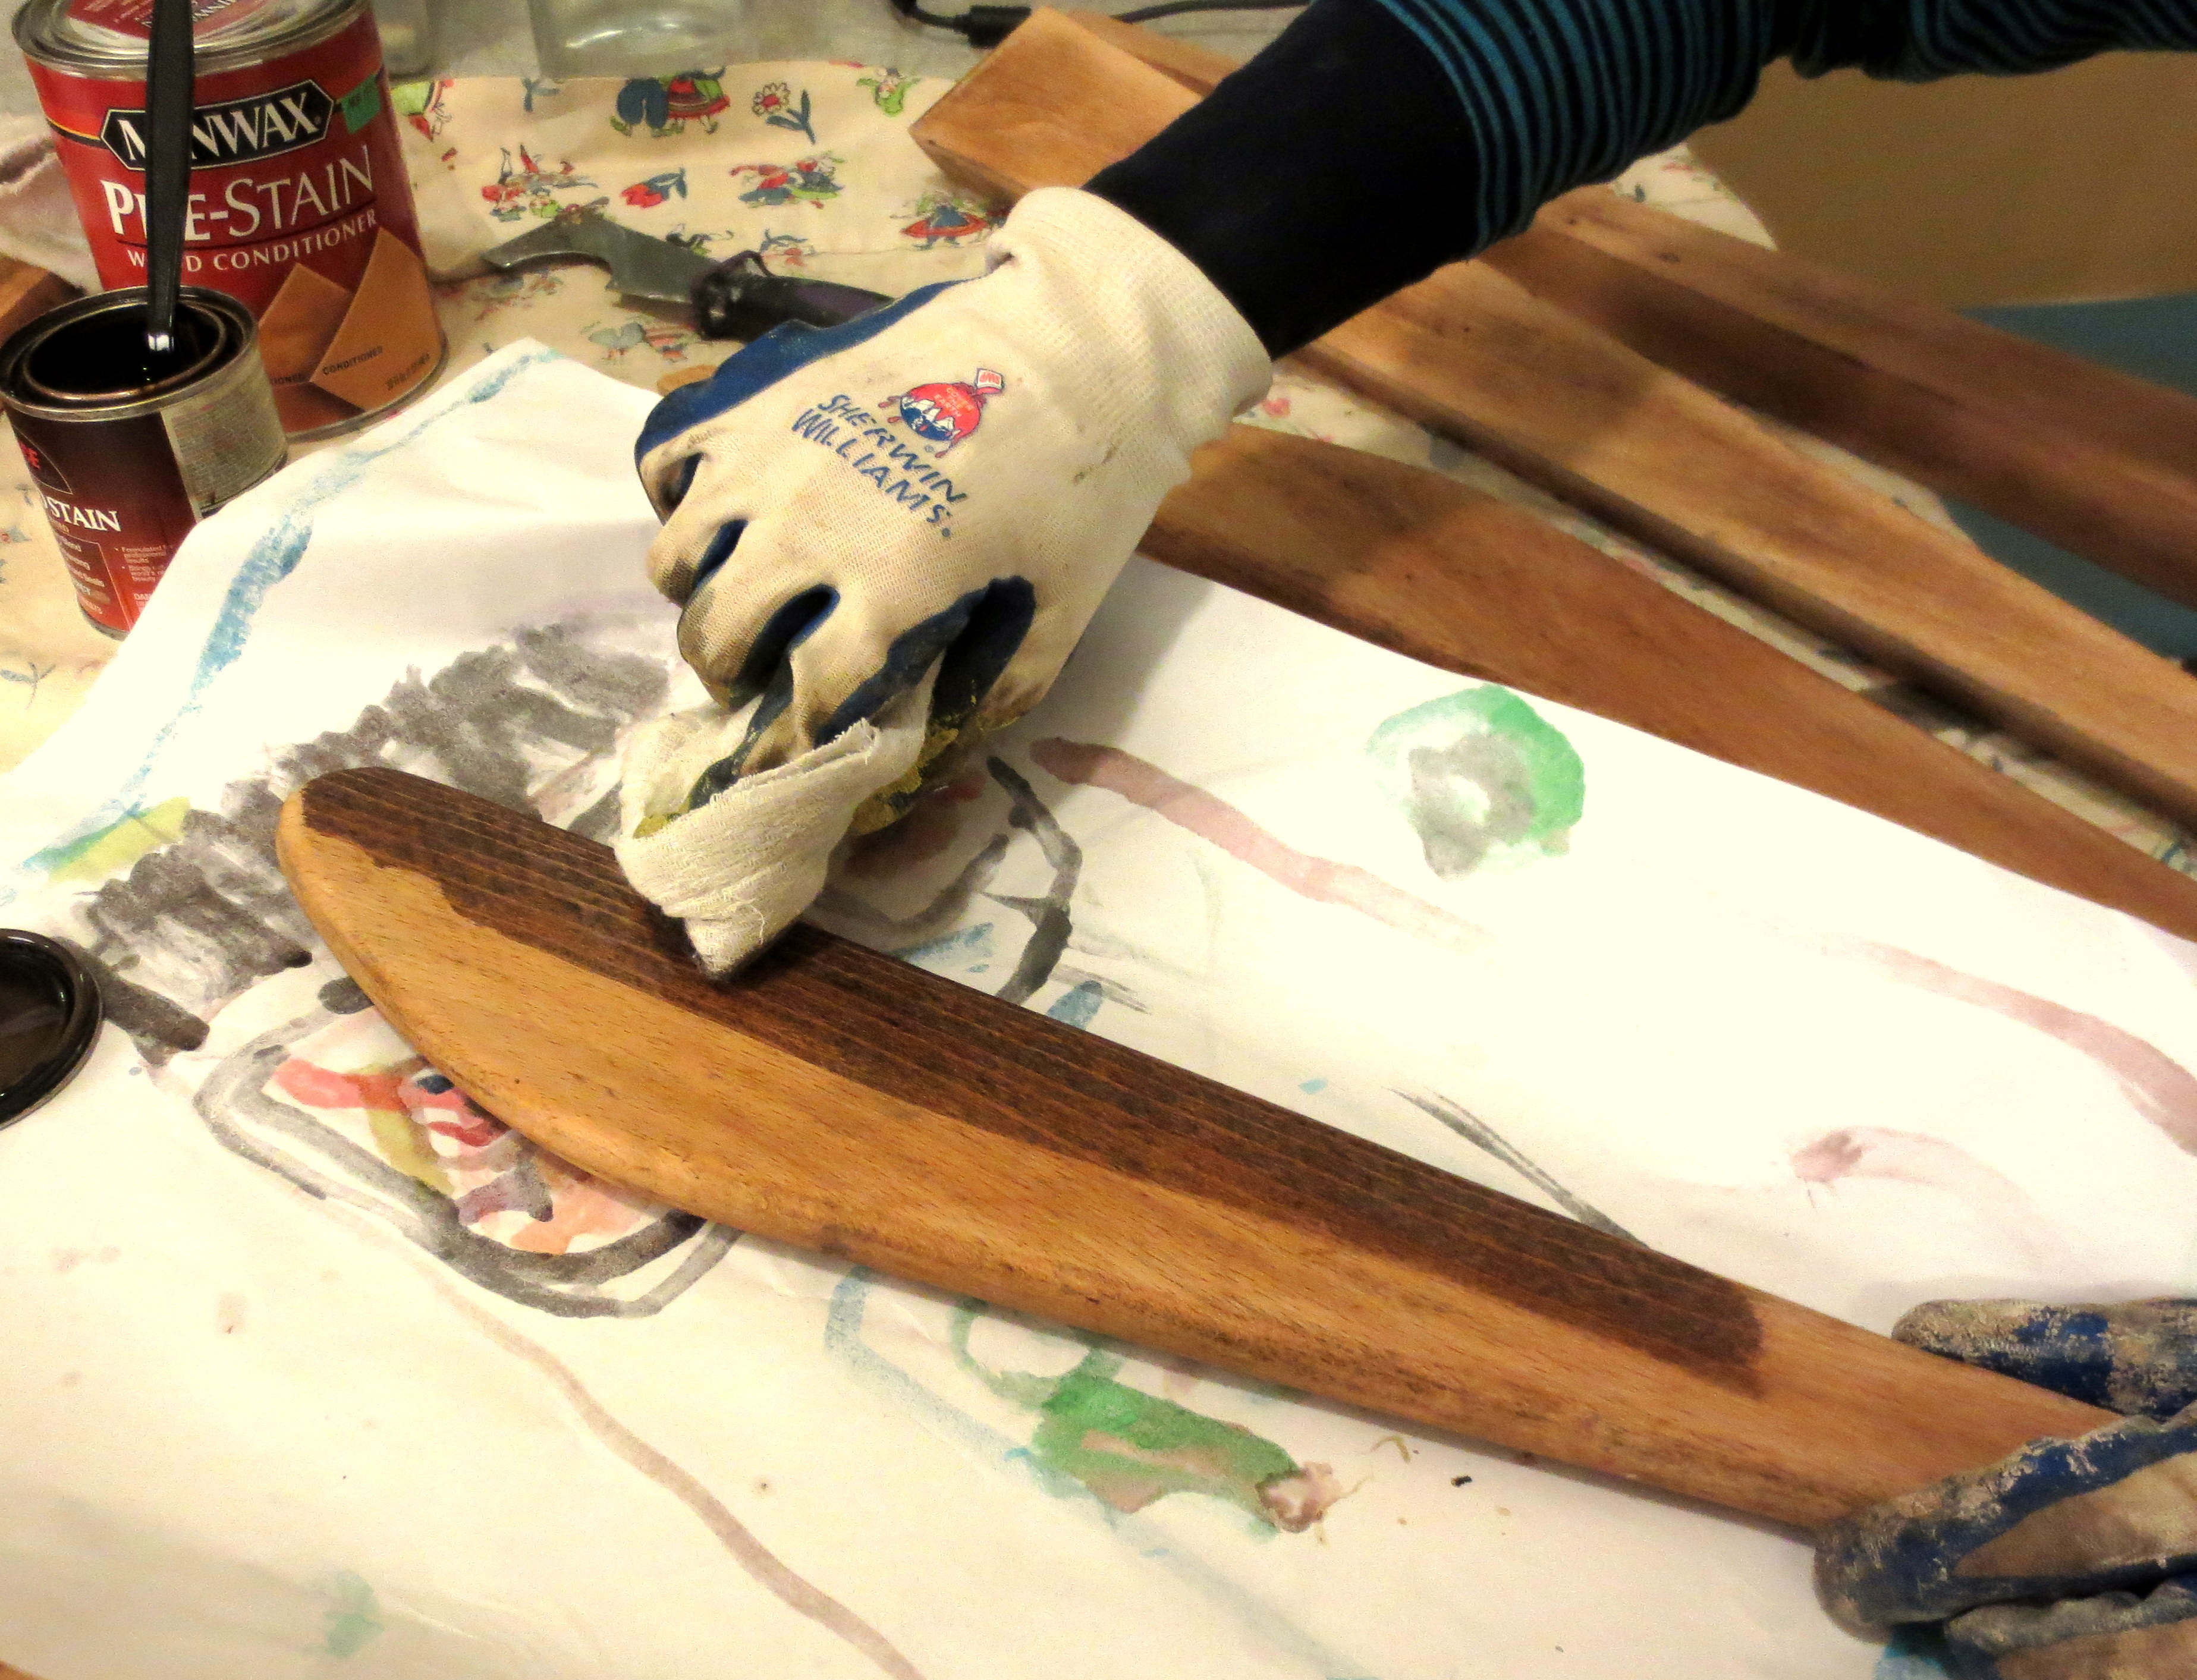
Now that the wood is clean and bare, I applied one coat of pre-stain wood conditioner, so that different parts of the wood absorb the stain at the same level. You don’t want your Mid-Century Modern chair looking like a bad spray tan from 1998.
 Then apply a sloppy coat of stain (I chose “walnut”), let it sit for 5-10 minutes, then wipe off the excess. I stopped after one coat, but you can go darker with more coats. Just like spray tan, I guess.
I let the stain cure for 24 hours, then applied three coats of polycrylic in satin finish, with a light sanding between coats. We’ll put it all back together after the upholstery is done.
 STEP THREE – RE-UPHOLSTER! First, I covered the entire chair in polyester batting to smooth out the lumps and keep the stuffing intact, and (let’s be honest), to create an additional barrier between me and the cooties (real or perceived).
 As you can see, I covered about 85% of the chair before I ran out. It was nighttime and I was too lazy to get more:
 The next day, I used a 40% coupon to buy a couple yards of the most forgiving home décor fabric I could find in solid, serious gray. Since this is my first “real” upholstery project, I shied away from patterns or prints, which I would have to keep straight and aligned between sections of the chair (and inevitably screw up).
Lay the original fabric carefully over the new fabric and trace the outline, following every nook, cranny, slit and hole. They are all important. Cut the new fabric and iron flat.
 Based on my notes, I knew to start with the bottom seat cover, which was also the easiest. Position the fabric carefully over the seat, making sure it is even on all sides. Push the back of the fabric through the “crotch” of the seat (my term) in order to staple it onto the bottom rail.
 Flip the chair over and begin stapling the fabric to the bottom rail, starting in the center front, then to the center of the sides, and moving gradually towards the corners. Don’t be afraid to pull some of your first staples out in order to re-position or pull the fabric as tight as you can.
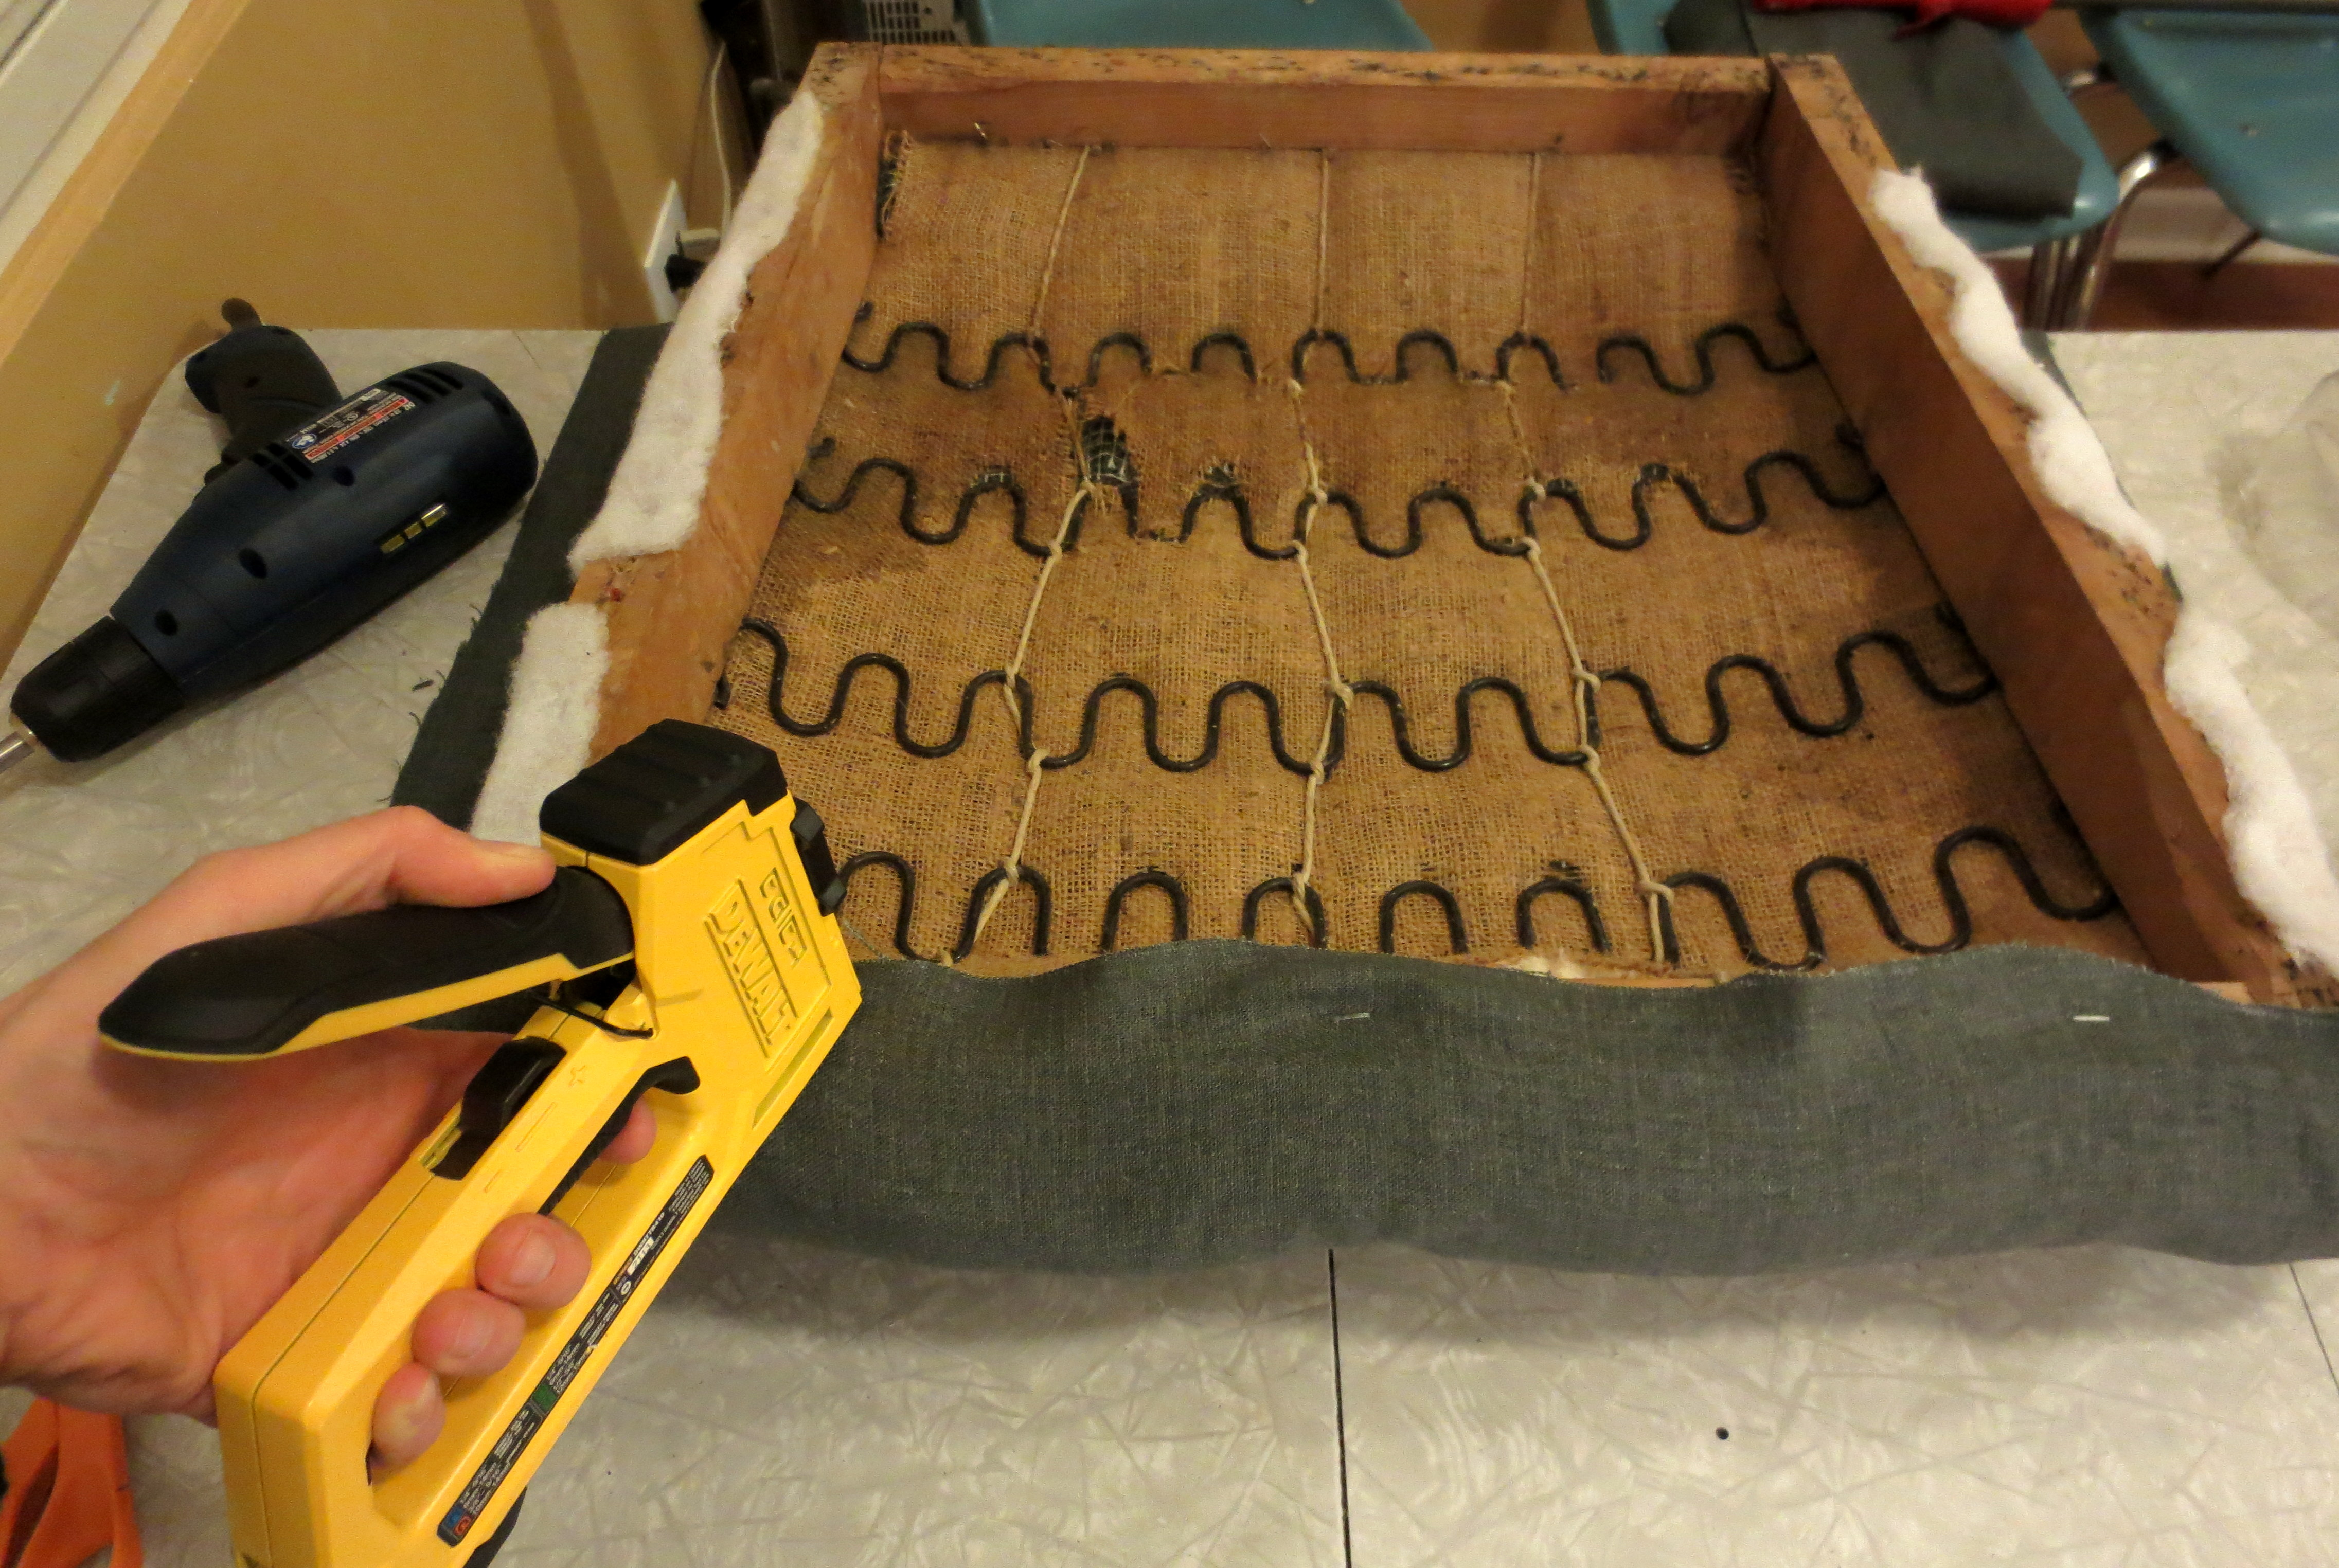 To achieve the smoothest finish, you should have no more than 1/8 inch between staples – basically back-to-back. Don’t you want the person who finds this in the alley 30 years from now to have to work as hard as you did to take it apart?
When you get to the corners, tuck the extra fabric in for a nice square fold and staple down.
 Now we repeat the same process for the front of the backrest. Looking back at my pictures, I knew that the sides should be stapled first. But before I did that, I centered the fabric over the top of the back rest and punched one staple to center it in place. Position the fabric carefully over dowels or dowel-holes for easy re-assembly. When in doubt, refer back to your original fabric, noting the slits, holes and areas crusted with wood glue.
 Staple up the sides, ending at the corners. Fold, tuck and staple the corners down.
 Now, for your final test: The back of the backrest. This is tricky, so pay attention..
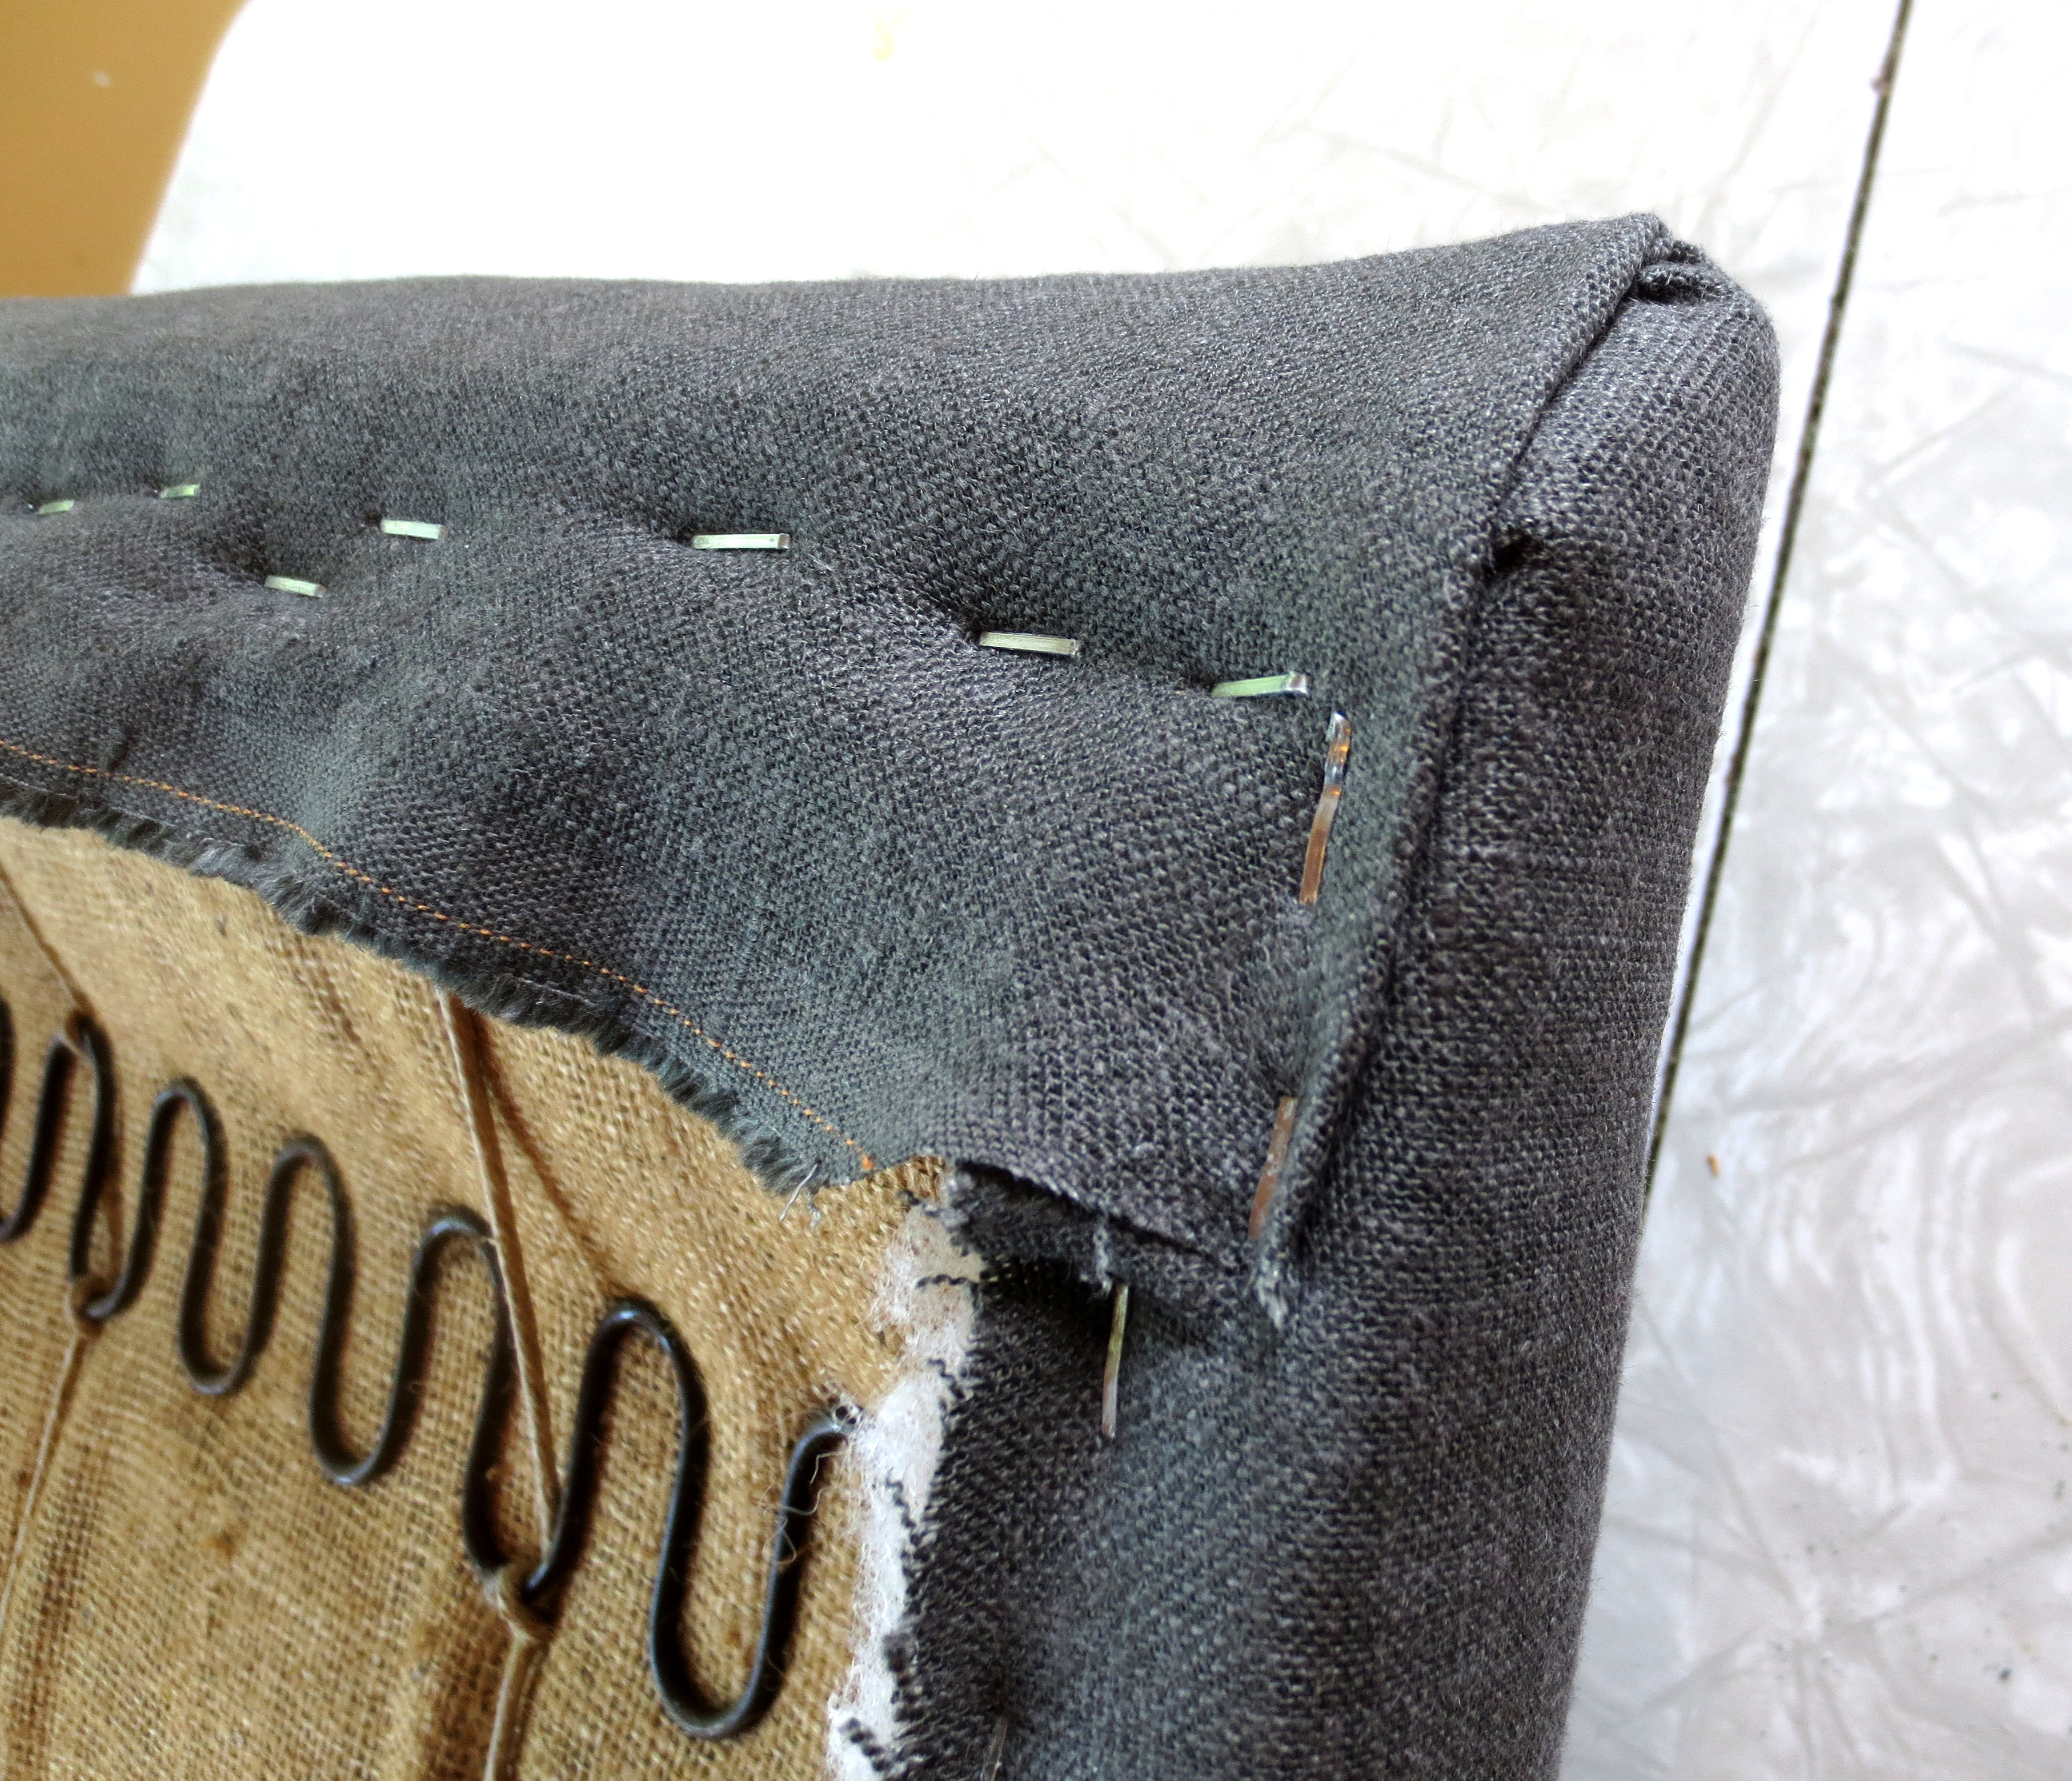
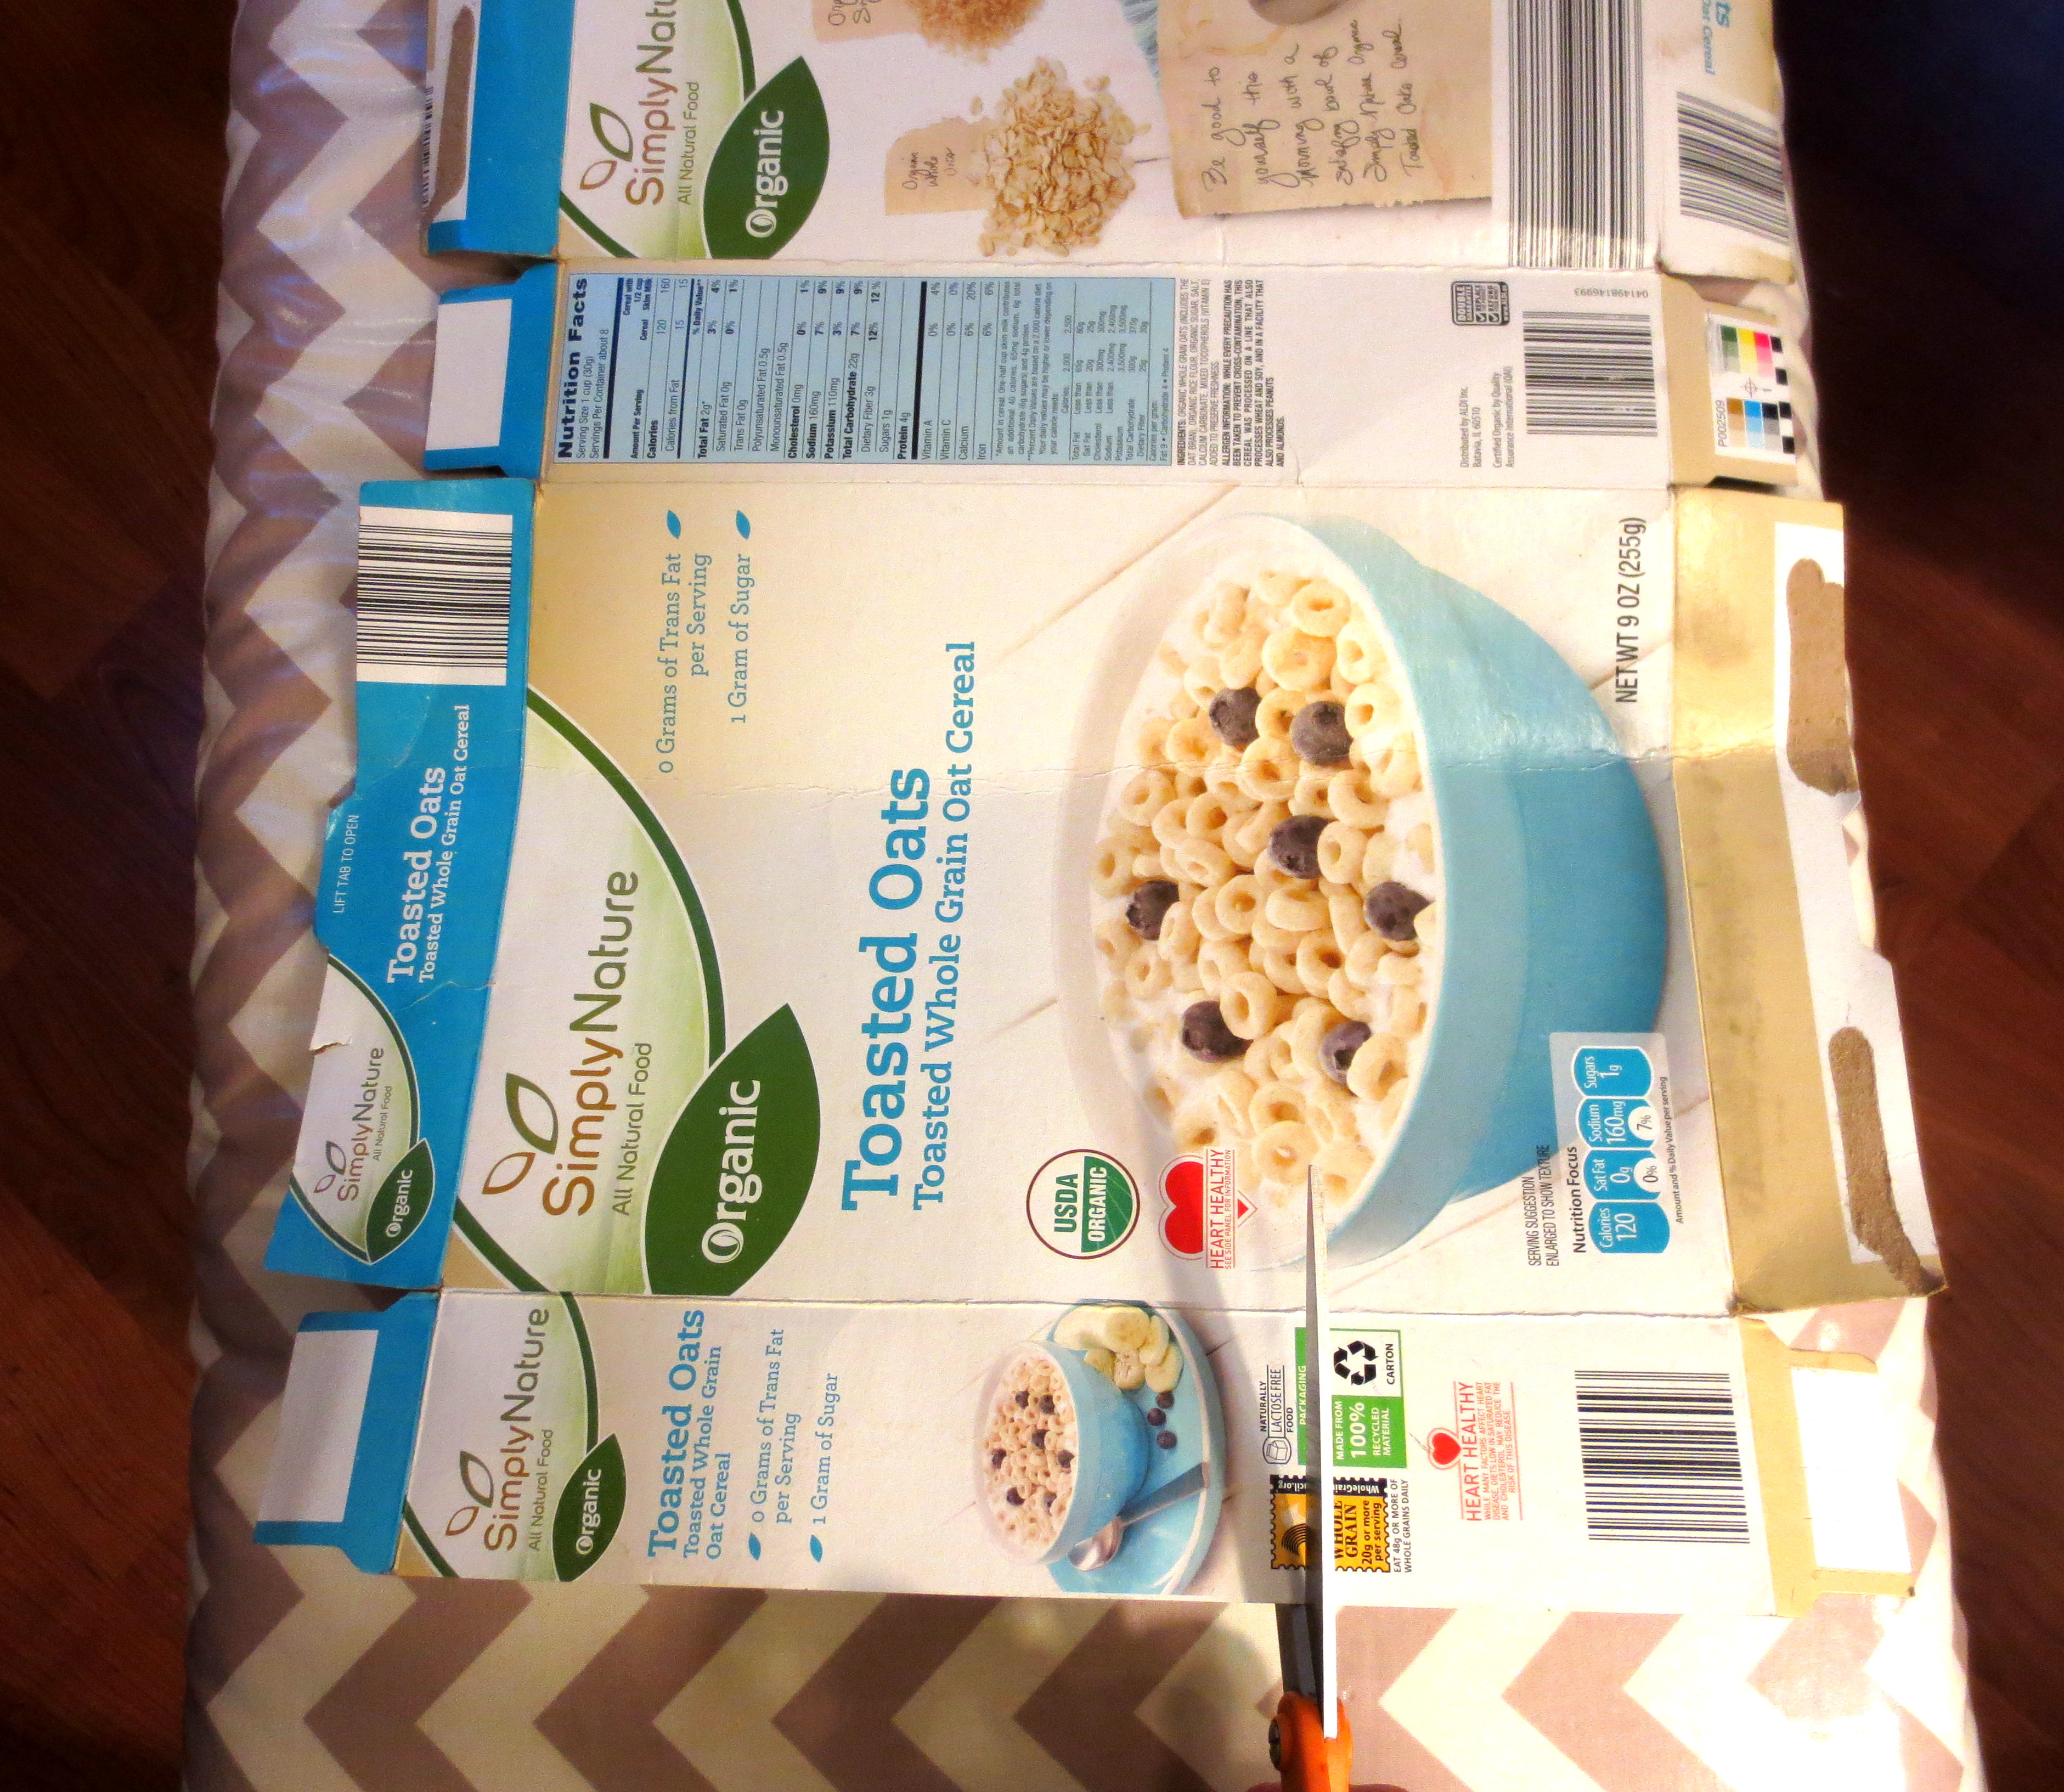
First, we need to staple the fabric to the top rail using a cardboard tack strip, which creates a straight edge for your fabric to drape over. You can buy tack strip if you want, but I just cut a ½-inch strip from a cereal box. And yes, they do sell organic Cherrios at Aldi:
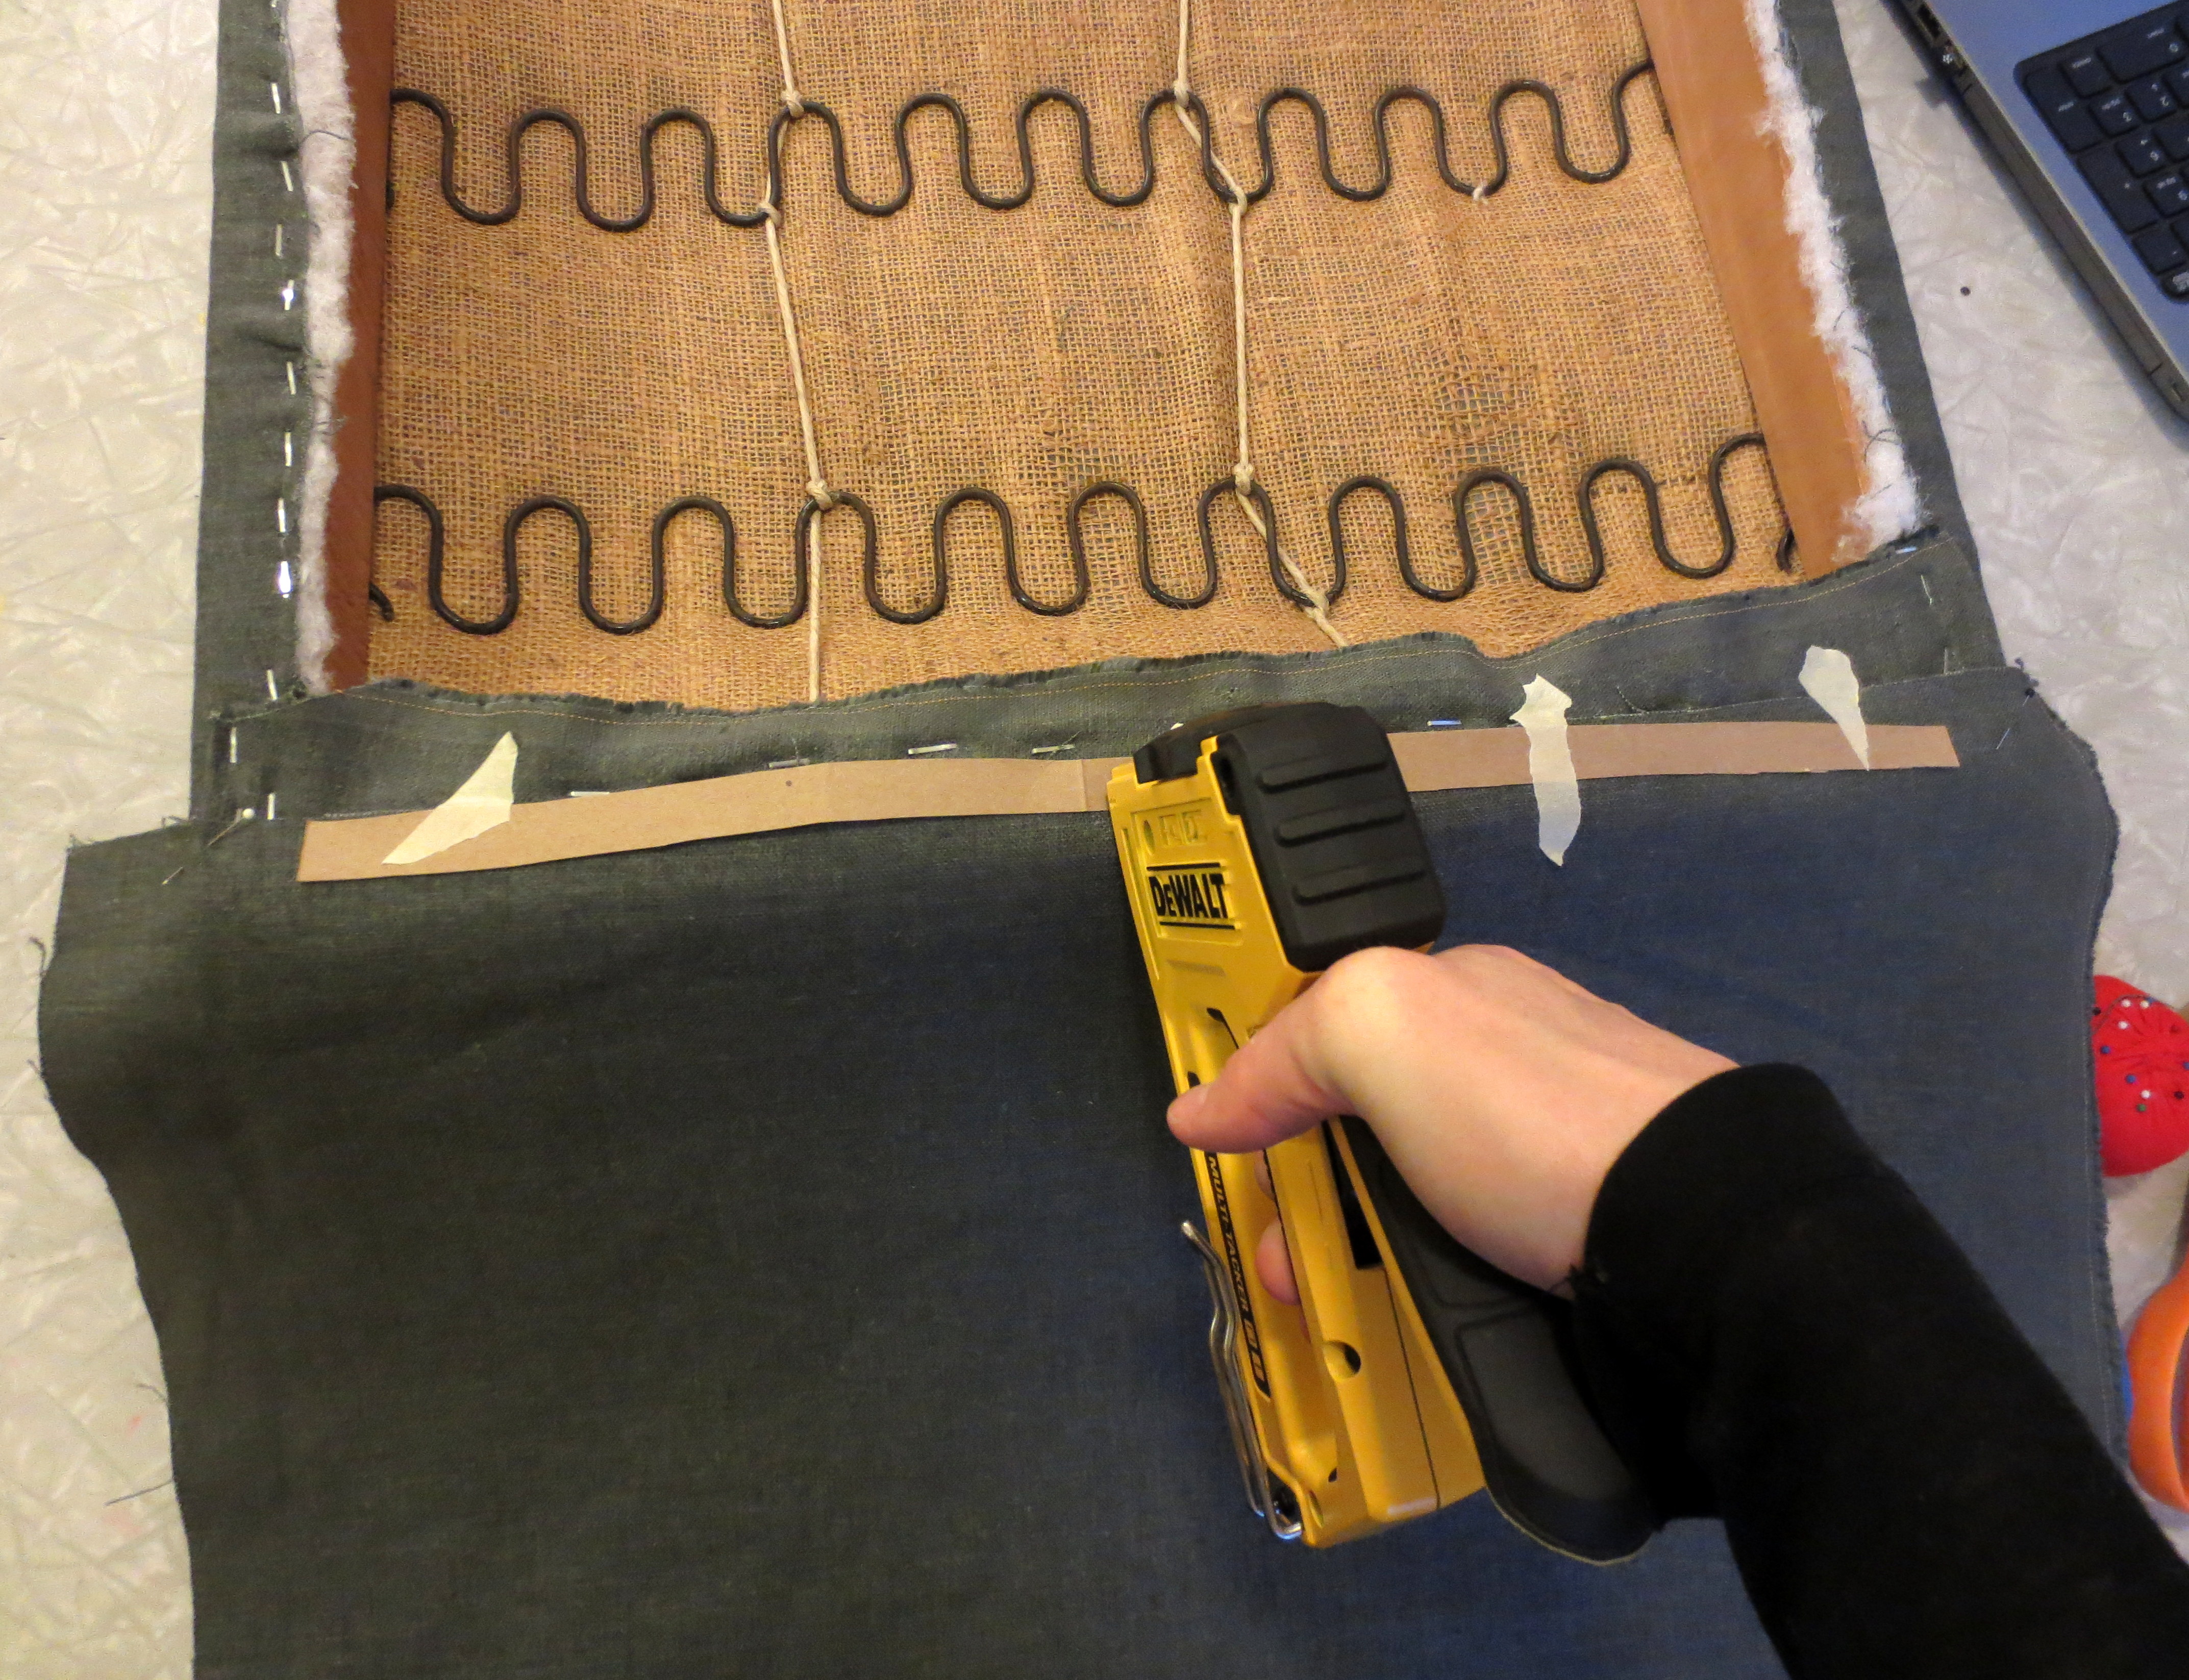
 Lay the fabric wrong-side up over the top of the chair, so that the bottom edge is parallel with the top rail of the chair (where you just stapled the top of your front back rest). Lightly tape or pin the tack strip over the bottom edge of your fabric (which is inside-out), and staple down in a very straight line.
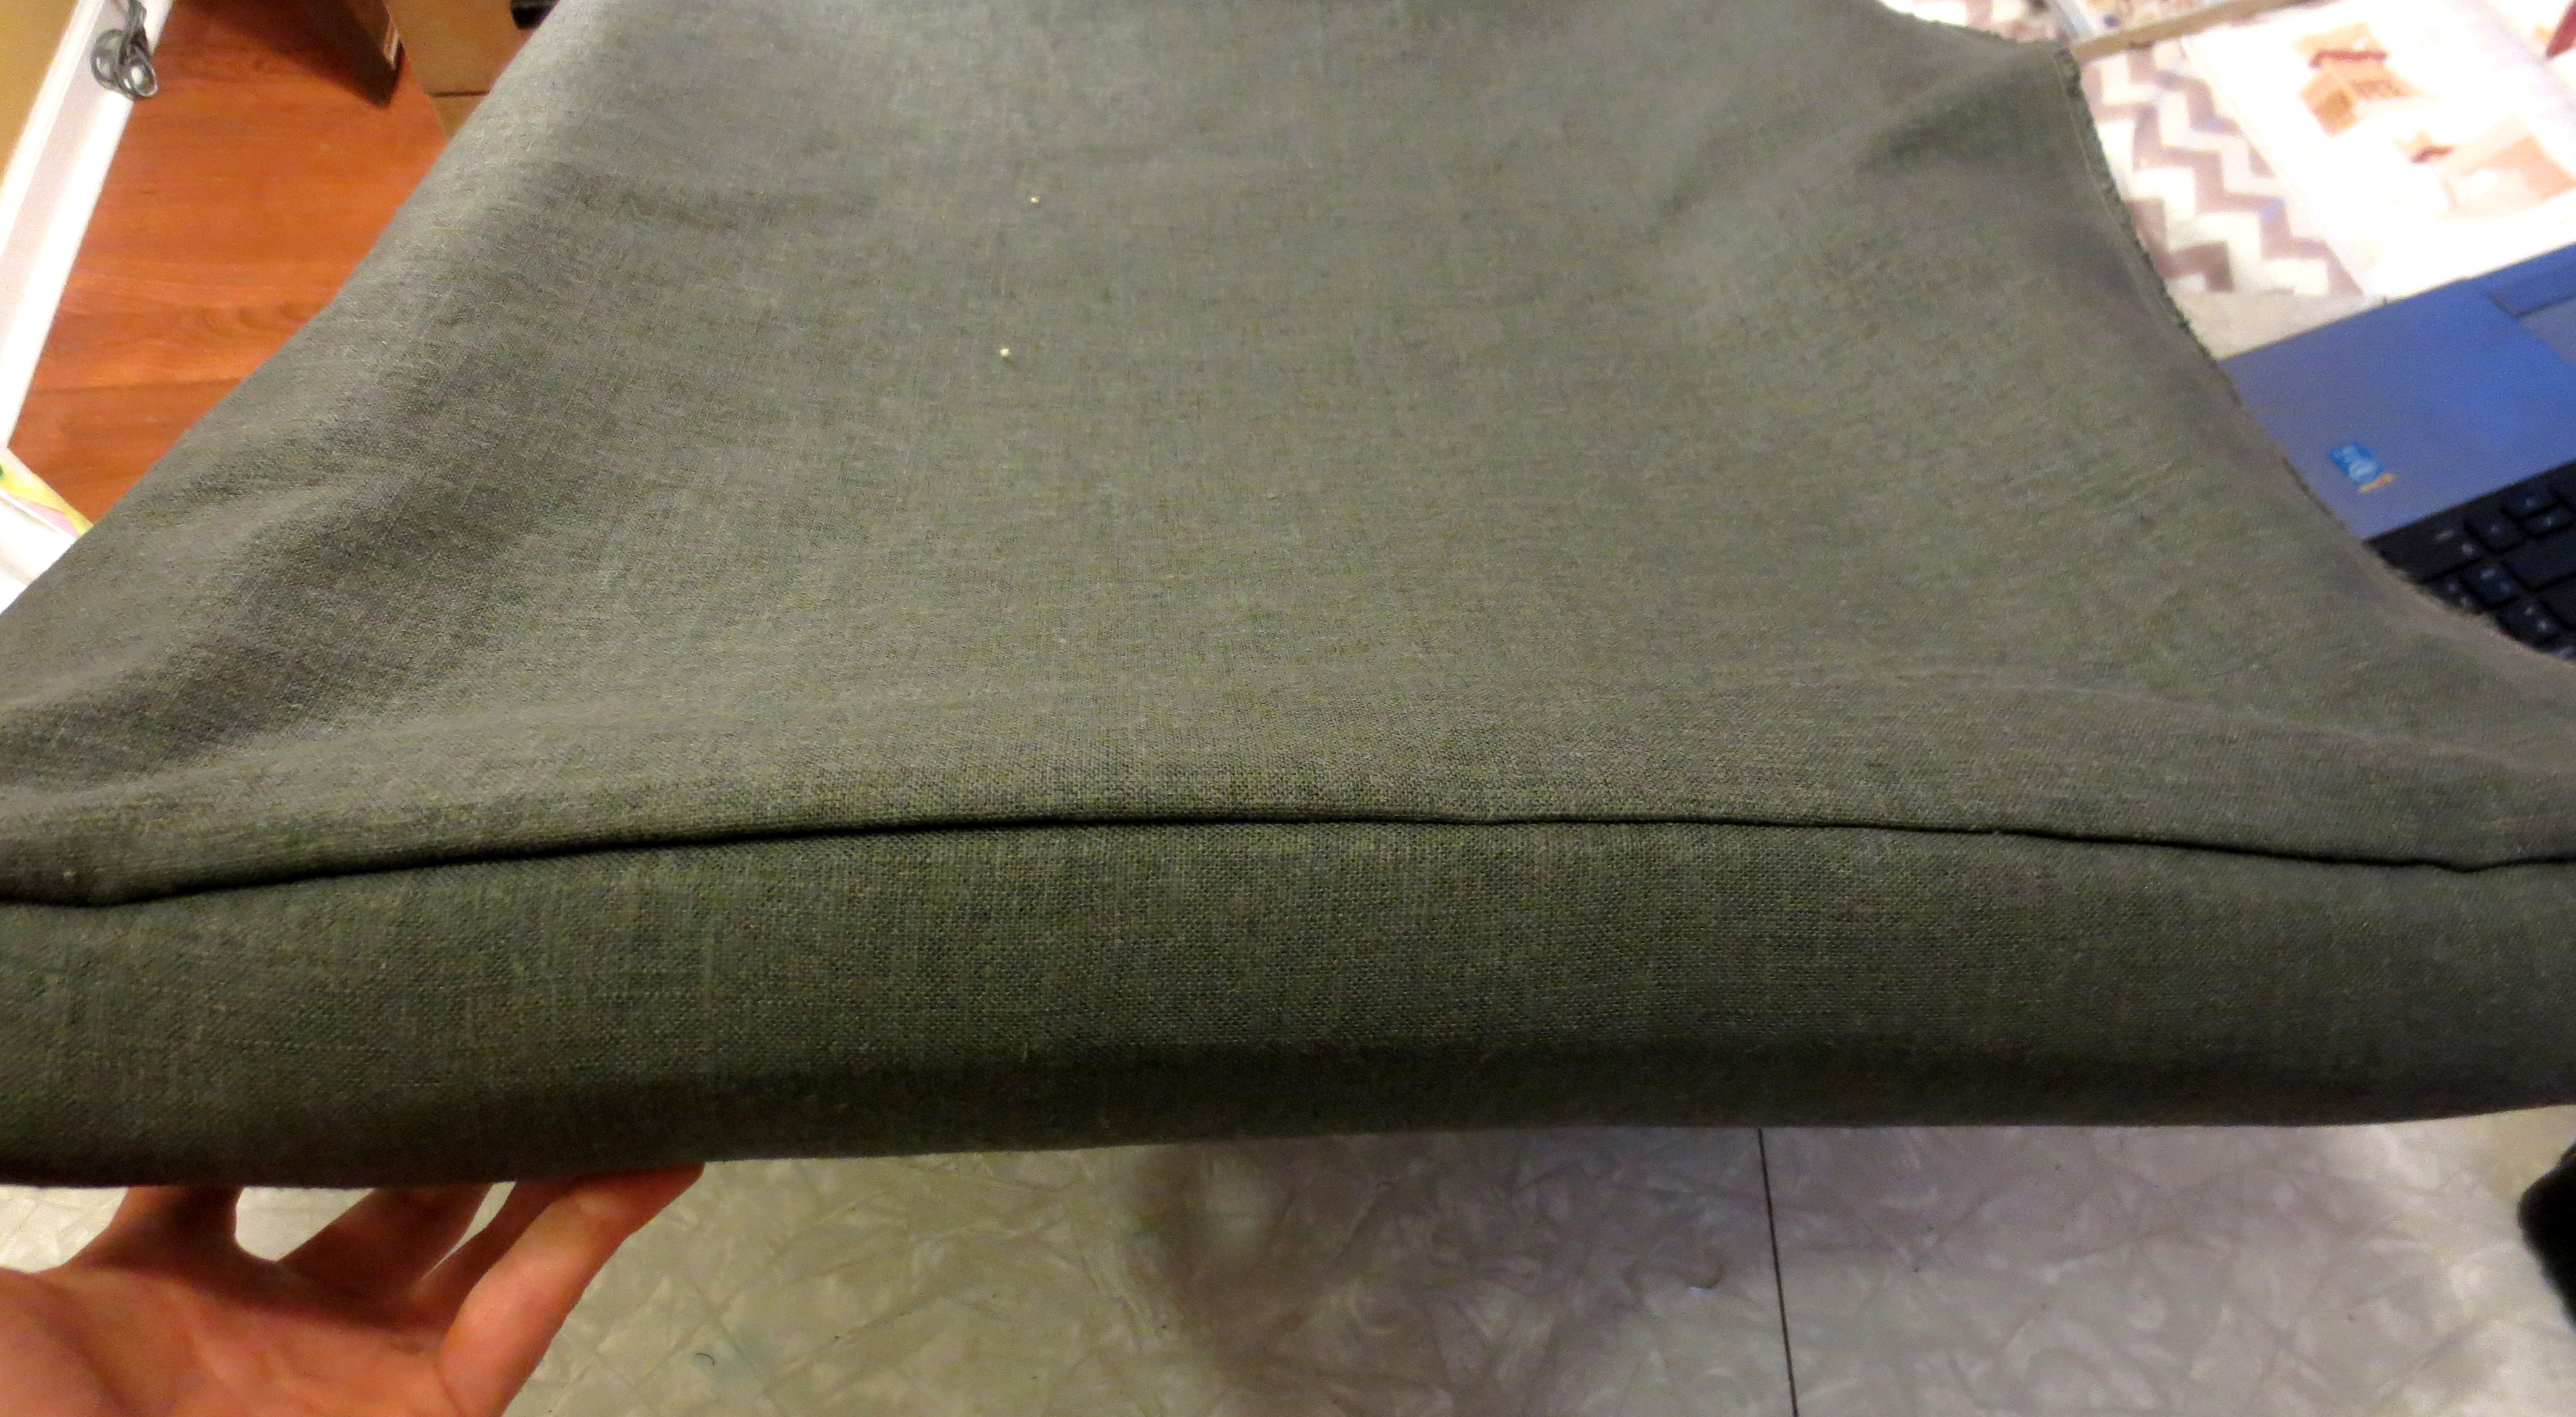
 Remove the tape or pins, and flip the fabric over to be right-side-up, draped over the back of your chair:
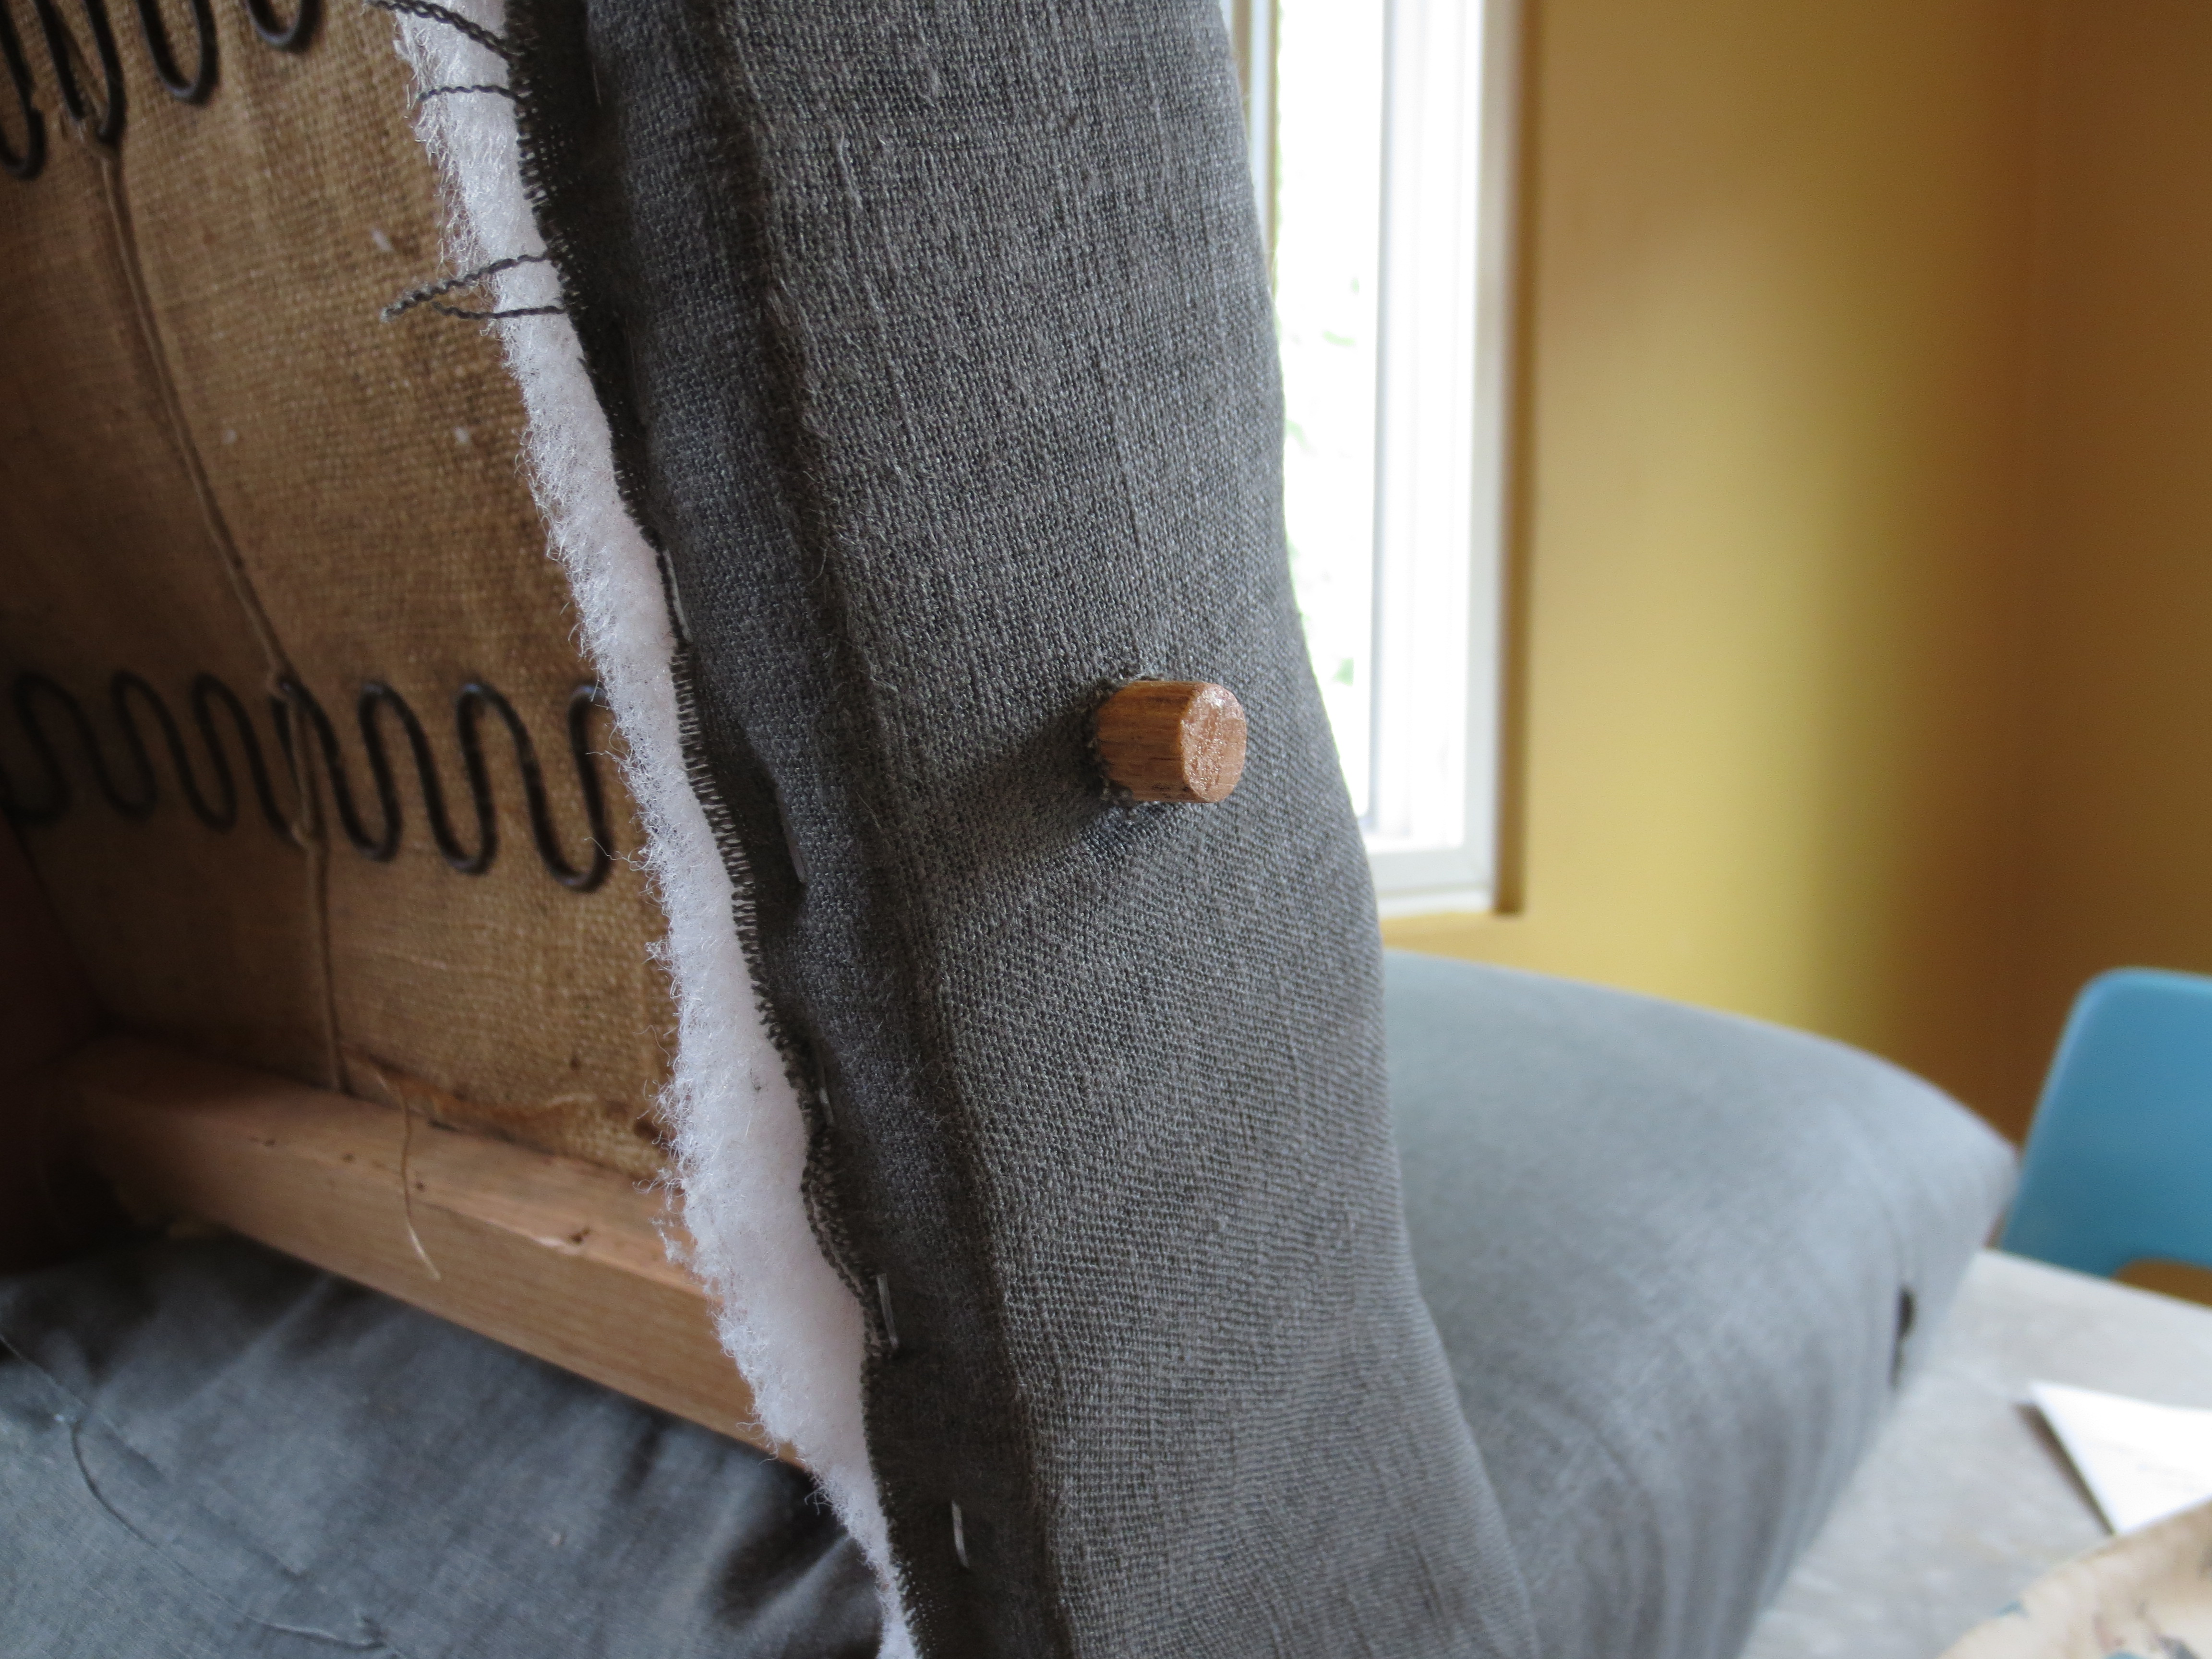
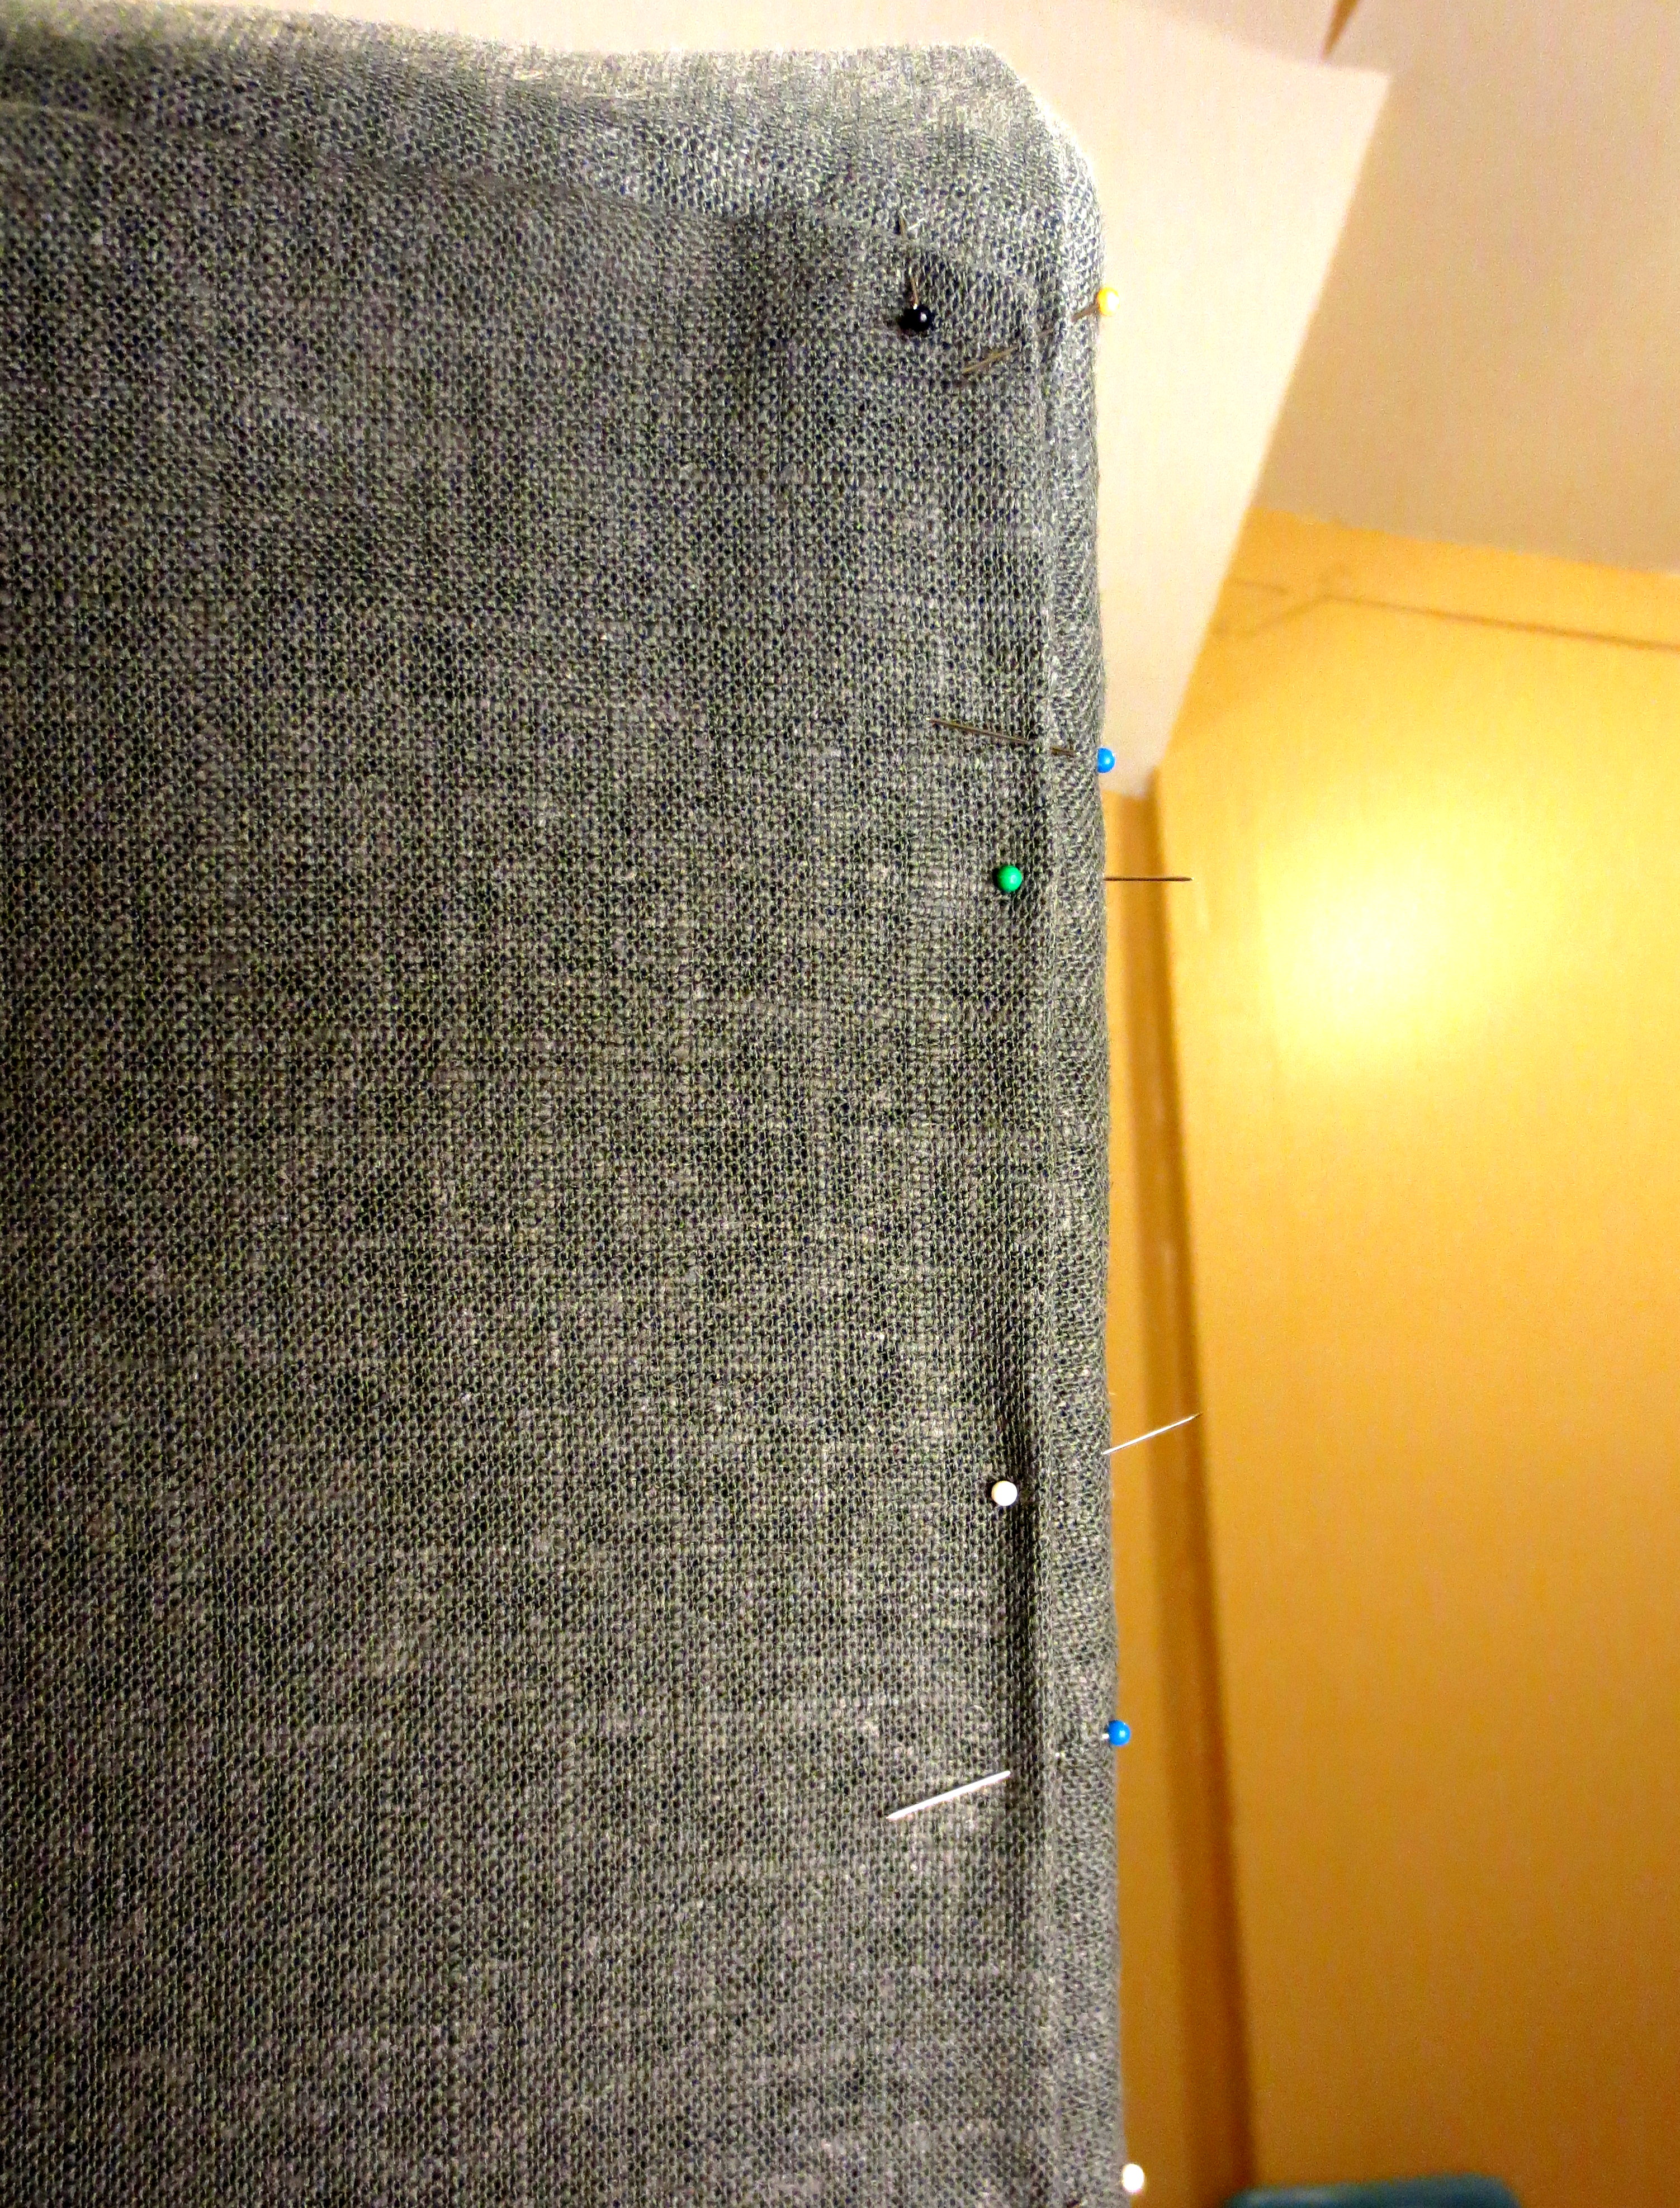
 Turn the chair back to an upright position. Fold the sides of the fabric in, and pin it to the front cover fabric that’s already stapled to the side rails:
 This is the only act of sewing in this whole project, but it requires the use of a special curved upholstery needle and a special stitch, sometimes called a blind stitch, slip stitch or ladder stitch. I could try to explain it to you, but this old British lady does it best:

Terrible shot of my amazing slip stitch. Note the curved needle.
Stitch down to the bottom of the chair, and staple the remaining fabric to the bottom rail. All the fabric should fit very tightly over the chair:
 STEP FOUR – REASSEMBLE: It’s 9:30 p.m., you’ve finished the upholstery. All that’s left to do is pop the arms and legs back on. Easy, right? You call your husband away from his own Important Creative Work and ask him for JUST A FEW MINUTES of help.
It’s so romantic: he holds the beautifully restored chair arms while you squirt wood glue into their holes. He’s even wearing that robe you bought him 9 years ago that says “Snuggle Champ” on the back:
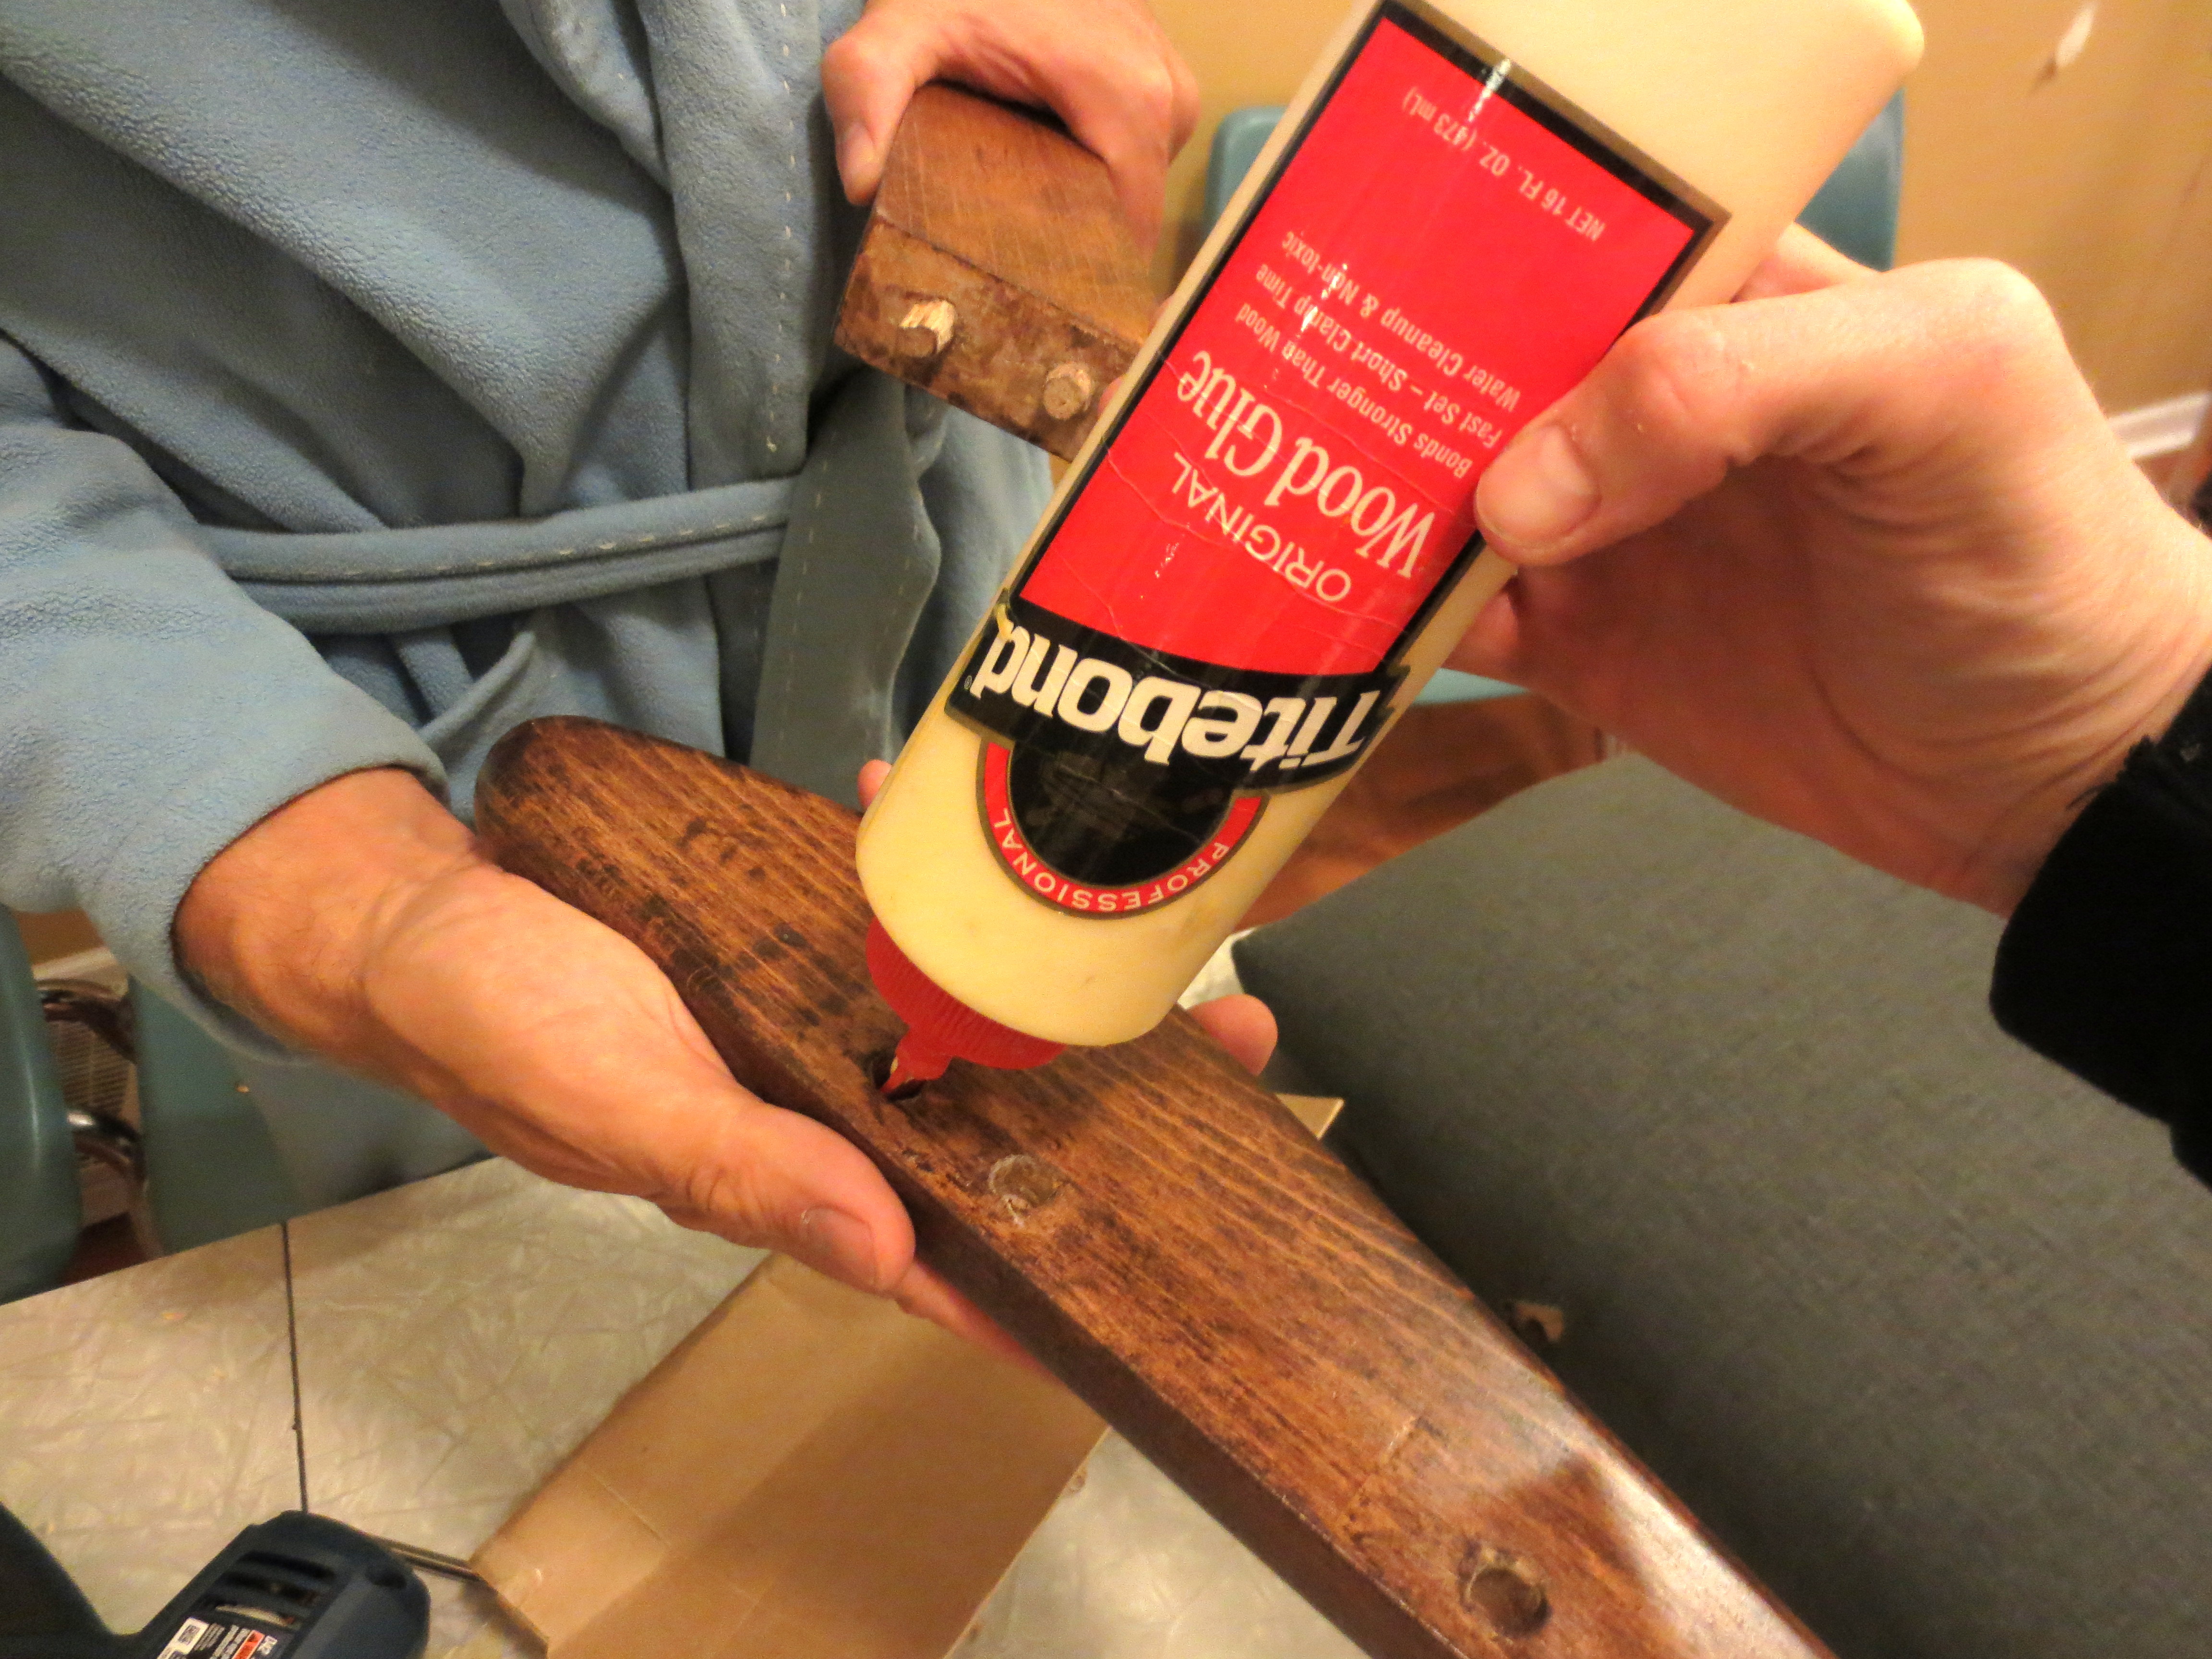
Why yes, we DO have a “Tite Bond!”
But again, things get complicated. Dowels don’t quite fit into their corresponding holes and must be chiseled out, the puzzle pieces don’t snap together so easily and must be banged on with a rubber mallet. At midnight.
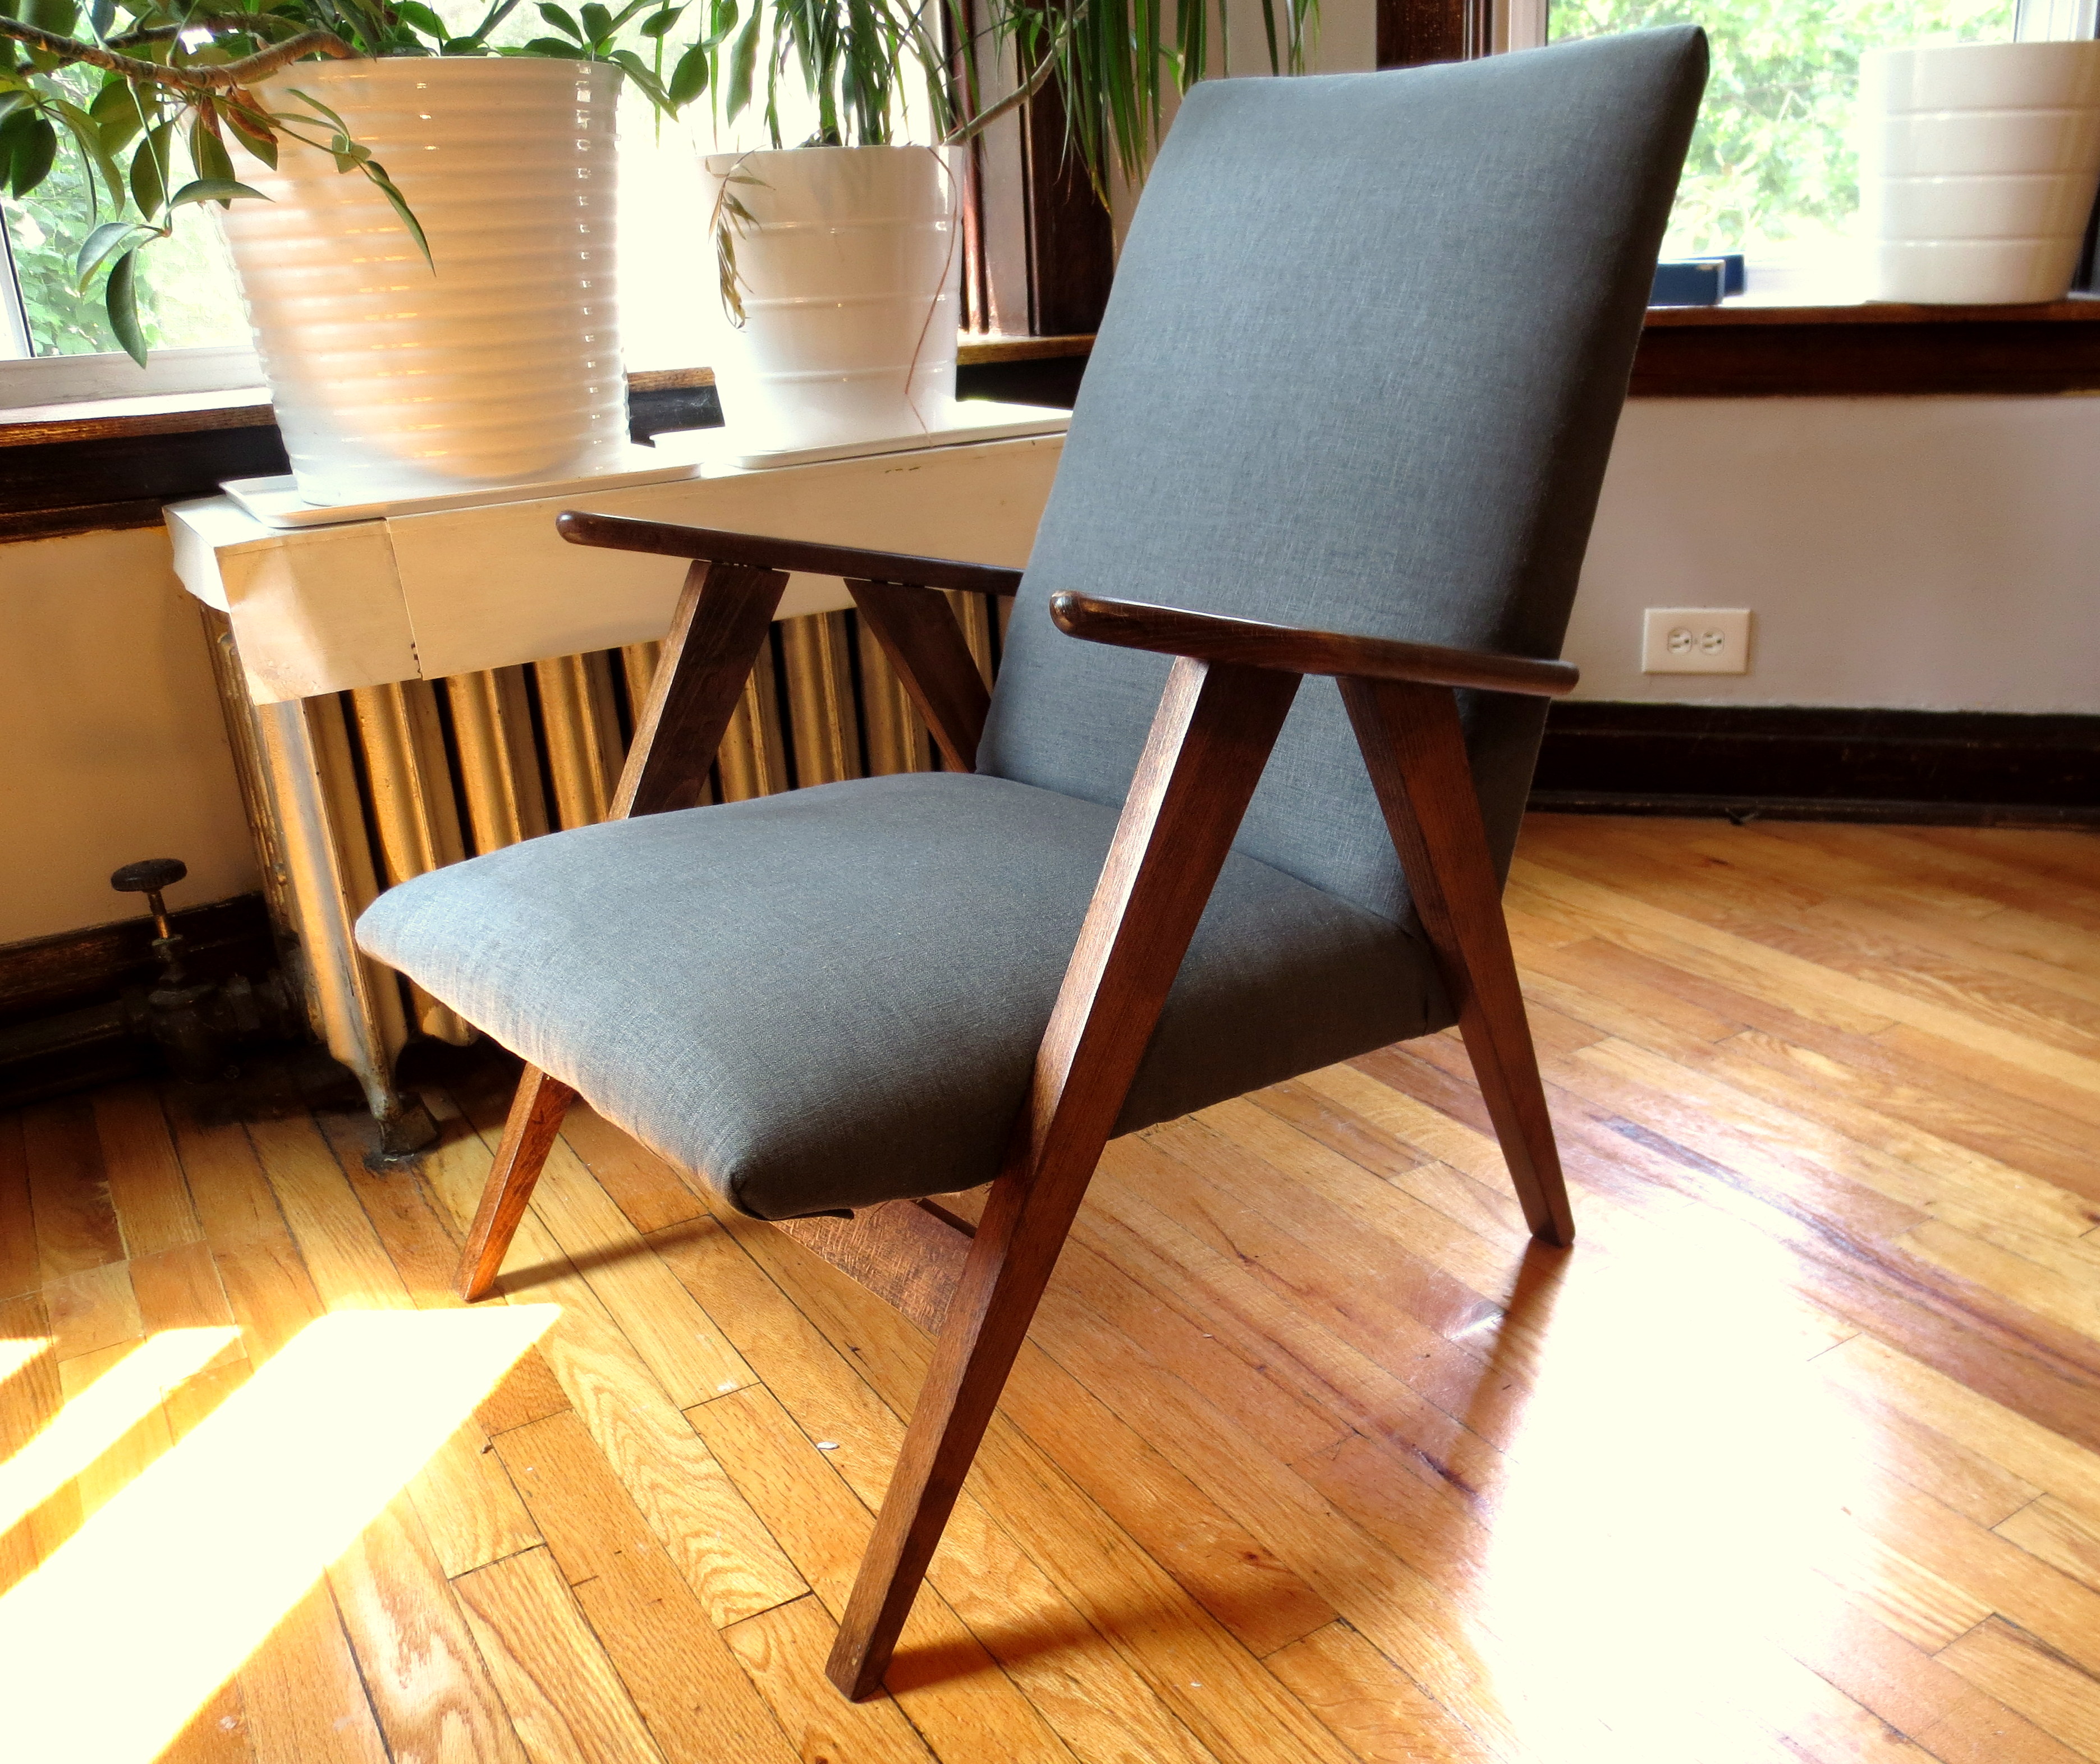
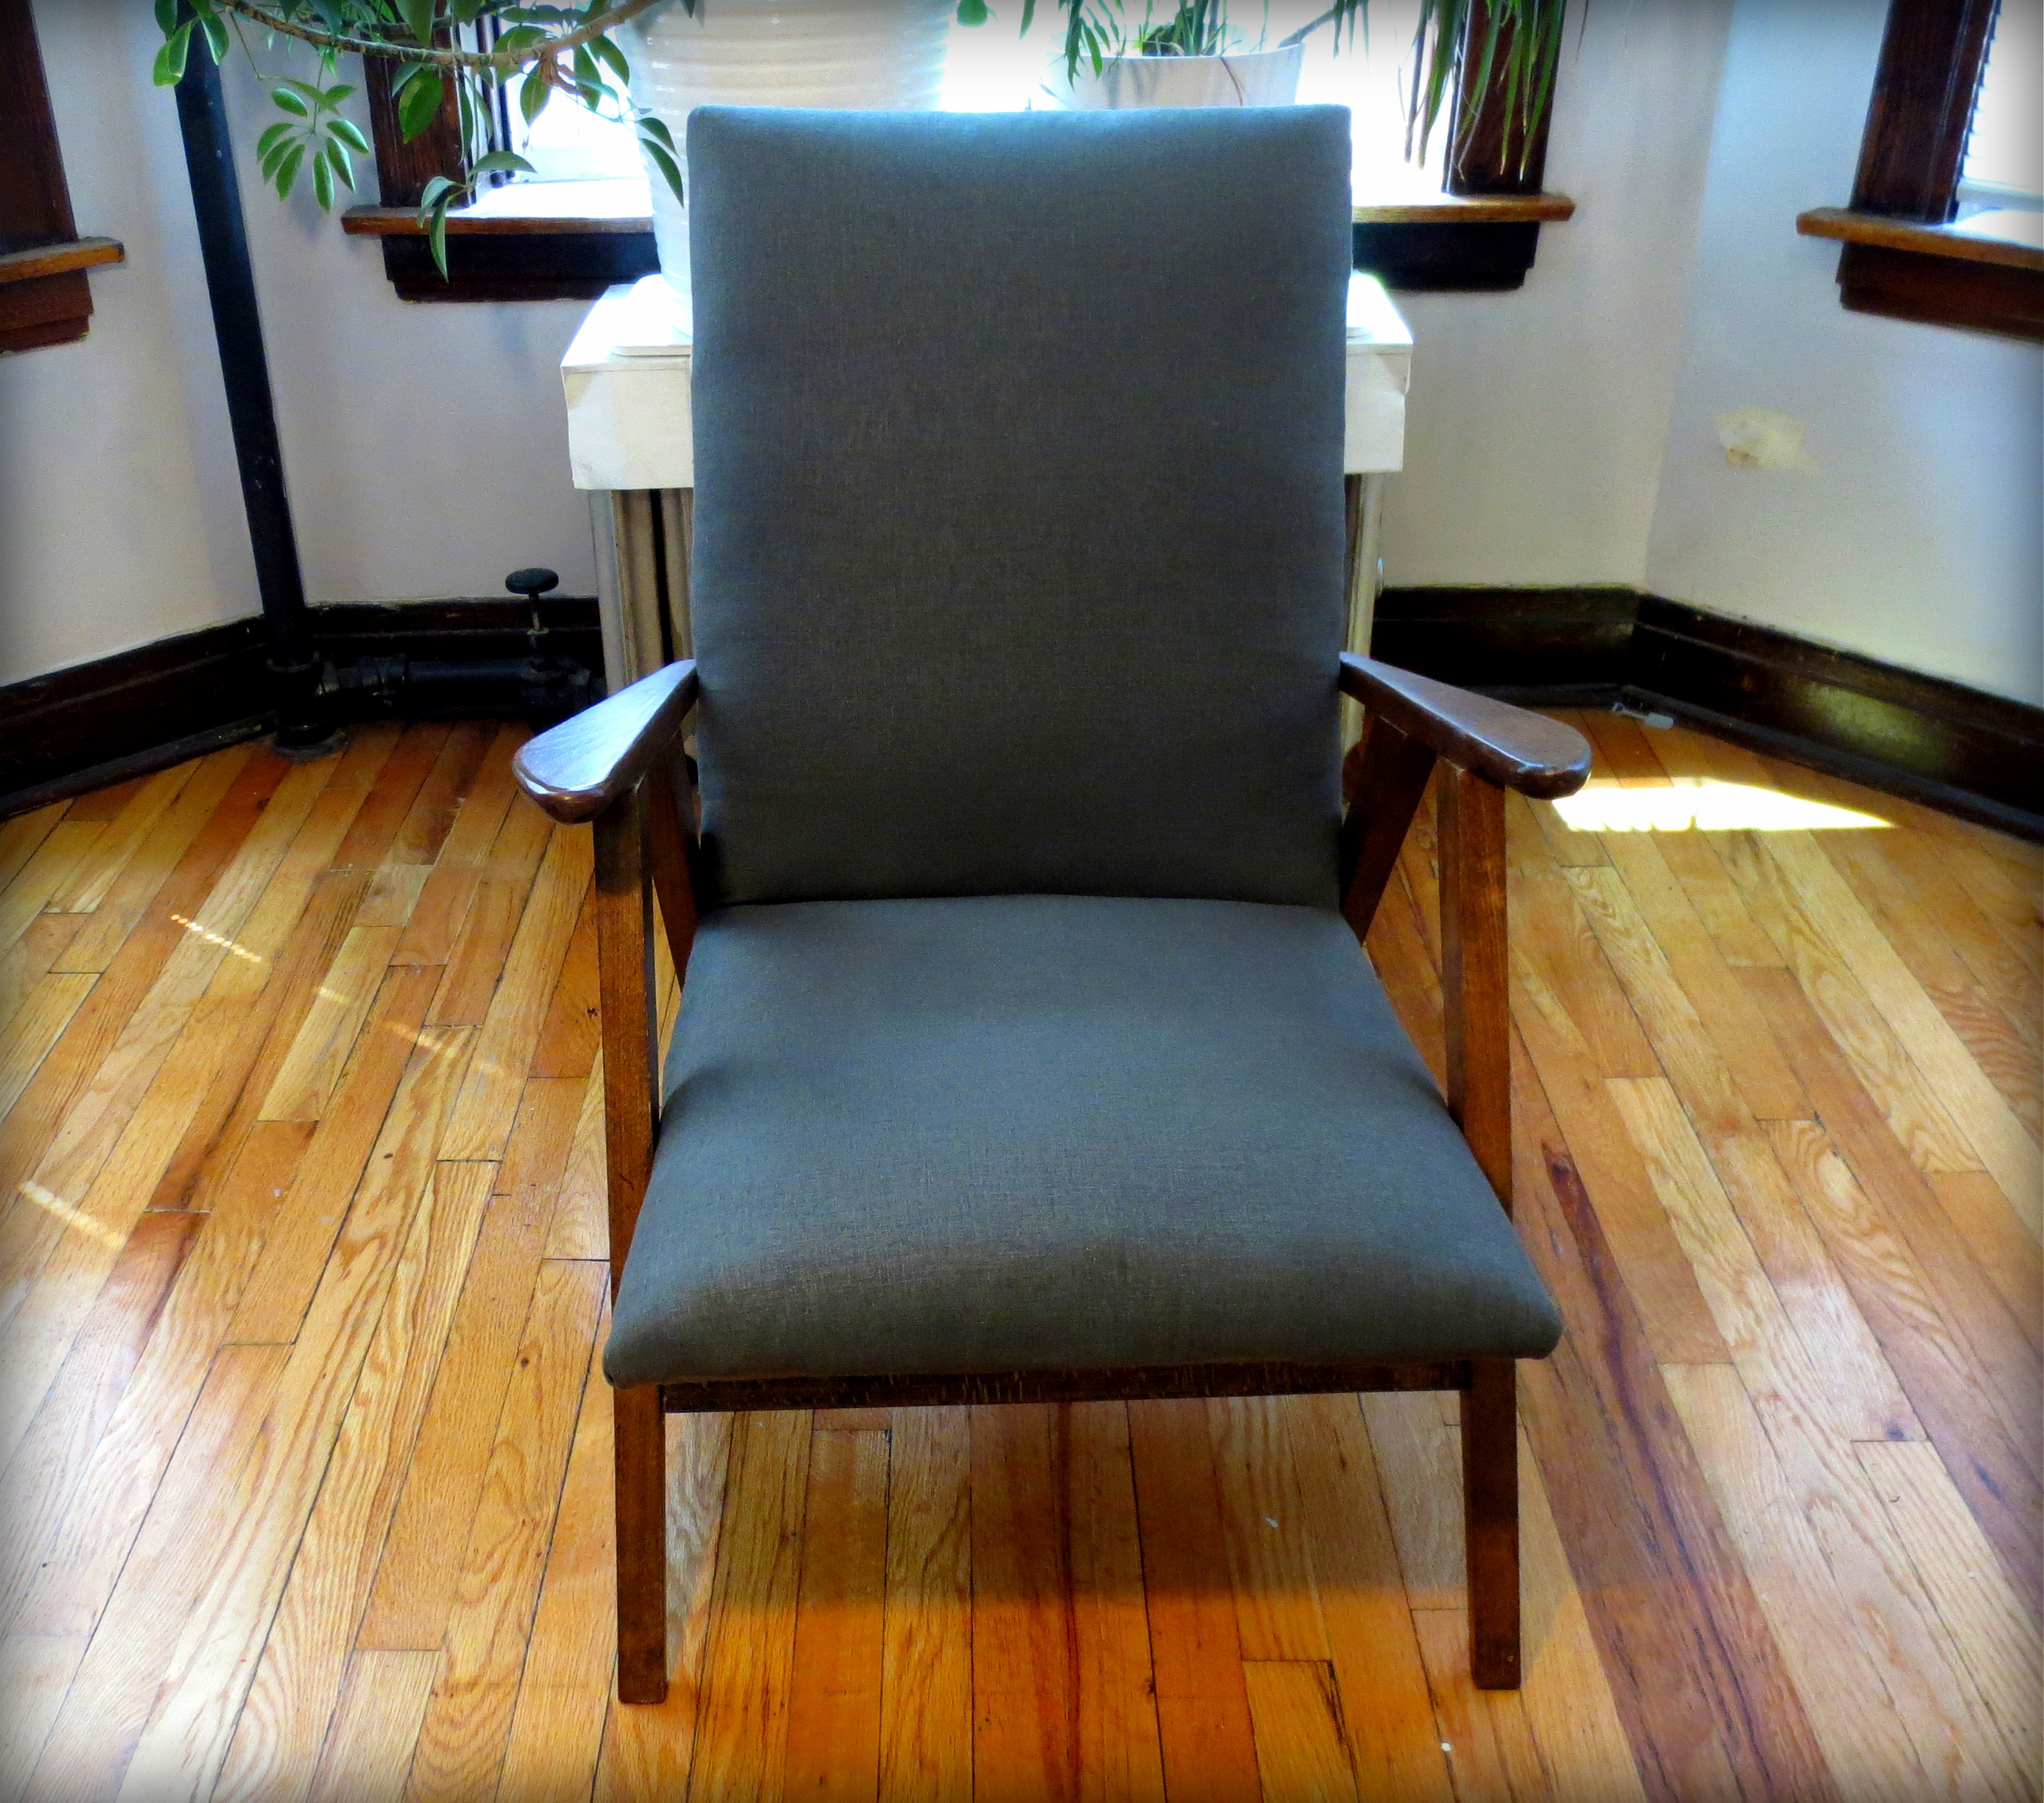
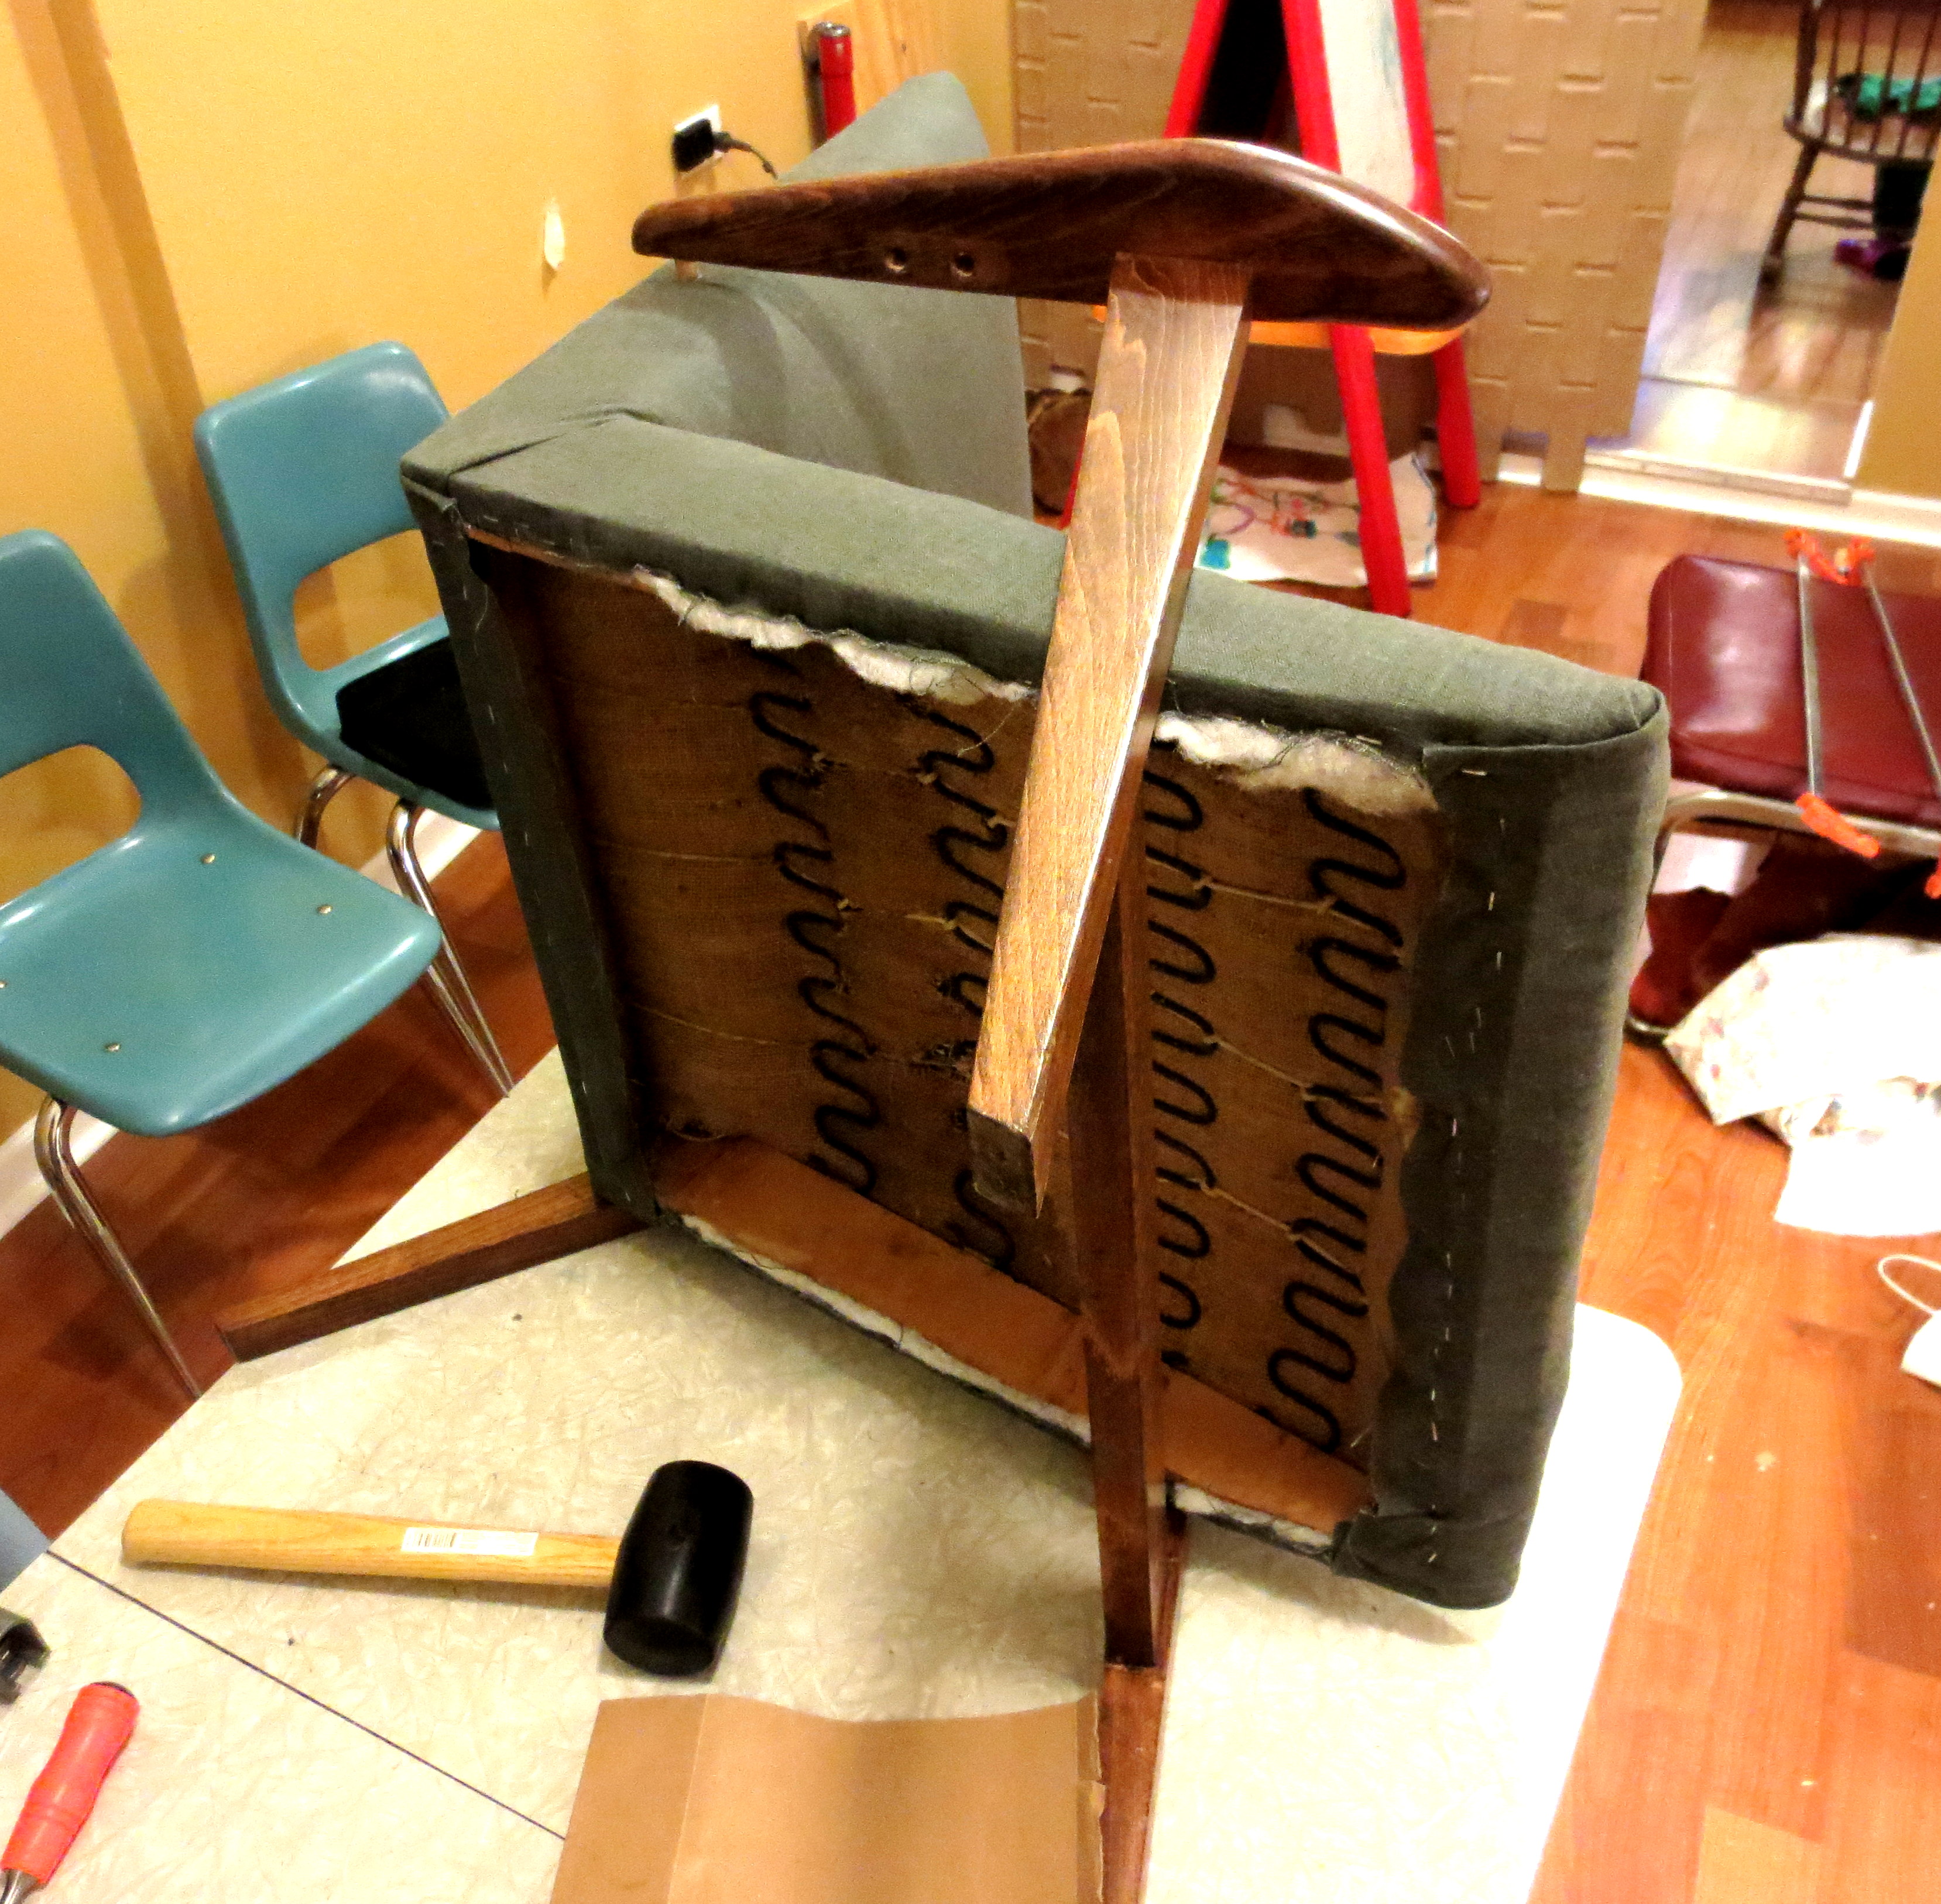 All this glue will set in the next 20 minutes and you can’t figure out how to keep it all together! Clamps, saran wrap, cookbooks. But in the end – together – you figure it out. You always do. Three hours later, you go to bed and hope the wood glue sorts it all out. The next morning, your new throne awaits!

 * No, this isn’t an endorsement of necrophilia. “Carcass” is what we expert re-upholsterers call the frame of the chair. It is also the name of an extreme metal band from Liverpool.

Neat! That looked easy. But it probably wasn’t?
LikeLike
It was probably the least easy project I’ve done to date! I had to study for this one. But I learned a lot of new skills and gained a lot of confidence. Ready to take on the next level of upholstery!
LikeLike
That is a very nice job for a first attempt at upholstery. I think my parents had a chair like that when I was little, in the early 60s. They were a bit moderne for their time and it was all Danish furniture and bare floorboards. Your new rescue chair would have looked right at home!
LikeLike
Showing your site today to a coworker – we’re both impressed with the easy to follow steps and all the great photos. That chair is an awesome find and love what you did with it… especially that trick with the steam!
LikeLike
Awesome looking chair! I’ve been trying to find the time to strip, sand and restain my vintage sewing machine cabinet which has a big gash on top from the last time I moved 😦 Between this post and a few youtube videos I have an idea of what I’m going to have to do now. Thanks!
LikeLike
I know how it feels to be overwhelmed or intimidated with a project. The only way to go is just start, and deal with whatever problems pop up. And try not to freak out, which I did multiple times with this here chair.
LikeLike
I had the time of my life reading about your projects when I found your site last night. You are soooo funny, thank you for the laugh, even my hubby and son enjoyed your stories. I had to read a lot of it out loud as they wanted to know what was so funny!! I’m looking forward to what you get up to next. X
LikeLike
Check out my chair. It’s on fire! FIRE, FIRE, FIRE!!! ‘THE WORKER IN ME’ By Tracey Maguire is heating up. She’ll be on the hot seat with some stickybeaks.
LikeLike
Pingback: Imitation is the Sincerest Form of Flat-Weavery*: Meet the Shaggy Twins | projectophile