
I wanted to build a padded headboard for a couple of reasons – both  practical and aesthetic: 1) We like to sit in bed and read at night, and 2) I want my bedroom to look more like a fancy hotel and less like a crappy rental.
Last month, we renewed our lease for another year and four months (yes, our landlord is clearly up to something). To celebrate, I painted the mustard-yellow bedroom a soothing shade of gray. The cool charcoal walls seemed like a great backdrop for a pop of yellow and white geometry. We already owned a yellow-and-white dresser/nightstand set that we picked up from a yard sale about four years back, and I wanted to continue that color scheme.

Tufting adds sophistication to your cheap IKEA bed
INGREDIENTS:
— Big slab of plywood or MDF board (medium density fiberboard)
— 2 inch foam, same height and length of the board
— Fabric, cut to the size of the board, plus a minimum of six extra inches on all sides
— Batting, same size as fabric
— Thick thread or twine
— Button kit
— D-ring hangers
TOOLS:
— Staple gun (and hammer if your staple gun is as weak as mine)
— Drill
— Scissors
— Serrated kitchen knife (the scarier the better)
— Long (3″+) decorator’s/upholstery needles or doll needles
— Duct tape (maybe)
— Shot of whiskey

These are some of the scary tools you get to use for this project
PART ONE: BASIC PADDED HEADBOARD
1) Have the hardware store cut your plywood so that it is the width of your bed and your desired height. Our double bed is 54” wide, and I made my headboard 30″ high.
But let me pause here to explain my first mistake, which I’ve been trying to blame on my husband, even though it’s my fault. I had seen similar projects that used plywood, and thought, “since we’re hanging this on the wall, we need something lighter.” So I sent hubby to our local big box for something lighter, and he returned triumphantly with MDF board. However, I realized later that MDF board was the wrong choice because:
– It isn’t really much lighter, since MDF is significantly denser than plywood
– It’s too thin to fully absorb your staples (ouch), and
– It’s awfully flimsy – a stiffer board would have made stapling easier.
But, I’m stubborn and cheap, so I stuck it out with the MDF.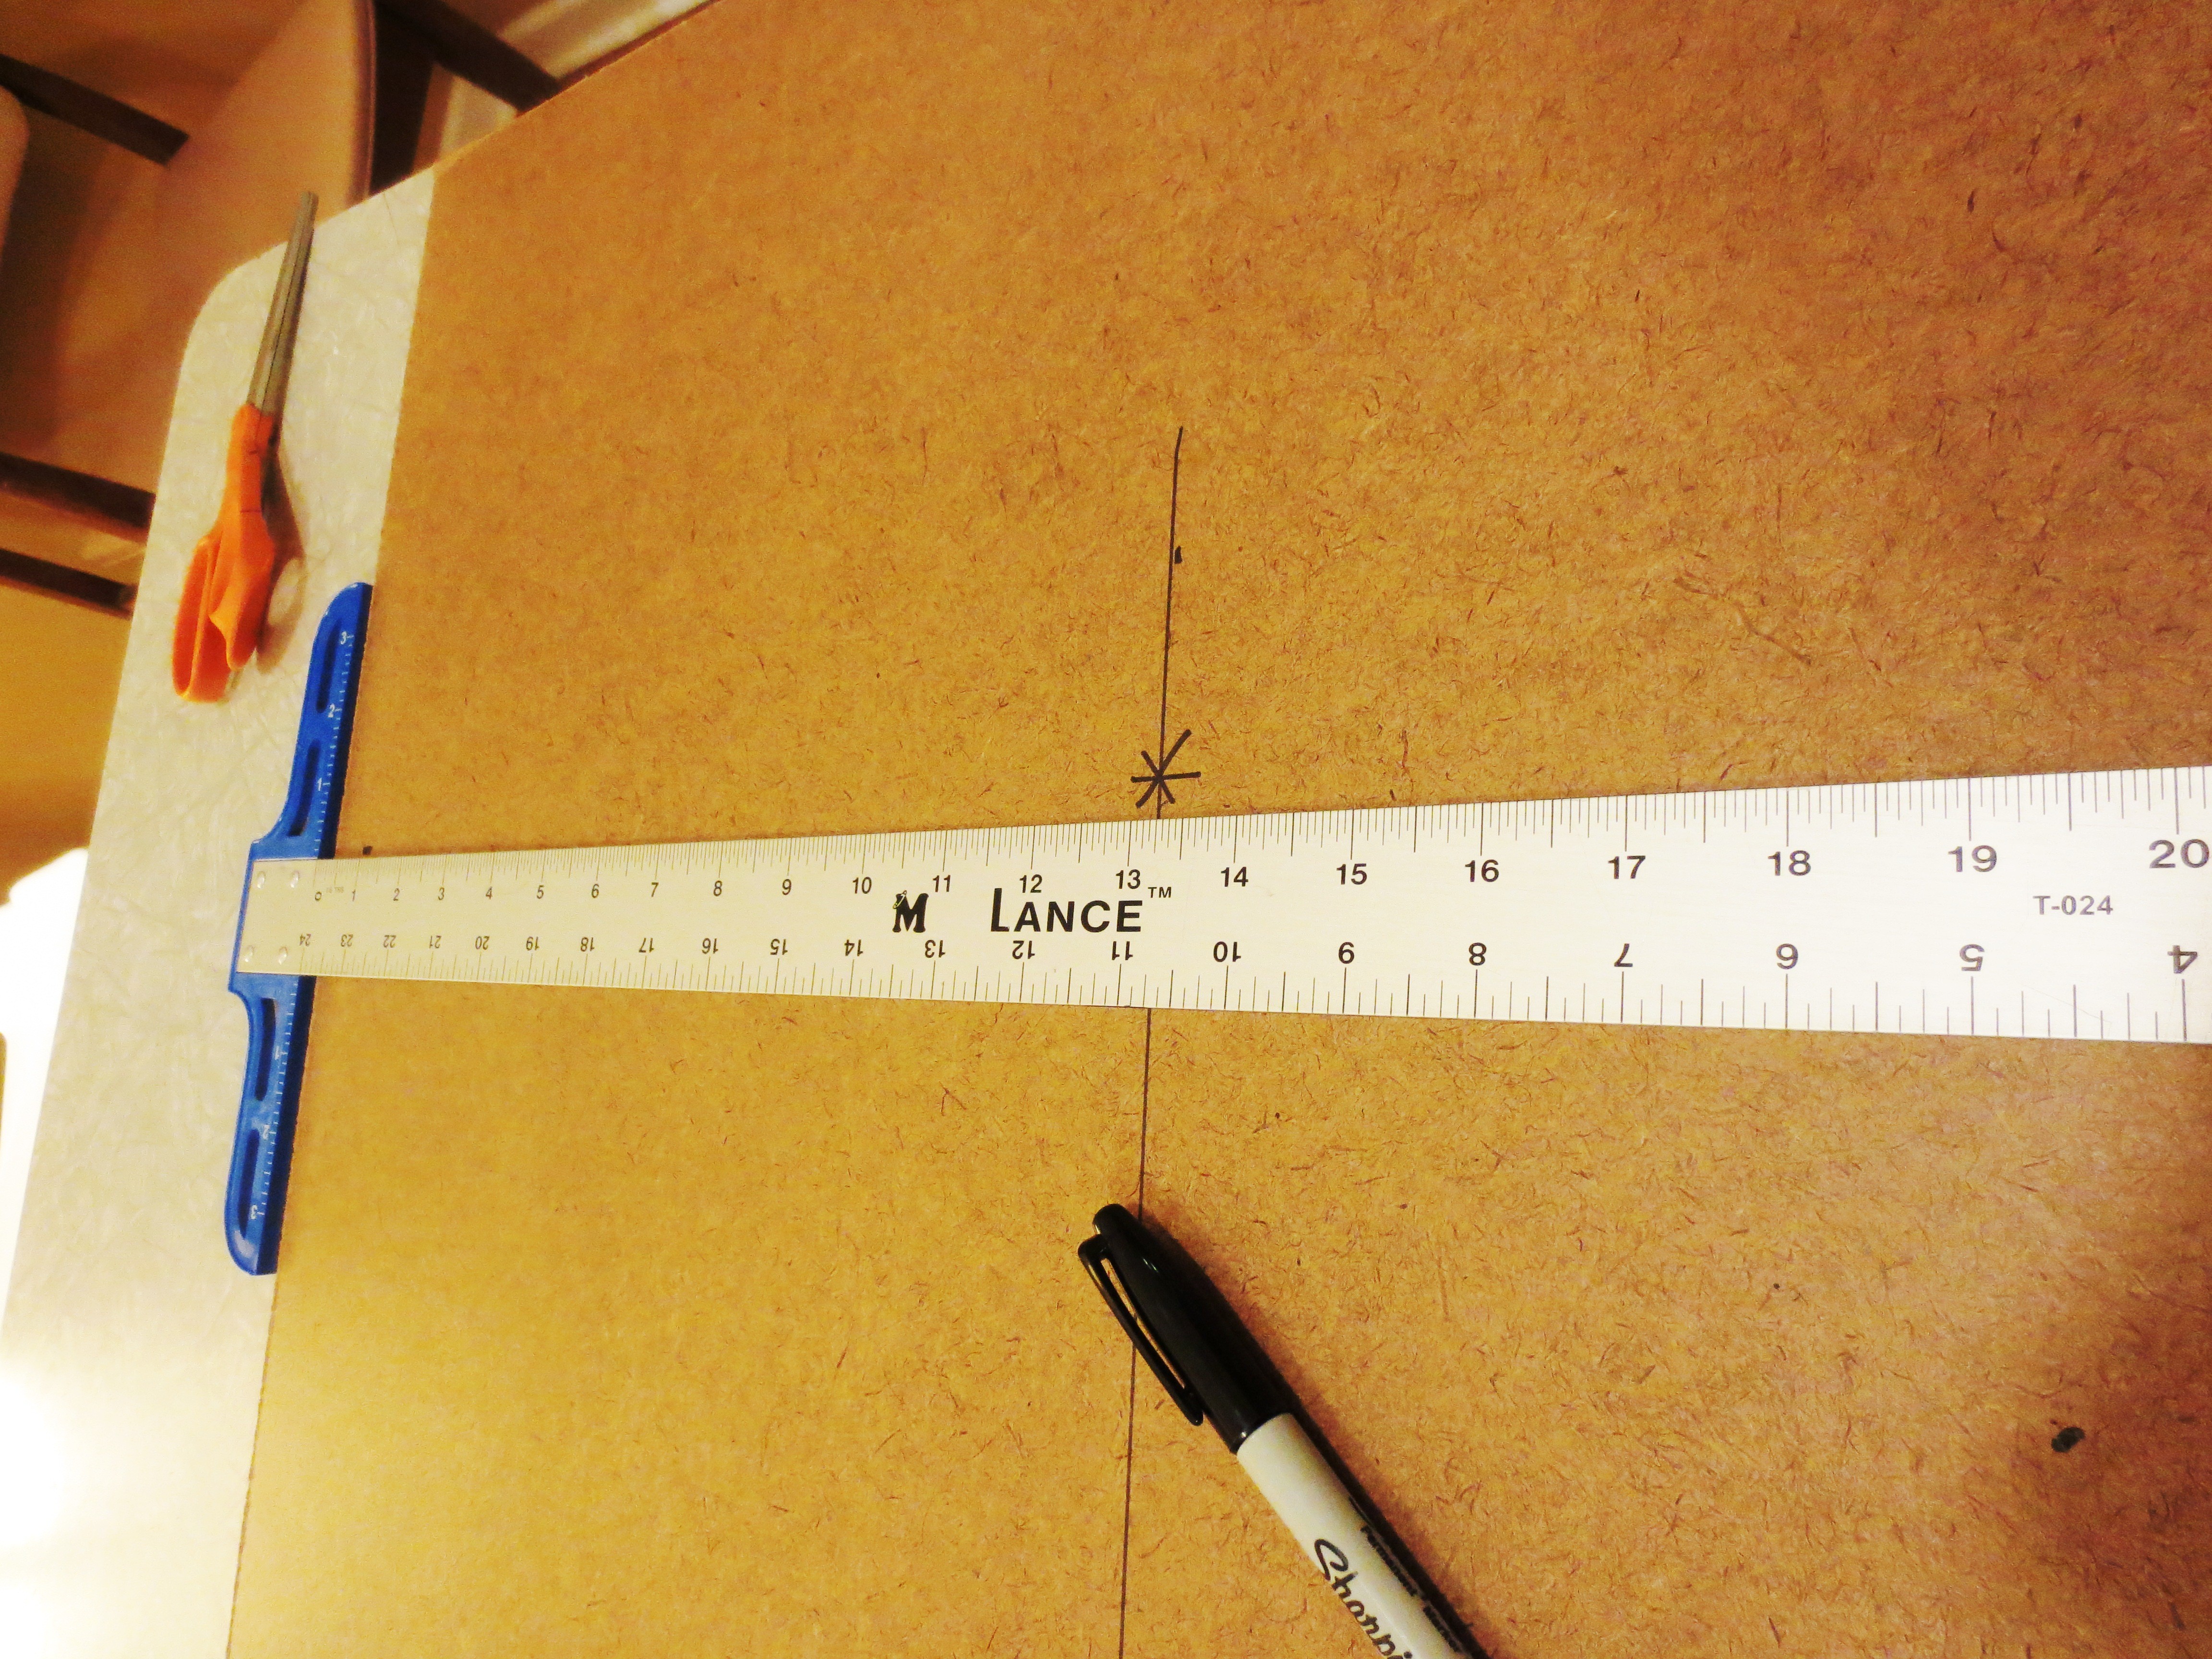
2) If you’re tufting, decide on how many buttons and how far apart you’d like them to be. I chose eight buttons in two rows of four, spaced about ten inches apart. Measure and mark the button holes on your board, and drill through them with a 7/32 drill bit.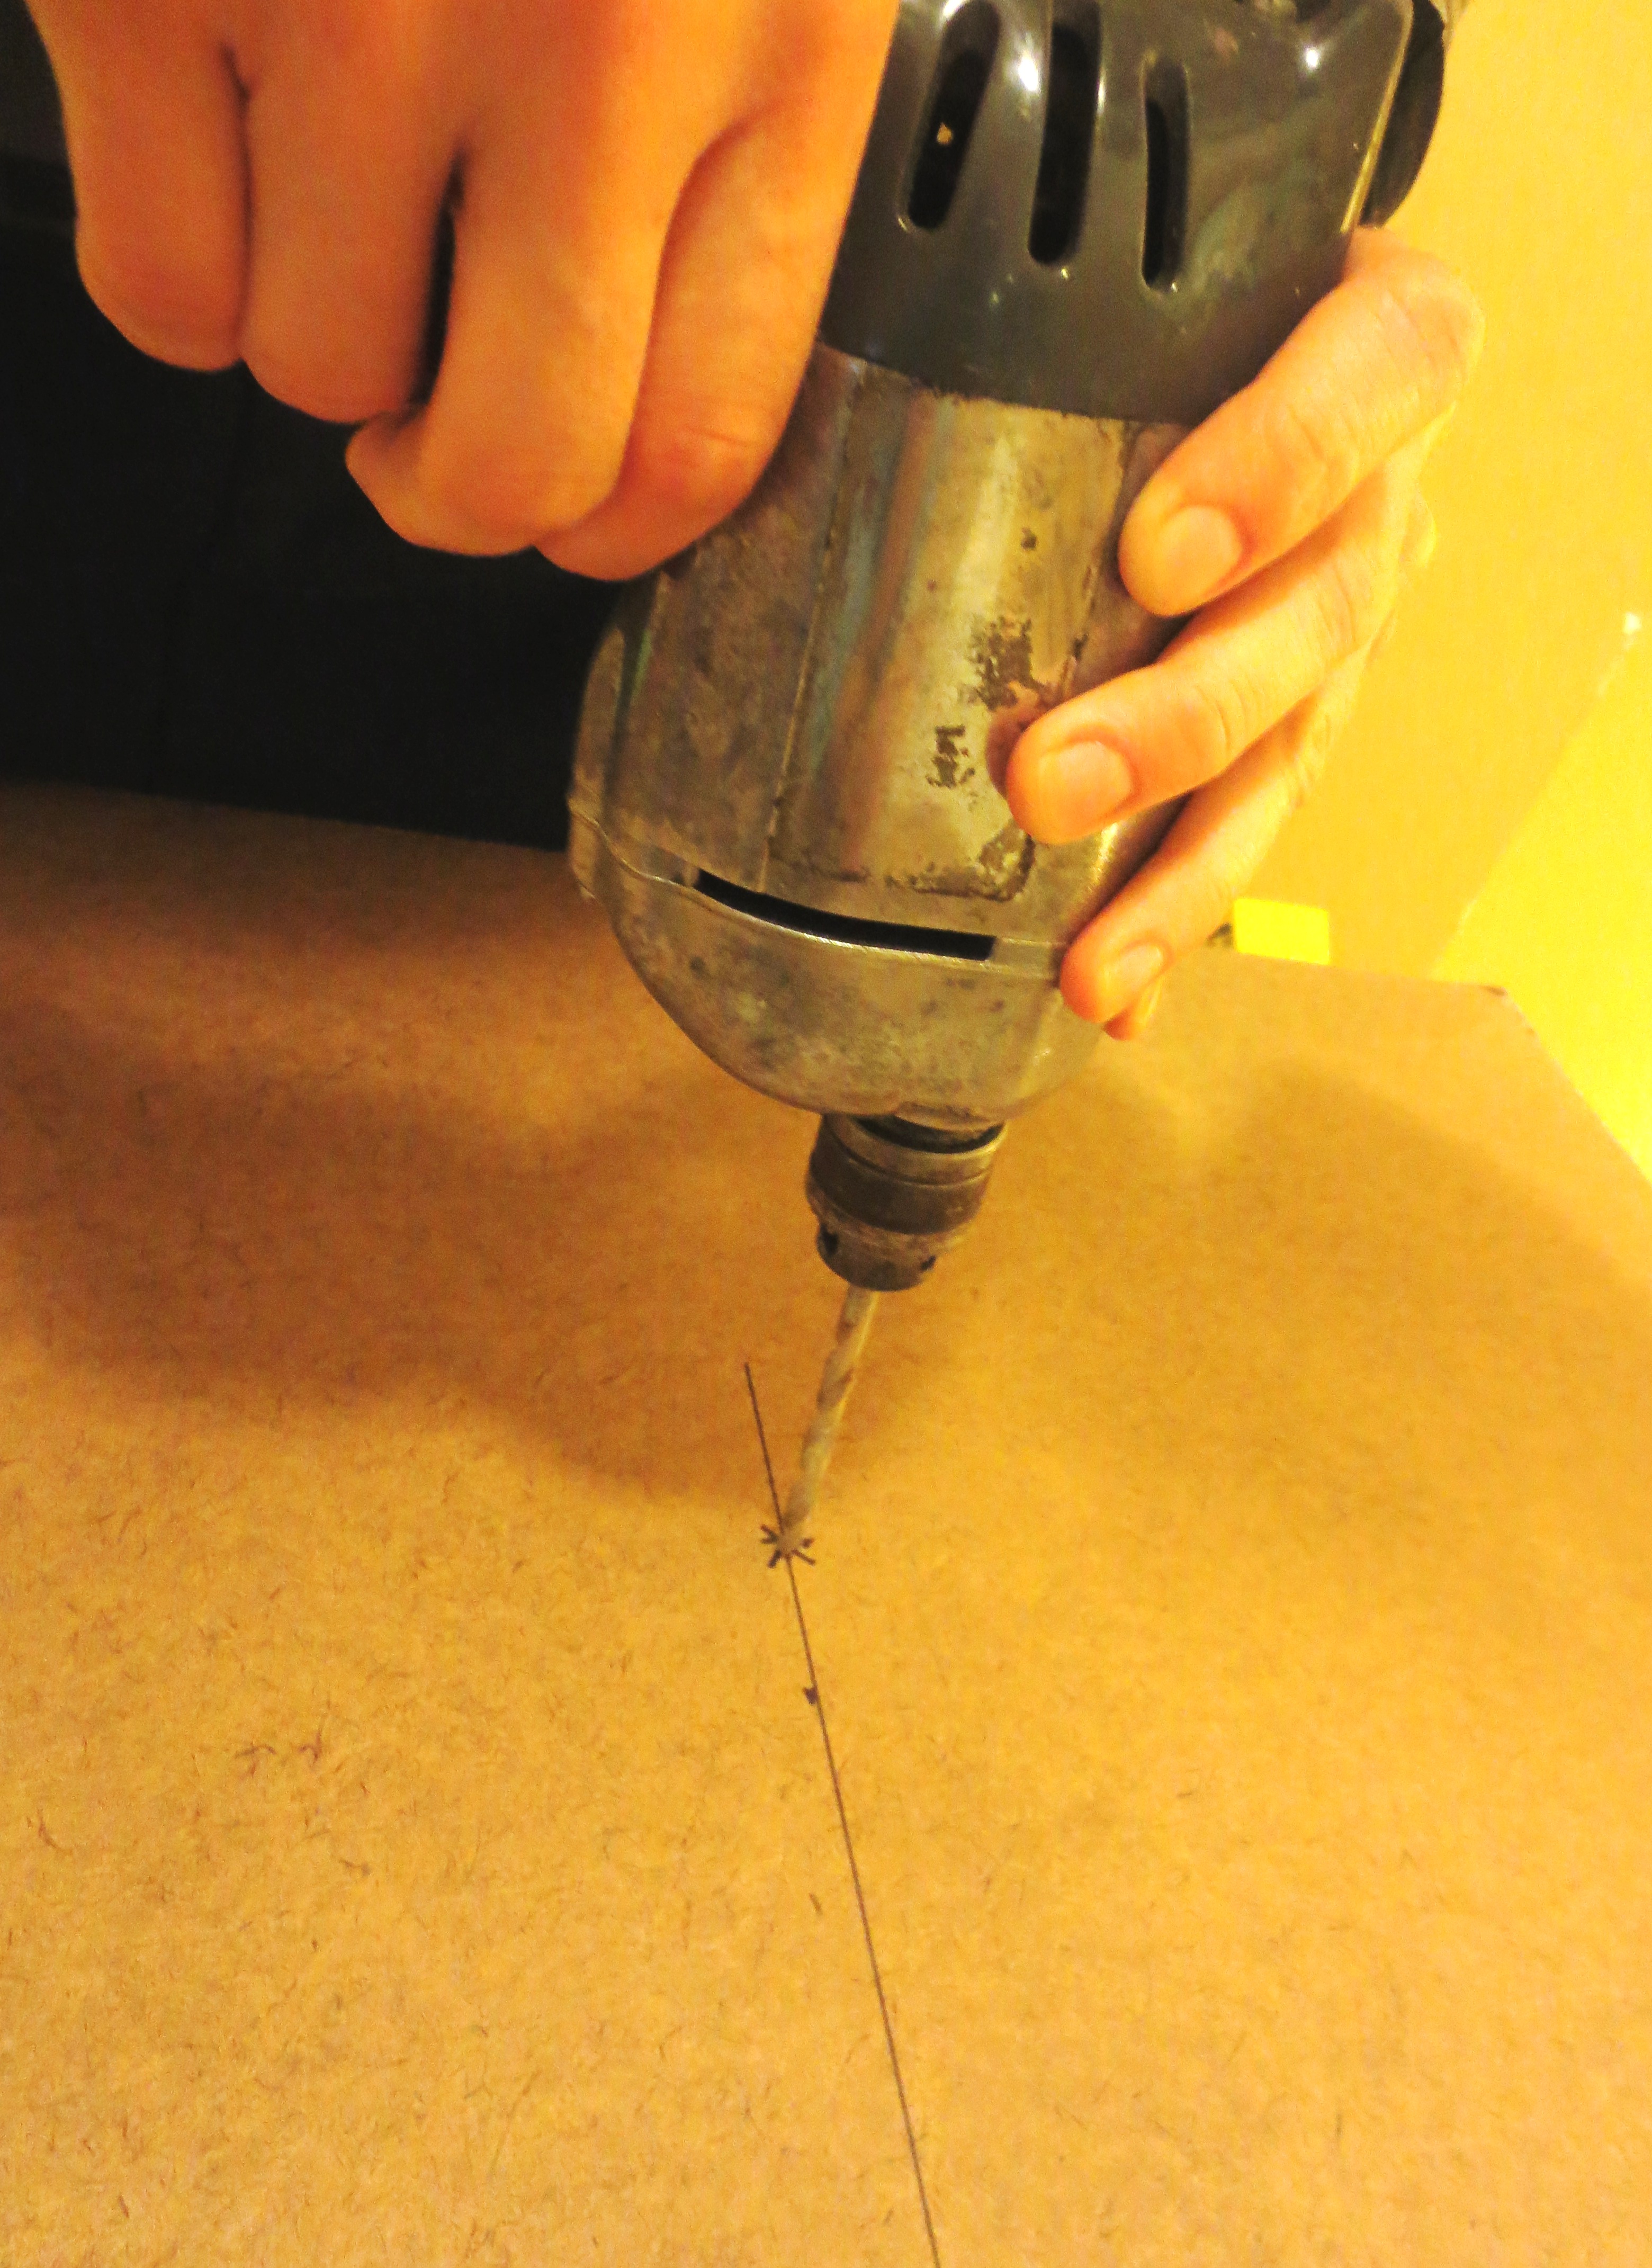
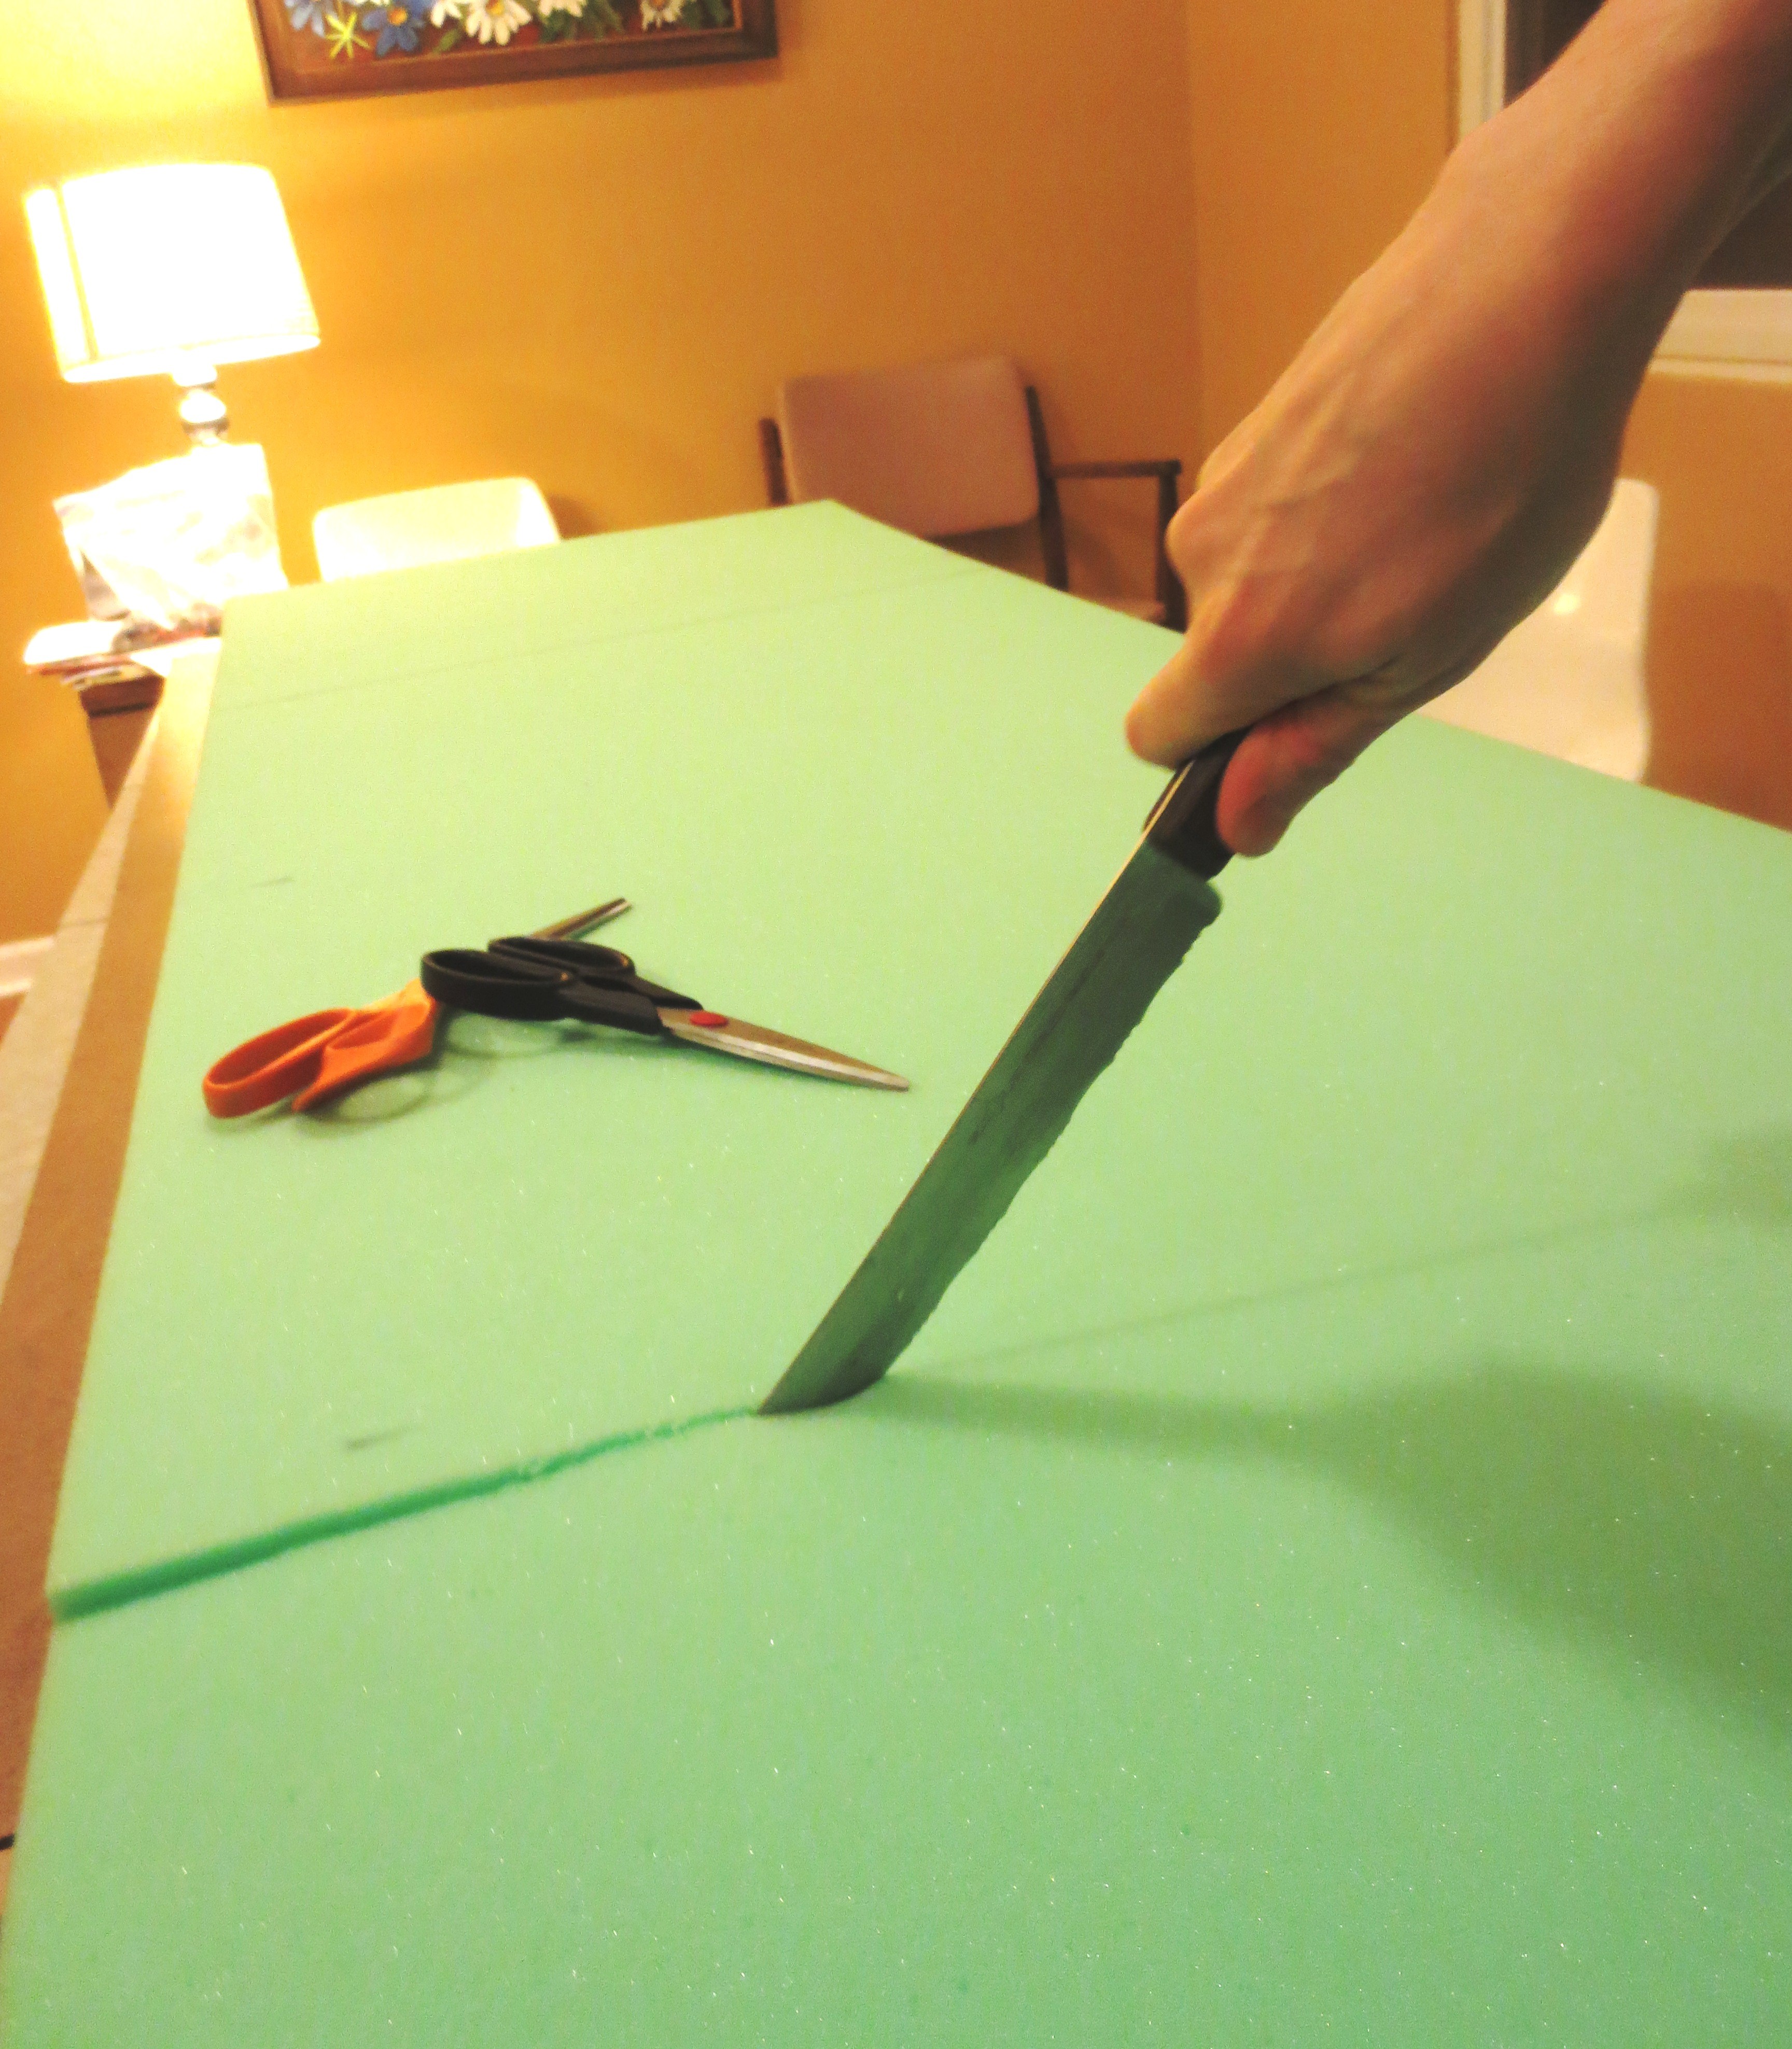
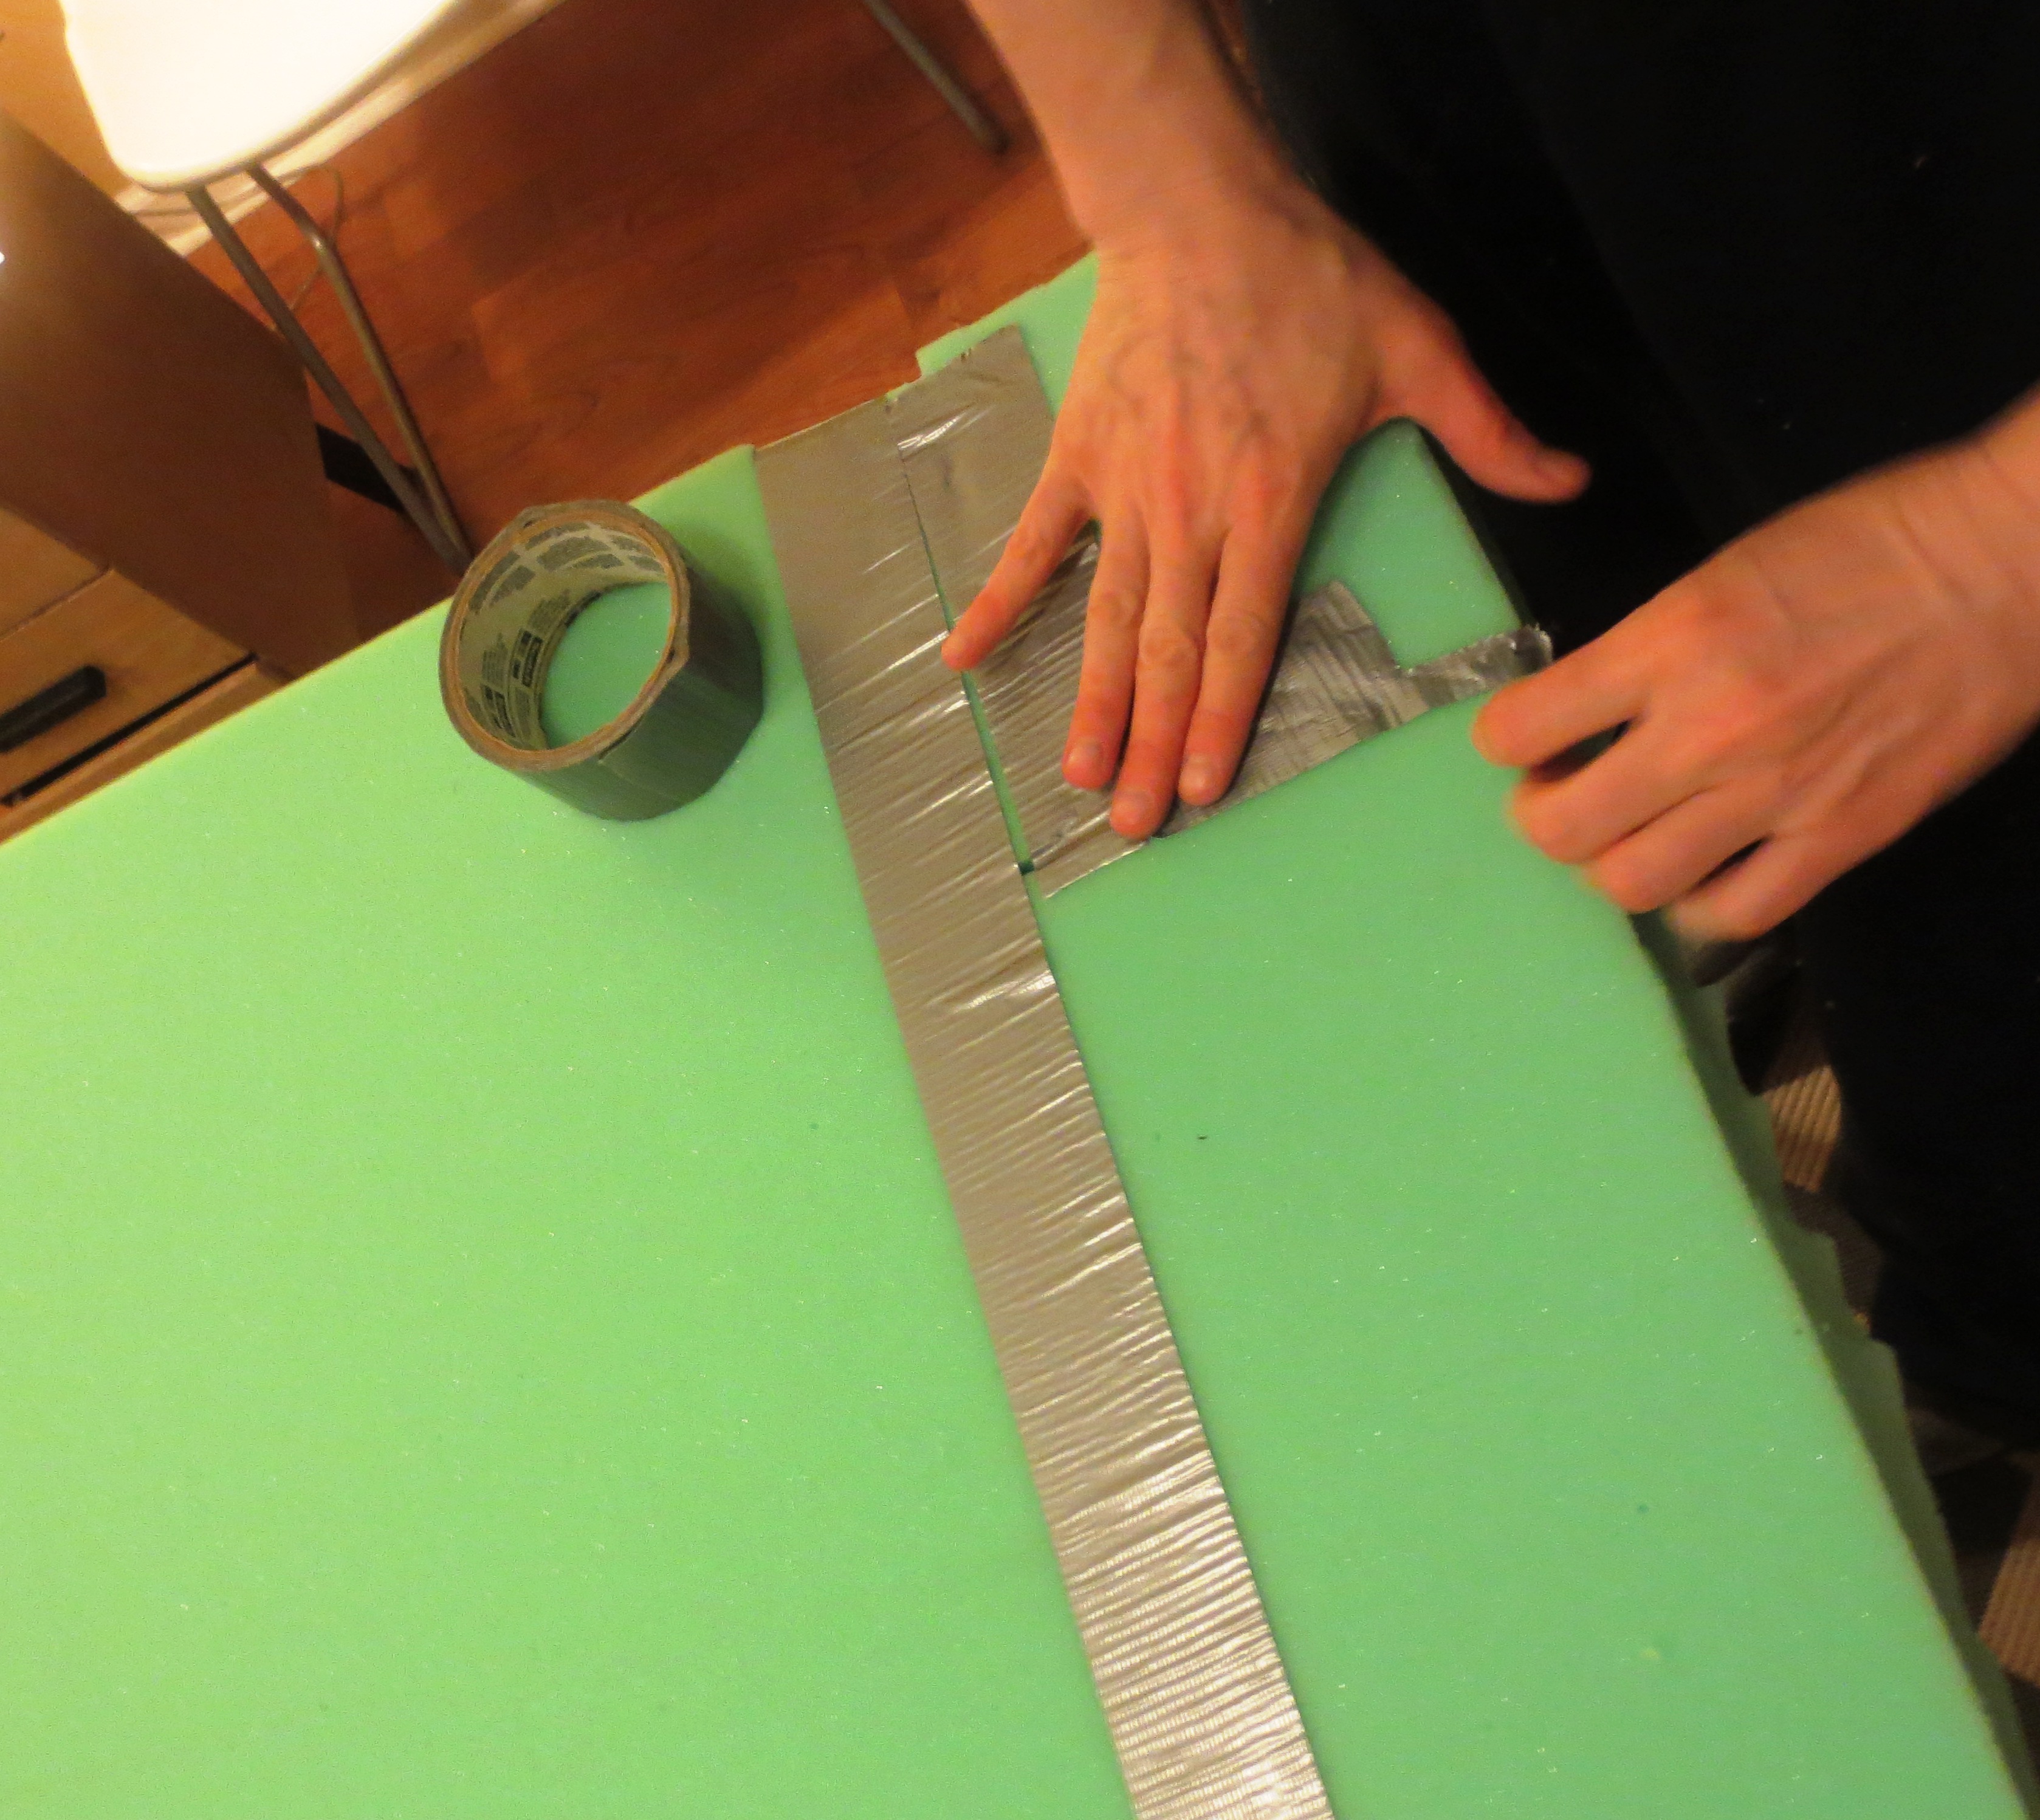
3) Place your foam over the board. If you are lucky enough to have an exact fit, skip to step 4. My foam was cut at the craft store from a bigger roll that was only about two feet wide, so I had it cut a foot longer than the length of my board. I then cut off the excess length – first with a utility scissors, then with a serrated kitchen knife (do this step after all small children have gone to bed). I cut the excess pieces to fill in the remainder of the board space, then added a touch of class by duct-taping them all together.
 Remember, that for this project, it’s what’s on the OUTSIDE that counts.
4) Place your batting over the foam, with at least six inches of batting past the edges. Pull the batting as tight as you can over the foam and staple it to the back of the board, stapling every six inches or so.
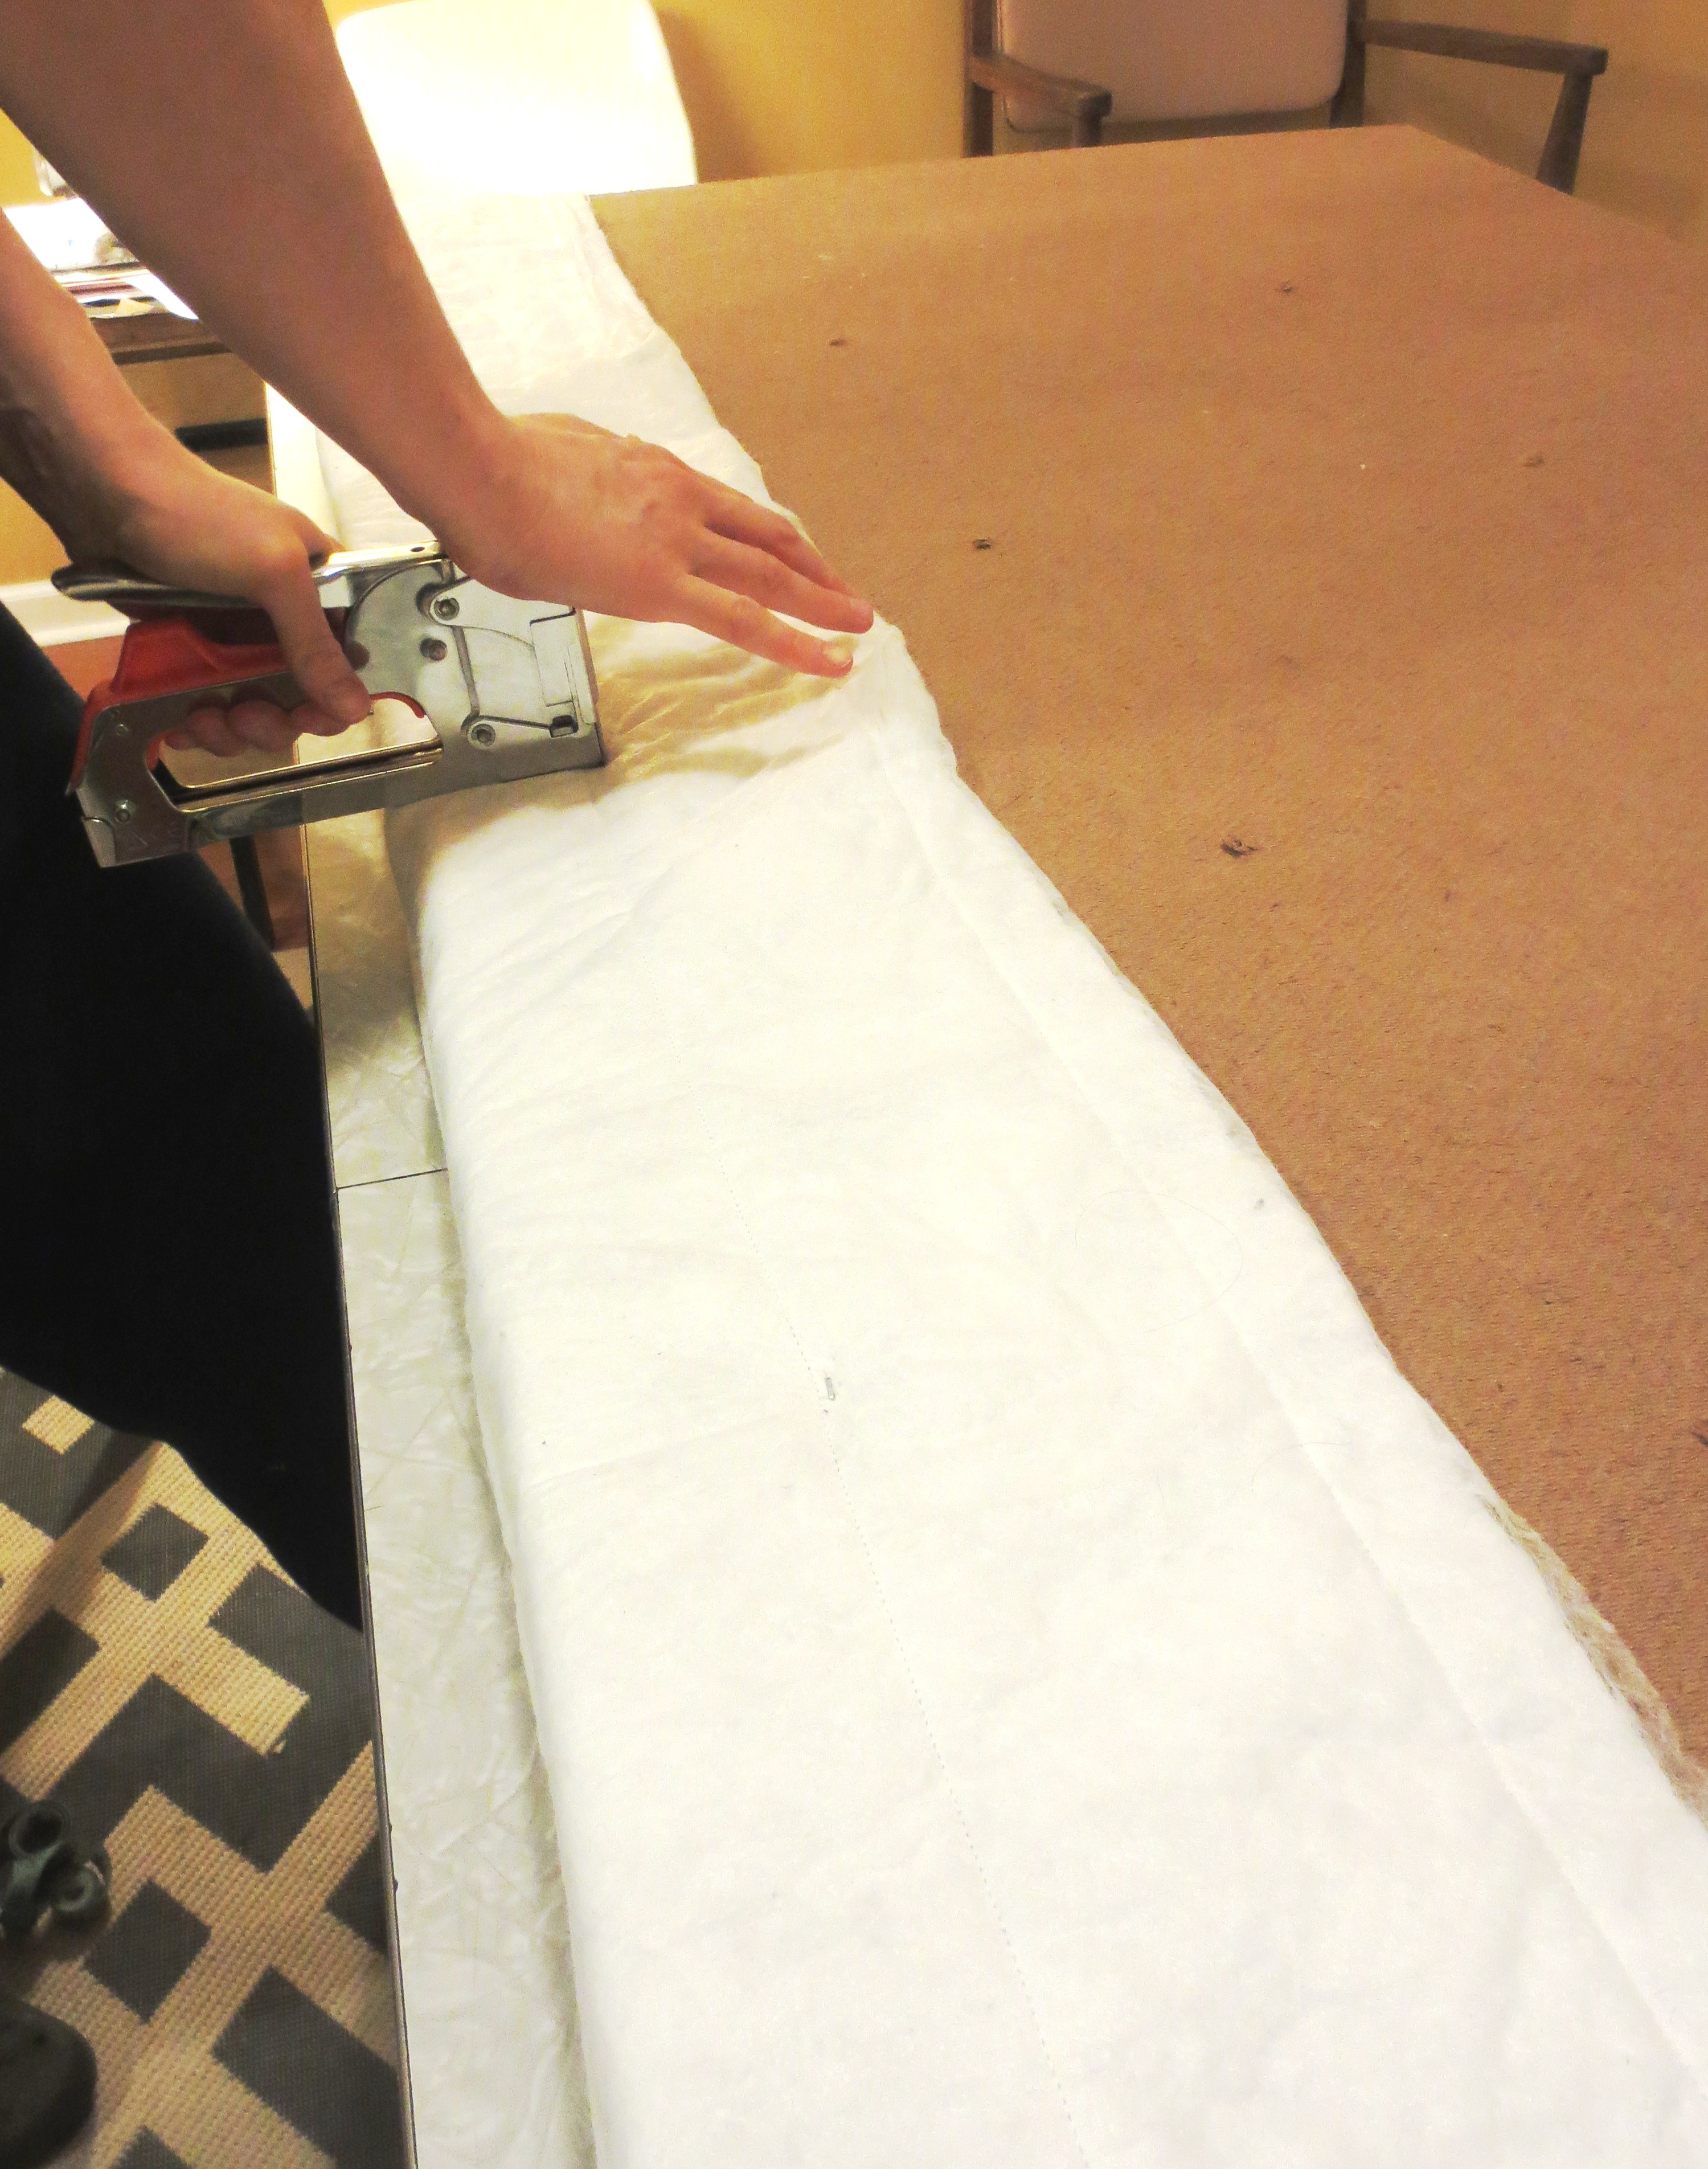
5) Iron your fabric, and then repeat Step 4 with the fabric, taking care to twist and pull the corners so that no fabric is loose. I chose to cut some of the excess fabric off the corners to avoid stapling a big pile of fabric, but if you have a good staple gun, this shouldn’t matter.
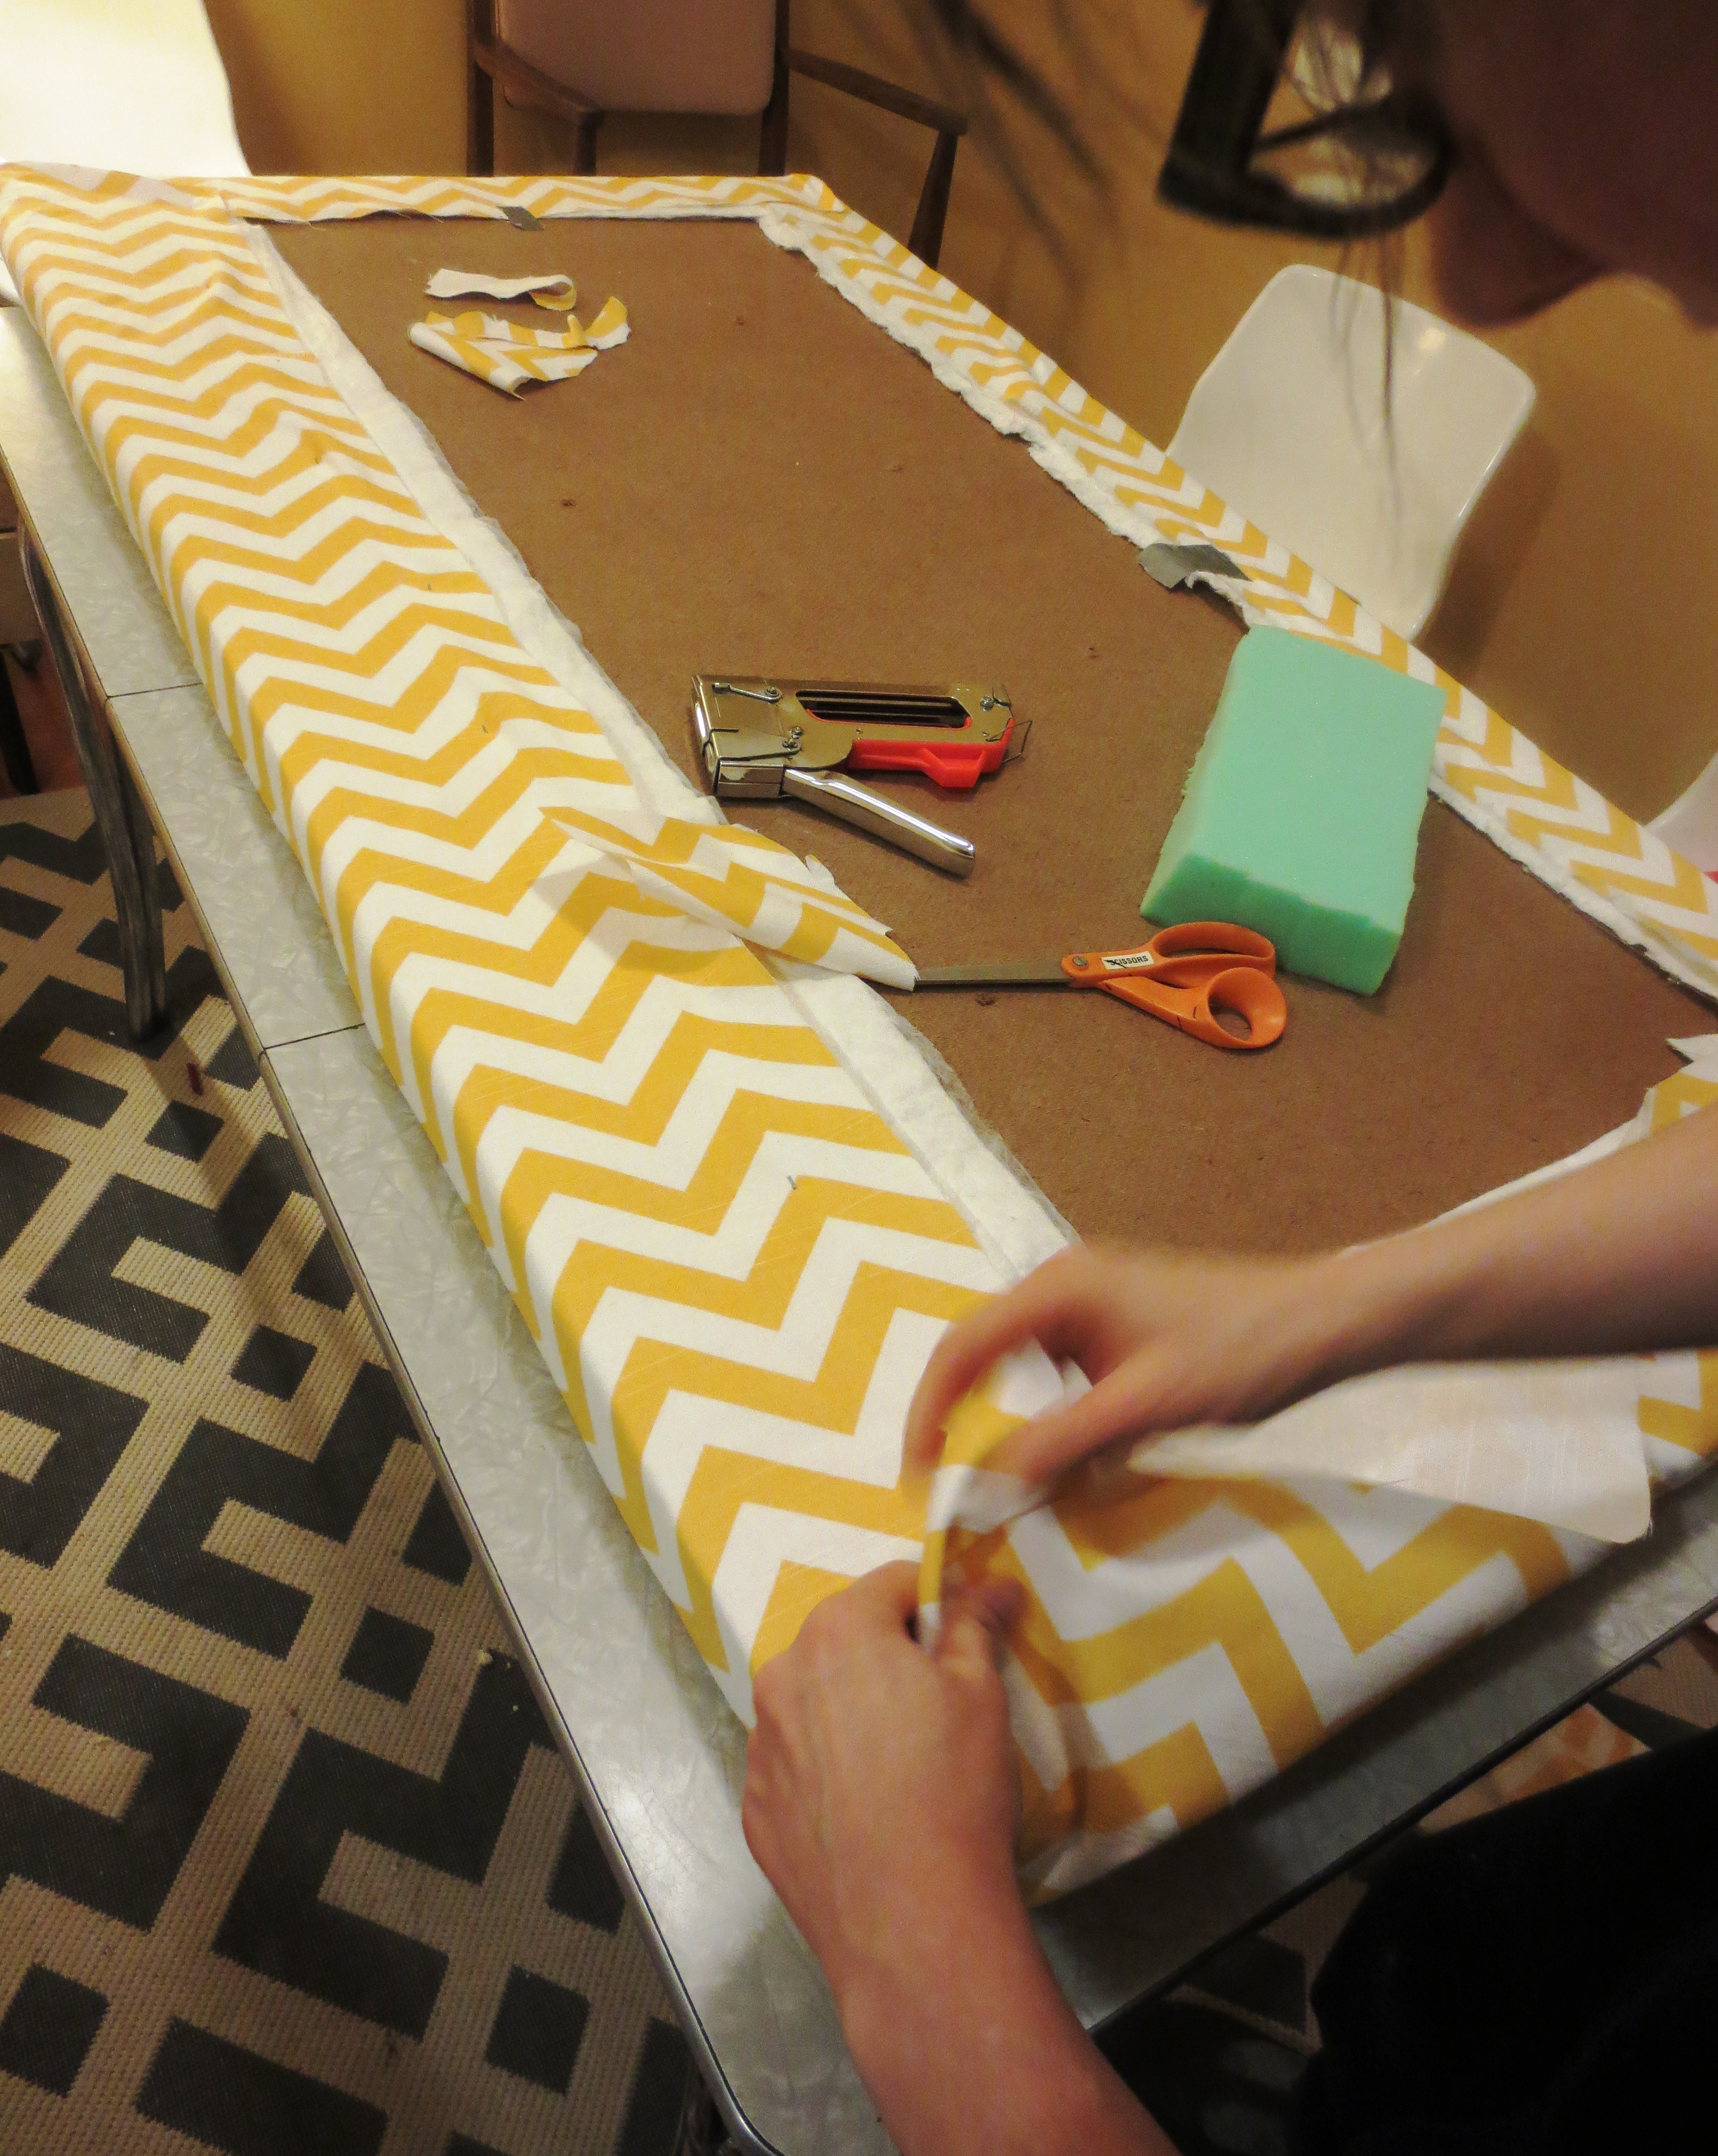 I will confess now that I planned for the zig-zags to run horizontally across the board. Of course, I didn’t think of this when I ordered the fabric, and it wasn’t enough to cover the width of the board. So, I turned the fabric around and it fit plenty well with the zig-zags running vertically. Oh well.
PART TWO: TUFTING WITH BUTTONS
6) The tufting process is by far the most time consuming, so if you’re looking for a one-hour project, stop here and skip to step 10. First, you’ve got to make your buttons. If you’re eccentric, you could try using flat “sew-through” buttons, but I decided to make my own shank fabric-covered buttons. You’ll need a button kit from the craft store (about $9), plus some extra fabric to cover the buttons.

For each button, cut a circle of cloth with the template. Place your fabric in the mold (a little plastic cup) and place the button shell over the fabric. Use your thumb or the “pusher” to press the shell into the mold with the fabric. Tuck the excess fabric into the shell, then place the back (with the little hook or “shank” over the shell) and push into the mold with your pusher. Then pop your finished button out, like magic!

Don’t let this happen to you!
Warning! If you used a heavy fabric for your headboard, you will have trouble using that same fabric to make buttons. After disfiguring my thumb on the first button (derailing my hand modeling career), I pulled this piece of scrap fabric out from the rag bin under the kitchen sink. It’s a retired bed sheet that we cut into rags. But it was clean and white and thin enough for my button kit.
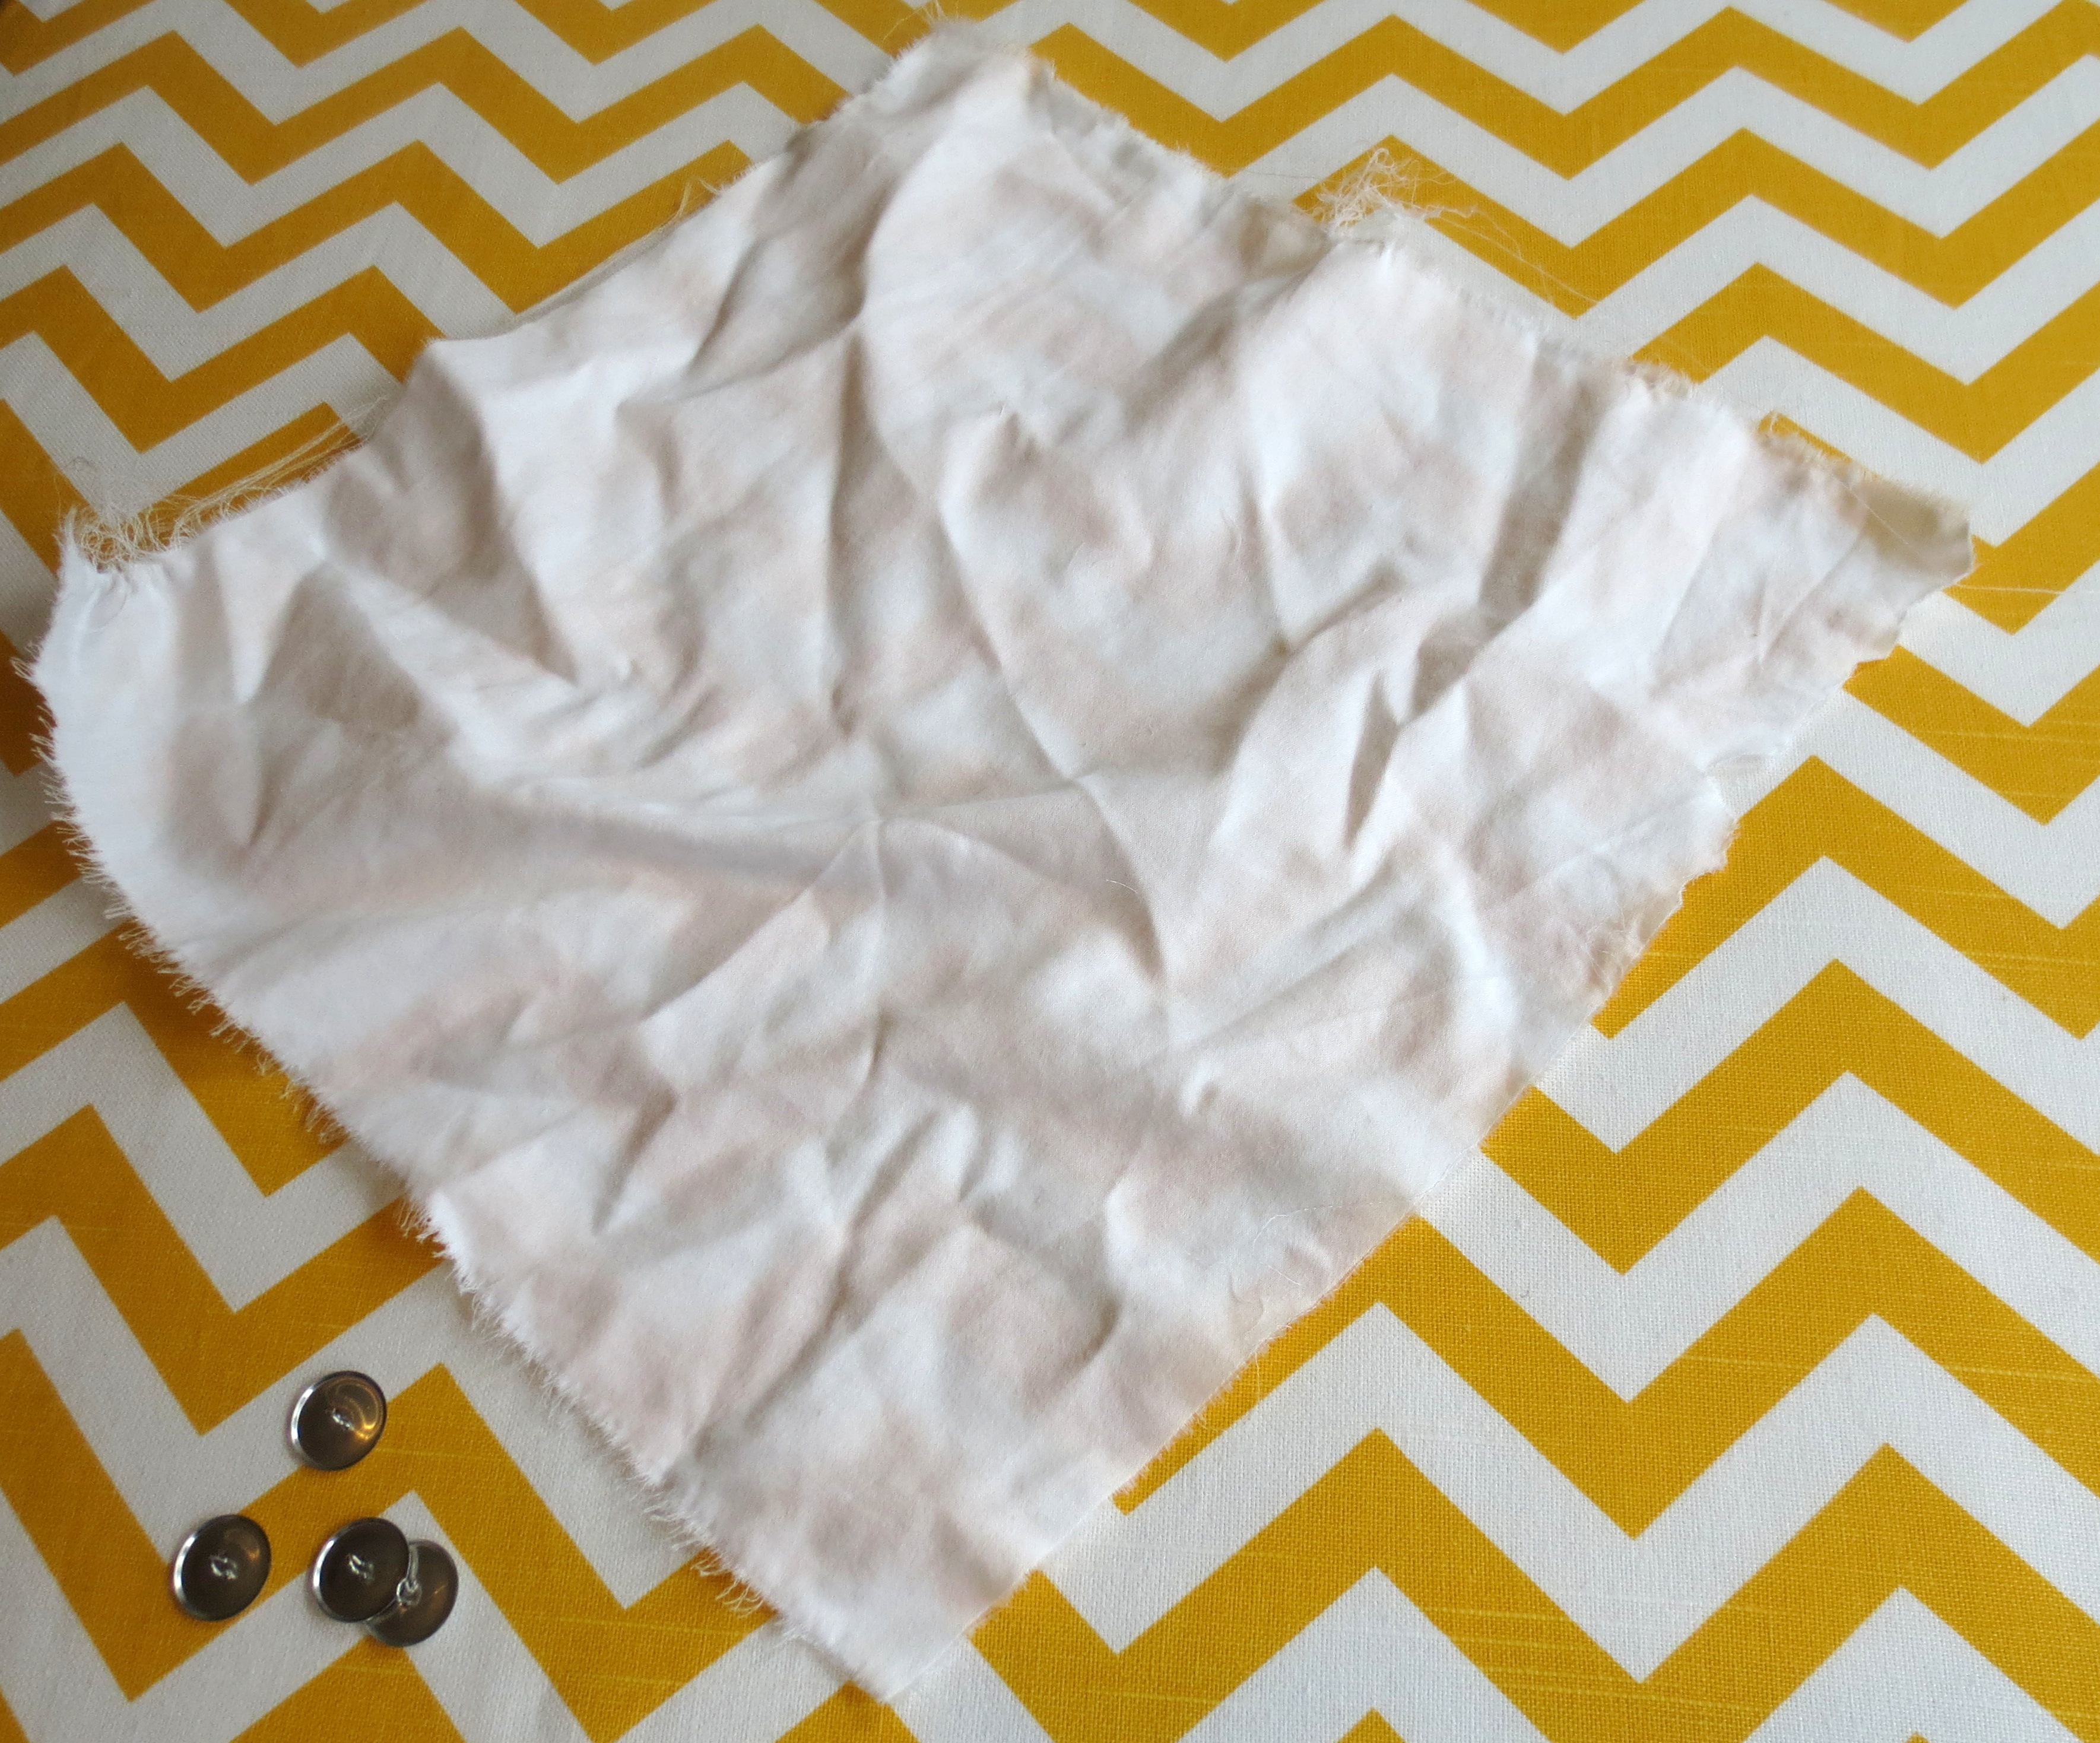
Old rags add a touch of class!

Also great for diabetic dolls
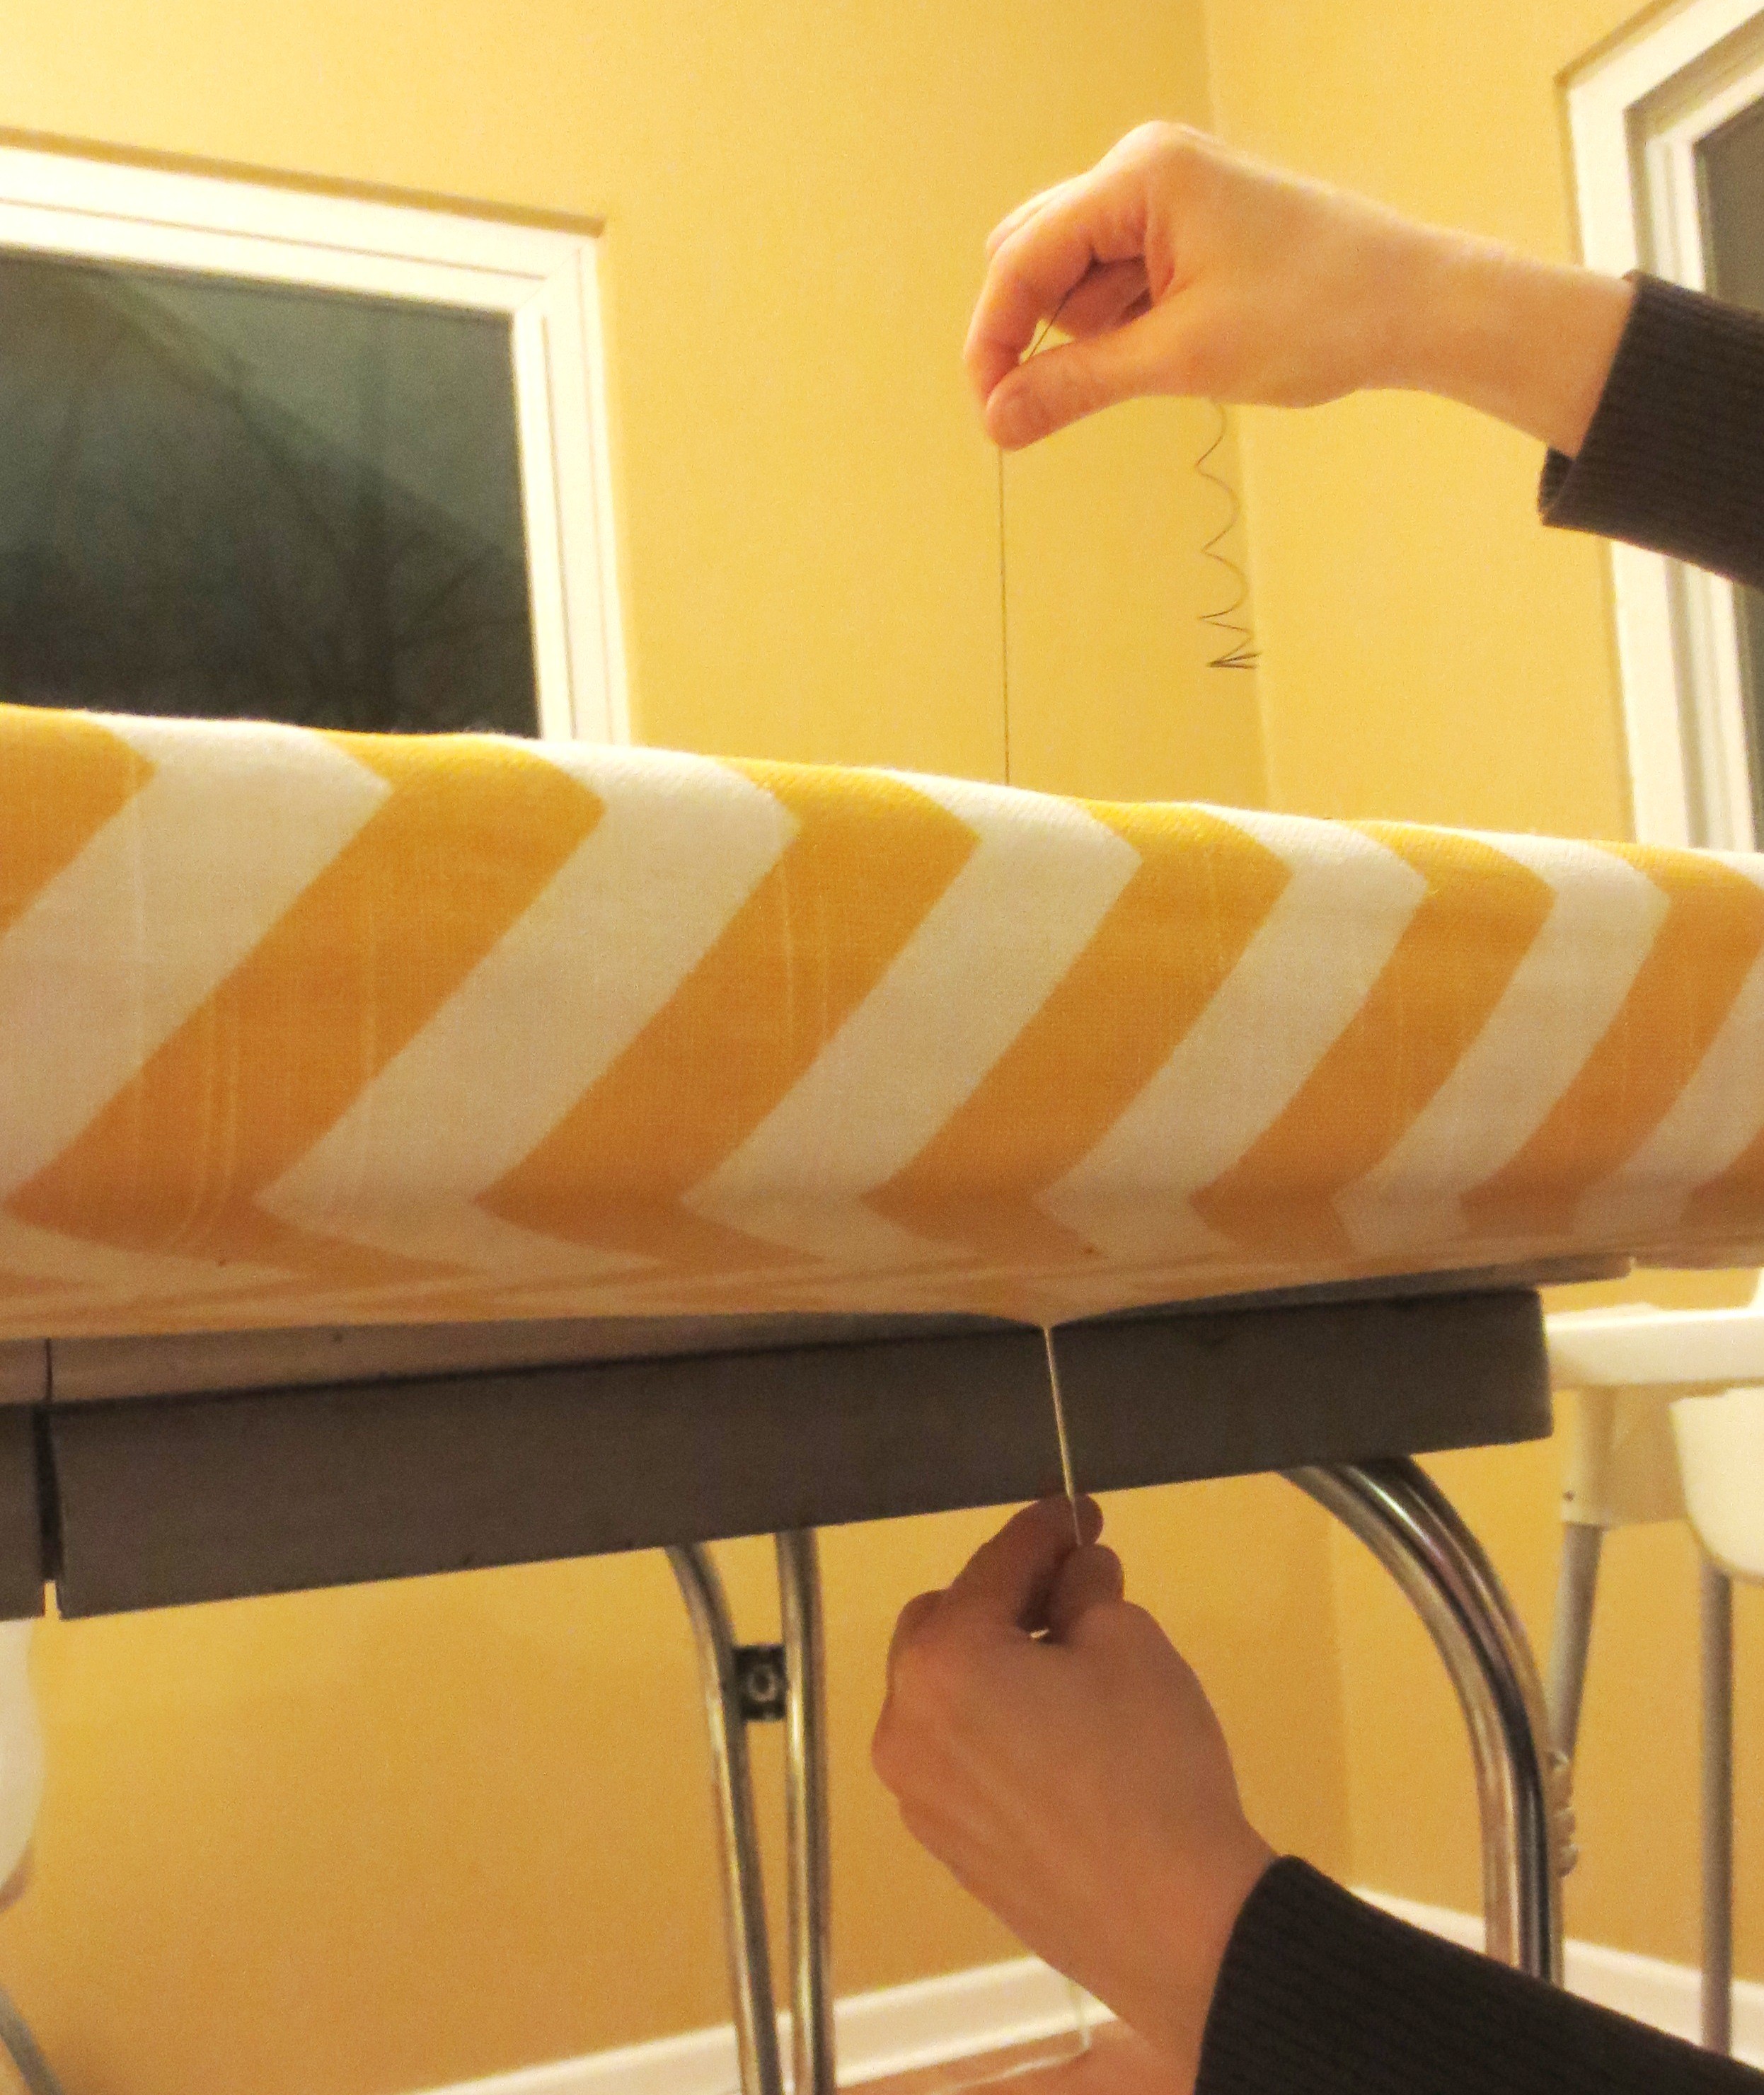
7) Secure the buttons to the front of the headboard. Use a needle that is at least as long as the thickness of your materials—board, foam and fabric—about 3″ for this project. They are called upholstery or decorator’s needles, but I found these “Doll Needles” at the craft store, which worked well (they are also useful for intimidating dolls).
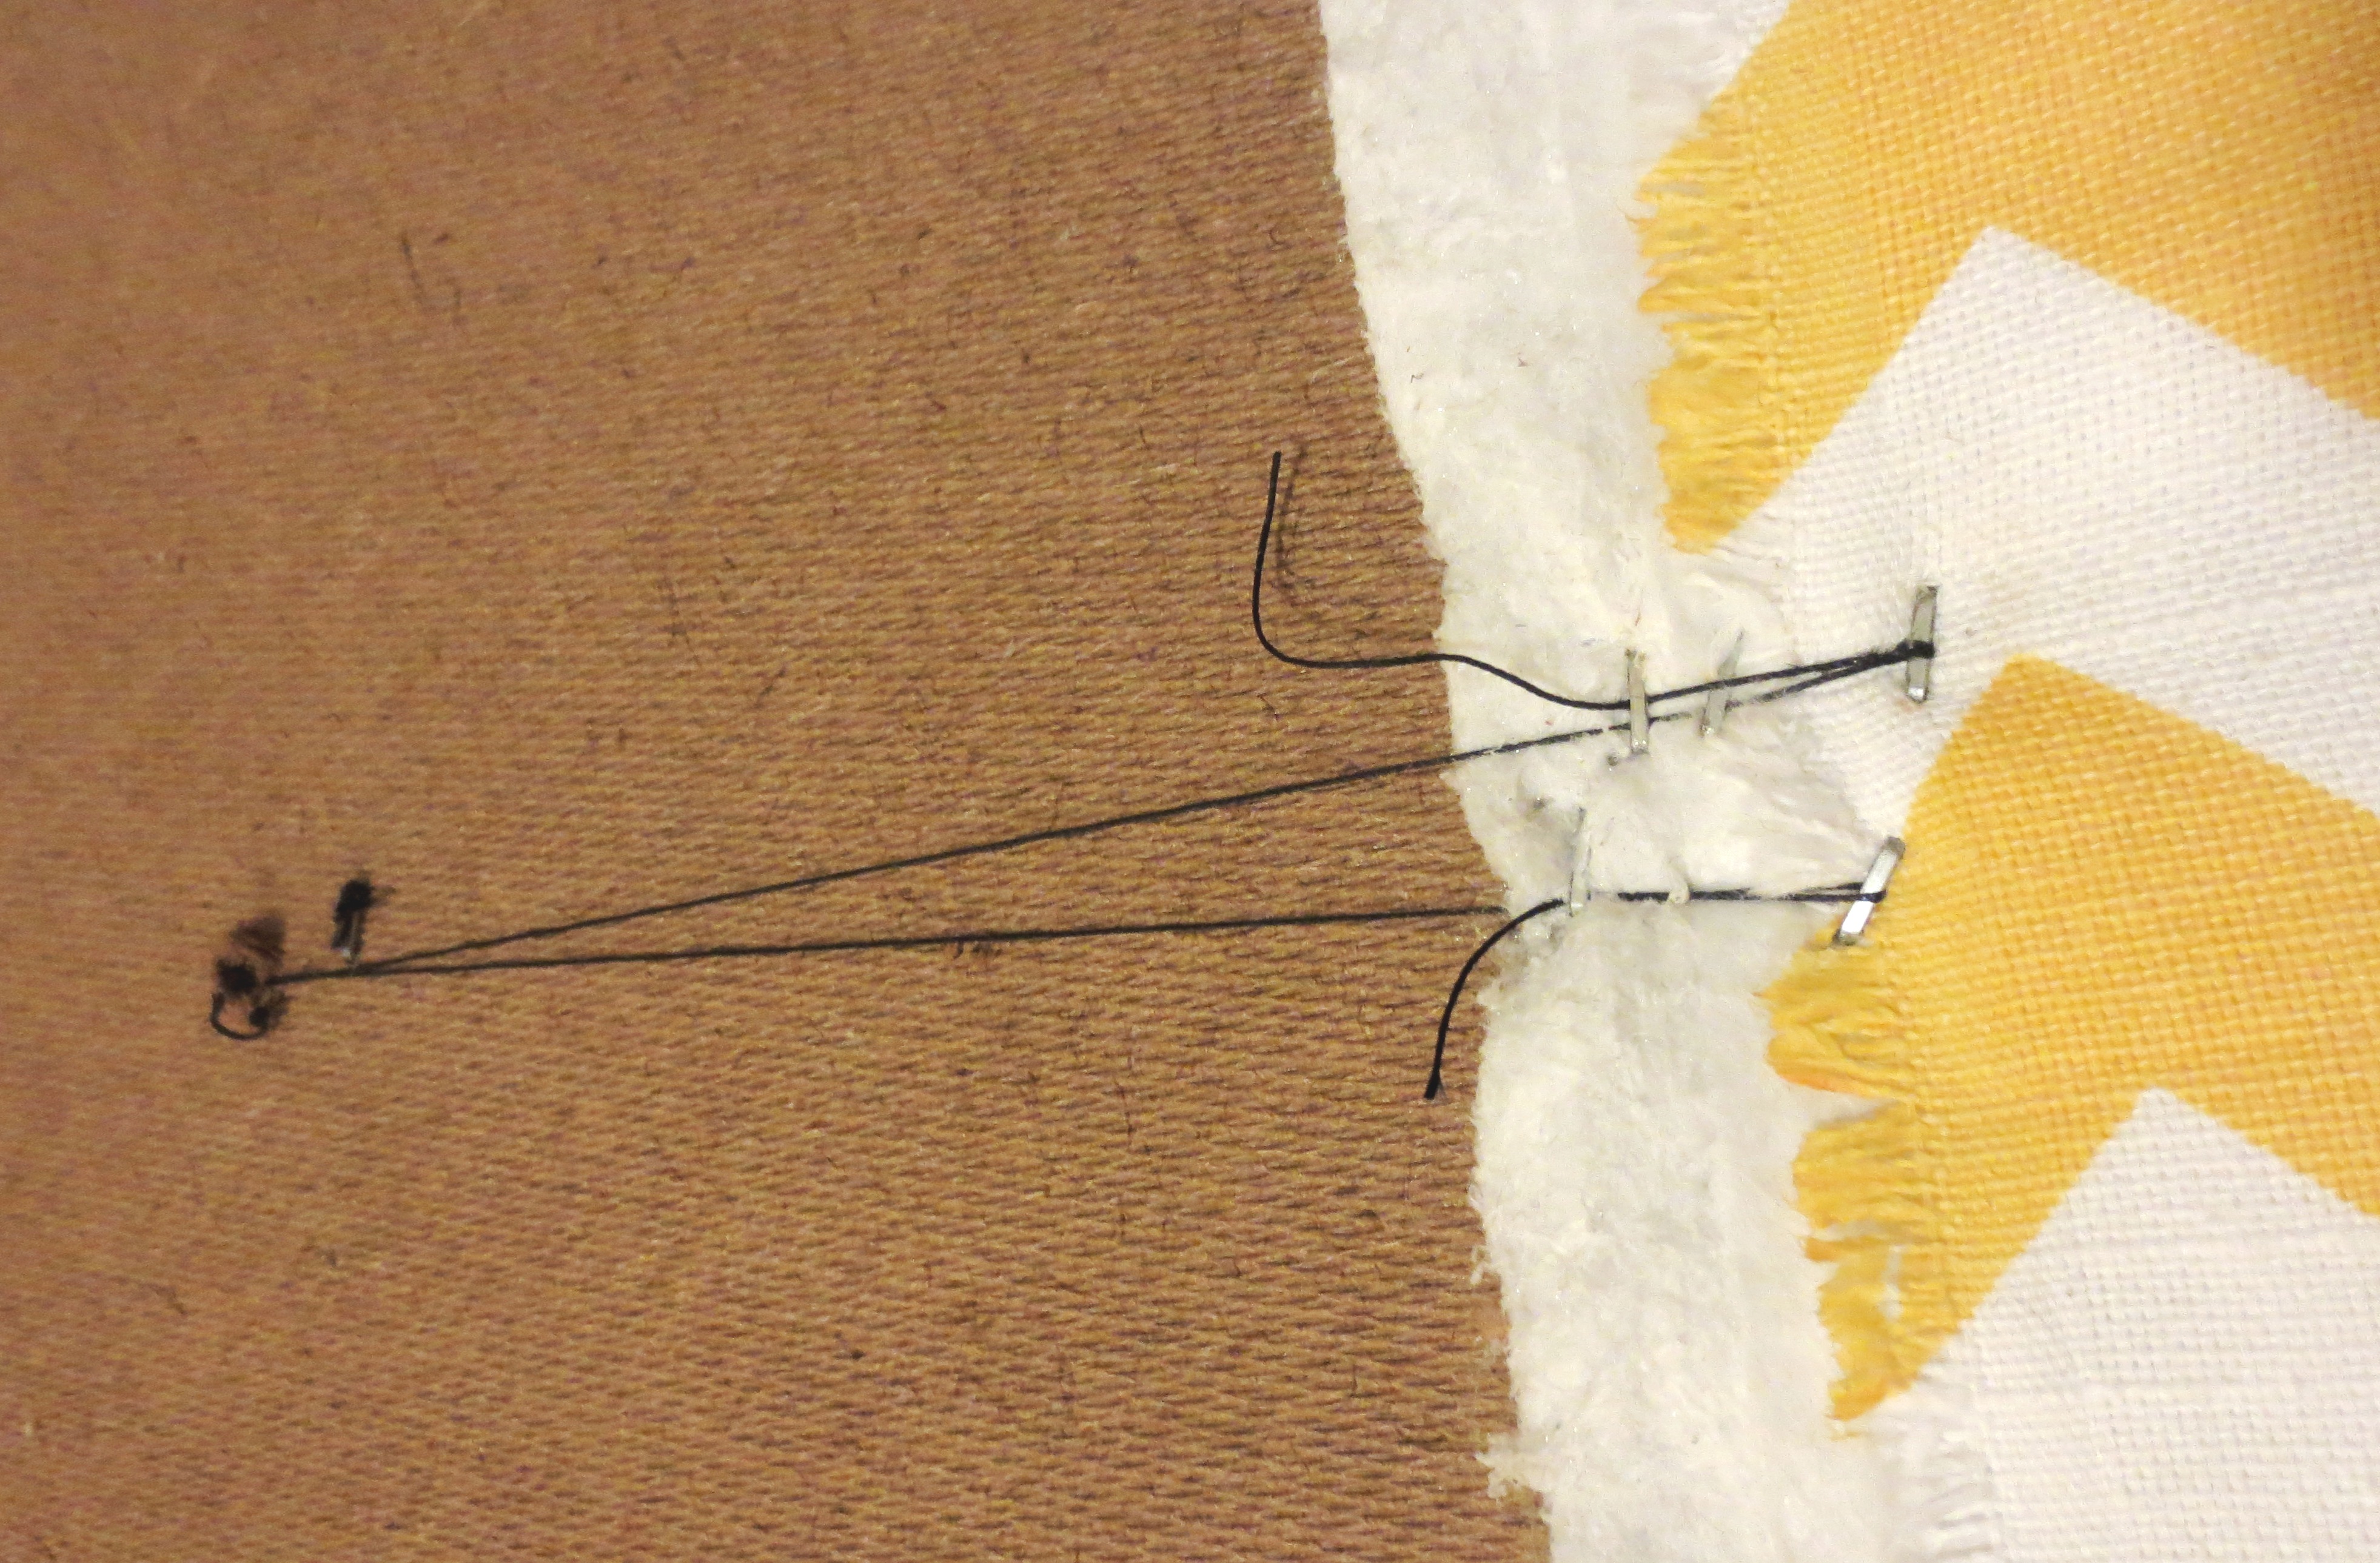
Locate the holes you drilled in Step 1. Thread the needle with very thick thread or twine (knotted tightly) and insert it into your pre-drilled button hole. Leave a couple inches of thread still hanging out top and staple that thread to the board. I stapled the thread over some batting overhang to make it more secure. Remember that the thickness of the thread really does matter. My thread ran out after the first seven buttons. I dug around and found a piece of thin twine, which worked so much better than the thread. I could pull the button tighter and staple it more securely to the board. Use twine.

This thread isn’t really thick enough
8) Pull the needle out through the fabric side. Thread the needle through the hook on the back of the button a couple of times.

9) Now take a deep breath, or maybe a drink. Push the needle back through the fabric/foam and poke around until you can locate the hole in the board again, and pull the needle back through (this step may take a while).

This step will really piss you off
Pull the thread as tight as you can, then staple the end to the board a few times. If you only have two hands, have a friend pull the thread while you staple. Repeat with each button.
10) Attach D-ring hangers to the back of your board with a drill. You may want to locate the studs in your wall before this step, so you can match the hangers to the studs where you will drill your screws.
11) Sit back, read a celebrity magazine, and fall asleep with your shoes on. Your bedroom is now 50% more classy.

I might need to re-think the bed linens now

Is this Scott or Clare writing? You guys are both so funny, it’s hard to tell. Also I don’t know how you have time for this stuff. Duly impressed. I want something like this for our bed, but would much rather pay you to make one for me. How much?
LikeLike
This is Clare, though I did make Scott my humble assistant for this project (mostly holding the fabric down so I could staple it and occasionally reloading the staple gun). I’d be happy to make another one. I got all my screw-ups out of the way in the first attempt, so #2 should be pretty straightforward.
LikeLike
Yes, when do you have time to do these things? It’s great, I love it 🙂
LikeLike
You two are so creative!!
LikeLike
Pingback: Finally, Relief for your Art-Infested Refrigerator | projectophile
Pingback: Transform your Pockmarked IKEA Bench into a Thing of Beauty | projectophile
Just discovered this site & so far it’s a winner! I love your hilarious dialogue with each set of instructions 🙂 Craft On!!!!
LikeLike
Pingback: Turn your Filthy Target Ottoman into a Glamorous Tufted Foot Lounger | projectophile
This is so cool! I think I have the same ikea bed and would love to make my guest room less cheapy and more hotely!
LikeLike
Pingback: Trouble in the Bedroom? Turn a Thrifted Sheet into Happy Yellow Pillowcases | projectophile
Pingback: Create Whimsical Wall Art out of Dirty Old Hubcaps | projectophile
Pingback: 80 Headboard DIY | Rilane - We Aspire to Inspire
Touche. Solid arguments. Keep up the amazing effort.
LikeLike
I had a similar idea and didn’t quite know how to make it happen. Thanks for the tutorial! How much was this project?
LikeLike
Great guide, thank you!
LikeLike
Great job!! You cracked me up. Keep up the good work. My granddaughter just asked for a floating headboard for Christmas. . I like your tips.
LikeLike
Try using an electric knife to cut your foam. Works great
LikeLike