Dress Like There’s Nobody Watching: The Working-from-Home Style Guide

Ever heard the advice, “Dress for the job you want, not the job you have”?  Perhaps you’ve also heard this inspirational line, “Dance like there’s nobody watching.”

When you work from home, the truth is somewhere in between: Dress Like There’s Nobody Watching. Because, really, nobody is watching. That you know of, at least.   NSA SurveillanceYes, I have one of those magical jobs that could only exist in the 21st Century.  I work from home, part-time.  I have deadlines, but long as the work gets done, it doesn’t matter exactly where or when I do it.  I love the relative flexibility and freedom, the ability to spend more time with my children while they’re still needy and incontinent. *

But most of all, I love the FASHIONS!  Don’t be fooled – dressing for the Home Office means so much more than just crawling out of bed towards your laptop.  You, too, can dress for success with these simple tips!

PROJECTOPHILE’S FASHION, BEAUTY and LIFESTYLE TIPS FOR THE HOME-BASED WORKER

Most of you heard this advice at the Unemployment Office after you lost your job in 2009: Change out of your pajamas every day, even if you have no place to go.

But how do you ignore this advice if you sleep in your underwear? You find the next best thing to pajamas: Sweatpants!

But not just any sweatpants – your husband’s sweatpants!  When Scott and I wed  five years ago, we committed ourselves to a sweatpants-free marriage.  It was a matter of pride that our pants had zippers, buttons, and belt loops – no elastic in sight.  That all changed last year when Scott underwent a minor procedure that will prevent us from having any more (of his) children.  The doctor instructed him to bring baggy sweatpants to the procedure, since he’d be sporting some ice packs below the belt on the way home.  He grabbed a pair from the $5 sweatpants/shirts bin at Walgreens, strategically located between the junk food and the check out:

_photo15_de_2a_4ce359a7efc9__1349453903000

Unfortunately,  most insurance plans do not cover Prescription Sweatpants.

The sweatpants seal had been broken!   And soon enough, those shapeless, XL sacks of cotton became my daily work wear.
IMG_2339And when there’s a chill in the air, nothing complements your husband’s sweatpants better than his second-favorite hoodie: IMG_2342
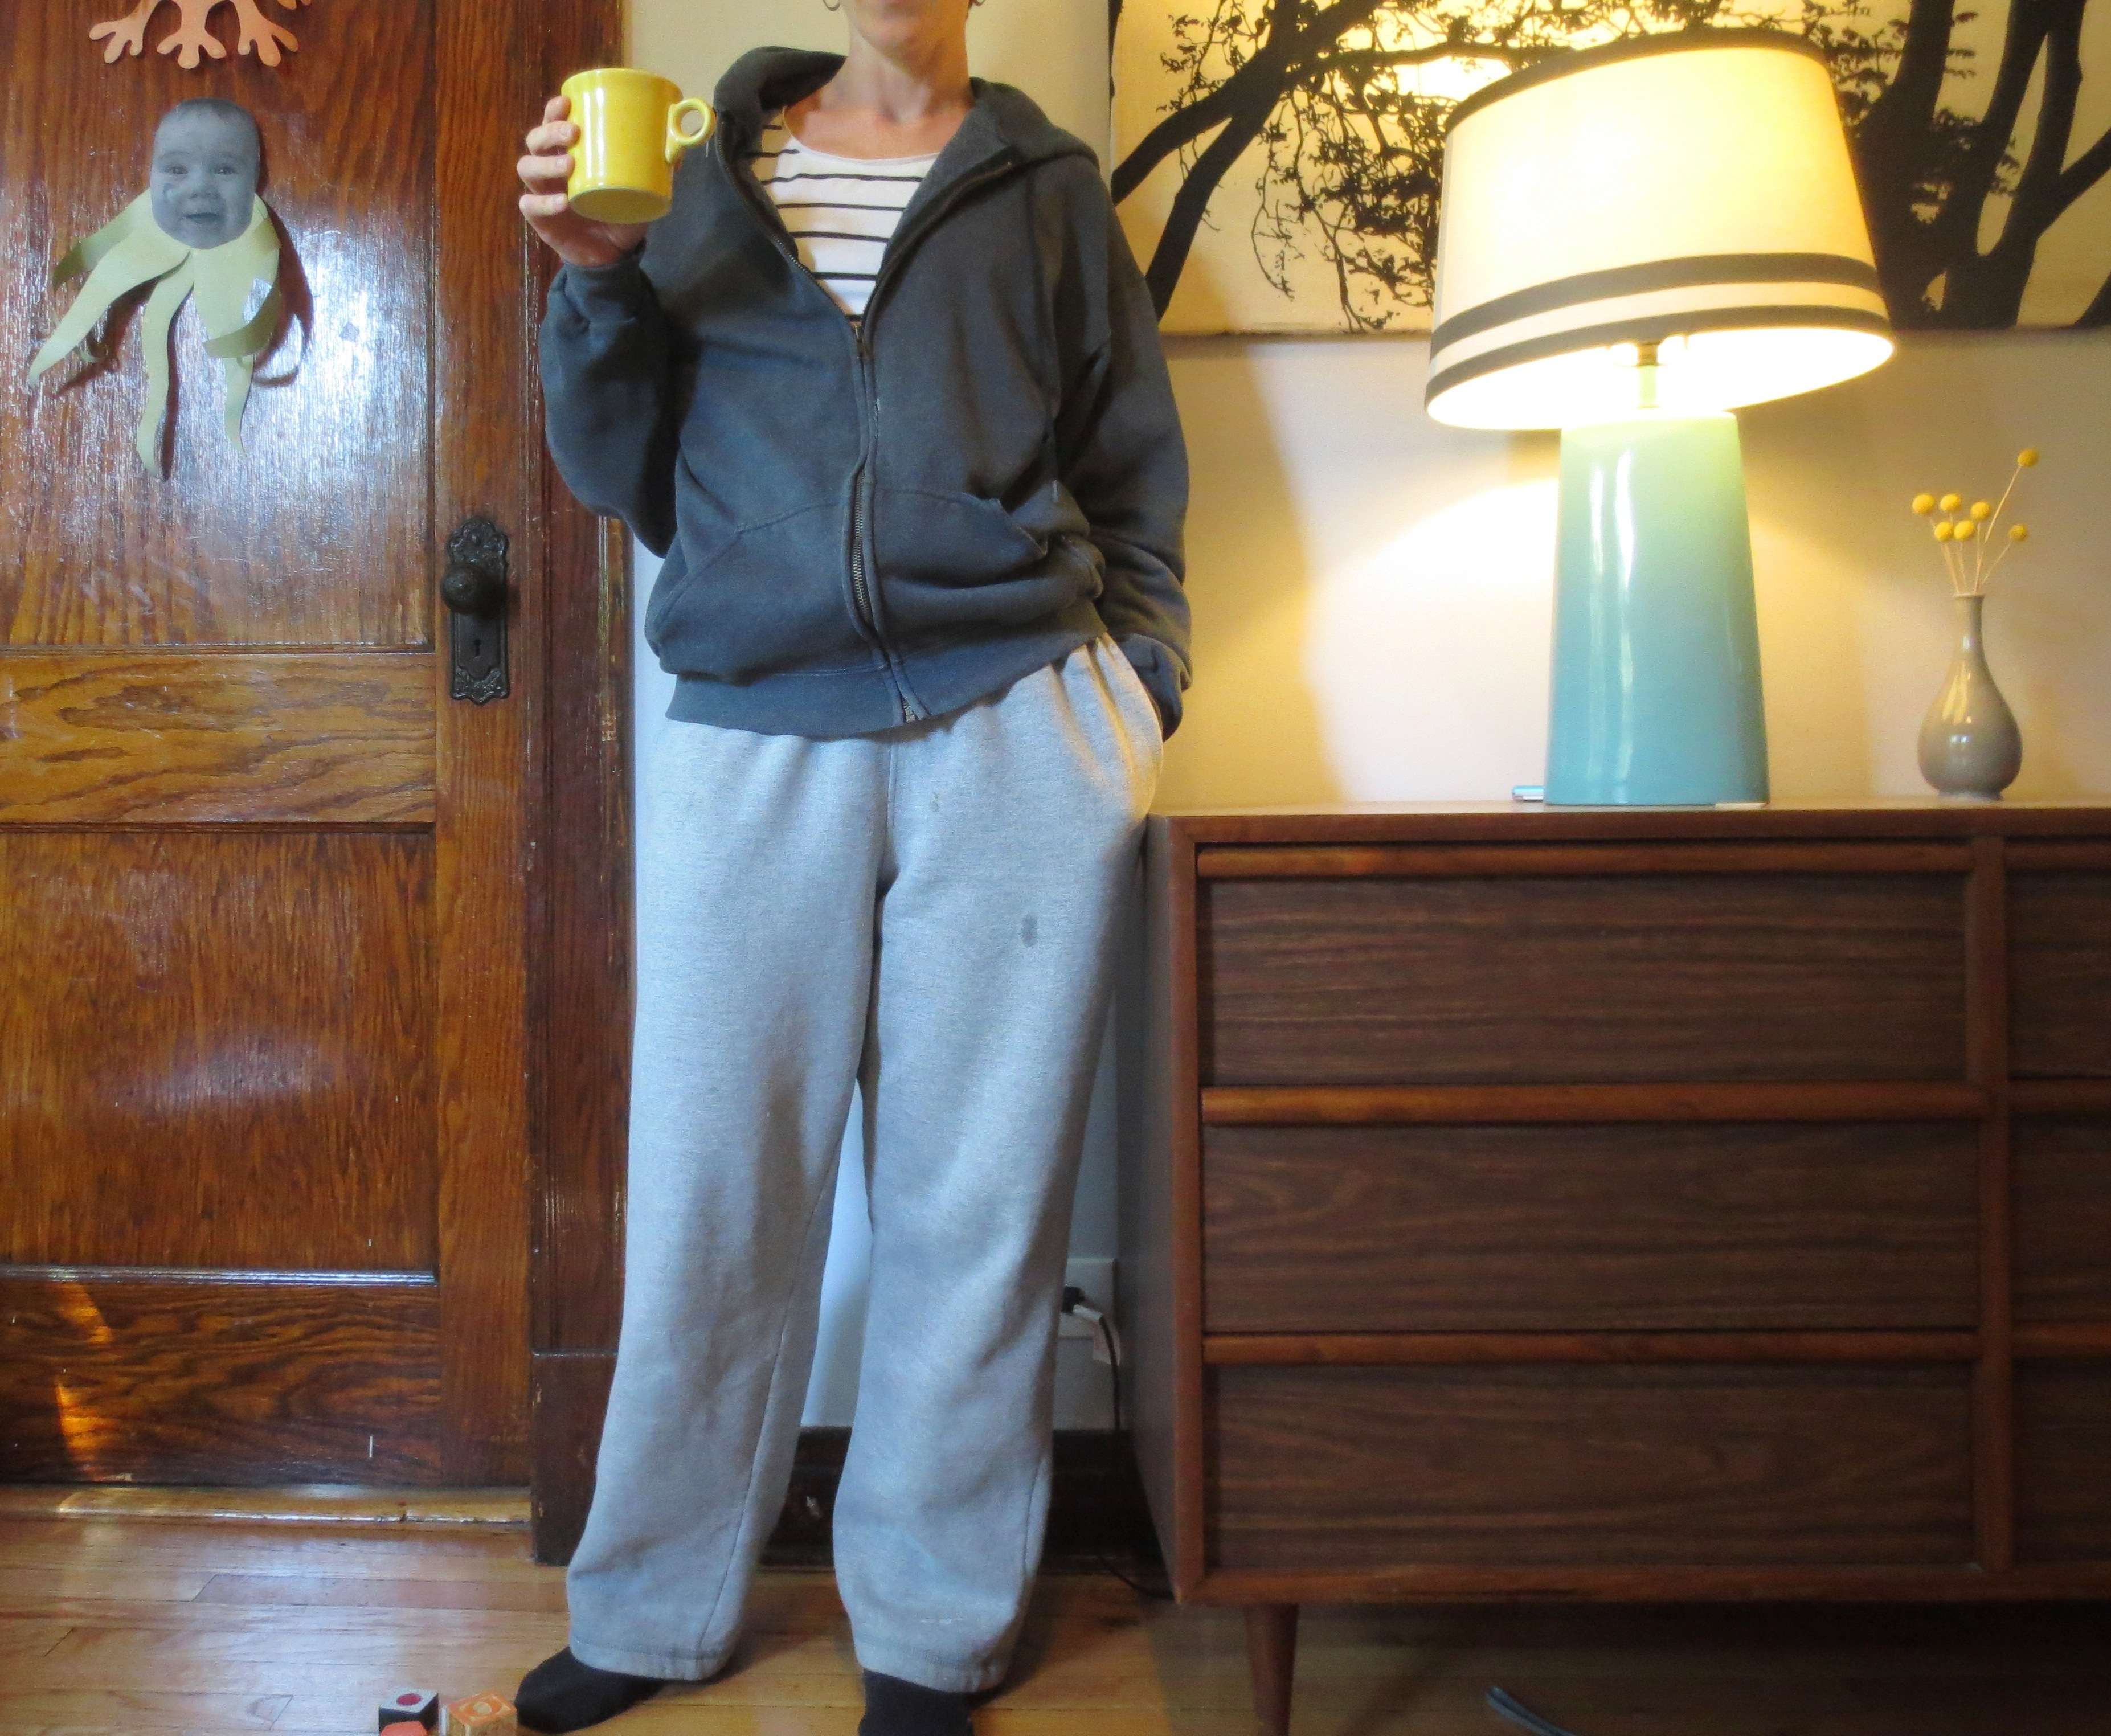
DON’T FORGET YOUR EXTREMITIES!  For the Home-Based Worker, your choice of footwear is a very personal one:  Slippers or socks?  Slippers make my feet sweat.  But even in the summer, I can’t risk leaving my feet bare, since most of our apartment’s floors are either sticky or planted with Legos. Thick wool socks fit the bill. Skip the cotton — wool breathes and never gets stinky.

In the winter, you don’t want to heat the whole house just to keep your three square feet of workspace warm.  If your electronic devices aren’t keeping you toasty enough, consider cutting the tips off your least-favorite pair of gloves for additional warmth, without any loss of dexterity. IMG_2345
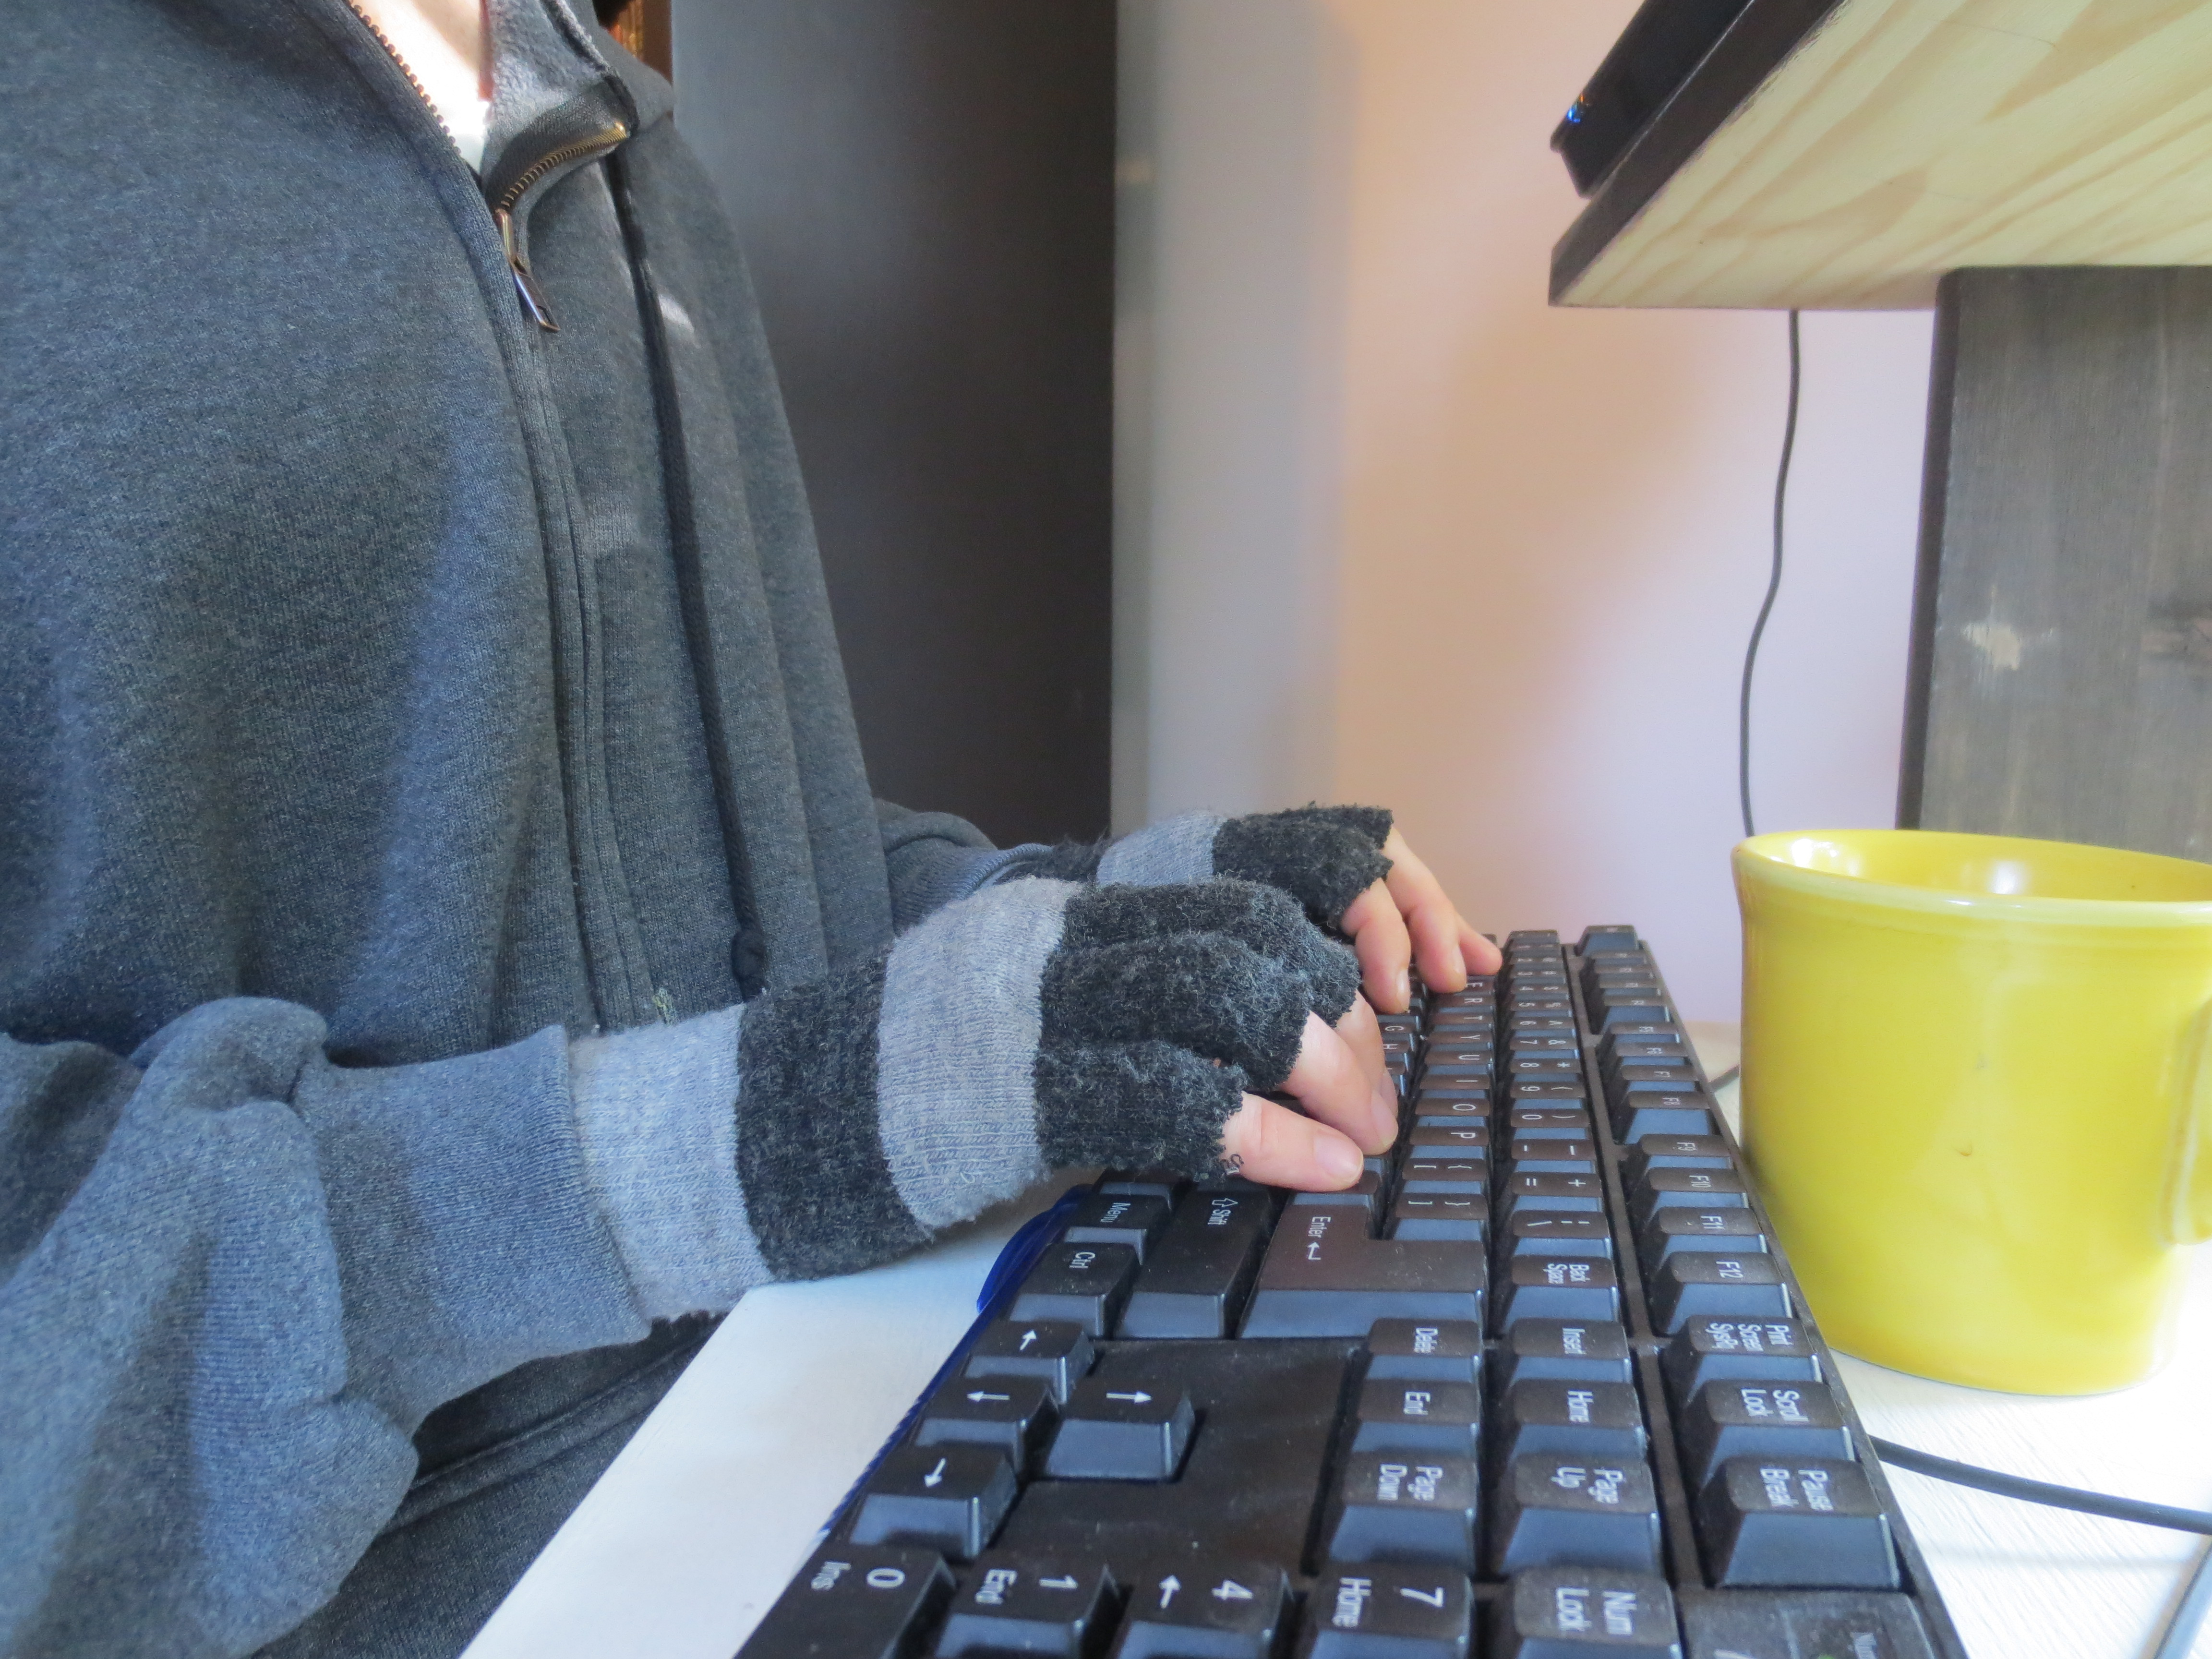
WHEN YOU NEED TO KICK IT UP A NOTCH:  When I’m feeling drowsy or hitting a deadline, I’ll pull on some actual athletic gear, like running shoes, shorts and sports bra.  The tight synthetic fibers always get my heart pumping. Please note that sweatpants, track pants and yoga pants do NOT qualify as athletic.

WHEN YOU MUST LEAVE THE HOUSE:  A FIVE–MINUTE MAKEOVER: Sometimes you need to run to the post office or pick your kids up from school. Many Home Workers find the process of leaving the house to be quite traumatic. The good news is that you don’t actually have to take a shower.  Here’s a few easy steps to ease the transition from the Inside to Outside World in five minutes or less.

1) First, brush your teeth and tongue. If you really can’t be bothered, then a stick of Trident will do.
2) Using a wet washcloth, scrub away the eye boogers and grape jelly that’s dried on your cheek.
3) Apply some deodorant if you plan on hugging anyone. Otherwise, don’t bother.
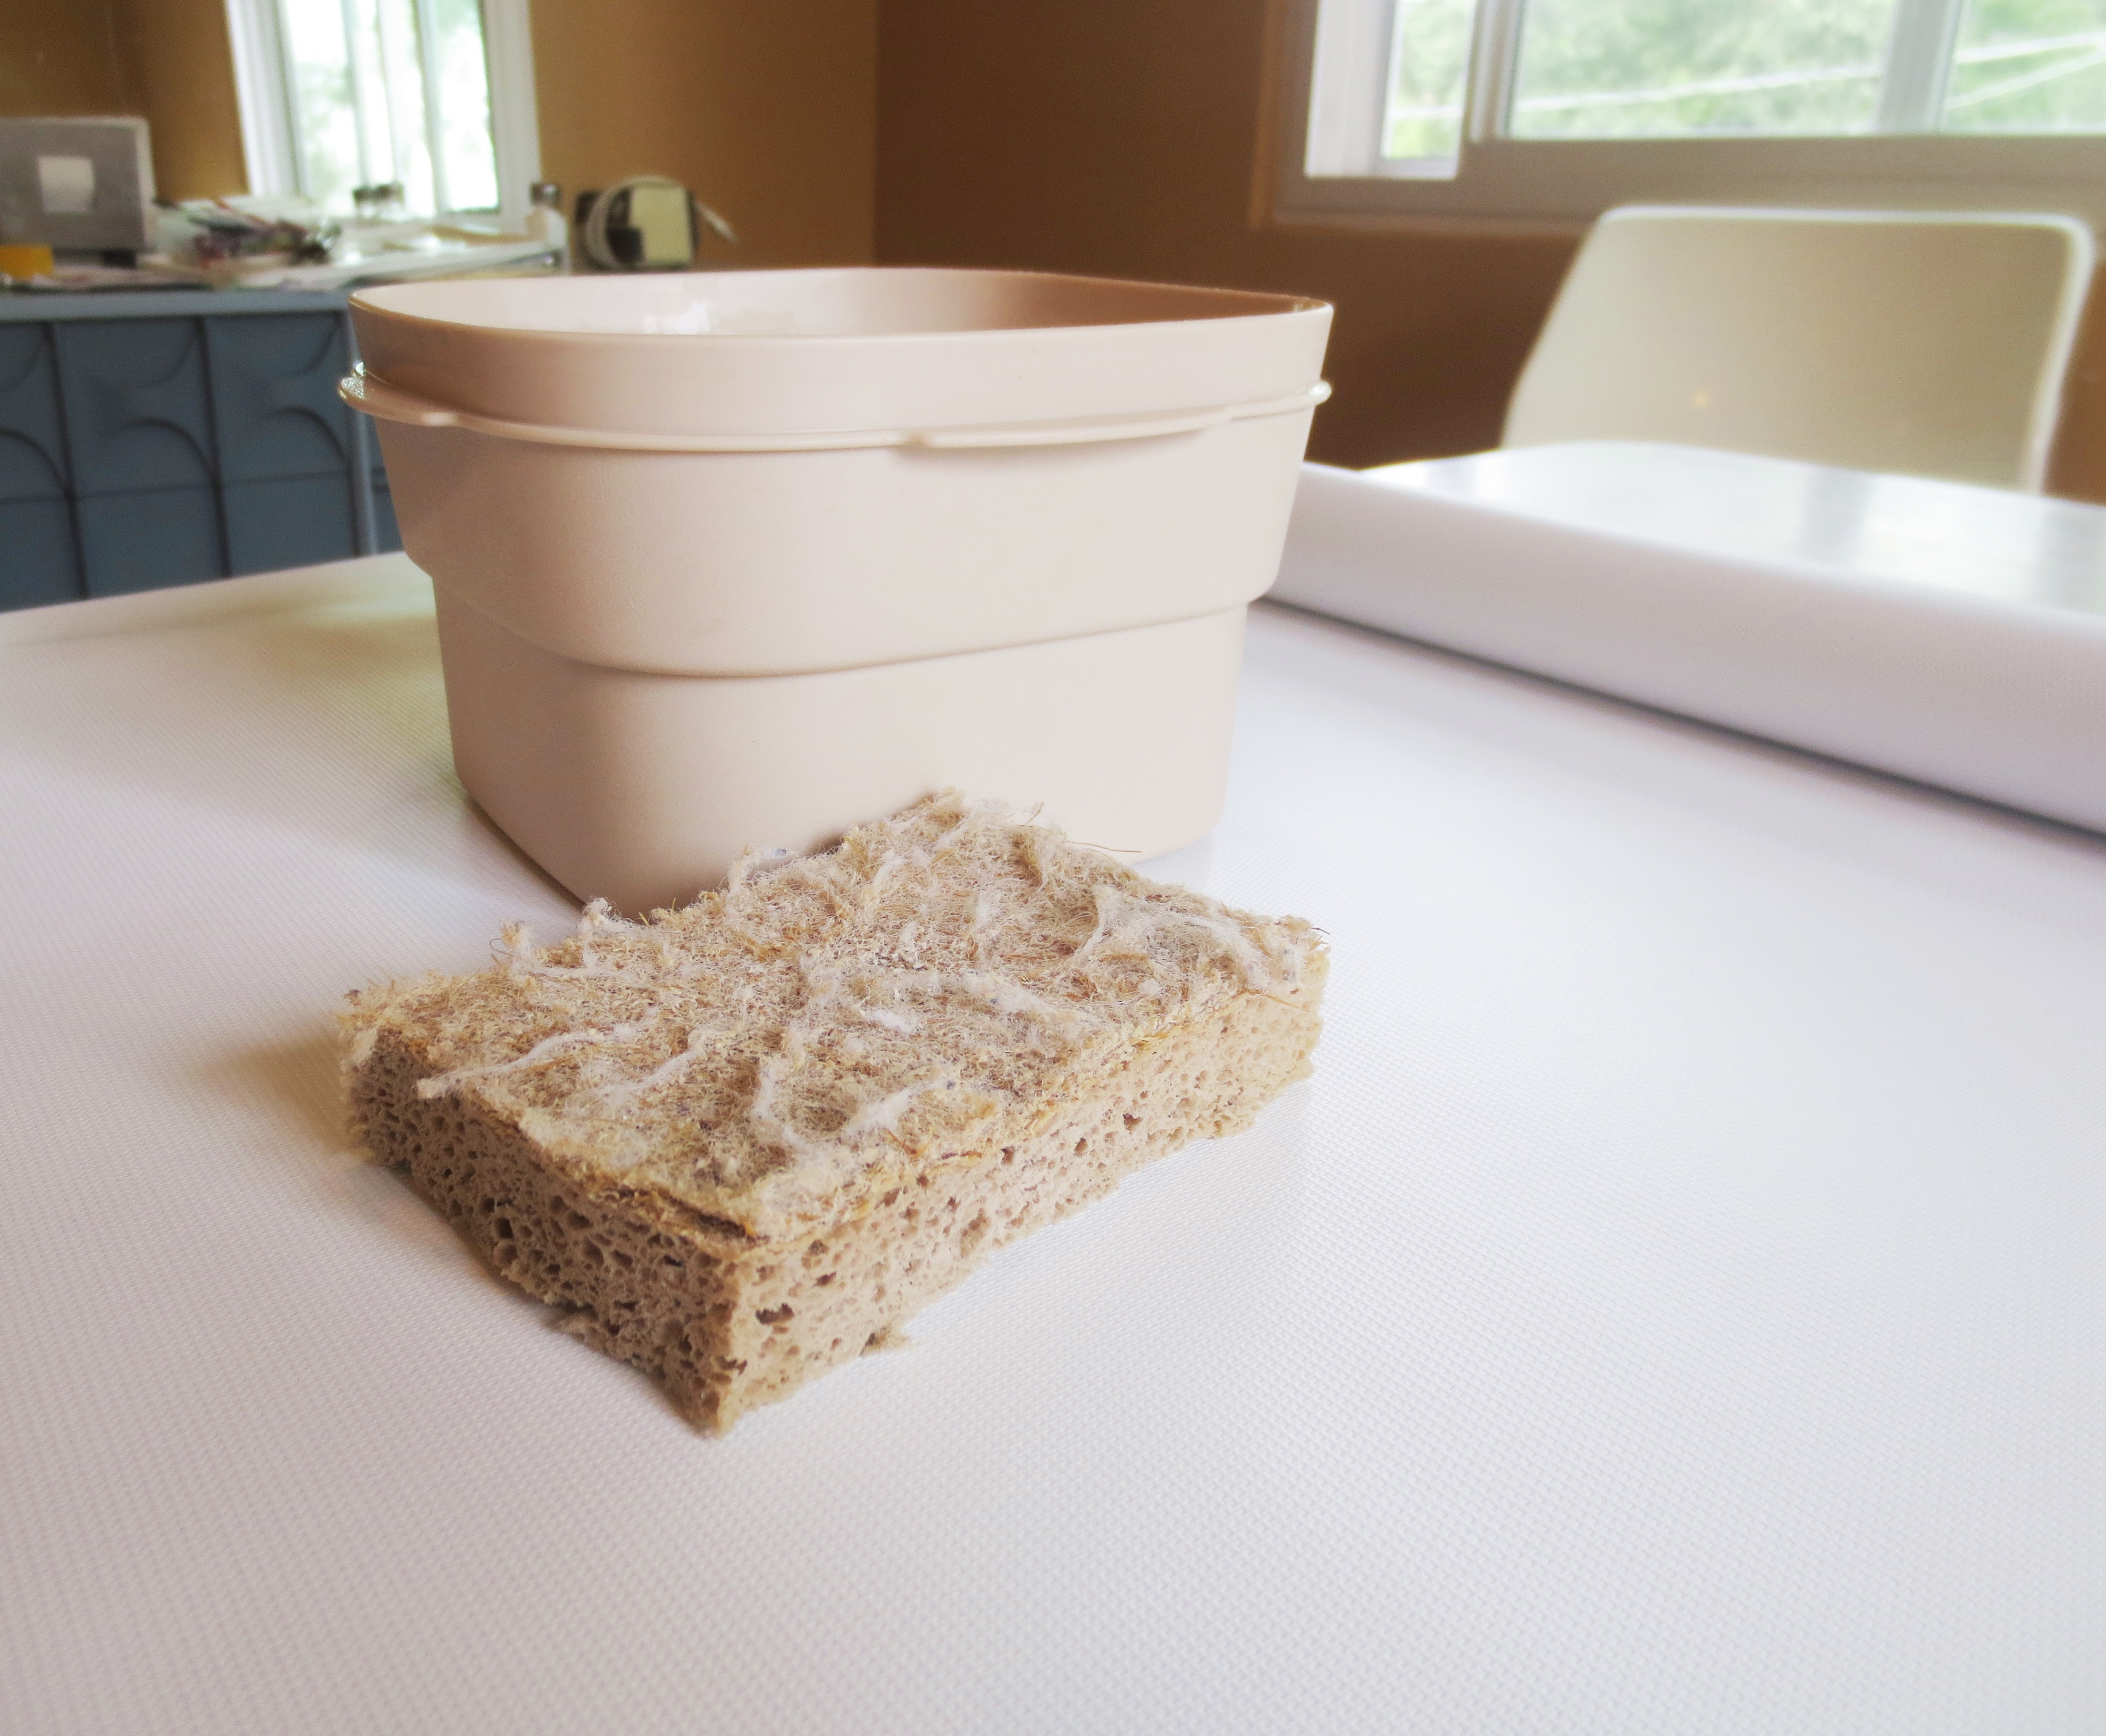
4) Even though shoulder-length hair is fairly easy to maintain, it does start to look like a greasy rat nest after a couple of days.
IMG_2285Let’s get a close up of those oily bangs — eeew!:
IMG_2289Use my patented two-step system to transform your look. All you need is some shampoo and a water bottle — no shower required. IMG_2302
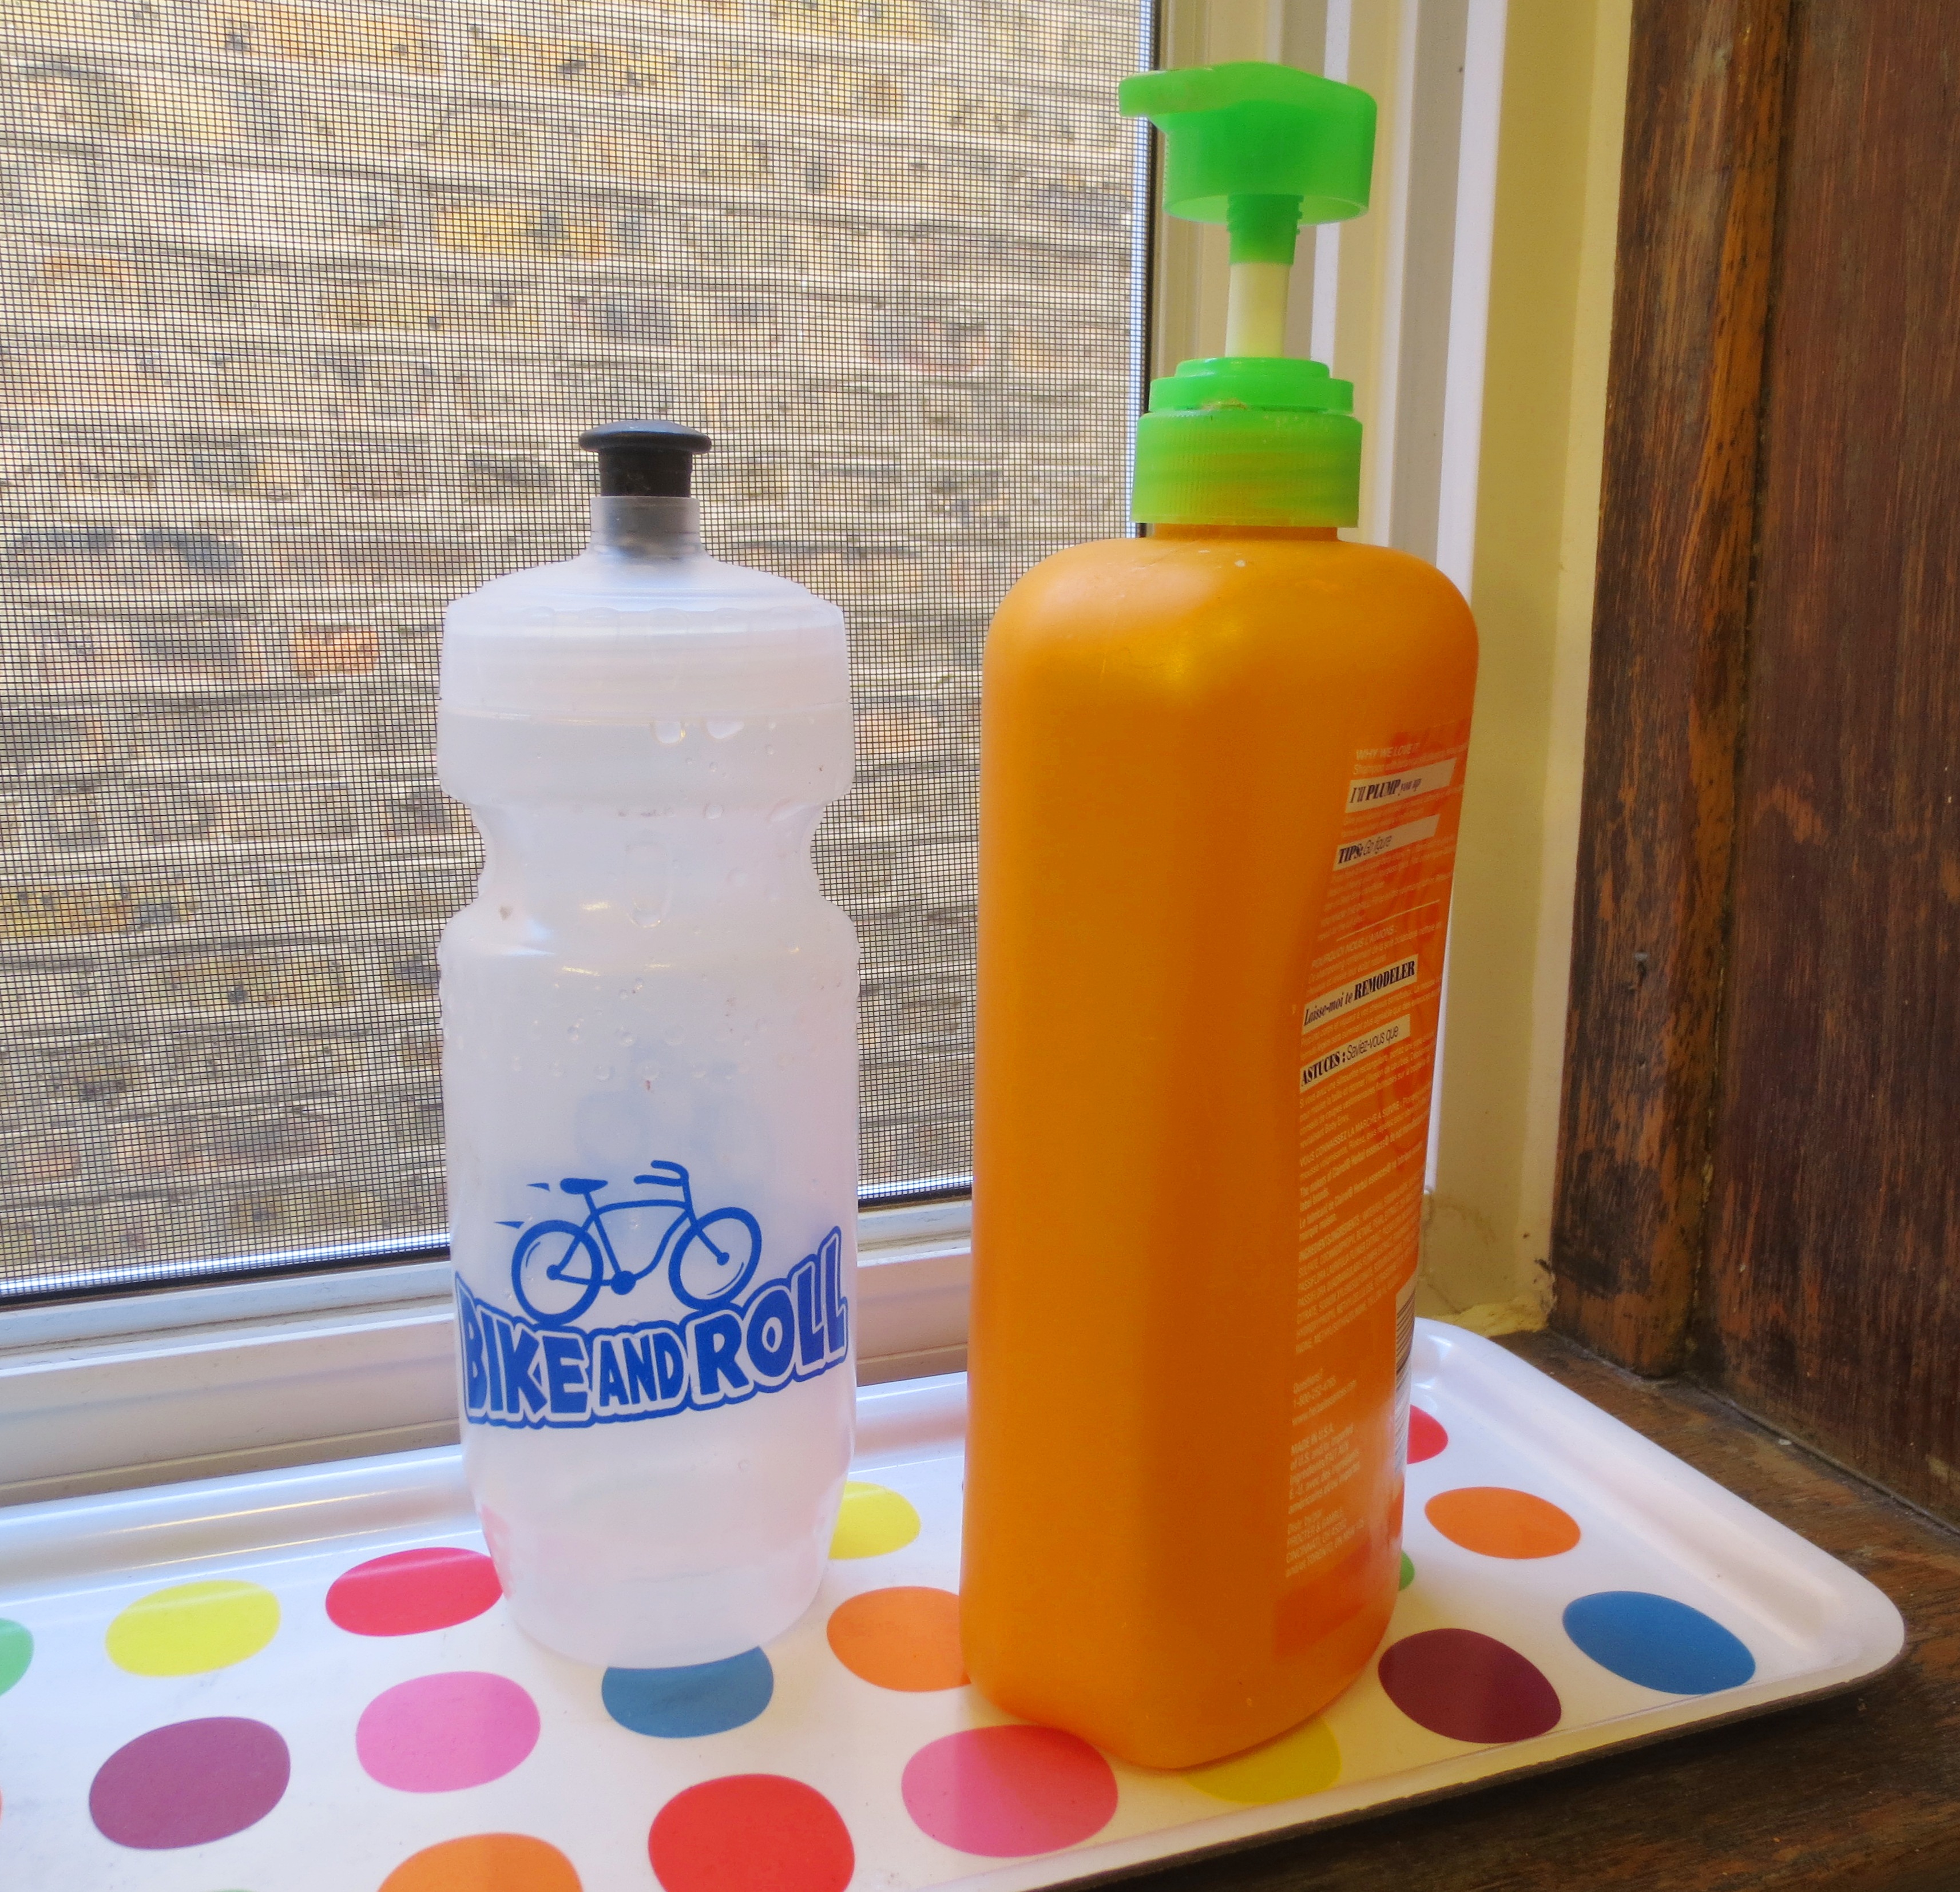
While leaning over your sink, simply wet and wash ONLY THE BANGS (or the hairline area if you don’t wear bangs).

IMG_2308

My husband wants you to know that I’m not naked; I’m actually wearing a tank top but you just can’t see the straps.

Rinse your bangs with the water bottle and blow-dry. Pull the rest of the hair into a sleek ponytail. What a transformation!
IMG_2325Can we get a close up of those clean, shiny-but-not-greasy bangs?IMG_23225) Makeup: I’ve heard that makeup helps women feel sexy, but lipstick makes me feel like a circus clown.  So I have nothing to add here.

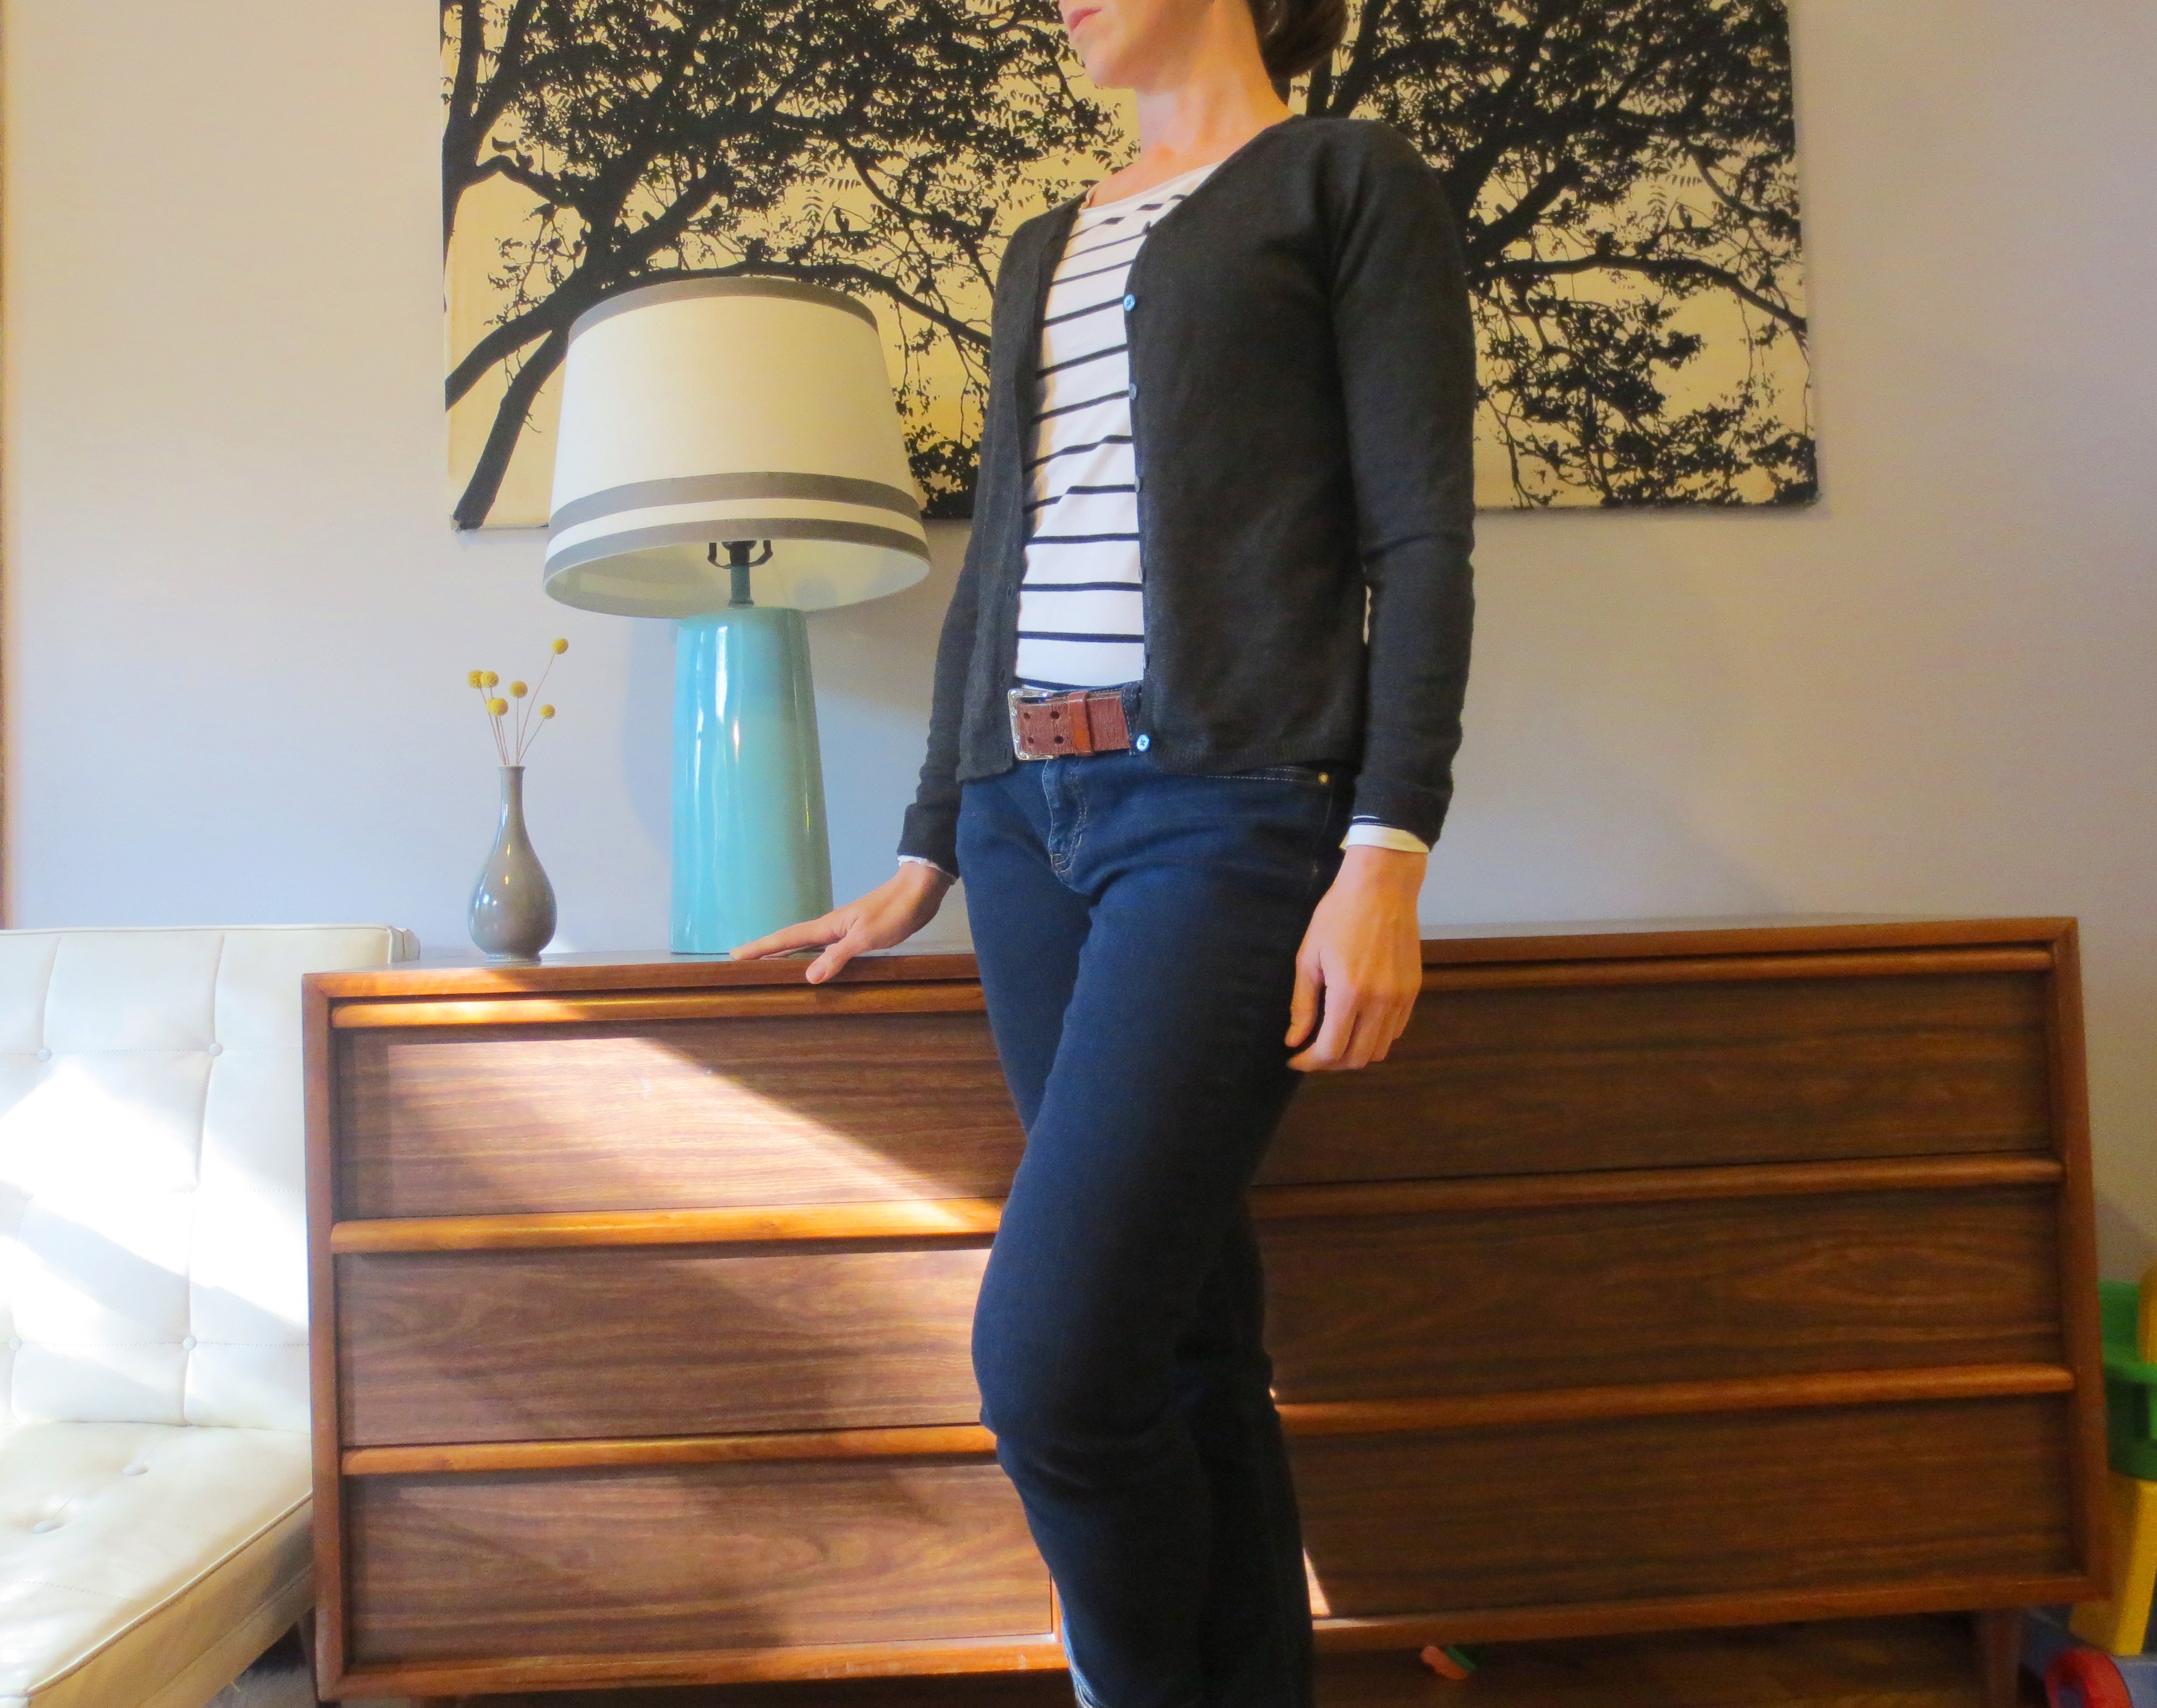
6) Swap out your sweatpants for something on the other end of the comfort spectrum, like jeans.  I’ve learned that “skinny” jeans, while a questionable style choice for some, actually hold their shape quite well after days or weeks without being laundered due to their high level of elasticity.  Use the same washcloth from Step #2 to dab away any visible stains.

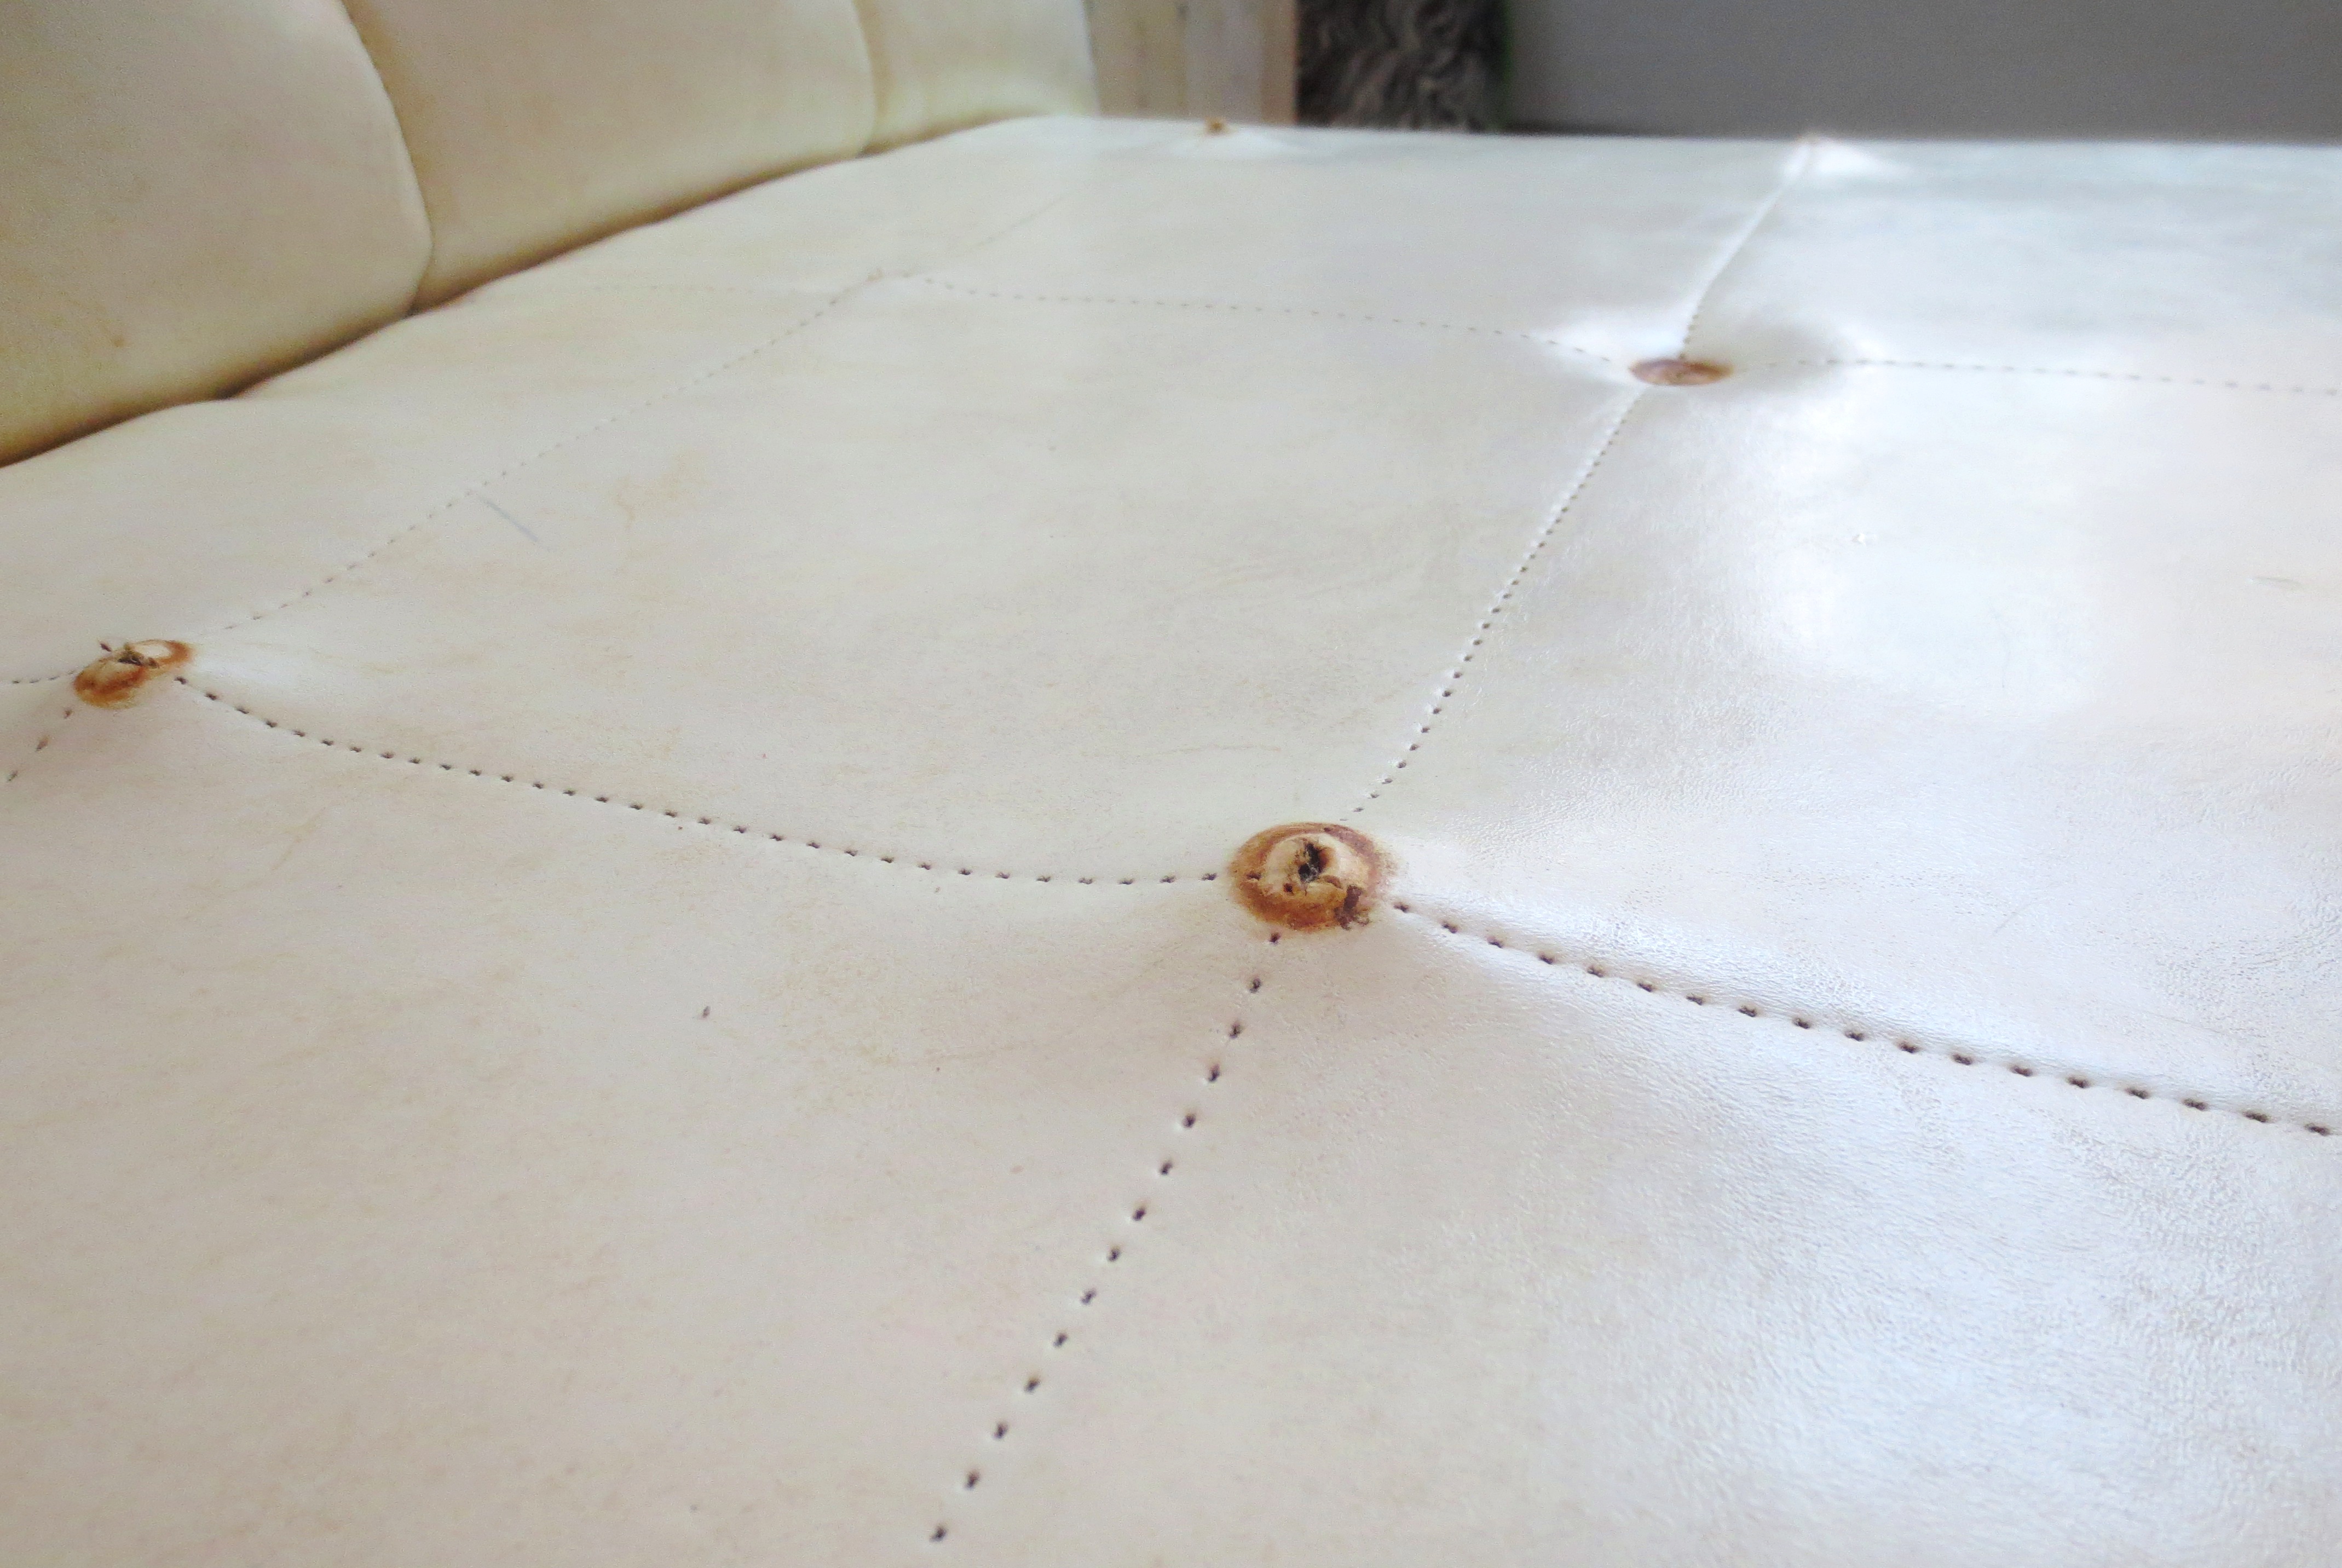
7) Time to change your shirt? No way! Just add an extra layer to mask whatever stains you’ve accumulated over the past few days. A sweater vest is perfect for hiding the grape jelly stains on your torso:
IMG_2347Choose a cardigan for when your front is clean but you accidentally dipped your elbow in chocolate cream pie (I actually did this on Sunday).
IMG_2355OTHER WORKING-FROM-HOME LIFESTYLE TIPS:
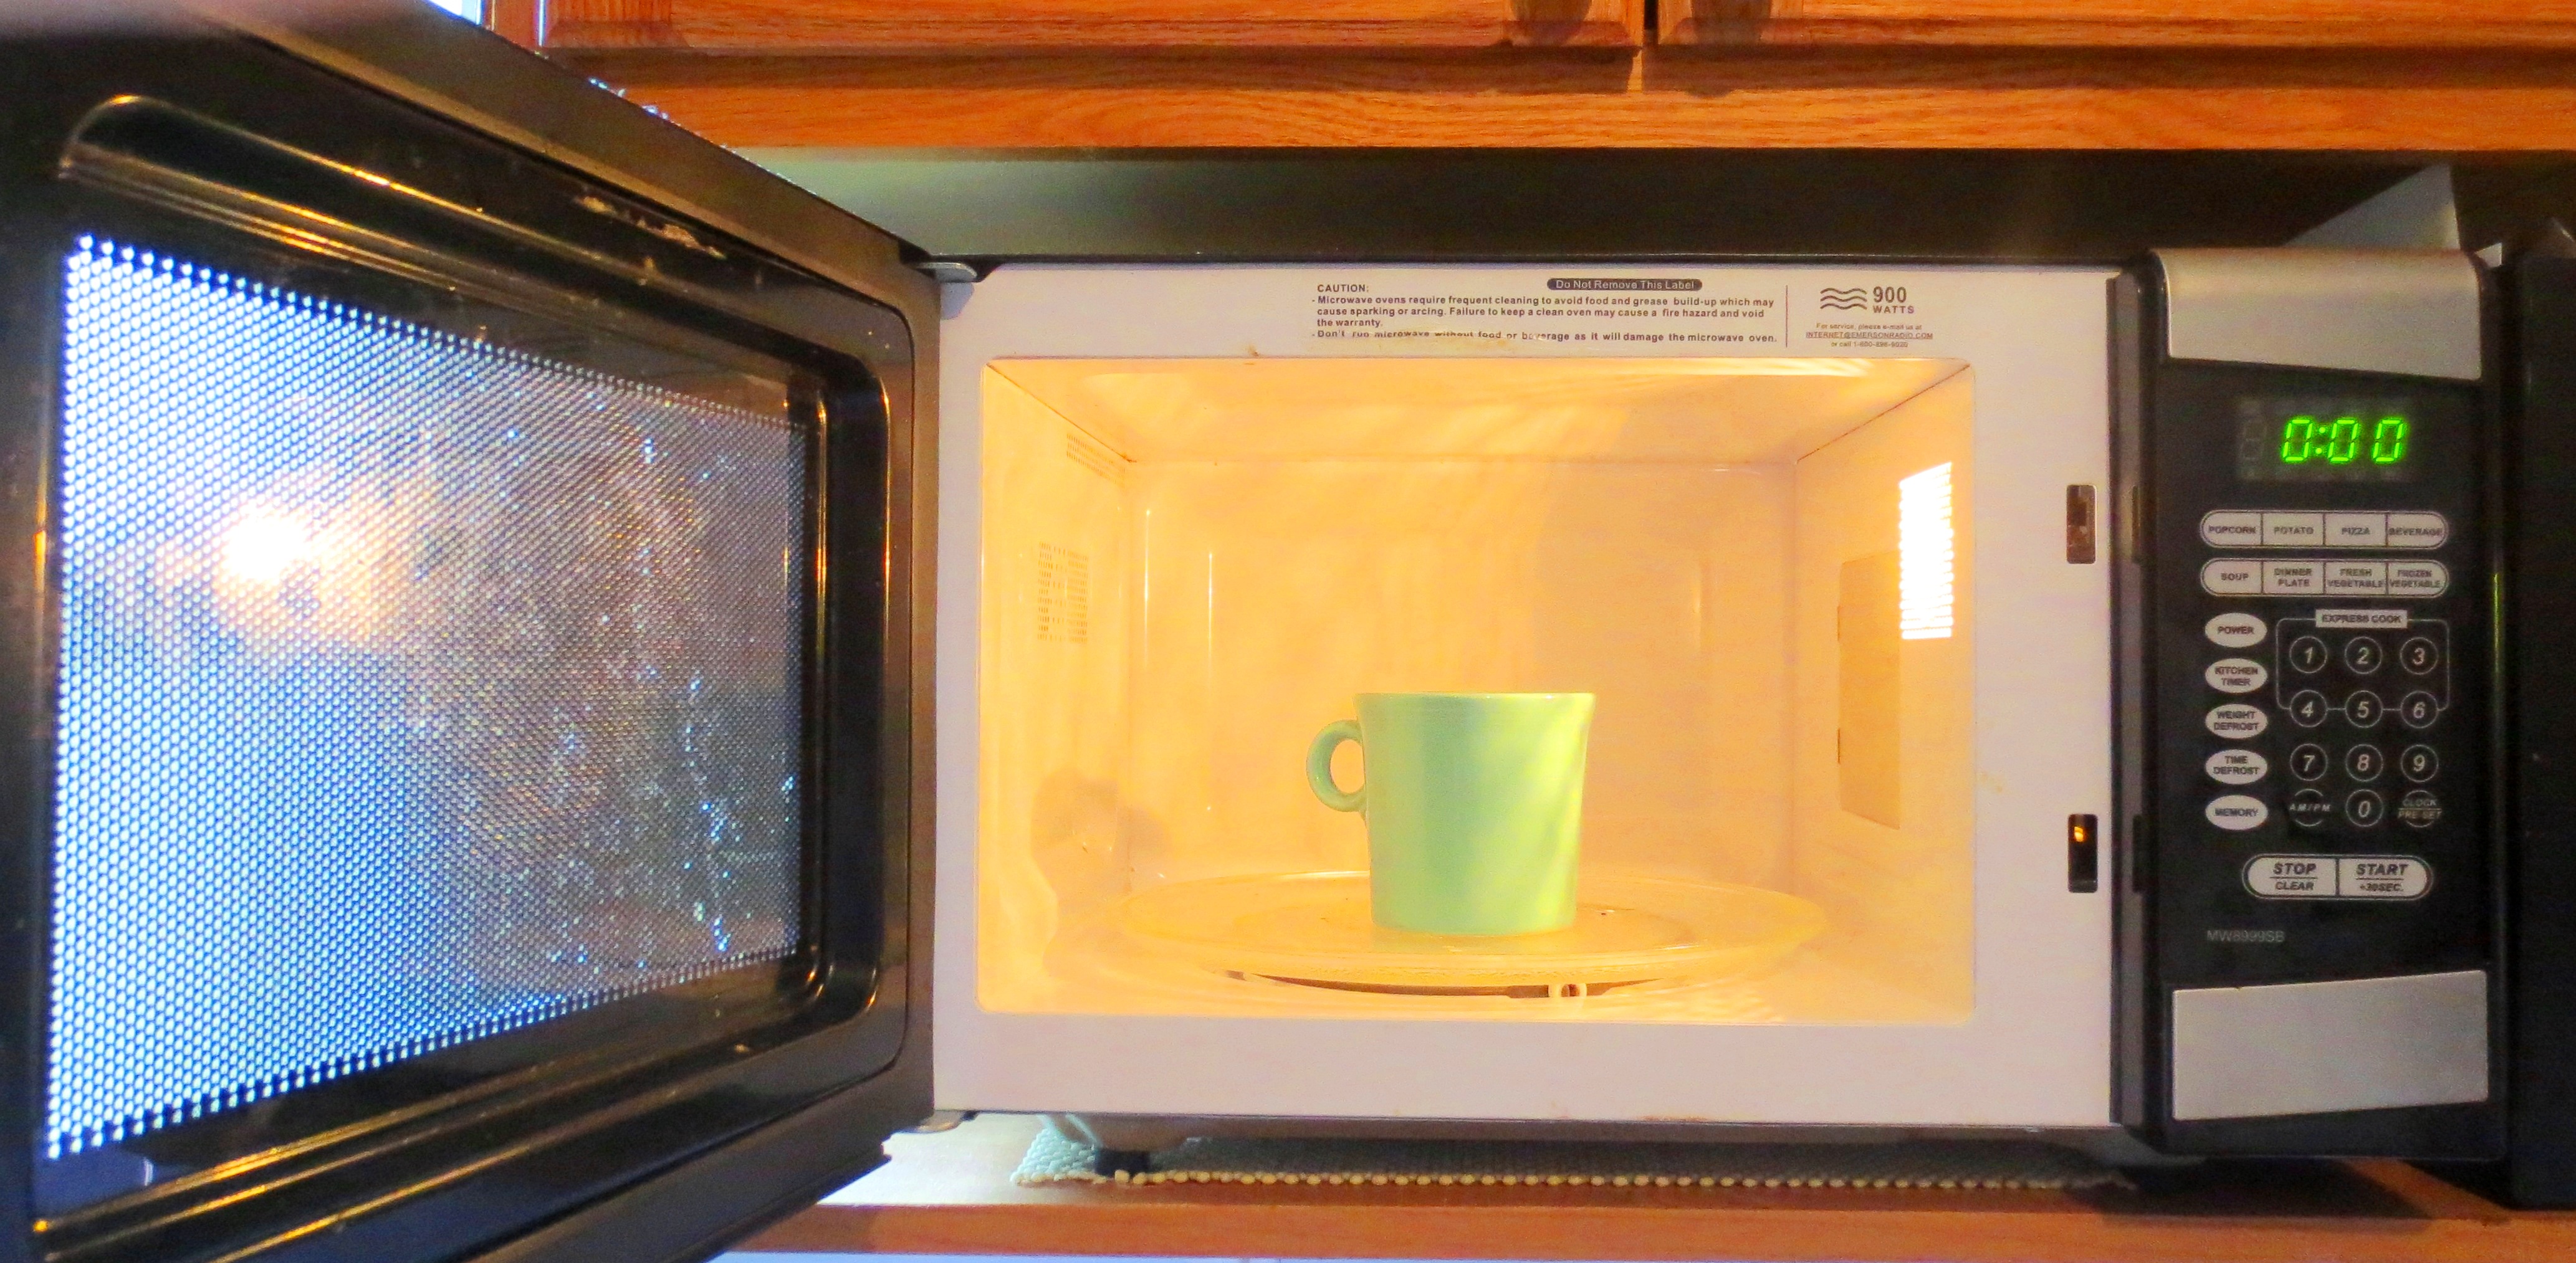
Re-heat the same cup of coffee over and over again. Alternately, leave a cup of coffee in the microwave for days on end.  Wander around the apartment aimlessly while drinking your coffee, put it down, and promptly forget where you left it.  Especially if you use cream and sugar, your kids will be thrilled to discover it days later covered in green fuzz.
IMG_2272Leave the radio on for at least  eight hours a day. This is the closest thing you have to human interaction, and the hourly change of programming will give you a sense of the passing of time. I like to take a coffee break at 11:00 AM to chat with Terry Gross. Plus, you’ll always know when someone famous dies, cause she’ll immediately air their interview from the archives.

terrygross

Terry Gross, lounging on a bed of rose petals, just as I always imagined.

Finally, pay special attention to your local traffic report.  Pity the poor members of the Commuting Class, while sipping your fifth cup of reheated coffee.  Just don’t spill any on your sweatpants.

* This means I also get to be full-time cook, laundress, grocery shopper and butt-wiper. Jealous?

So, you Dream of Killing your Kids? The 26 Most Bizarre Google Searches that Brought you Here

Today, I’m celebrating Projectophile’s 26th post!  Sure, most people celebrate the 25th incident of something, but I got sidetracked by the Poor Man’s Barcelona Chair, and was compelled to mess with that project first.

precious moments 25 years_26And yes, blogging about blogging is as uninspired as writing about writing.  Or dancing about dancing. Or, fill in your own [VERB] about [SAME VERB IN GERUND FORM].

But enough talking about blogging about blogging. Let’s talk about my blog!

Six months, 26 posts and 300,000+ visitors later, I’d say it’s going pretty well — as far as unpaid work goes.  But the only way to get paid is to run ads.  And I get most of my project supplies from Your-ad-hereplaces that don’t regularly advertise, like the alley or the thrift store or neighborhood yard sales.

But even if this blog never makes a dime, it has given me the richest reward of all:  Laughing at other people.  You see, WordPress provides me with a daily list of the search terms that were used to find this blog.

Now, most of you found Projectophile from a link on Facebook (are any of you on Twitter?), or Apartment Therapy, or — for a terrifying week in April – former Bush speechwriter David Frum’s blog on the Daily Beast. Hi NRA members and weird government conspiracy theorists! Love you!  No need to shoot. 

davidFrum

David Frum: Just another sockless, secretly Canadian conservative pundit who loves Projectophile.

But a whole lot of you found my little corner of the internet through good old fashioned Googling. I’d like to think that – even though this wasn’t exactly what you were looking for – you never regretted clicking that link.

And based on WordPress stats, it appears that most of you Googlers are a severely paranoid bunch.  At least half of your Google searches are some variation of the question “Is Craigslist Dangerous?” *  In second place are those of you who want to know if Modern Design is Dangerous (it is).  And a small minority of you want to know about Grandpas, or Waterbeds or Death or Jim Croce (who, coincidentally, died on a waterbed with his grandpa).
INFOGRAPH_26google searchesTo celebrate my 26th post, I’ve handpicked the search terms that have brought me the most side-splitting (and head-scratching) giggles over these last six months. Let’s see just how strange my new readers actually are!

Top 26 Most Bizarre Search Terms that Brought You to Projectophile:

  1. Black lacquer oriental armoire with forest scene
  2. IKEA cabinets are moldy
  3. Trauma therapy dolls
  4. Brady Bunch staircase unsafe?
  5. Dream about killing your kids
  6. Refinishing bowling alley
  7. Hidden meanings on Craigslist couch
  8. Bedroom space odyssey
  9. How to make a standing desk from milk crates
  10. Plastic-covered living room
  11. Jim Croce adjectives to describe furniture
  12. Can little kids dream about older kids for no reason?
  13. Peach Victorian living room set
  14. Who loves outsider art?
  15. Craigslist waterbeds
  16. What means chiropteraphile?**
  17. Health hazards of modern paintings in households
  18. Live the modernist dream
  19. Respiratory system diagram
  20. Children’s architecture hidden in the adult word
  21. Grandpa
  22. Refrigerator art therapy
  23. Can’t reach desk!
  24. Bad houses for kids funny
  25. Utah Mormon Mid-century modern architecture
  26. I don’t like modern homes
  27. Do kids jump off indoor banisters?
  28. A house designed to kill people
  29. Choppy bowl cut

* The answer is, “Only if you consider ugly furniture and flaky buyers without exact change to be dangerous.” 

** Yeah, I had to look it up as well.  This is a misspelling of chiropterophily, a term that botanists use to describe flowers which are primarily pollinated by bats.  Bat-pollinated flowers are light-colored, open at night and have strong odors. Did you know that bats can identify nectar-producing flowers using echolocation?

The Poor Man’s Barcelona Chair: Restoring a Thrift Store Surprise

A week ago today, my two-year-old threw up on me in a neighborhood park. Within seconds, preschool forensic experts from every corner of the park swarmed around to guess what my boy had eaten for lunch.

IMG_2194

A re-enactment of the throwing up incident.

I’m not telling you this to elicit sympathy, or curb overpopulation by grossing you out of having kids of your own.

I want to share a story of silver linings, and serendipity.  A lesson about slowing down and digging around.

The next day, instead of working, I had to keep this sick little boy home with me.  By mid-morning he had nothing more than a mild fever. Out of sheer boredom, we rode the cargo bike to our favorite neighborhood thrift store, looking for nothing in particular.

While digging around in the racks of bedding, I bumped my shin against something pleathery. I pulled apart the tangled web of musty Disney Princess comforters to find this:V__7ACFI texted the above picture to Scott, who has gotten pretty good at being my husband. His response? I trust your judgment, Love.

With its filthy vinyl skin and wooden legs, it’s not exactly a Barcelona chair.  It’s not even a Toldedo (Spain) chair. More like a Toledo, Ohio chair.

But for $20, I couldn’t leave it behind.

Twenty bucks may seem steep for a thrift store, but to put it in perspective, (the horribly misnamed) Design Within Reach sells a “real” white leather Barcelona chair for  $5,271.  What other design bloggers might call an “investment piece.”barcelona_DWR_redThe chair definitely needed some tough love: A thorough all-over cleaning, plus new tufting and buttons on the seat cushion.  IMG_2157
IMG_2159I found a few minor tears and scrapes in the vinyl, but nothing too visible or worth repairing:

IMG_2167HOW TO RESTORE YOUR POOR MAN’S BARCELONA CHAIR
INGREDIENTS:

One crummy looking white vinyl (pleather or Naugahyde) chair
Vinyl cleaner + rag
Fabric-covered shank buttons or button-making kit
Big ball of twine
Large doll or decorator’s needle
Staple gun + scissors

STEP ONE – UNBUTTON:  The buttons and most of the stitching on the backrest are fine. But on the seat, the stitching is entirely gone and a couple of buttons are missing. The remaining buttons are loose and rusted, having stained the vinyl beneath them.

Since the bottom dust cover is missing, we can easily see where the buttons are attached to the seat base.

IMG_2160Simply clip the twine and unravel it from the nails and staples, and pull the buttons off the top.  Keep the nails in place for step three.  Your seat now has puckered rust stains where the buttons once lived:
IMG_2183STEP TWO – CLEAN: I spent some time in vintage car enthusiast chat rooms — the only place on the internet you’ll find an informed debate about how to care for old vinyl seats (in their case, car seats).  I was told to avoid abrasives or harsh (acid-based) cleaners that will wear away vinyl’s plastic coating, causing it to dry and crack.  I couldn’t keep track of the recommend brands, so I pedaled over to my nearest AutoZone and grabbed the first bottle I saw.**
IMG_2239This stuff actually worked quite well, applied with a soft, clean rag and some muscle.  I didn’t wear gloves, and it left my bare hands feeling strangely soft and supple, like the back seat of a ’68 Firebird.  Next, use an old toothbrush to clear the gunk from the crevice between the seat and back.

While cleaning, I discovered that the original vinyl is more of an creamy eggshell white than a pure white. And, perhaps in an attempt to look like real cow skin, the original vinyl has a swirly yellowish pattern imbedded in it. This might give you some perspective on the color: IMG_2171PRO TIP!  It’s time to talk about bed bugs.  They are real, and have infested the homes of several people in my life, which makes me think twice about dragging home second-hand furniture.  You won’t find much soft stuffing in this chair, but just to be sure I pulled a sample from under the seat and tried an old trick I learned as a kid when my cat had fleas.   We would comb Kitty’s fur and set a tuft of it on a wet paper towel.  If the bits of dust in her fur turned red on the towel, we knew she still had fleas because fleas (like lice and bedbugs) poop blood.  Gross but true.  Whew, Toledo passed the test!

IMG_2166

I sure had fun making Scott guess what this was when he got home from work.

STEP THREE – RE-TUFT:  Since the old metal buttons left permanent rust stains on the vinyl, I needed buttons that were slightly bigger than the stains. I bought two sets of covered shank button kits at my local craft store, and used part of an old bed sheet for the fabric cover. There’s instructions on the package in three languages, so you should be able to figure that process out yourself.IMG_2180Now the actual button tufting requires easy access to the bottom of the seat.  Fans of hospital-based TV dramas will appreciate this opportunity to play doctor.

ER_show

“We’re gonna need 500 cc’s of Twine, STAT!”

Gently lift the chair up on the “Operating Table” for the big procedure.
IMG_2207Provide your nurse with twine, scissors, buttons and a very long doll or decorator’s needle. Estimate about a foot of twine for each button. IMG_2208Thread a piece of twine through the needle and pull it up through the existing button hole:
IMG_2211Thread the twine through the loop on the back of the button.
IMG_2216IMG_2219Pull the twine back down through the same hole you came up from.
IMG_2223Pull both ends of the twine as tight as you can, loop around the nail and staple to the base of the chair.
IMG_2224Here’s the first row — two down, one to go: IMG_2228Repeat 8 more times.IMG_2258Now, figure out what to do with the $5,251 you just saved!
IMG_2257IMG_2244IMG_2255
IMG_2236** Surprisingly, there are no bike racks at AutoZone.IMG_2189

Transform your Pockmarked IKEA Bench into a Thing of Beauty

Someday I’ll tell you all about my love/hate relationship with IKEA:  that I don’t understand how a business specializing in furnishing small, urban spaces – ridiculously small spaces – requires you to drive for half a day from your modest city apartment to the sprawling edge of the suburbs.  And how, by the time you get home, the veneer on your 600-pound particleboard bookshelf has already started to warp and bubble.

Living-and-bedroom-IKEA-catalog-2012_unicycleinred

Glad to see IKEA finally responding to the needs of the color-blind urban Unicyclist.

But then I may also tell you how finding the IKEA catalog in the mailbox is a serious event in my home.  I lay in bed, browsing its colorful pages and drifting into white-washed Scandanavian dreams:  my blonde children quietly playing on their child-sized furniture, my husband and I sipping French-pressed coffee and reading the Stockholm newspaper, me on my second year of government-paid maternity leave, he on his eighth week of paid vacation.

But for now, let me show you how I transformed our structurally sound but cosmetically disastrous IKEA Sigurd bench into a thing of beauty.
IMG_2069It’s a solid bench, and never wobbled for a second. But after just a few months in our dining room, blemishes started to appear on the veneer surface.  Tiny holes in the finish would allow untold gallons of spilled milk to penetrate the vulnerable particleboard below, which would then swell and expand the surface blemishes even further:IMG_2060

IMG_2061Oh, and then there’s that can of polyeurethane I spilled a few months ago. And that bucket of white primer that I knocked over as well:IMG_2062Since it’s nearly impossible to sand and refinish particleboard, I decided to cover the thing in lovely fabric, using roughly the same process as my Floating Headboard.

INGREDIENTS + TOOLS:
One beat-up IKEA Sigurd bench
Oil-cloth or Laminate fabric
Interfacing
Foam padding (not entirely necessary)
Staple Gun
Screwdriver

STEP ONE – DISMANTLE: Remove the seat from the base of the bench by unscrewing the brackets.  Store the screws and brackets in a closed Tupperware container or sealed bag, because, if you’re like me, you’ll get bored and unscrew the seat panel “just to see what happens” but not actually start the project for a couple of weeks. That is plenty of time to lose your screws.
IMG_2064IMG_2065STEP TWO – SELECT FABRIC & FOAM:  Choose a fabric designated as “oilcloth” or “laminated.” You could also get away with using an outdoor (plasticky) tablecloth or even an old shower curtain. Anything that is slick enough to easily wipe clean. Unless you don’t have small kids, then do whatever you want.  I chose a grey-and-white chevron pattern because I am mildly addicted to chevrons, but have limited myself to one chevron-patterned item in each room.

To get the correct amount of fabric and interface, measure your seat panel and add about ten inches extra on all sides (five inches if you’re not using a foam pad).

PRO-TIP!  It is not completely necessary to use padding on your bench. This is a very personal decision and you should consider the length of your meals, the size of your ass(es) and how comfortable you want to make dinner guests. I was leaning away from using foam padding, mostly because I am lazy (please don’t make me go to Jo-Anne fabrics again) and cheap. A bench-sized piece of High Density Urethane foam will set you back at least $50 (U.S).

Then, the night before I finished this project, I took the baby on a walk to the store.  It was a big moving weekend in Chicago and the alleys were bursting with treasure. Would you believe my luck? I found a perfectly good (mostly) roll of three-inch thick foam perched atop a trash can, charmingly tied up with twine. And it fit right on top of the stroller!
V__A6F1Especially if you acquire your foam from an, ahem, non-traditional source, you’ll need to cut it down to size (and lightly spray with vinegar to eliminate the smell). Simply trace the outline of the seat panel on your foam, then grab your scariest kitchen knife and stab away the excess.  IMG_2074

IMG_2082

Neither of us can remember where this knife came from. To my knowledge, it has never been used on food.

STEP THREE — COVER:  Make a sandwich out of your interfacing, foam and seat panel, checking that there is a uniform amount of interfacing on all sides. IMG_2094 Pull the interfacing tightly over the foam and staple it to the bottom of the seat panel, far enough towards the middle that you will have room to attach your legs again. IMG_2095 Since you can see through the interfacing, mark the screw holes with a black marker so you don’t forget where to re-attach the brackets.
IMG_2100Now, do it again with the fabric, placing it right-side-down on your kitchen table, then pulling and stapling onto the seat board. Again, use a marker to note the location of the screw holes.IMG_2104STEP FOUR – REASSEMBLE:
Place the leg base back on top of your upside-down seat panel. Line up the screw holes on the leg base with the marks you’ve made on the seat.  IMG_2113Depending on the thickness of your fabric, you may need to create “pilot holes” through the fabric and interfacing with a sewing needle to give the screws easier access to their home holes.IMG_2121Screw your brackets back in and go to bed.
IMG_2125When you wake up the next morning, enthusiastically reveal the newly-transformed, cushier, fantastically more stylish bench to your children. Then try to ignore the four-year-old when she tell you that she doesn’t like it when things change.
IMG_2138IMG_2137IMG_2143IMG_2142

From Bowling Alley to Dining Room: Refinishing Fiberglass and Chrome Chairs

putnam

Robert Putnam, after winning the gold medal for Depressing the Hell out of America

When I was a young and impressionable, I read a terrifying book called “Bowling Alone,” by Robert Putnam.  He describes the collapse of the American community and the decline of social capital – the kind of cohesion achieved by interacting with other human beings.** According to Putnam, folks today don’t join block clubs, political parties, or bowling leagues; if they want to roll, they bowl alone (or stay home and play bowling video games).

Ah, bowling alleys. Once the quintessential pleasure palaces of the mid-century American working class, they are closing up shop all around us.

But the decay of America’s social fabric can be your gain!  On Saturday, we were browsing the local yard sales and met a nice lady who returned from a bowling alley auction with a garage full of these fiberglass-and-chrome beauties! Ten dollars a piece? I’ll take four.
IMG_1939

IMG_1960I’d been looking to replace our cheapy plastic IKEA dining room chairs, but with something equally affordable, easy to clean, and similar in style to our chrome-and-Formica dining room table. And perhaps a bit more durable:

IMG_2013

A perfect illustration of my love-hate relationship with IKEA.

These chairs needed more than just a hose down in the back yard — I was looking at five decades of rust, nicotine, pencil marks and scratches (never mind the dried gum).IMG_1962

IMG_1963

Sorry to show everybody your underside, mister chair.

HOW TO RESTORE 40+ YEAR-OLD FIBERGLASS BOWLING ALLEY CHAIRS:

STEP ONE — LEGS:  Grab a pack of extra fine steel wool – 000 or 00 grit (the back of the package should explain what works best for chrome or polished metals).  Don’t just use whatever is under your sink. It should look like this: IMG_yesandno1Rub the steel wool over the chrome legs until you’ve removed rust spots and buffed it to a shine. I recommend doing this outdoors since the steel wool will produce tiny steel droppings which will get into everything, including your skin.  So maybe wear pants, too.  Here’s a Before & After:
IMG_1946IMG_1948STEP TWO — WASH:  Give your chairs a quick bath with mild dish soap, warm water and a regular sponge. You’ll need to wash away the “low-hanging” grime to see what you’re really dealing with.

STEP THREE — SCRATCH:  Warm up you biceps, cause we’re gonna put some muscle and scratch into it.  This is where I had to do some experimenting. While the chair was still wet (and with a spray bottle handy to keep everything damp) I tried several different mild abrasives – the scrubby side of a new sponge, extra fine steel wool, 600-grit sandpaper, 400-grit sandpaper. I didn’t have the nerve to move to a lower grit, so I called on an old friend  … Melamine Foam.  You know, the Magic Eraser?

Magic Eraser, I can’t quit you. You’re so good at cleaning everything. I would brush my damn teeth with you if the warning on the box wasn’t telling me not to.

Anyway. Slip on rubber gloves and watch the grime magically disappear. Like a kamikaze in sponge form,  Magic Eraser will also disappear, selflessly sloughing itself down to a useless nub. Budget about one-half Magic Eraser per chair.
IMG_1973The Eraser will also remove much of the “shine,” if your chair had any left.  Don’t panic, we’ll get it back in the next step.

IMG_1969

Look closely — can you see the difference?

Rinse and repeat, and rinse again. Whether you’re using sandpaper or the Magic Eraser, you’ll be left with a funny white residue, so rinse thoroughly and let air dry. Your chair should be clean and slightly rough, but without any big scratches.

PRO TIP!!  The level of sanding is really up to you.  Unlike a painted surface, fiberglass is the same color inside and out, so don’t be afraid to rub out any unsightly scratches. However, I chose to keep some, both because I was afraid of what heavy sanding might do, and because I wanted to keep a little bit of the chair’s old charm:

IMG_1981

Anybody else suddenly feel like ordering Thai food?

STEP  FOUR – SHINE: When the chairs are completely dry, move to the outdoors or a well-ventilated area.  Saturate a clean rag with Penetrol. This is actually sold as a conditioner for oil-based paints, but resourceful boaters have discovered that it makes a great finish for fiberglass surfaces (I had to spend lot of time on boat forums to figure this out).  IMG_2004Rub a generous  — but not sloppy or drippy – amount of Penetrol on your chair.

IMG_2009

It is important to take your sweatpants off completely before soaking them in petroleum distillate. Also, no smoking!

After about 3 minutes, wipe off the excess Penetrol with a dry, soft rag.  You don’t want any wet spots left after buffing – this stuff is really weird and sticky.  If you leave it outside, don’t be surprised if bugs get stuck to it.

Let the first coat dry for at least a day, and then apply another coat or two for extra shine. There are very limited instructions on the can, so just take my word for it. This requires extreme amounts of patience, but in the meantime you can figure out what to do about those yucky feet.

STEP FIVE – FEET:  Decide that those rotting rubber feet can no longer be a part of your gorgeous new dining set. IMG_1989…And leaving them bare seems like an equally bad idea:
IMG_1992Grab one of the old feet, and head back to your beloved local hardware store.  You know, the one where they conveniently display the nails and mousetraps at toddler eye-level. 5594_10201231227960488_833031627_nThe ½ inch rubber feet that I grabbed fit perfectly, so I bought their entire inventory.
IMG_2022IMG_2025


STEP SIX — BUILD SOCIAL
CAPITAL:
And now, Professor Putman, I promise to use these chairs to gather together friends and neighbors as frequently as possible.
IMG_2030
IMG_2021IMG_2016IMG_2018**Hey, don’t blame me, I just went on vacation with 35 other people.

Funkify your Picnic with Psychedelic Carrot Fruit Pops

Earlier this summer, high on Vitamin D, I promised my family that we would eat at least 50% of our non-breakfast meals outdoors. Perhaps you think of picnicking as the most liberating and carefree way to eat, but there are some serious challenges: the food must be in solid form, not require refrigeration or utensils, and in our case, be safely consumed by toddlers.  By August, our picnic routine had become rather stale: sandwiches, fruit, carrot sticks.  Repeat.

Then one day, perhaps channeling my urge to shake things up picnic-wise, my 4-year-old started jamming the carrots sticks INTO the fruit, and to her delight, the sticks stuck! IMG_1881Now this isn’t a food blog; I only write about cooking when it involves feats of food architecture or engineering.  But I think the four-year-old is really on to something here — you can’t deny that these carrot-and-fruit pops are very funky; they would blend in seamlessly with the most sophisticated mid-century modern decor, or perhaps be at home in a psychedelic, psilocybin-fueled disco lounge of the1970s.

Since I told Estelle she couldn’t start her own blog until she was at least six, we’re going to highlight her discovery here.

MAKE YOUR OWN PSYCHEDELIC, MID-CENTURY MODERN CARROT & FRUIT POPS

STEP ONE:  Select the kind of fruit to use, as long as it is a “mushy” fruit and not a hard one. My daughter’s top three fruits were grapes, strawberries and prunes (yes, prunes).  Hide the fruit from your family until the time is right, or perhaps leave a threatening note.  Most family members — without knowing why — will instinctively eat the thing that you are saving up for a special project (we were making these for Estelle’s day camp picnic potluck thingy). IMG_1878Wash your fruit and carrots. Peel the carrots and slice them into thin sticks. The best sticks for sticking are the ones that come from the pointy bottom of the carrot — the pointier the better.
IMG_1877STEP TWO – GRAPES: Start with grapes, because grapes are small and slippery and take more patience. Remove grapes from their stems and push the pointy end of the carrot stick into the hole where the grape stem used to be.  Push it up about 3/4 way into the grape, so that it is securely lodged but not pushing out the other end.
IMG_1886Repeat 47 more times:
IMG_1914STEP THREE – STRAWBERRIES: Take your strawberries and cut off the stems and hard white part near the stem.  While it is tempting to cut the bigger strawberries in half or quarters, you must resist.  You need that firm center part to hold the carrot stick in place.

Use a straw to drill a pilot hole in the center of the berry, then insert the carrot stick, penetrating about 3/4 of the way in.  Meanwhile, crack a joke about “putting the straw back in strawberry”, and then ponder the lost art of pun-making.

IMG_1896

Putting the straw back in strawberries

STEP FOUR – PRUNES: Smush up your prunes with your fingers until they are soft. Then jam the carrot stick in there and mold the prune back into a pleasant shape. You may pierce the prune completely to ensure proper skewering — it actually looks kind of cool with the carrot point sticking out the top.
IMG_1903PRO TIP: The prune step is very sticky, so don’t plan on answering the phone or handling any important historical documents until you have completed it and washed your hands.IMG_1912STEP FIVE: Arrange the carrot-fruit pops lovingly on a platter.  We were in a mighty hurry to get to camp on time, so we didn’t do this step very lovingly.  But you get the idea.
IMG_1904And in review: IMG_1905IMG_1910IMG_1911

Turn Your Ugly Vinyl Roller Shade into a Work of Art

One day I was doing some activity on the floor of my living room (let’s say it was exercise). I stared long and hard at our white vinyl roller shades.  They serve a very important function:  keeping the blazing sun and heat out in the summer, and allowing us to shamelessly prance around in our underwear during the endless night of our Chicago winters.  They ain’t pretty, but they get the job done.

But the longer I stared, the more I realized that our roller shades were actually retractable blank canvases.

IMG_1766

Of course we took the Christmas lights down AFTER I took this picture.

How could I have gone this long without seeing the creative possibilities lurking in almost every window in our home?   All I needed was some masking tape, spray paint and an unhealthy obsession with chevrons.

Why spray paint?  I had been pondering this project for a while, but didn’t trust the effects of regular latex wall paint.  Then last month, I was in the suburbs buying up spray paint for myself and my other inner-city friends** and stumbled upon  this paint made especially for fabric and vinyl.  I grabbed a can in grey – my favorite decorating color.   After a few weeks of procrastination, I was ready to paint.
Picture 036HOW TO TURN YOUR HIDEOUS VINYL ROLLER SHADES INTO BEAUTIFUL WORKS OF ART:

STEP ONE — PREPARE: Take the shade out of its bracket, but
first, put some pants on because  you will be standing on a ladder in front of the window. I once saw a naked man changing a light bulb on a ladder in front of his window and it is an image that I can never forget.

As with all painting projects, we must create a welcoming surface for your paint – clean, dry, and free of any grease or dust.  After a few seconds of internet research, I determined that the safest way to clean vinyl shades, especially the “blackout” shades that we have, is with water and a sponge, and maybe a little bit of mild dish soap.
IMG_1778STEP TWO — MEASURE:  Measure the width of your shades and determine the length of the shade that will actually hang down.  For example, since my window is only 70” tall, in practice, I’ll never actually see more than 70” of shade.

Pick a design. Chevrons are trendy now, but it doesn’t mean they are not fantastic. I also love that the word CHEVRON has a chevron right in the middle of the word (at least in English).  Like a visual onomatopoeia!Picture 001To set the pattern, take the width of your shade and divide by the number of points you want your chevrons to have. My shade was 41 inches wide, so I divided that in half (20.5″) and then in half again (10.25″).  I marked four spots with a pencil on the bottom of the shade, each 10.25 inches apart.  Pencil a line up the shade from each of the four points on the bottom to make sure you are staying straight.

I also decided that I wanted 10 inches of white space between my chevrons. This is completely arbitrary, it just seemed like a nice even number, and not cursed or culturally significant.

STEP THREE — TAPE: You could cut the masking tape as you go, but I find it easier to cut off a bunch of strips at once and have them handy for mass application.  But don’t just tear it off like a savage– cut the tape with a scissors at a straight 90 degree angle (cutting freehand worked for me).
Picture 011Next, line up the bottom of your tape so that one end meets the bottom corner of the shade, and the other end meets the apex of the first chevron, then smooth out the tape.  Use another strip to make the “down angle” of the chevron – again meeting at the apex and then at the bottom middle point of the shade (for my 41 inch shade that was the 20.5 inch-point).   Picture 019

At this point you can add as many strips as you like to achieve the desired chevron thickness. As you can see, I started with two strips of tape, then finished and realized I wanted it thicker.  Easy enough to do, I just applied another strip to each “arm” (or wing?) of the chevron.Picture 022

To create the next line of chevrons, just measure 10 inches from the apex (top point) of your first row of chevrons.  Draw a line horizontally across connecting the two marks (check to make sure it’s roughly level) and start taping again. Repeat as many times as you like.  I didn’t tape all the way to the top of my shade because (1) I’m Lazy, and (2) I thought it would add visual interest to have a white space at the top. But mostly I just wanted to finish taping and watch the first episode of Breaking Bad Season 5 before it was time to go to bed.

STEP FOUR — PAINT:  Lay your shade down on a tarp outside or in a  REALLY well ventilated area, like a garage with the door open.  Run your finger over the tape to make sure it is completely stuck to the shade.
Picture 025 Before using spray paint, always strap on your safety goggles and face mask. I still haven’t bought a replacement for my old face mask that got moldy, so I went with the non-NOISH approved handkerchief instead:

Picture 028

Complete the look with an old maternity tank top worn inside-out.

After shaking your can for a minute, spray with continuous, even application.   Give the whole thing a light misting, then go back to where you started and do it again. Repeat until you either run out of paint or you’re satisfied with the results.

In Progress: Thin coat #1

In Progress: Thin coat #1

In Progress: Thin coat #2

In Progress: Thin coat #2

PRO TIP:  When using spray paint, keep that hand moving and don’t linger over any particular spot for more than a second, or you will end up with a crusty little blob like this one: Picture 039_arrow

ANOTHER PRO TIPThere really isn’t that much paint in a single can. I realized I was running out and made a quick decision to leave the very top of the shade white; otherwise, I would have to somehow get to the suburbs to get a replacement can.  I actually like the way it turned out, but do yourself a favor and buy two cans.  Also, if you feel yourself running low, make sure you fully coat the areas where the masking tape meets the shade. As long as you have crisply-lined edges, the middle of the chevrons won’t be as noticeable if they’re a bit splotchy.

Lucky for you, spray paint dries almost instantly when applied in thin, even coats. This means you can start pulling off your masking tape after a few minutes, or when you can feel that the paint is dry to the touch.
Picture 041 I LOVE pulling masking tape off!  It feels like I am giving my shade a face lift and am pulling off the bandages. Since I’m neither wealthy nor weird enough to consider plastic surgery on myself, this is a pretty big thrill for me.

When pulling up the tape, start with the last piece of tape you applied – in this case the top layer of the three layers in each branch of the chevron.  Since the strips of tape are overlapped, this will keep you from pulling up the edges of the neighboring tape.

Seriously — I can’t believe how good this turned out.

Wait—you’re not done yet! When you’ve finished peeling, clean off the back of the shade with a damp sponge. My tarp was covered in a very fine layer of wood dust from my recent MCM Credenza Makeover project, which of course stuck to the back of the vinyl shade.  Remember that as you roll the shade up, the back will rub all over the front, so keep it clean.

Finally, erase all the pencil marks you made in step two, and — with your pants still on — hang your beautiful artwork up in the window!

IMG_1854IMG_1858IMG_1865IMG_1855** Loyal readers know that you can’t buy spray paint within Chicago city limits, which I almost never leave.

Late Mid-Century Modern Makeover: Two-Toned Credenza

One cold day this past winter, I decided that our old IKEA TV cabinet was just so, well, IKEA looking. We all know those particleboard beasts that practically stink of meatballs and lingonberries.  It was purchased in a different time of my life:  Before I owned a power sander, or knew how to set automatic Craigslist keyword searches on Google Reader (or whatever it is now). It was time for a fresh start.

Picture 038

I deliberately took a bad picture of the old TV stand and made sure to leave all the crap on it so you would share my contempt for this thing.

As it turns out, I found a young lady in the Rogers Park neighborhood of Chicago who was ready to make a fresh start of her own.  Fed up with big city living, she was shipping herself back to Ohio (or was it Iowa*?) and  was foolishly selling this sturdy, but stunning, late mid-Century credenza for only $35 (I gave her $30).
IMG_1648I was almost certain the credenza was solid wood, but this late MCM stuff can play tricks on you.  Just to make sure, I scratched the top layer off a discreet corner of the top panel, and sure enough… more wood.  Whew.  IMG_1647Structurally speaking, this thing was in perfect shape.  But on the surface, it needed a lot of sanding and some combination of stain and paint.  My goal was to keep most of the original wood surface, but stain it darker, then use white paint to highlight the fabulous cabinet lines and drawer pulls.  I borrowed my kids’ crayons to sketch out a few options, and settled on  a modified version of number 2.

Picture 044

Black-and-white photos make my confused drawings look like evidence in a mid-century noir thriller.

And before the trolls get all purist on me about keeping the original wood, let me show you a close up:IMG_1652HOW GIVE YOUR LATE MID-CENTURY MODERN CREDENZA A TWO-TONED FACELIFT:

STEP ONE:  Pull out the drawers and mark their position on the back (i.e., Top, Middle, Bottom).  You could use 1, 2 and 3, but then you might forget if 1 is the top or the bottom.  This has actually happened to me.  Unscrew the drawer pulls and tape the screws to the back of the pulls. Also, be sure to mark the pulls with the position of the mother drawer.  This may seem a bit anal, but when a screw has been sitting happily in a hole for over 40 years, it may resist being screwed into another hole (this is not a euphemism for anything).
IMG_1657Next, unscrew the doors from their hinges (leaving the hinges attached to the cabinet). Line the screws up in the proper order and tape them down on the floor of the cabinet, so you don’t lose them or forget their proper hole assignments.  They should look like happy snuggle buddies:

IMG_1671

I’ve never felt more affection for nails.  Sleep tight, little buddies!

STEP TWO: Move the cabinet body to a totally bare room, or preferably outdoors (I used our front porch, which isn’t legally a porch).  Use a 100-grit sandpaper and a power sander to remove the old varnish.

Picture 009

Can you guess why I’m wearing a handkerchief over my face instead of a NIOSH-approved dust mask? The answer may surprise you.

Brush off the dust, then gently wipe with a damp (not wet) rag.  Then you will see all the spots you missed.  At this point, I like to go over the rough spots as well as the rounded edges and hard-to-reach spots with a piece of sandpaper in my bare hands. Finally, give the whole thing a once-over with 220-grit sandpaper.  You don’t need to get down to the bare wood, just get all that old varnish off so the wood is ready for a new stain.  Wipe with a damp rag and let dry.

  **  LET’S BREAK FOR AN IMPORTANT SAFETY MESSAGE  **
When spray painting or sanding, I always recommend wearing eye goggles and a face mask thing.  Who knows what kind of freaky chemicals they used to finish furniture in the middle part of the 20th Century — and here you are blasting it into very small, perfectly inhalable molecules!

But during this project, I learned a very important and disgusting safety lesson about safety equipment.  After spray painting my DIY hanging fruit basket, I immediately threw my goggles, gloves and mask into my Safety Gear Tupperware container and sealed it up tight.   Two weeks later, I popped open the container and find this:

Picture 019

I can’t believe I’m actually showing this to you.

I debated whether I should share this lesson with you, lest you think I am the sort of person who regularly grows GREEN AND BLACK MOLD on her personal belongings (I am not).  Don’t learn this lesson the hard way: face masks get really damp from your wet breath.  Either hang them up to dry, or store them in a BREATHABLE container — not an old Tupperware.

Picture 005

Scott captured the moment I discovered that something wasn’t right in my “Safety Gear” tupperware container. Please also ignore the fact that I’m wearing his sweatpants.

STEP THREE:  When the wood is dry, it’s time to stain it a dark walnut hue. Pull on your gloves, grab a handful of clean rags, gently stir the stain and apply generously, rubbing in the direction of the wood grain.
Picture 033Really slop it on! At this point you want to get it very damp. After about 15 minutes, take another clean rag and rub in all the stain that hasn’t yet soaked into the wood, blending together different areas of the wood that may have gotten more or less stain.  DO NOT leave any wet spots standing on the wood… they won’t dry properly and will be very sticky and tar-like.  And don’t panic if there are a few lighter spots;  you’ll repeat the process in 4-6 hours, giving extra stain love to those trouble spots.

IMG_1730

This is what we DIY-ers call “sloppy wet.”

STEP FOUR:  Wait at least 24 hours for the stain to dry, then apply three coats of water-based polyurethane varnish.  You’ll need to lightly sand before applying the second and third coats of varnish. But don’t fret, each coat only takes about two hours to dry.

STEP FIVE: Time to move on to your DRAWERS AND DOORS.  Lightly sand the surface in the direction of the grain.  Wipe with a damp cloth and let dry. Give the front panels of your doors and drawers one coat of oil-based white primer.

IMG_1662And no, you cannot skip the priming step. I’ve been pondering a memorable, catchy slogan to pass on to my readers about the importance of priming:
“If you prime, the result is sublime.”   Or,  Use the primer, it will look much finer.” Or perhaps I should go negative… “If you don’t prime, it will look like peeling, bubbly slime.”  Readers?

So, the drawers were easy, but for the more intricate doors, I used one of the dozens of my Grandpa’s old fine art brushes that I inherited, to avoid getting primer in the nooks and crannies (remember that unless you own paint thinner, you’ll have to toss the brushes as oil-based primer isn’t water soluble).

Let the primer dry. If it you were really sloppy and it dried with serious brush marks, go ahead and lightly sand those down now.

STEP SIX:  Apply TWO coats of latex (water-based) paint with a roller, using very light, gentle back-and-forth strokes to achieve full coverage without dripping or oozing into the crevices.
IMG_1678During this step, I recommend keeping a damp baby sock handy to quickly wipe up any oopsies.  We seem to have dozens of these things in our rag bin, so if you need one, just ask.
IMG_1682When the paint dries, give it another light sanding with 220 grit sandpaper (the higher the number, the finer the sanding), wipe with a damp rag and let dry.

STEP SEVEN: Using a clear-coat polyeurethyne, brush very lightly over your painted drawers and doors.  You’ll be using three coats, so don’t feel the need to slop it on all at first.  The worst mistake you can make here is to slop on too much, then find that the polyeurethane dries into hard, milky little boogers which will be impossible to sand off and will drive you nuts (especially if you are a “picker” – you know who you are).  IMG_1726PRO TIP! Use a damp rag (socks, again!) to continually wipe around the edges of the drawers/doors to ensure that NO varnish dries on those inside edges. In fact, I left the inside edges completely “raw” to ensure that they would close properly once back in the cabinet.  Three coats each of paint and varnish will definitely add up.

STEP EIGHT:
When all the varnish has dried, screw the pulls back onto the drawers, and the doors back into their hinges.

Picture 041

No, this drawer is not lined with marble. That’s just some late ’70s contact paper that has permanently fused with the wood.

Now it’s time to fill your gorgeous new TV stand with DVDs you will never watch again!

Picture 051

Not shown: TV. We still have to sell the old TV stand on Craigslist. Anybody?

Picture 049

Brewing an unhealthy infatuation with these drawer pulls.

Picture 052

Picture 055

… and one last money shot, under the Marimekko.

* My Chicago-born husband doesn’t know that Iowa and Ohio are two different states. Perhaps he should leave the city more.

D.I.Y. Vertically Inegrated Produce Storage System (Hanging Fruit Basket)

Some days play out like the first half of an infomercial:  Dramatic black-and-white scenes, filmed with a hand-held camera, slowed down for effect when the spaghetti sauce splats against the wall, or the blender explodes asseenonTVwith green glop.  A woman — mild-mannered, but desperate — struggles to get dinner on the table, amidst of a landscape of dirty dishes.  The wild-haired children shriek for food. The husband repeatedly stabs at his watch with an irate index finger as if to say, “Woman, I’m gonna be late for my important after-dinner business meeting!”

Yet again, dinner is ruined. Social services are called.  Divorce papers are filed.  Country club memberships are quietly revoked.

All because the kitchen counter was over-run with bowls of fruit. 

Picture 036

An uncensored picture of my actual kitchen counter yesterday, in dramatic infomercial black-and-white.

Are you, too, feeling overwhelmed with the amount of precious space your family’s fruit bowls are taking up on the kitchen counter? Are you constantly misplacing your fruit? Are you embarrassed that you have less counter space than your friends? Do you need that counter for half-used bottles of sunblock, unpaid bills, bike lube and cell phone chargers?

Then you need a Vertically Integrated Produce Storage System (VIPSS), also known as a Hanging Fruit Basket.

Sure, you could just hop on over to your nearest BloodBath & Beyond and buy a new fruit basket, but where’s the fun in that? Making one out of junk and spray paint will take way longer, but leave you much more fulfilled.

INGREDIENTS:
Two to four thrift store baskets, any color and shape
Spray paint
Flimsy chain
Plant hanger, plus screws for hanging
Pliers and drill

STEP ONE: Go to the thrift store and gather up any kind of wire basket.  Don’t be afraid to explore a variety of shapes and sizes.  I recommend bringing along a helper.  At my local Village Discount Outlet, a fellow shopper WILL steal your cart if you leave it alone for more than a few minutes. Luckily, the same does not apply to my 4-year-old, or her basket collection.
Picture 003STEP TWO:  Cut off the tags and give your baskets a long soak in some hot, soapy water.  This will dissolve any dirt or dust and also eliminate the thrift store cooties (real or perceived).
Picture 005STEP THREE:  Let the baskets dry and take them outside. Apply several thin, even coats of spray paint in the color of your choice, and let dry for at least 24 hours before the next step.  I chose white because it is safe, and matches the fridge. Also, you can’t buy spray paint in Chicago, and the hardware store we visited in the suburbs caused the part of my brain that controls risk taking in color choices to backfire.Picture 010(Much later you may realize that it’s the 21st Century and you could have just ordered the damn paint online.)

PRO TIP: If you let your bowls dry overnight in the dining room, you may wake up to find they have been re-purposed by other family members for crayon storage and stuffed animal beds.
Picture 020STEP FOUR:  While the paint dries, visit your local hardware store and grab about six feet of metal chain, preferably the lightest, most pliable chain they have, and one with open loops. You’ll need to open those links easily with a pliers.

V__9E9D

Several different employees at the Home Despot made a joke about me using the chains to restrain my children. Classy!

Also, grab a plant hanger if you don’t have one.  Since my store only carried black, I whipped out the spray paint and gave it a quick coat of white to match.Picture 026

STEP FIVE:  Line up your baskets in the proper order, with the smallest on top and largest on bottom. Calculate how much room you want between the baskets. At this point, chain links are your new measure of length.  For example, I used 12 links between the bottom basket and the second-to-bottom basket.  Keep notes on how many links you use for each basket to achieve balance between the sides and prevent unsightly fruit tipping.  Hook the chains onto two sides of the basket, using the pliers to open and close chain links as necessary.
Picture 031STEP SIX: Carefully evaluate your kitchen real estate for a hanging location, noting sources of heat and light.  For example, my first choice location gets blasted by heat from a radiator in the winter, and from the east/south facing window in the summer.  So, we settled on this dark, overlooked corner, just north of the recycling bin and west of the Art Bulletin Board.
Picture 043STEP SEVEN:  Before you drill, decide which family members should have access to the fruit.  In my house, there is a certain short individual that is addicted to bananas.  In a move that now seems akin to torture, we put the bananas just inches out of his reach.
Picture 060STEP EIGHT:  Perhaps you have recently suffered a rib contusion and been told by your doctor to avoid lifting or reaching. Ask your handsome husband to drill the hanger for you, and listen to him complain about how badly-placed the drill holes are.

"@#$*&%@$"

“@#$*&;%@$”

STEP NINE: Hang your baskets and fill them with all the fresh, organic, locally-grown produce that you wished you actually ate.
Picture 053

Ten Signs You’re on Vacation in South Central Wisconsin

Even True Projectophiles need a vacation.  My project this week?  Spending a romantic long weekend alone with the husband, biking our way through the green, cow-spotted hills of South Central Wisconsin.

Every traveler relies on signs to guide her through unknown territory.  A good sign communicates its message across language and cultural barriers, and may just bring a smile to wandering sign-o-philes like us.

We started our journey on a Chicago-to-Madison bus, and were delighted to find that the bus’ tiny bathroom was rich in signage.

There are two buttons in this bathroom.  One flushes the toilet. The other stops the bus. Choose wisely.
IMG_1590Scott thinks the one below means:  “Gentleman, please sit down to urinate.”
My interpretation?   “Sad men in fedoras must not watch each other poop.”
WP_20130707_004When we finally arrived in our host town, Scott and I were a little shocked to find that the townspeople are divided into two distinct groups:  Charter Members, and OTHERS.
charter members othersThe town itself was quite welcoming, but there are a few rules here, especially about whom you can and cannot touch:
WP_20130705_021More rules? Well, SHIT.  Guess I better take my @#$%& potty mouth to the next &*$# town over.
IMG_1572The electricity here seems to be stronger,  meaner and more aggressive than what we’ve got at home, based on how many warning signs we found.
WP_20130705_026Though there are also much friendlier types of electricity here.  This one may just try to tickle you while you cheer it on:
WP_20130705_027Most people assume that Cheese dominates the Wisconsin economy. However, many of the town’s transactions are actually conducted with rhubarb:

WP_20130705_018

Kickstarter hasn’t made it to this part of the world yet.

But watch out — there is a seedy underbelly to the area economy.   If you thought human trafficking wasn’t a problem in South Central Wisconsin, you’d be dead wrong:

When will we quit treating innocent Area Sports Men like commodities that can be bought and sold?

When will we quit treating innocent Area Sports Men like commodities that can be bought and sold?

Someone in this town is fully armed, and really has a grudge against complicated school bus stop signs:
IMG_1582
No, look closer. That really is a bullet hole.
IMG_1584And speaking of seediness…  I’m not much of a gambler, but when it comes to Christmas in July, it’s double-or-nothing! Wait, make that triple-or-nothing!
WP_20130705_031Of course, I couldn’t resist making a sign of my own.  Especially after a twig jumped in my spokes and sent me flying over the handlebars, covering the left half of my body in bruises and road rash.
IMG_1600The good news is that 1) the majority of South Central Cheeseheads own pickup trucks, and 2) that hitchhiking is still a legitimate form of transportation. 

All you need is the right sign.