Make a Wallet out of Baby Pajamas and a Diaper Cover

About six months ago, a funny thing happened: I dressed the kids and left the house, with only my coat. Suddenly, I felt magical and weightless; a truly liberated woman. You see, for the first time in nearly five years, I didn’t bring a bag of crap. No diapers, no wipes, no spare pants or burp cloths or bibs. Everyone in my family was eating solid food, on a regular schedule;  everybody was potty trained.

I’d quickly boiled down my going-out necessities to what I could fit in my coat pocket: phone, keys and wallet. Then, as if sensing that my life was getting too easy, my wallet broke! The coin-purse end spilled its innards– coins, a band-aid, a bike tire valve adapter, some string and a piece of gum – all over the floor at Aldi.

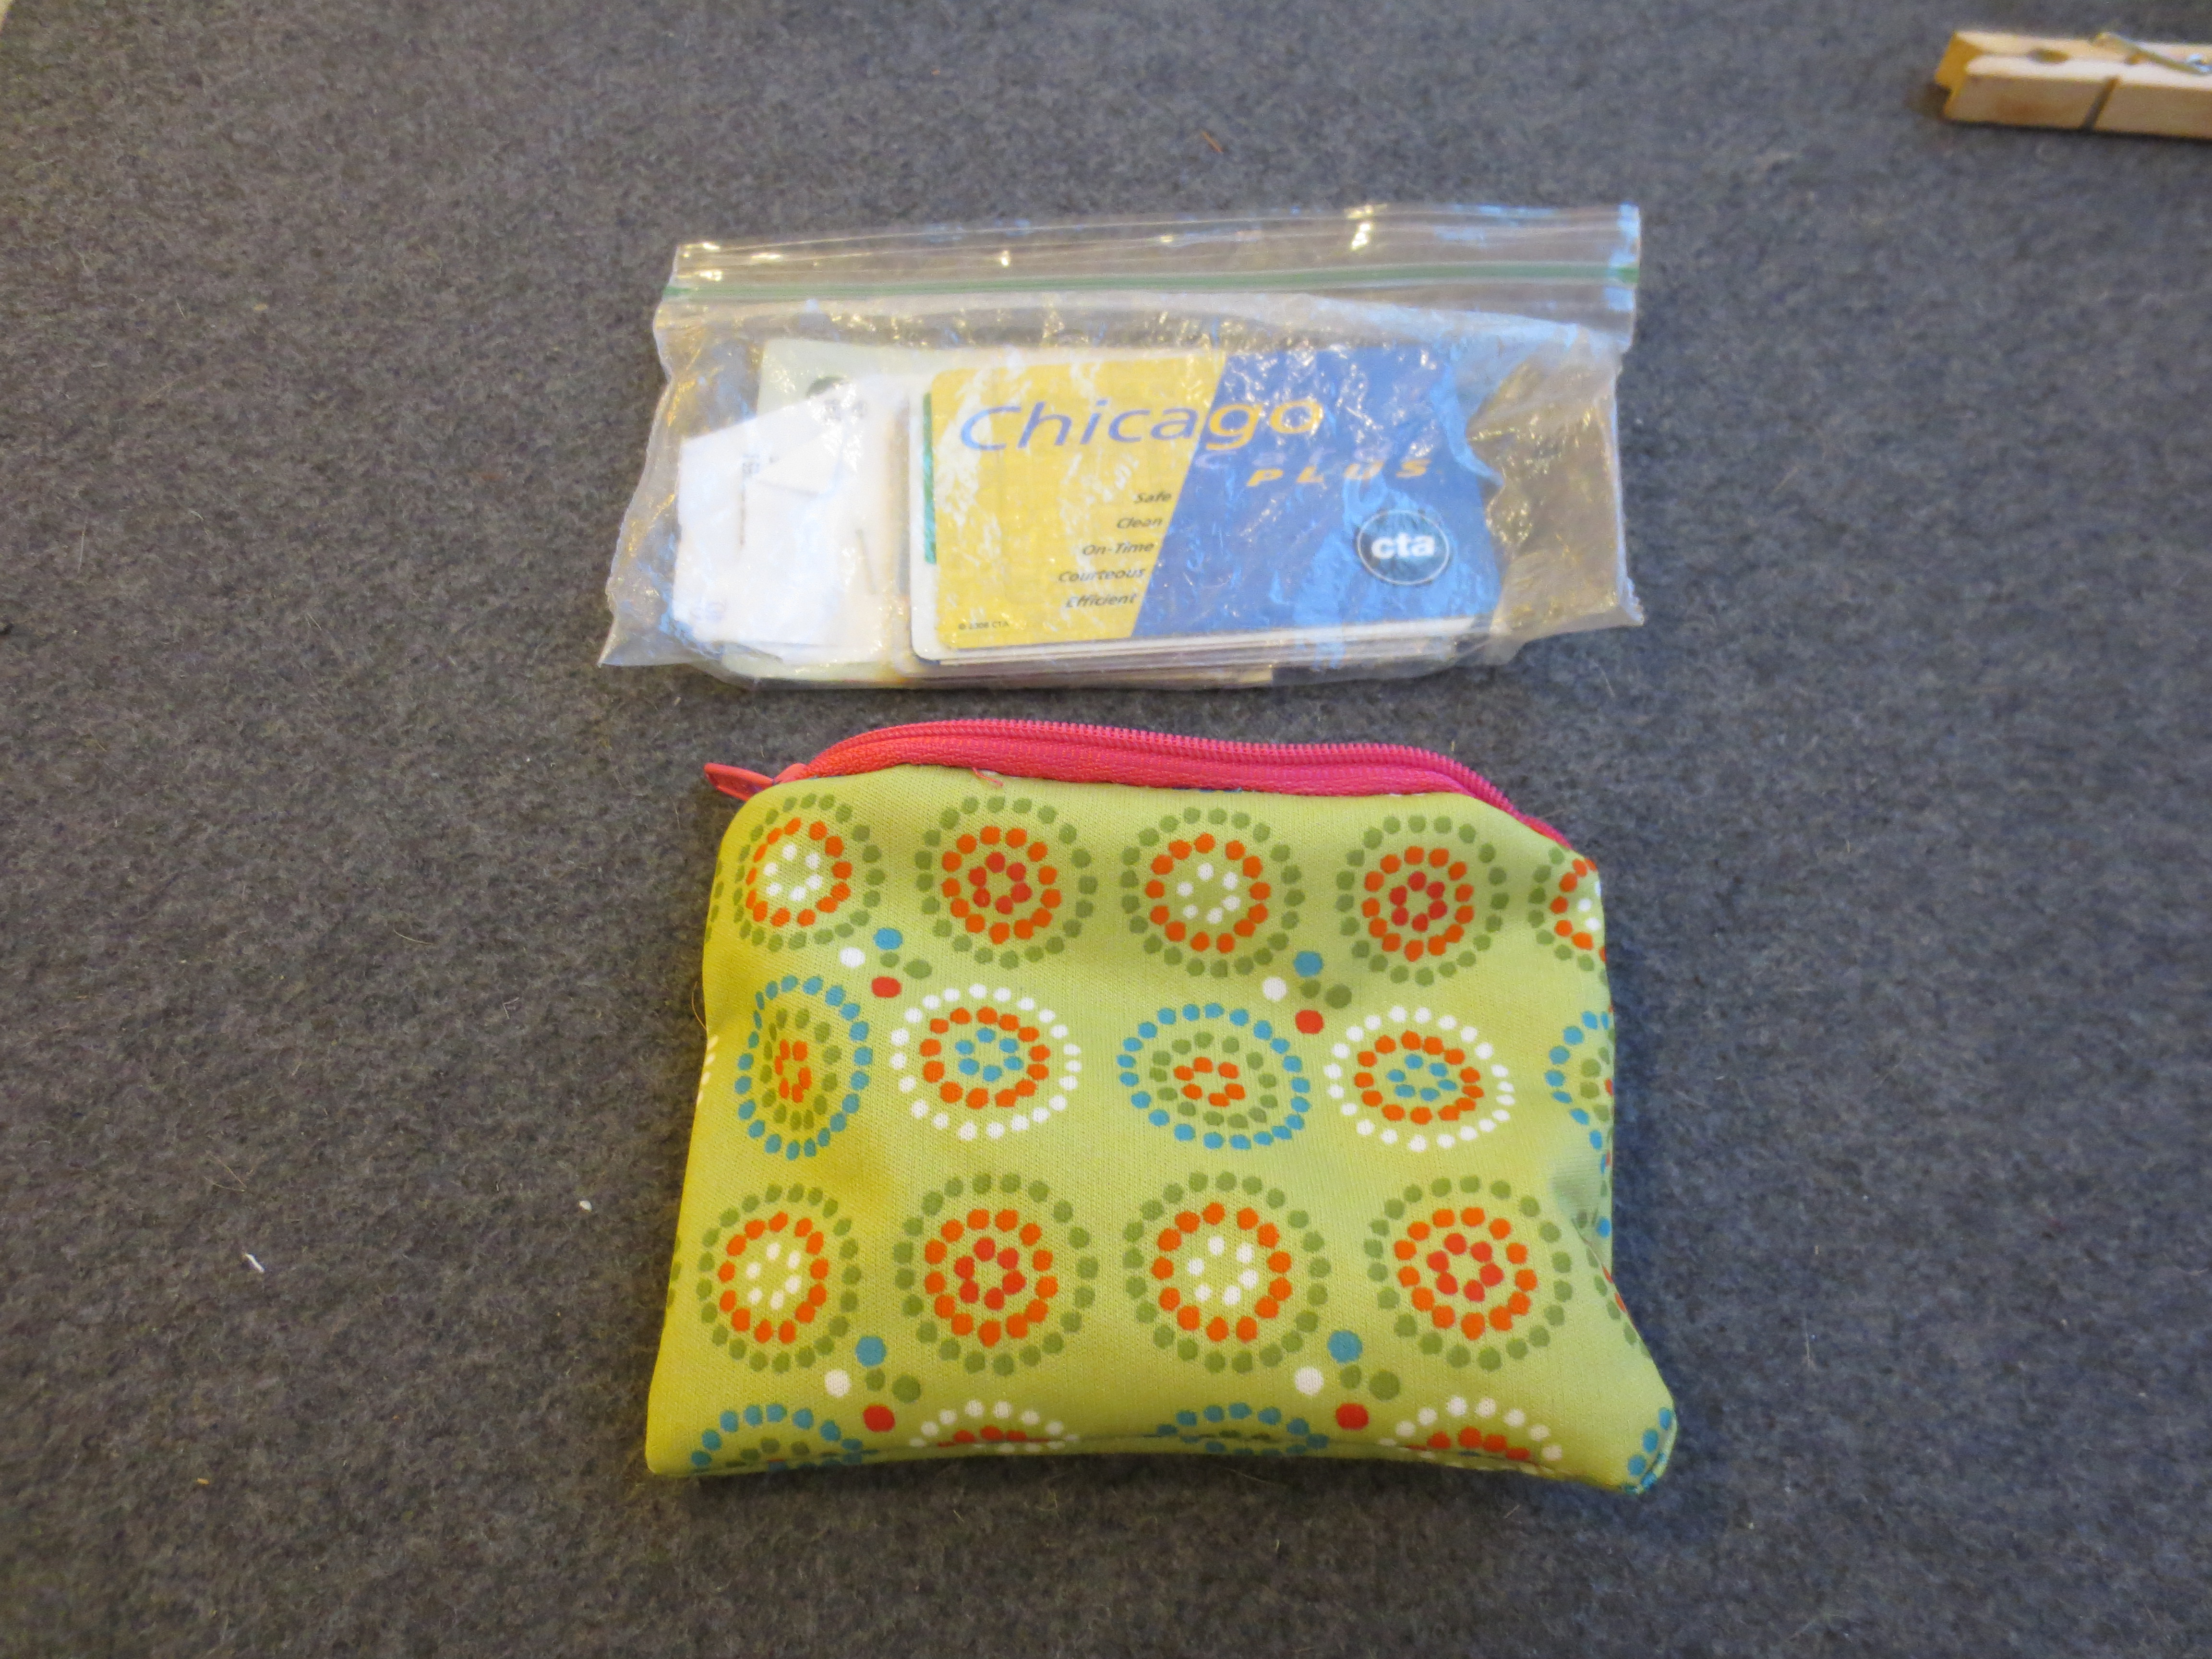
I hastily stuffed my most critical wallet contents into a snack-size Ziploc bag, and back into my coat pocket.

IMG_3699
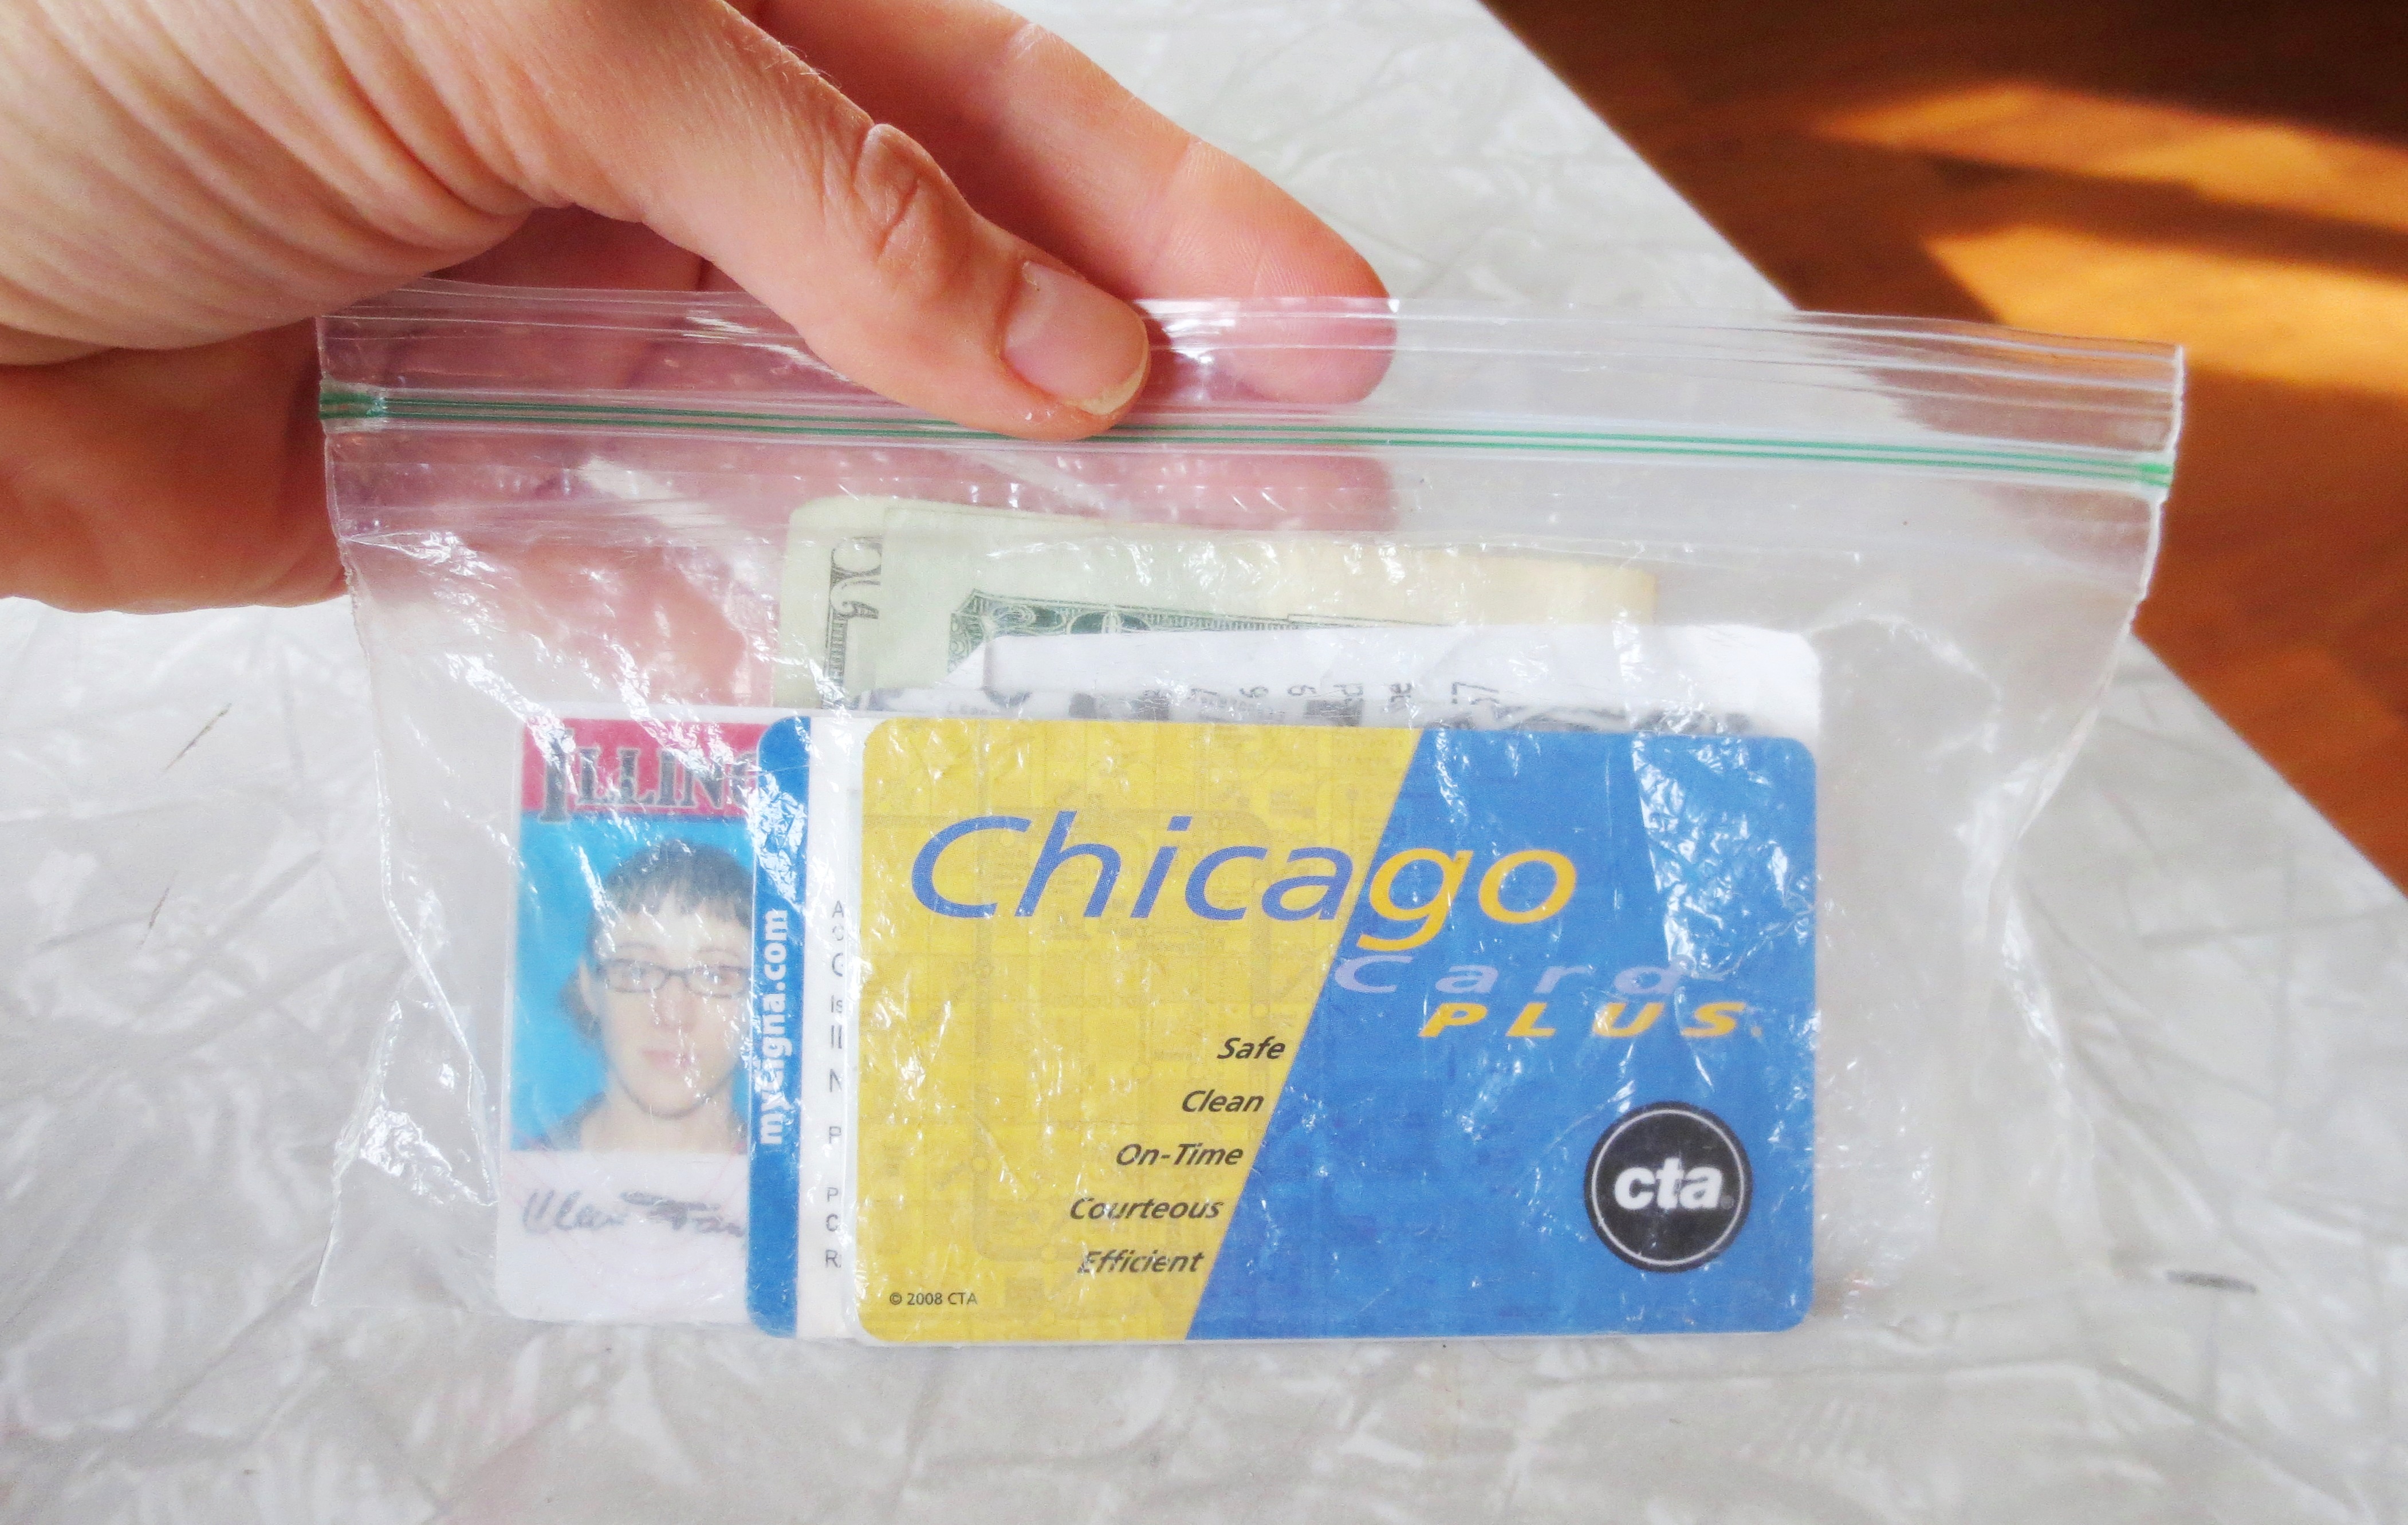
But, like trailer classrooms next to a school, what should have been a temporary “emergency” wallet became semi-permanent. And when the plastic baggie sprung a leak, I would simply reach into my kitchen drawer for a new one.

In process, I realized my old wallet had been weighed down by too many souvenirs from the past, like ghosts of my former self. My old college I.D., you know….in case I wanted to score some sweet student discount on incense. Or my midwife’s card, in case my (happily retired) uterus* suddenly went in to labor. What did I really need to keep?

IMG_3694

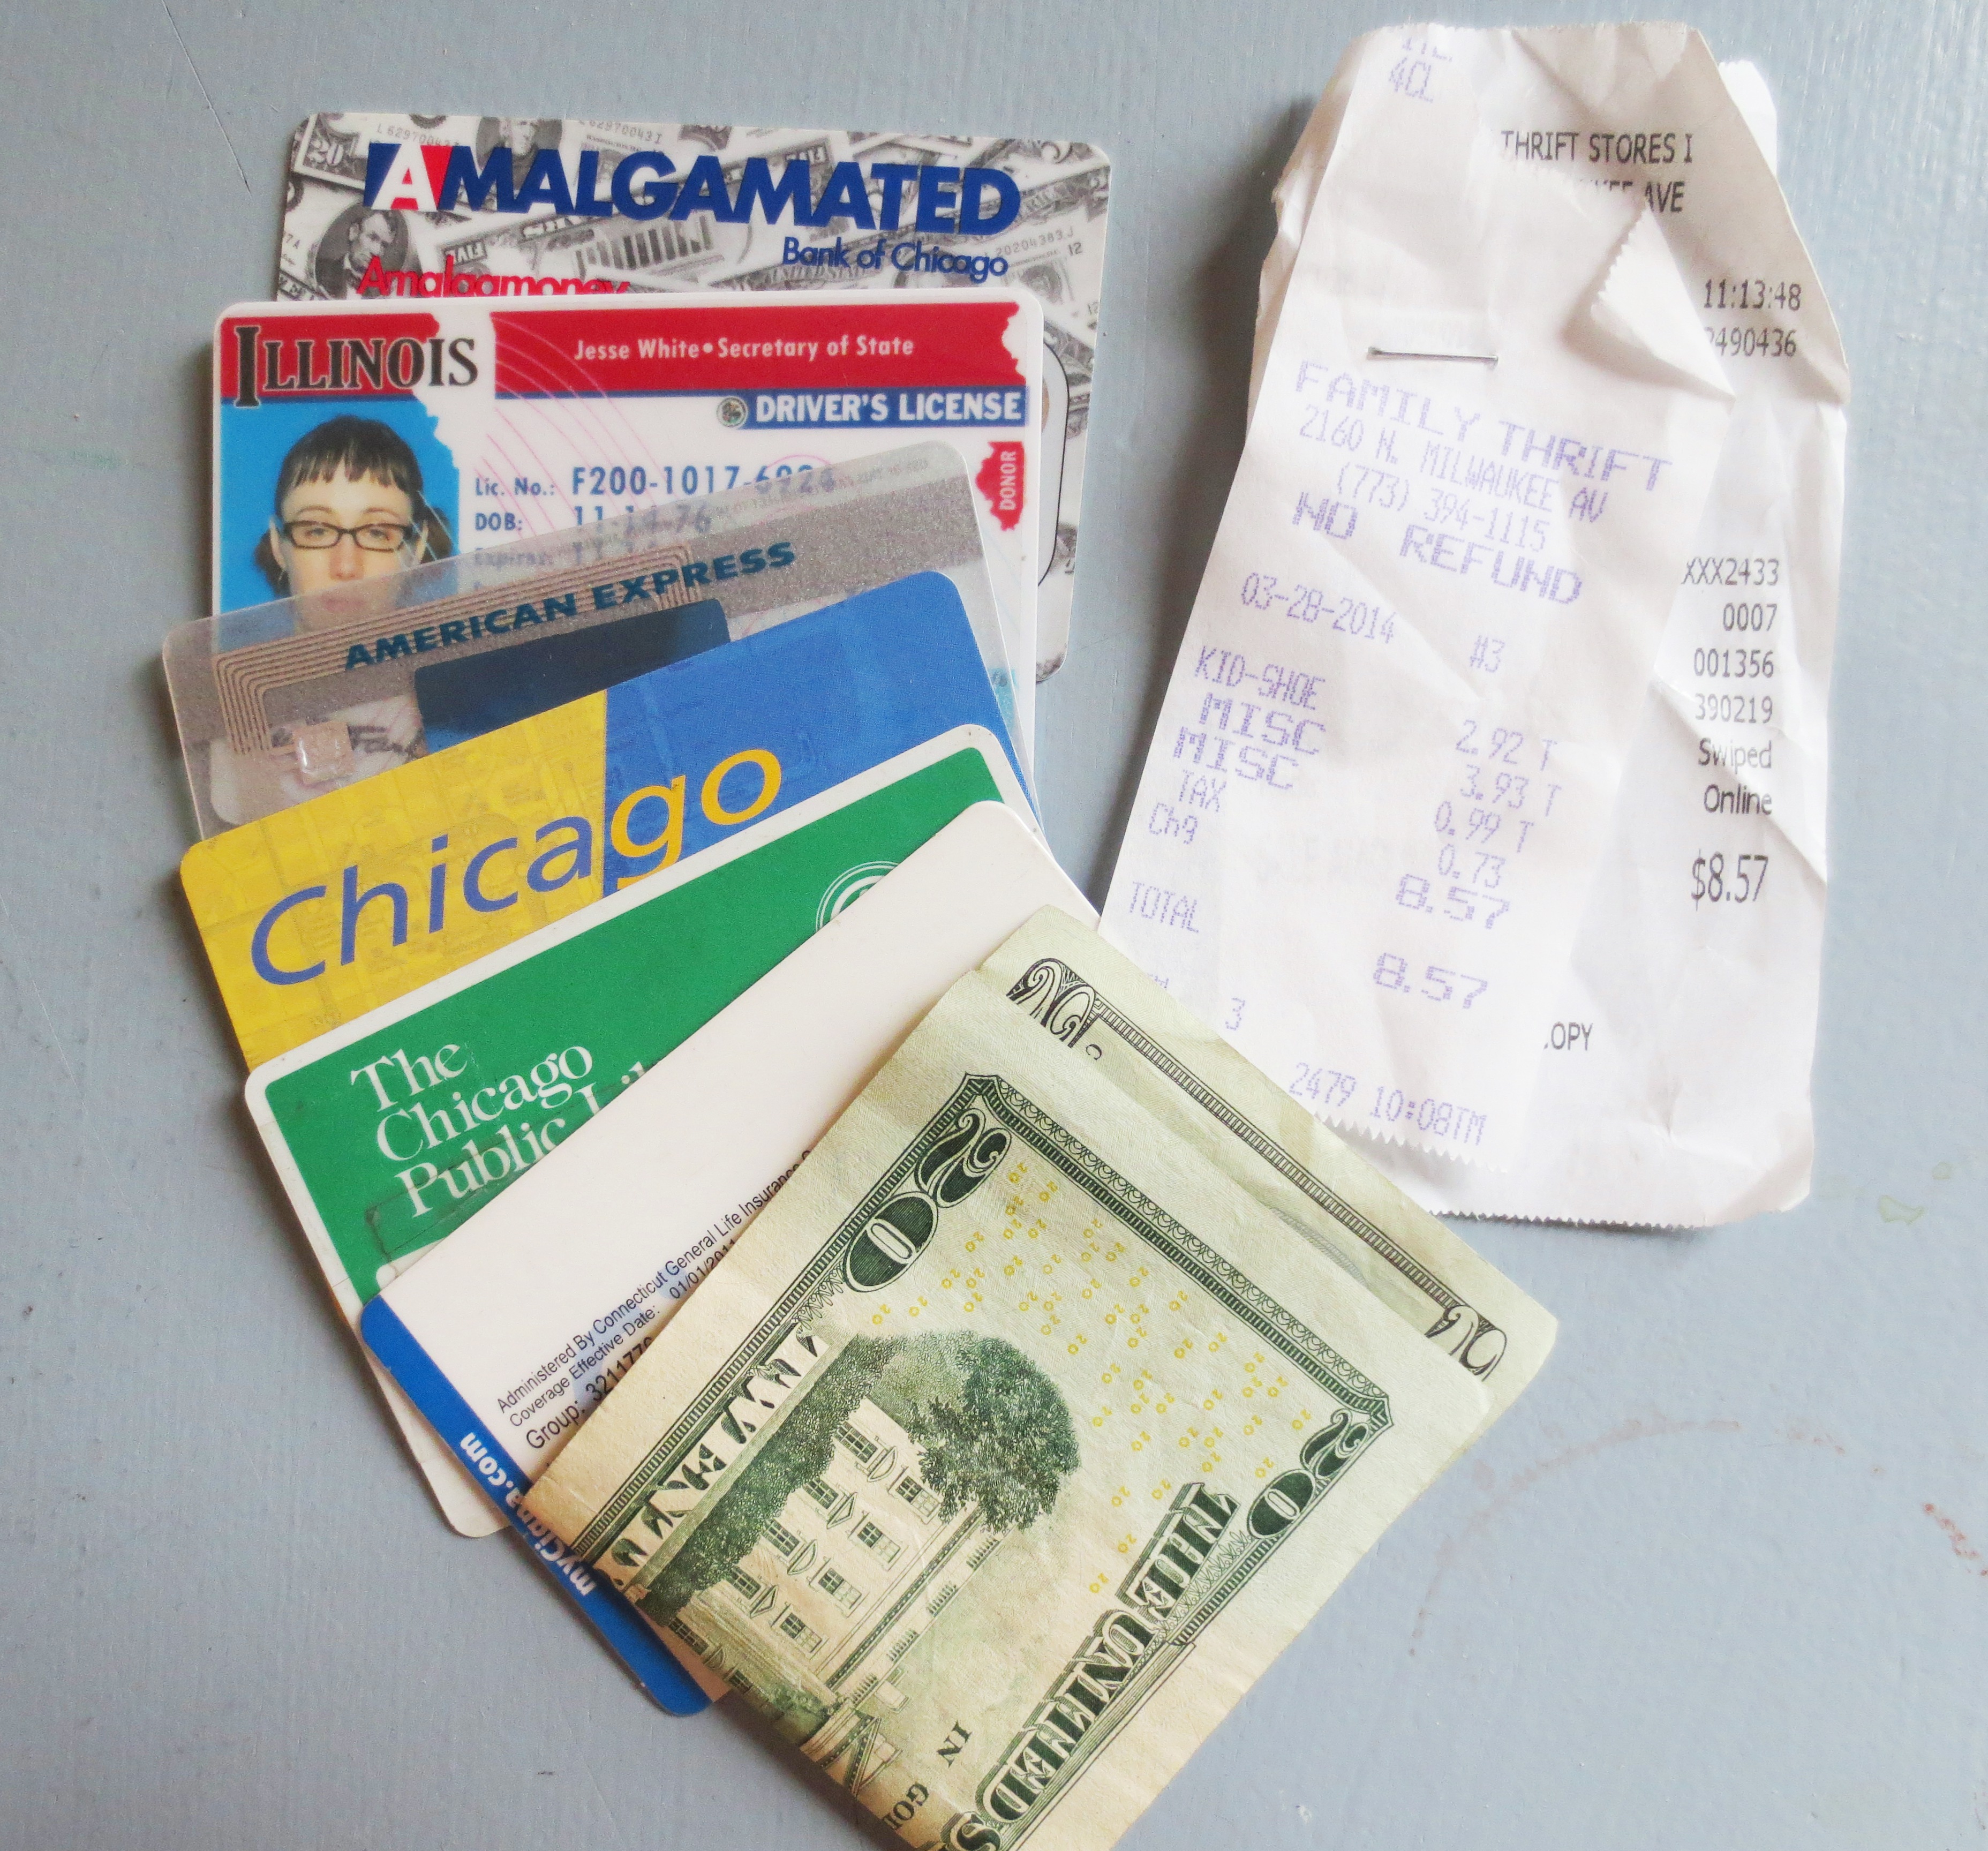
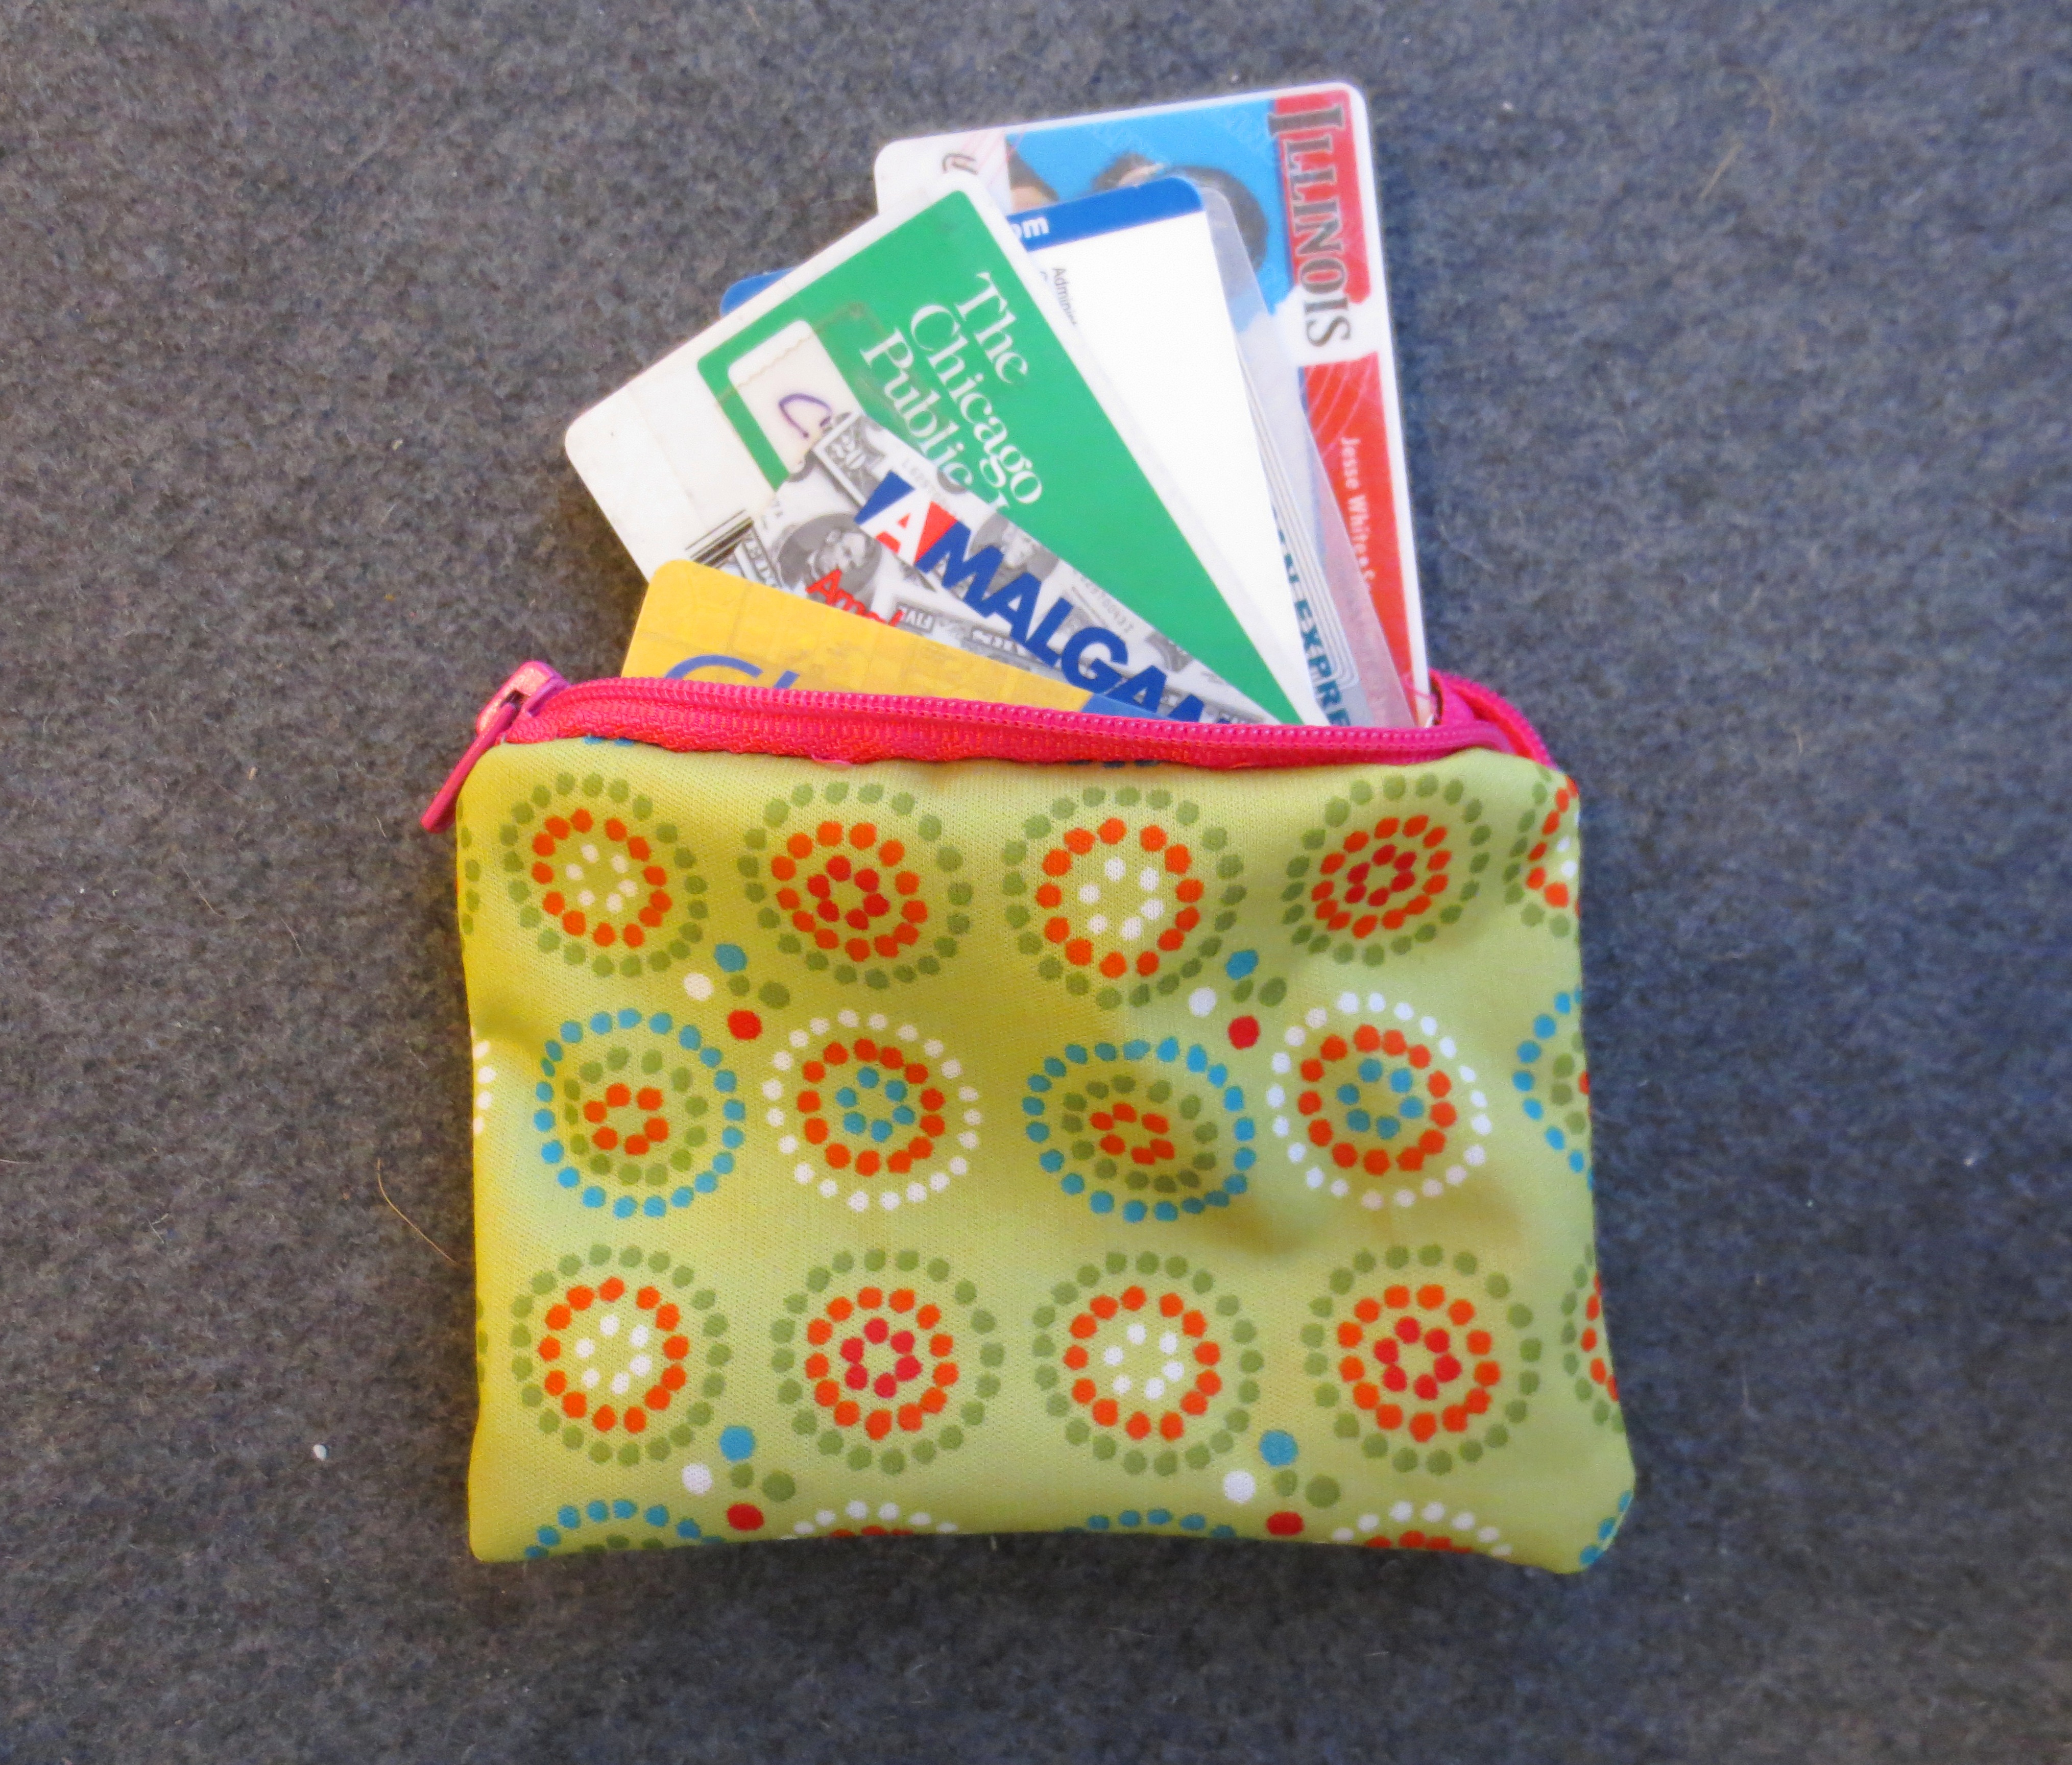
Bank and credit card, I.D., insurance, library card and transit pass.  Everything you’ll need to steal my identity.

This week, I decided to quit embarrassing myself at the cash register and make a “real” wallet to celebrate my new life. Happily, a proper wallet has only two components: a zipper and a bag.

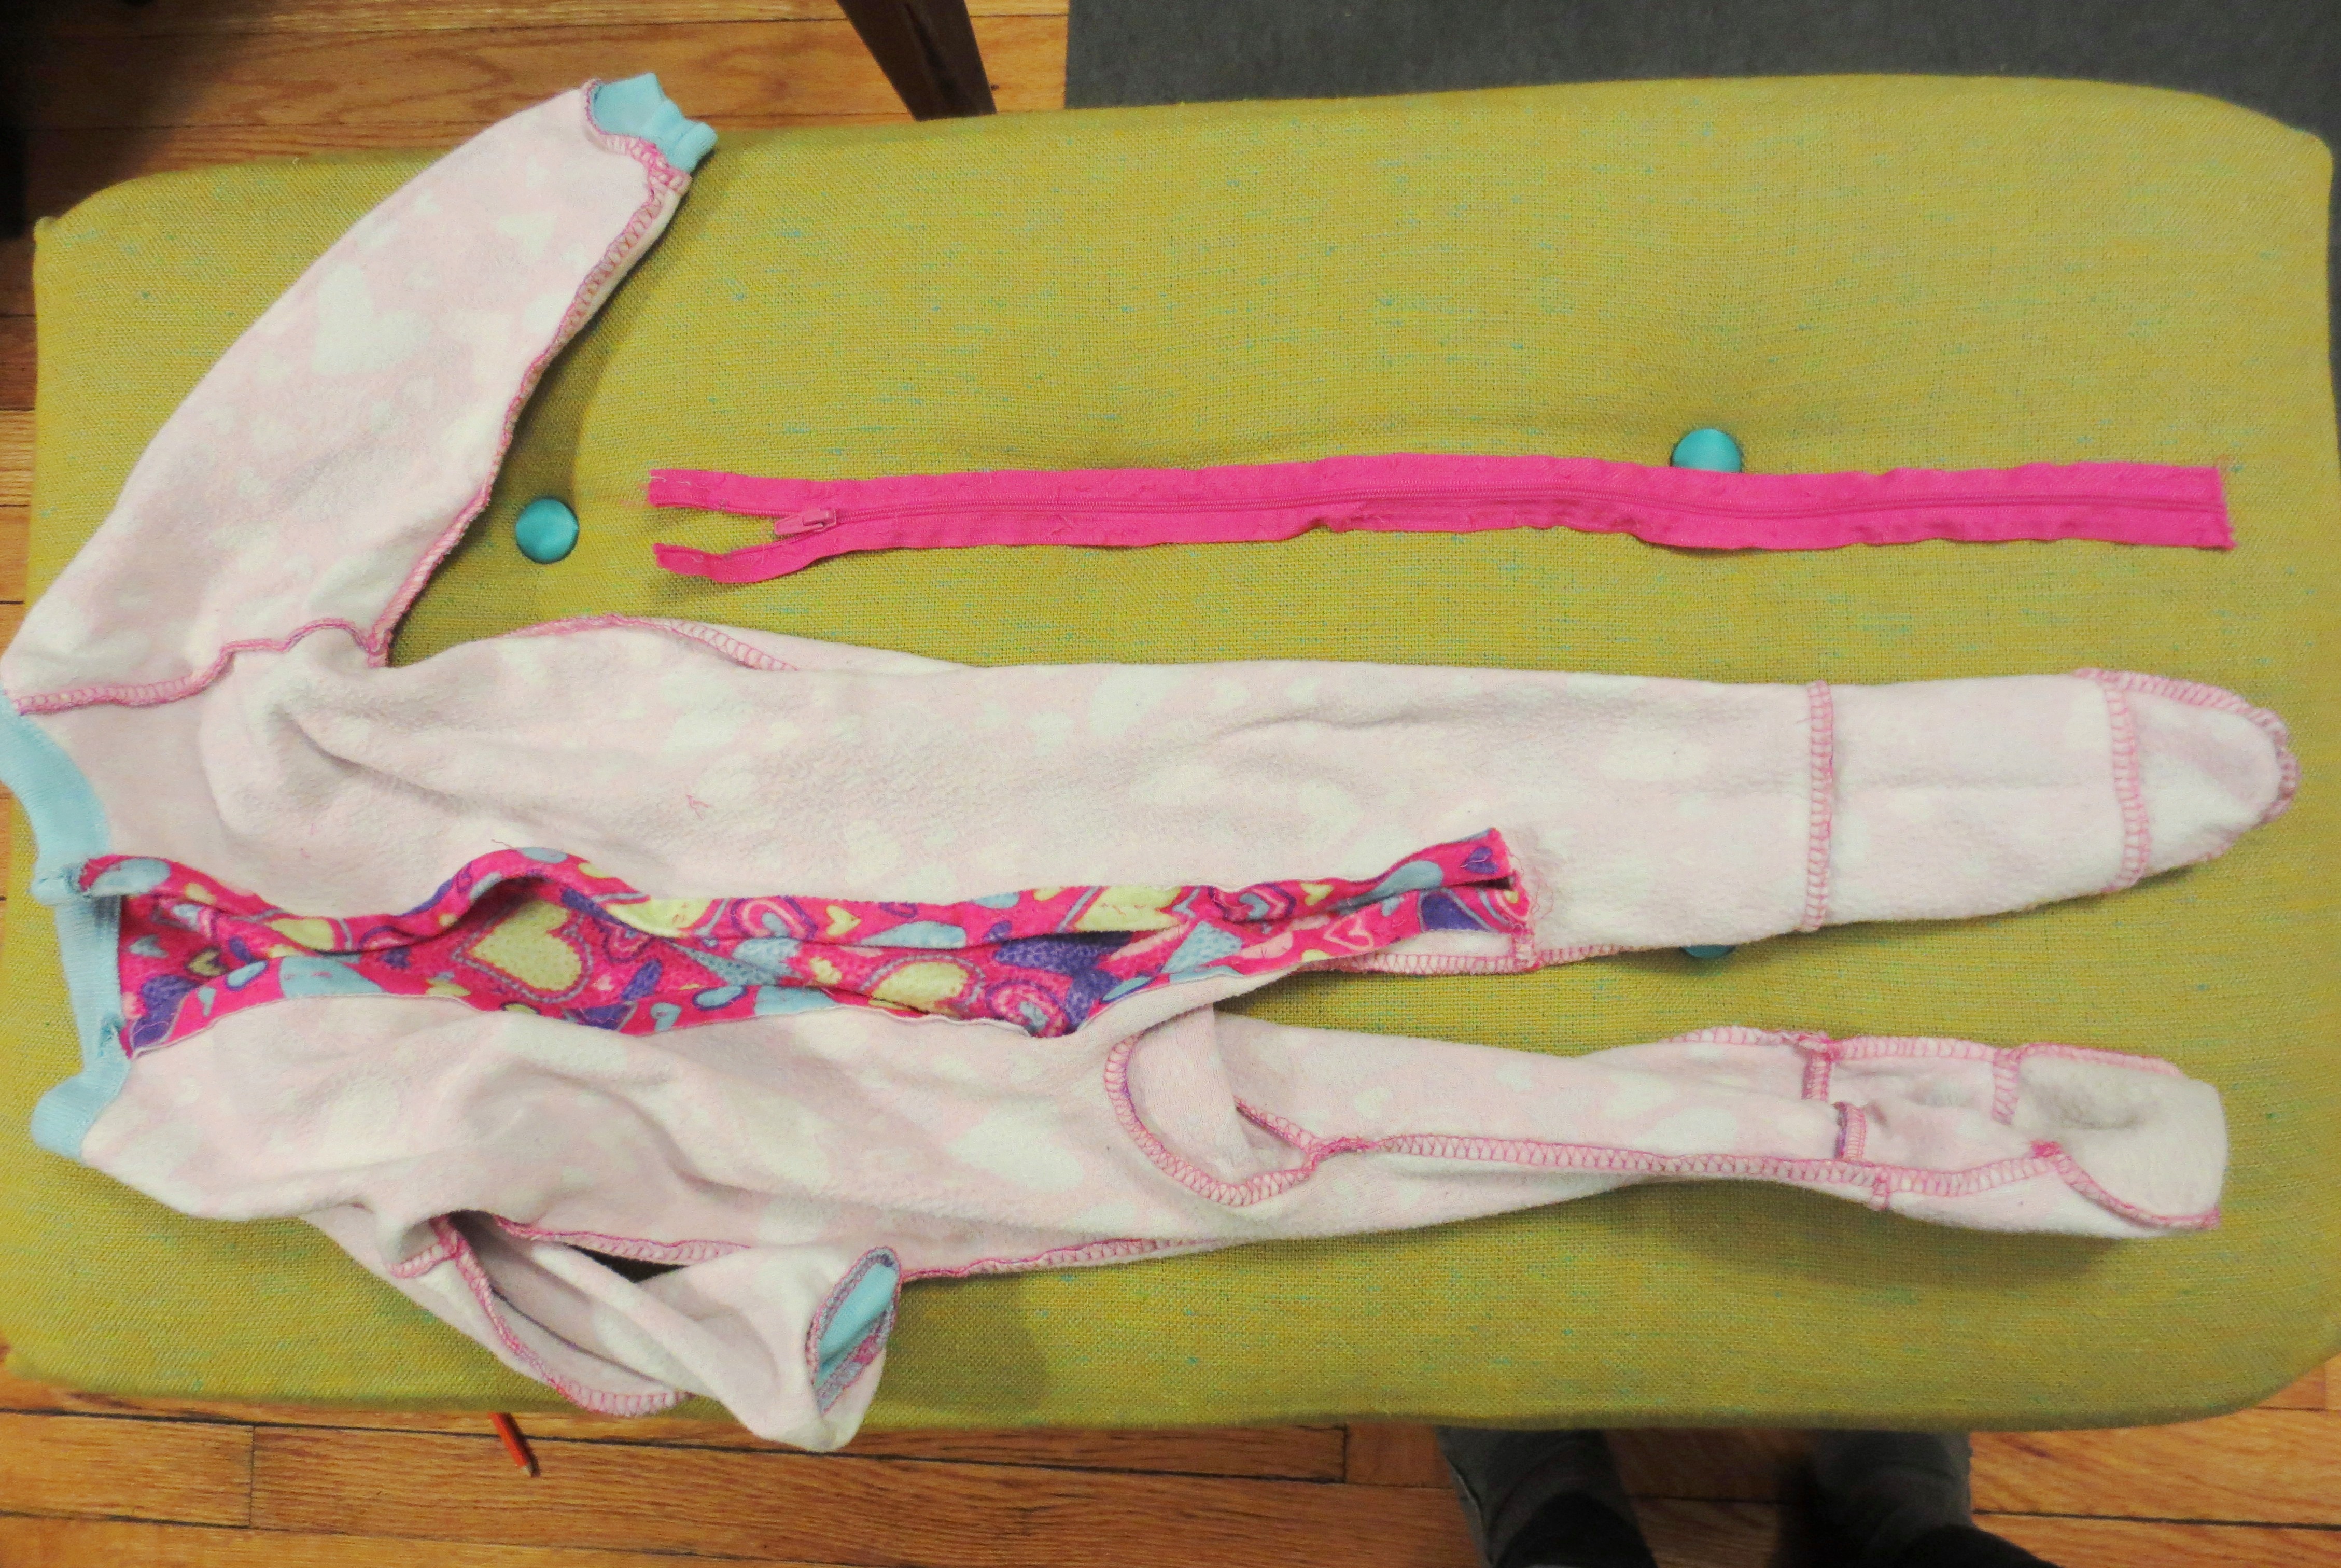
We’d both be disappointed if I just went out and bought those components. And, while folding laundry the other day , I noticed my younger son’s footed pajamas had a big hole in the toe. (he must have grown overnight and popped out the bottom). The pajamas — a hand-me-down from his sister — were pretty threadbare, so it wasn’t worth trying to fix them. But as I tossed them into the ragbin, I noticed the long, beautiful zipper running down the length of the PJs: Component #1.

IMG_3705

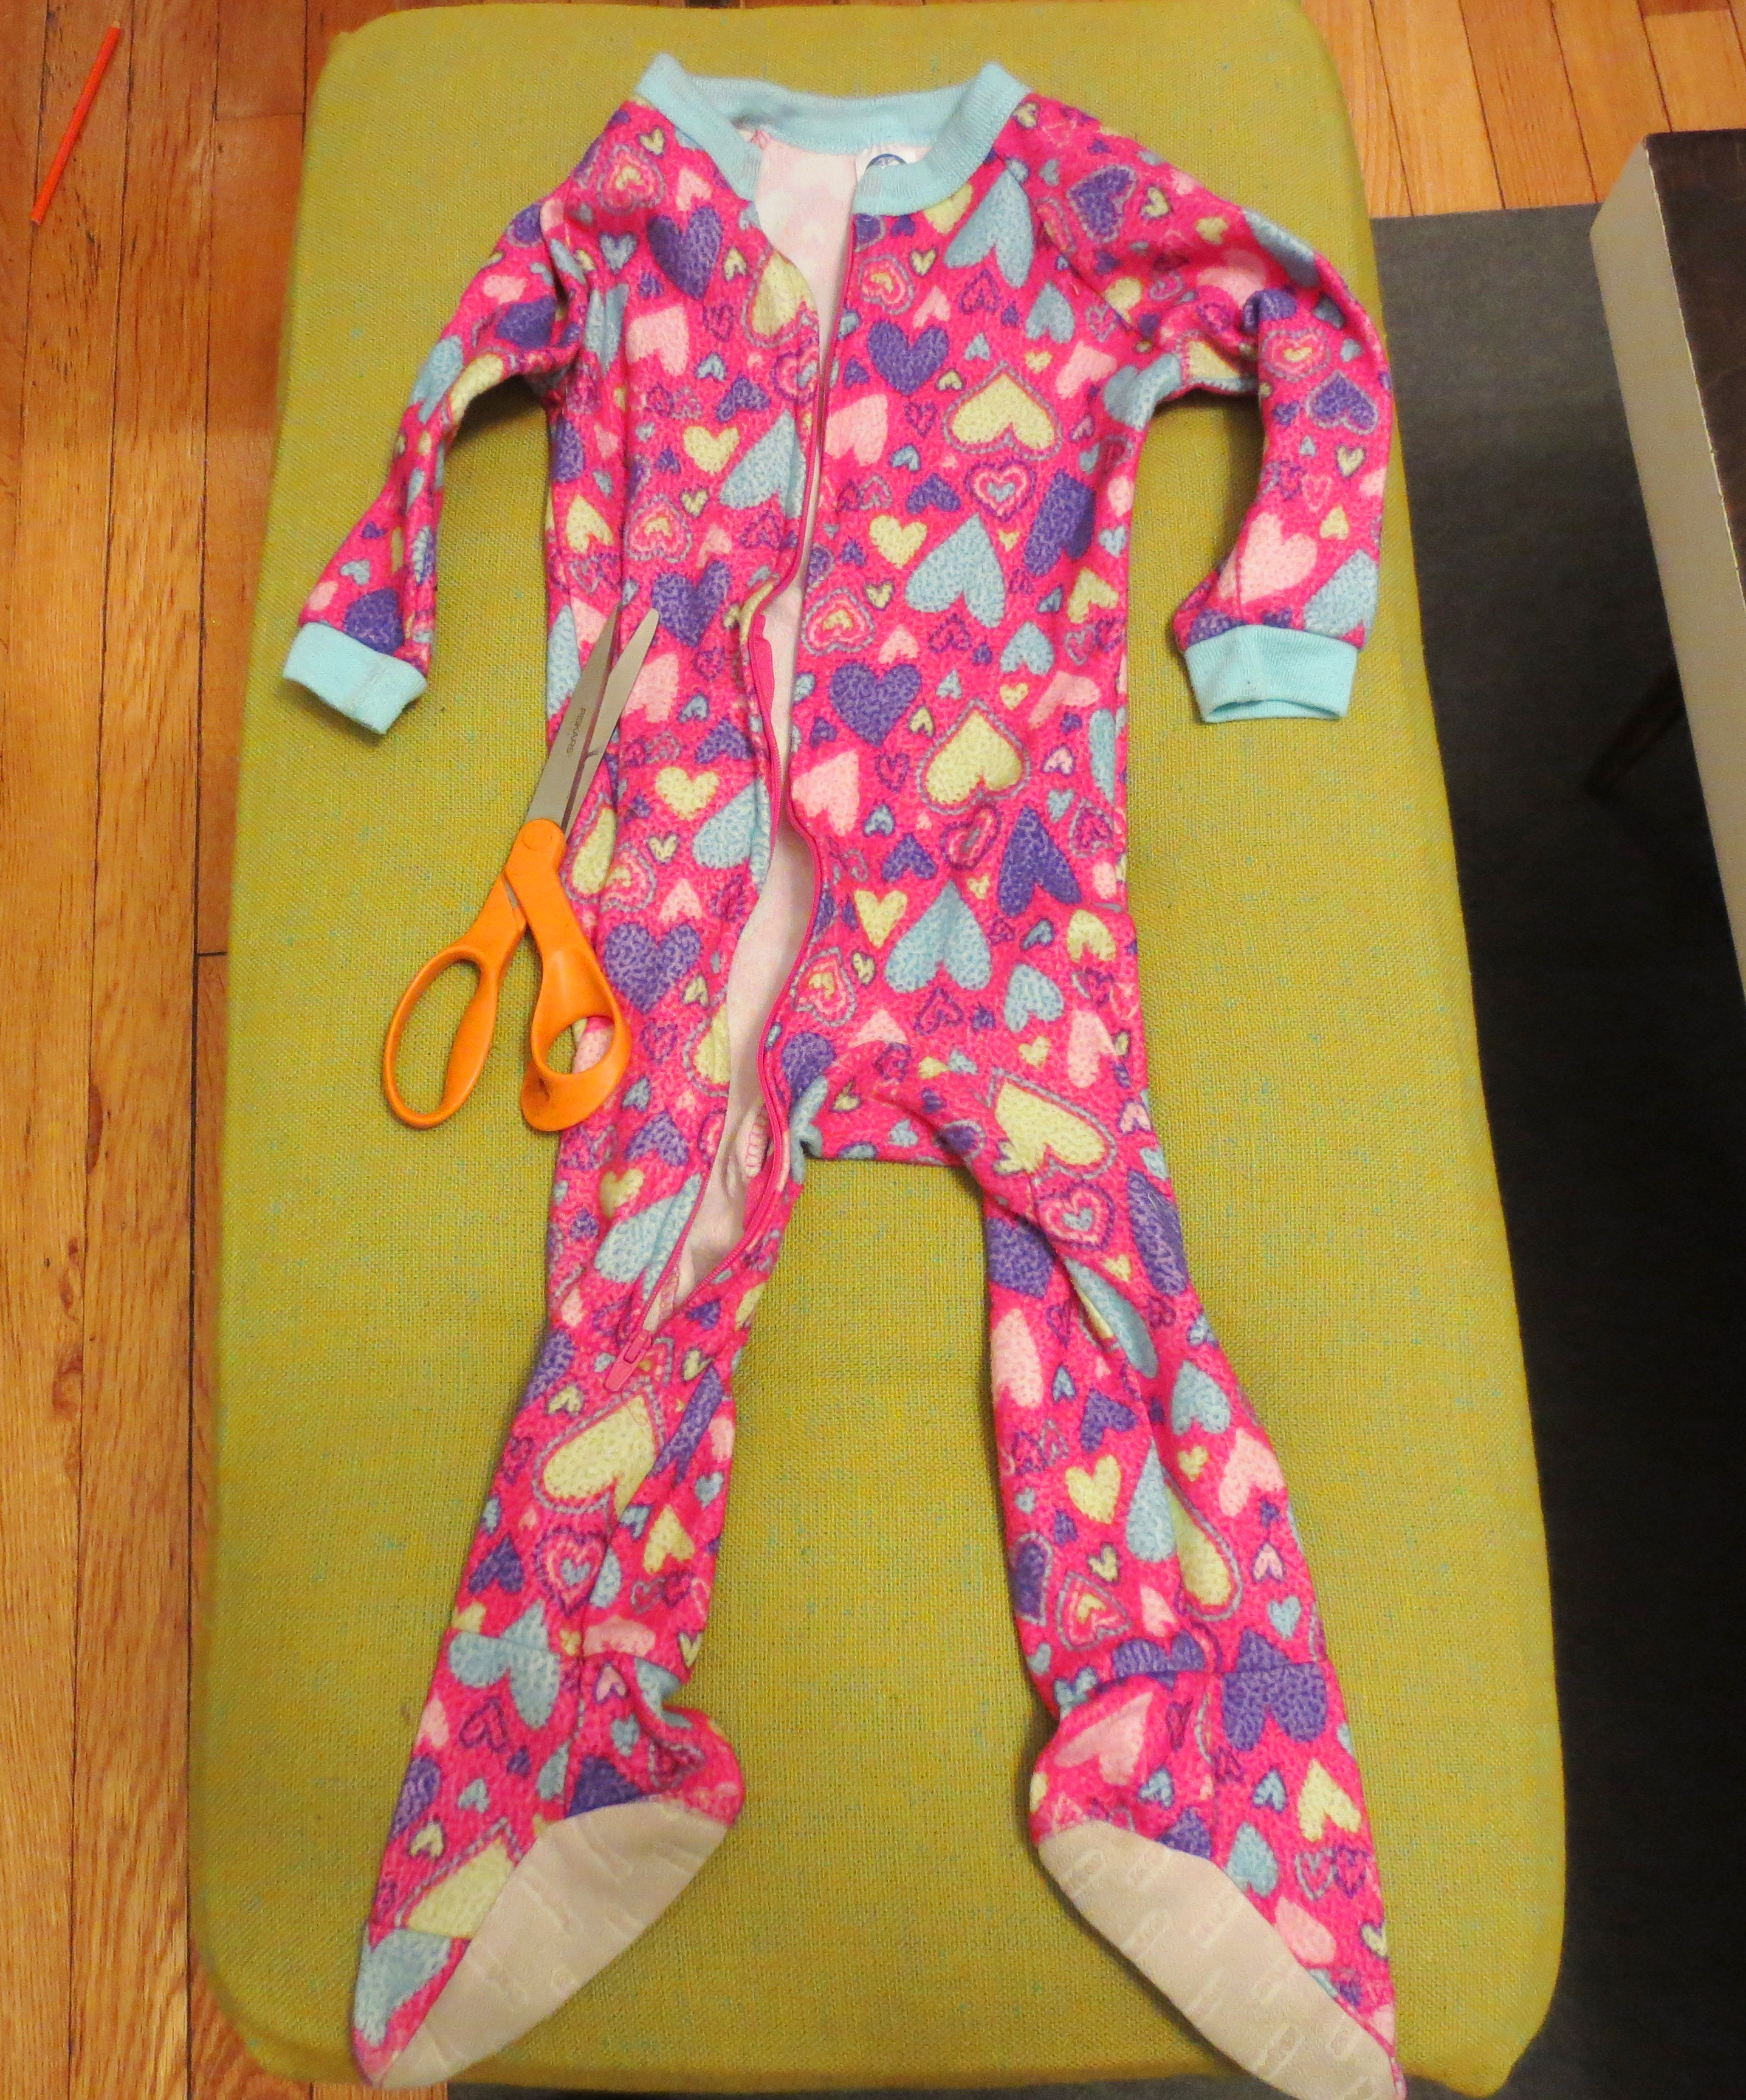
Be sure to remove the baby BEFORE you start cutting.

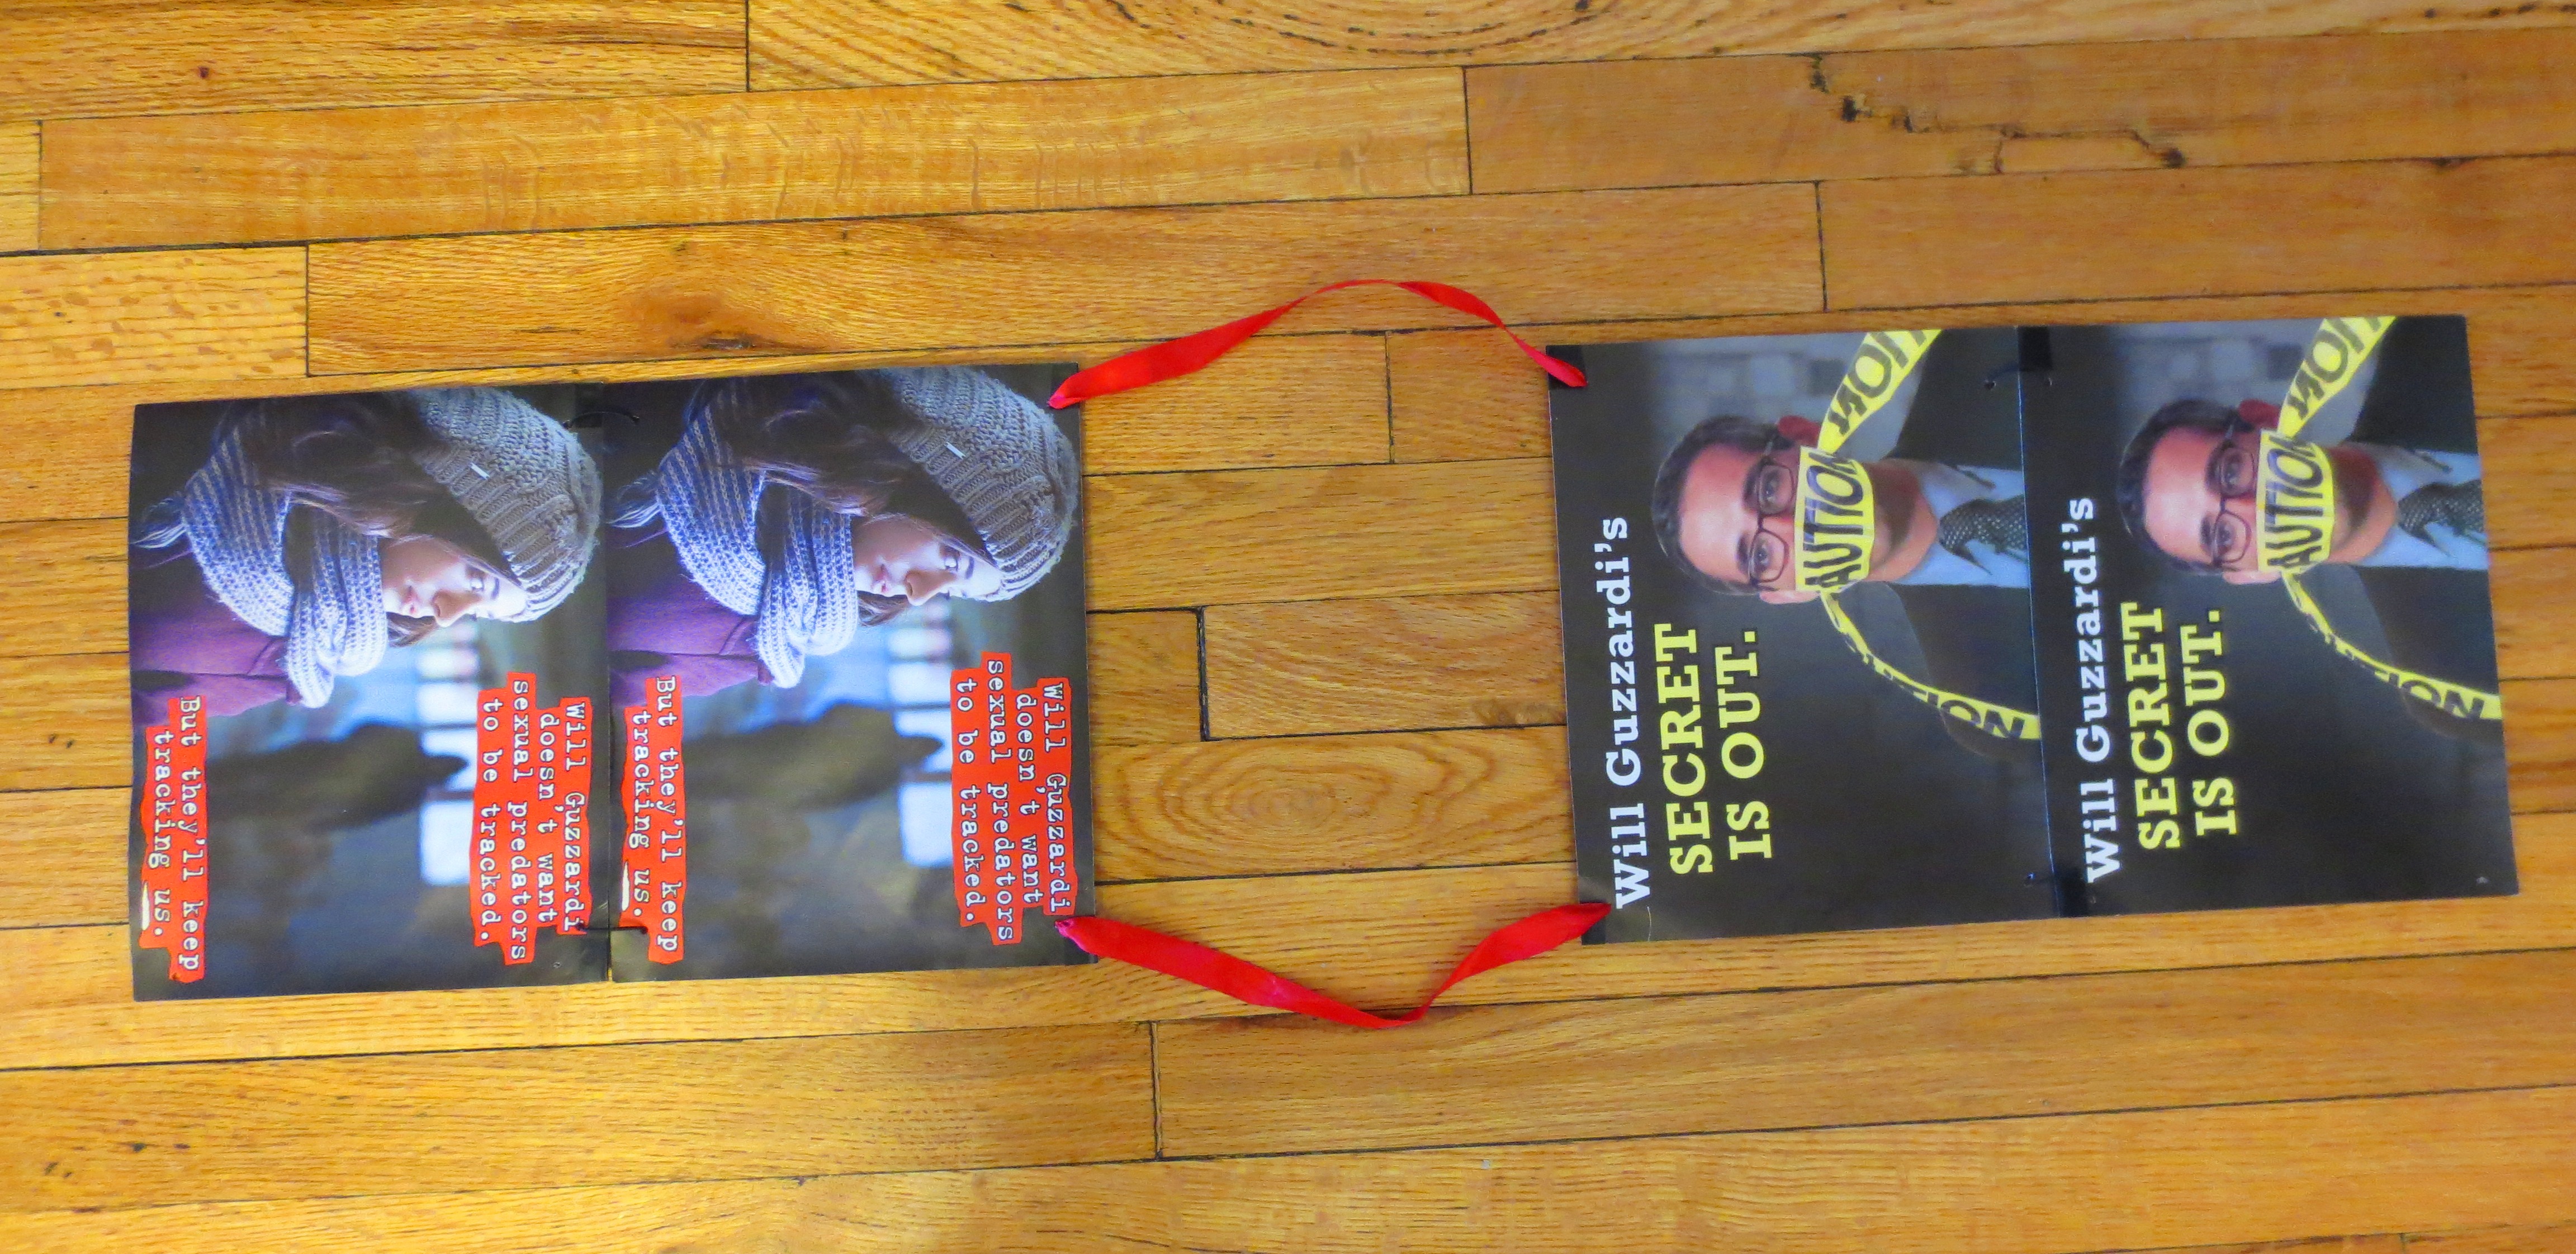
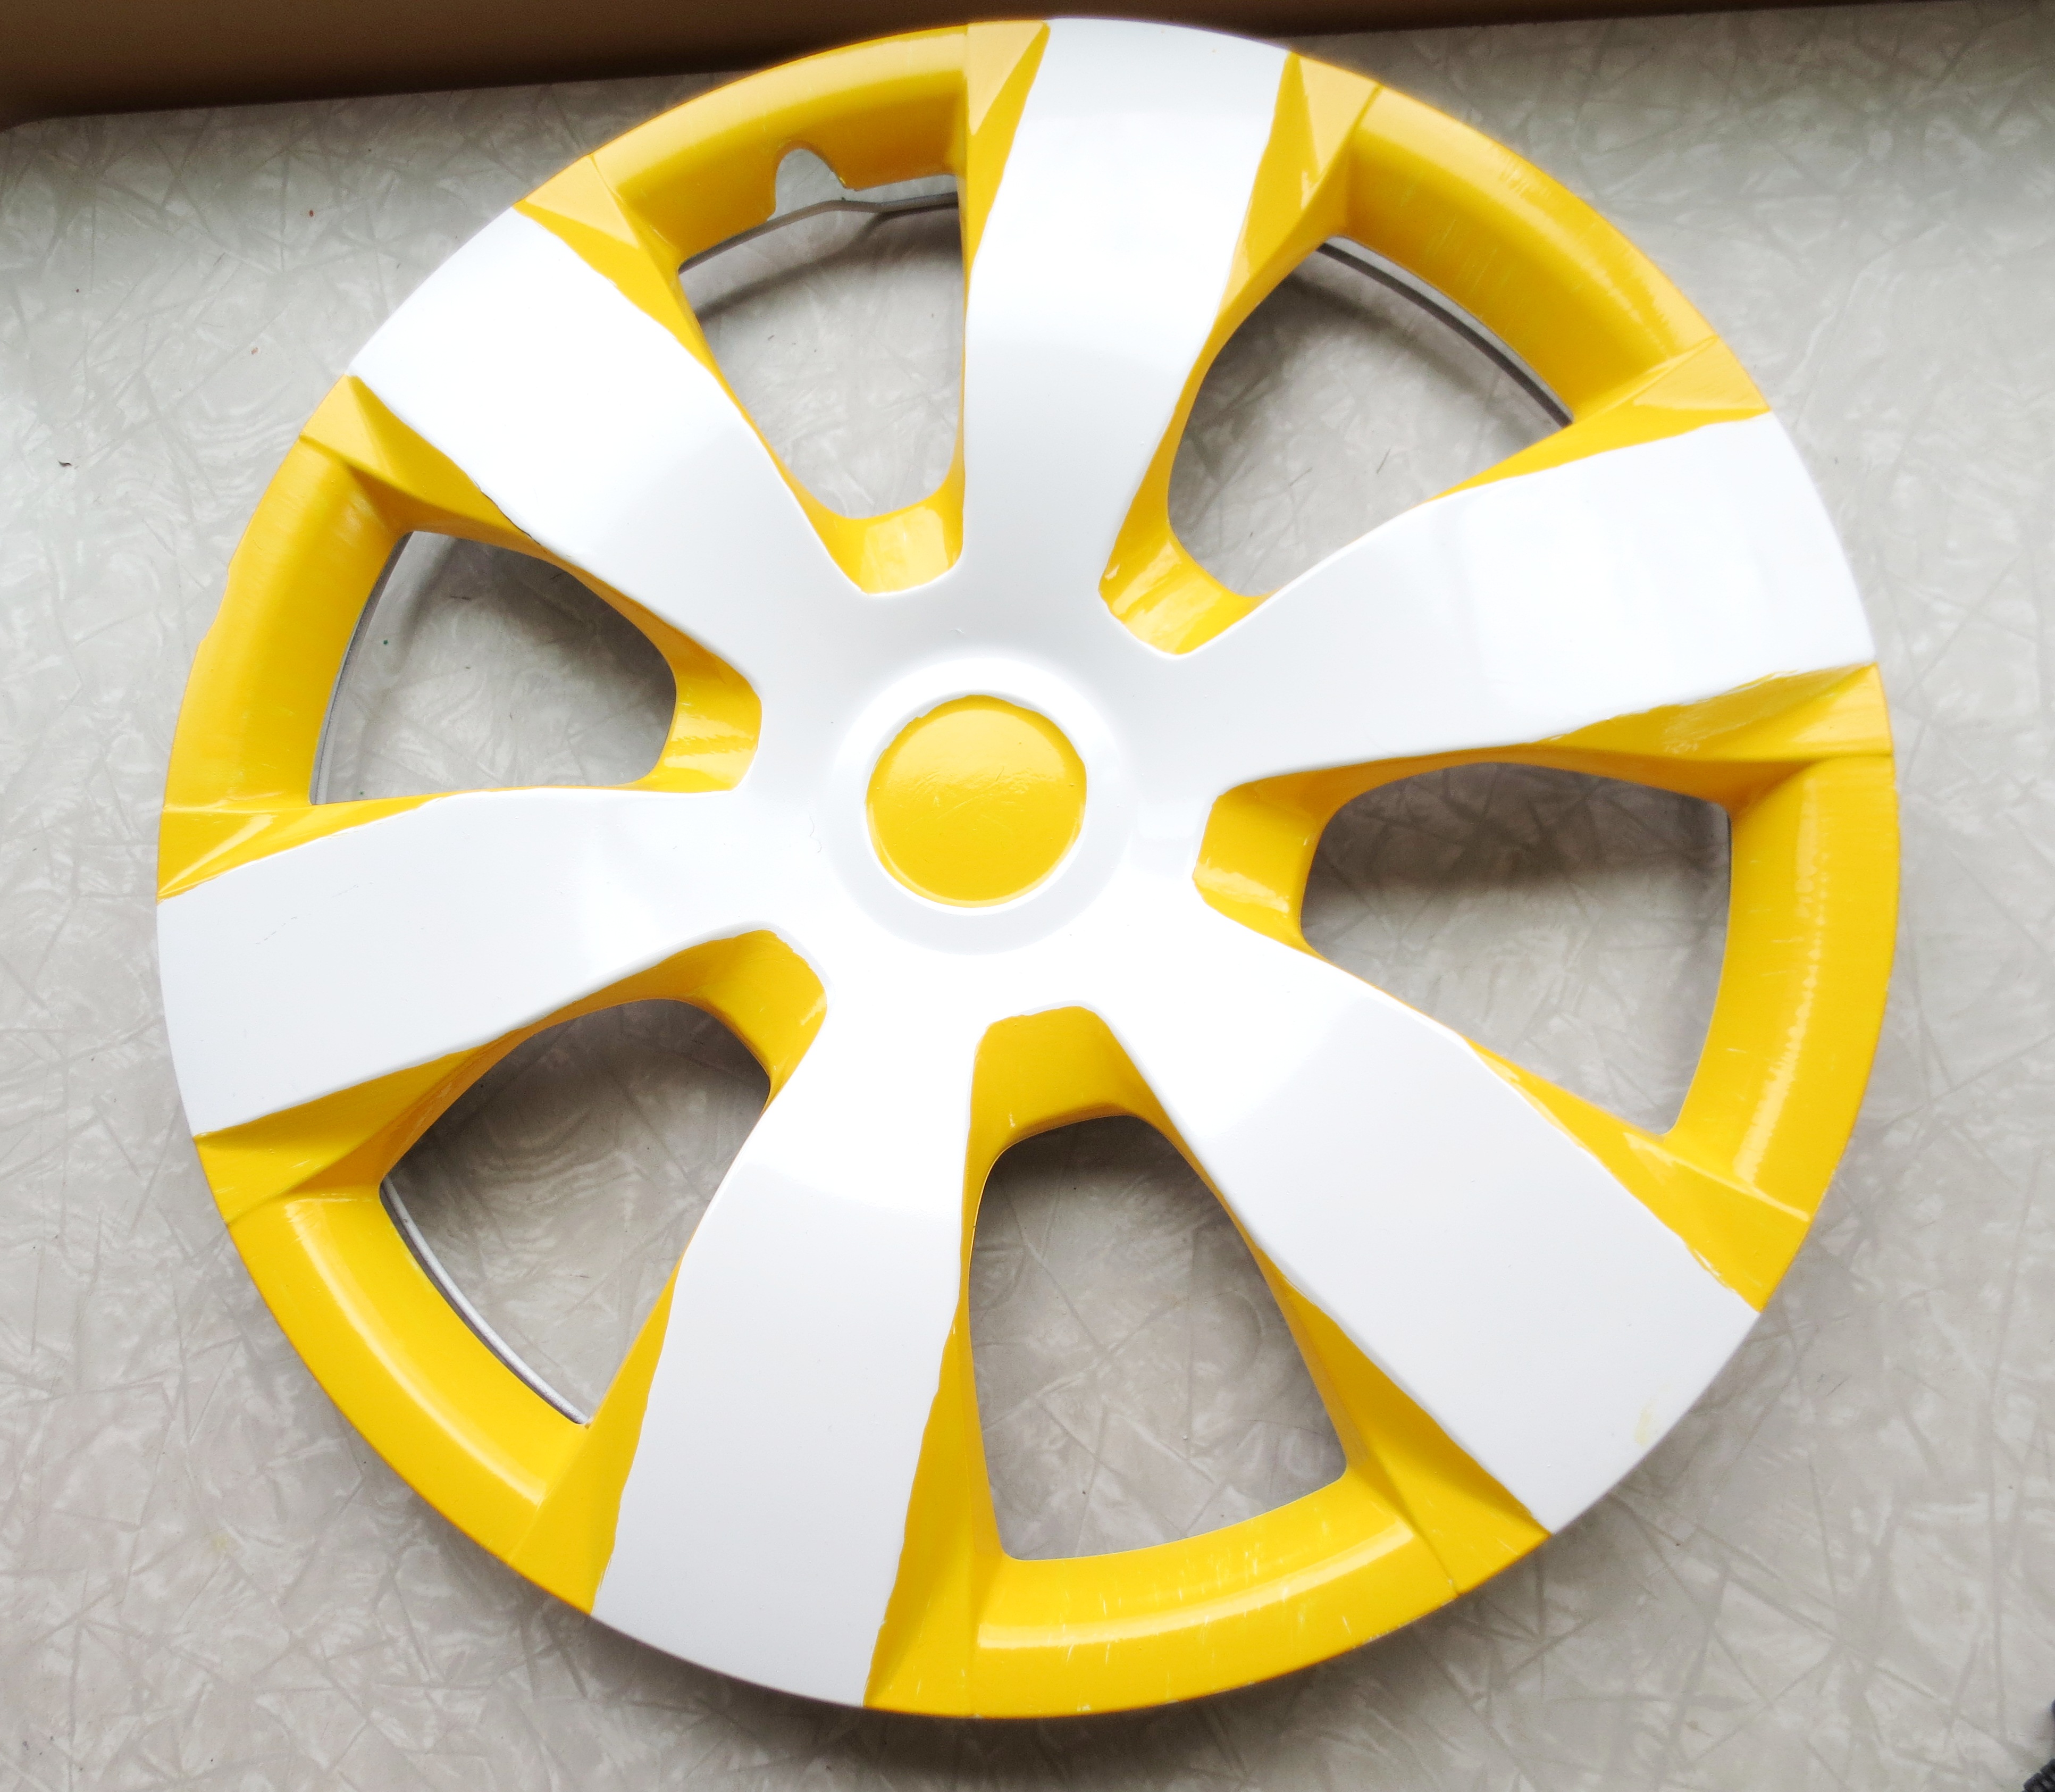
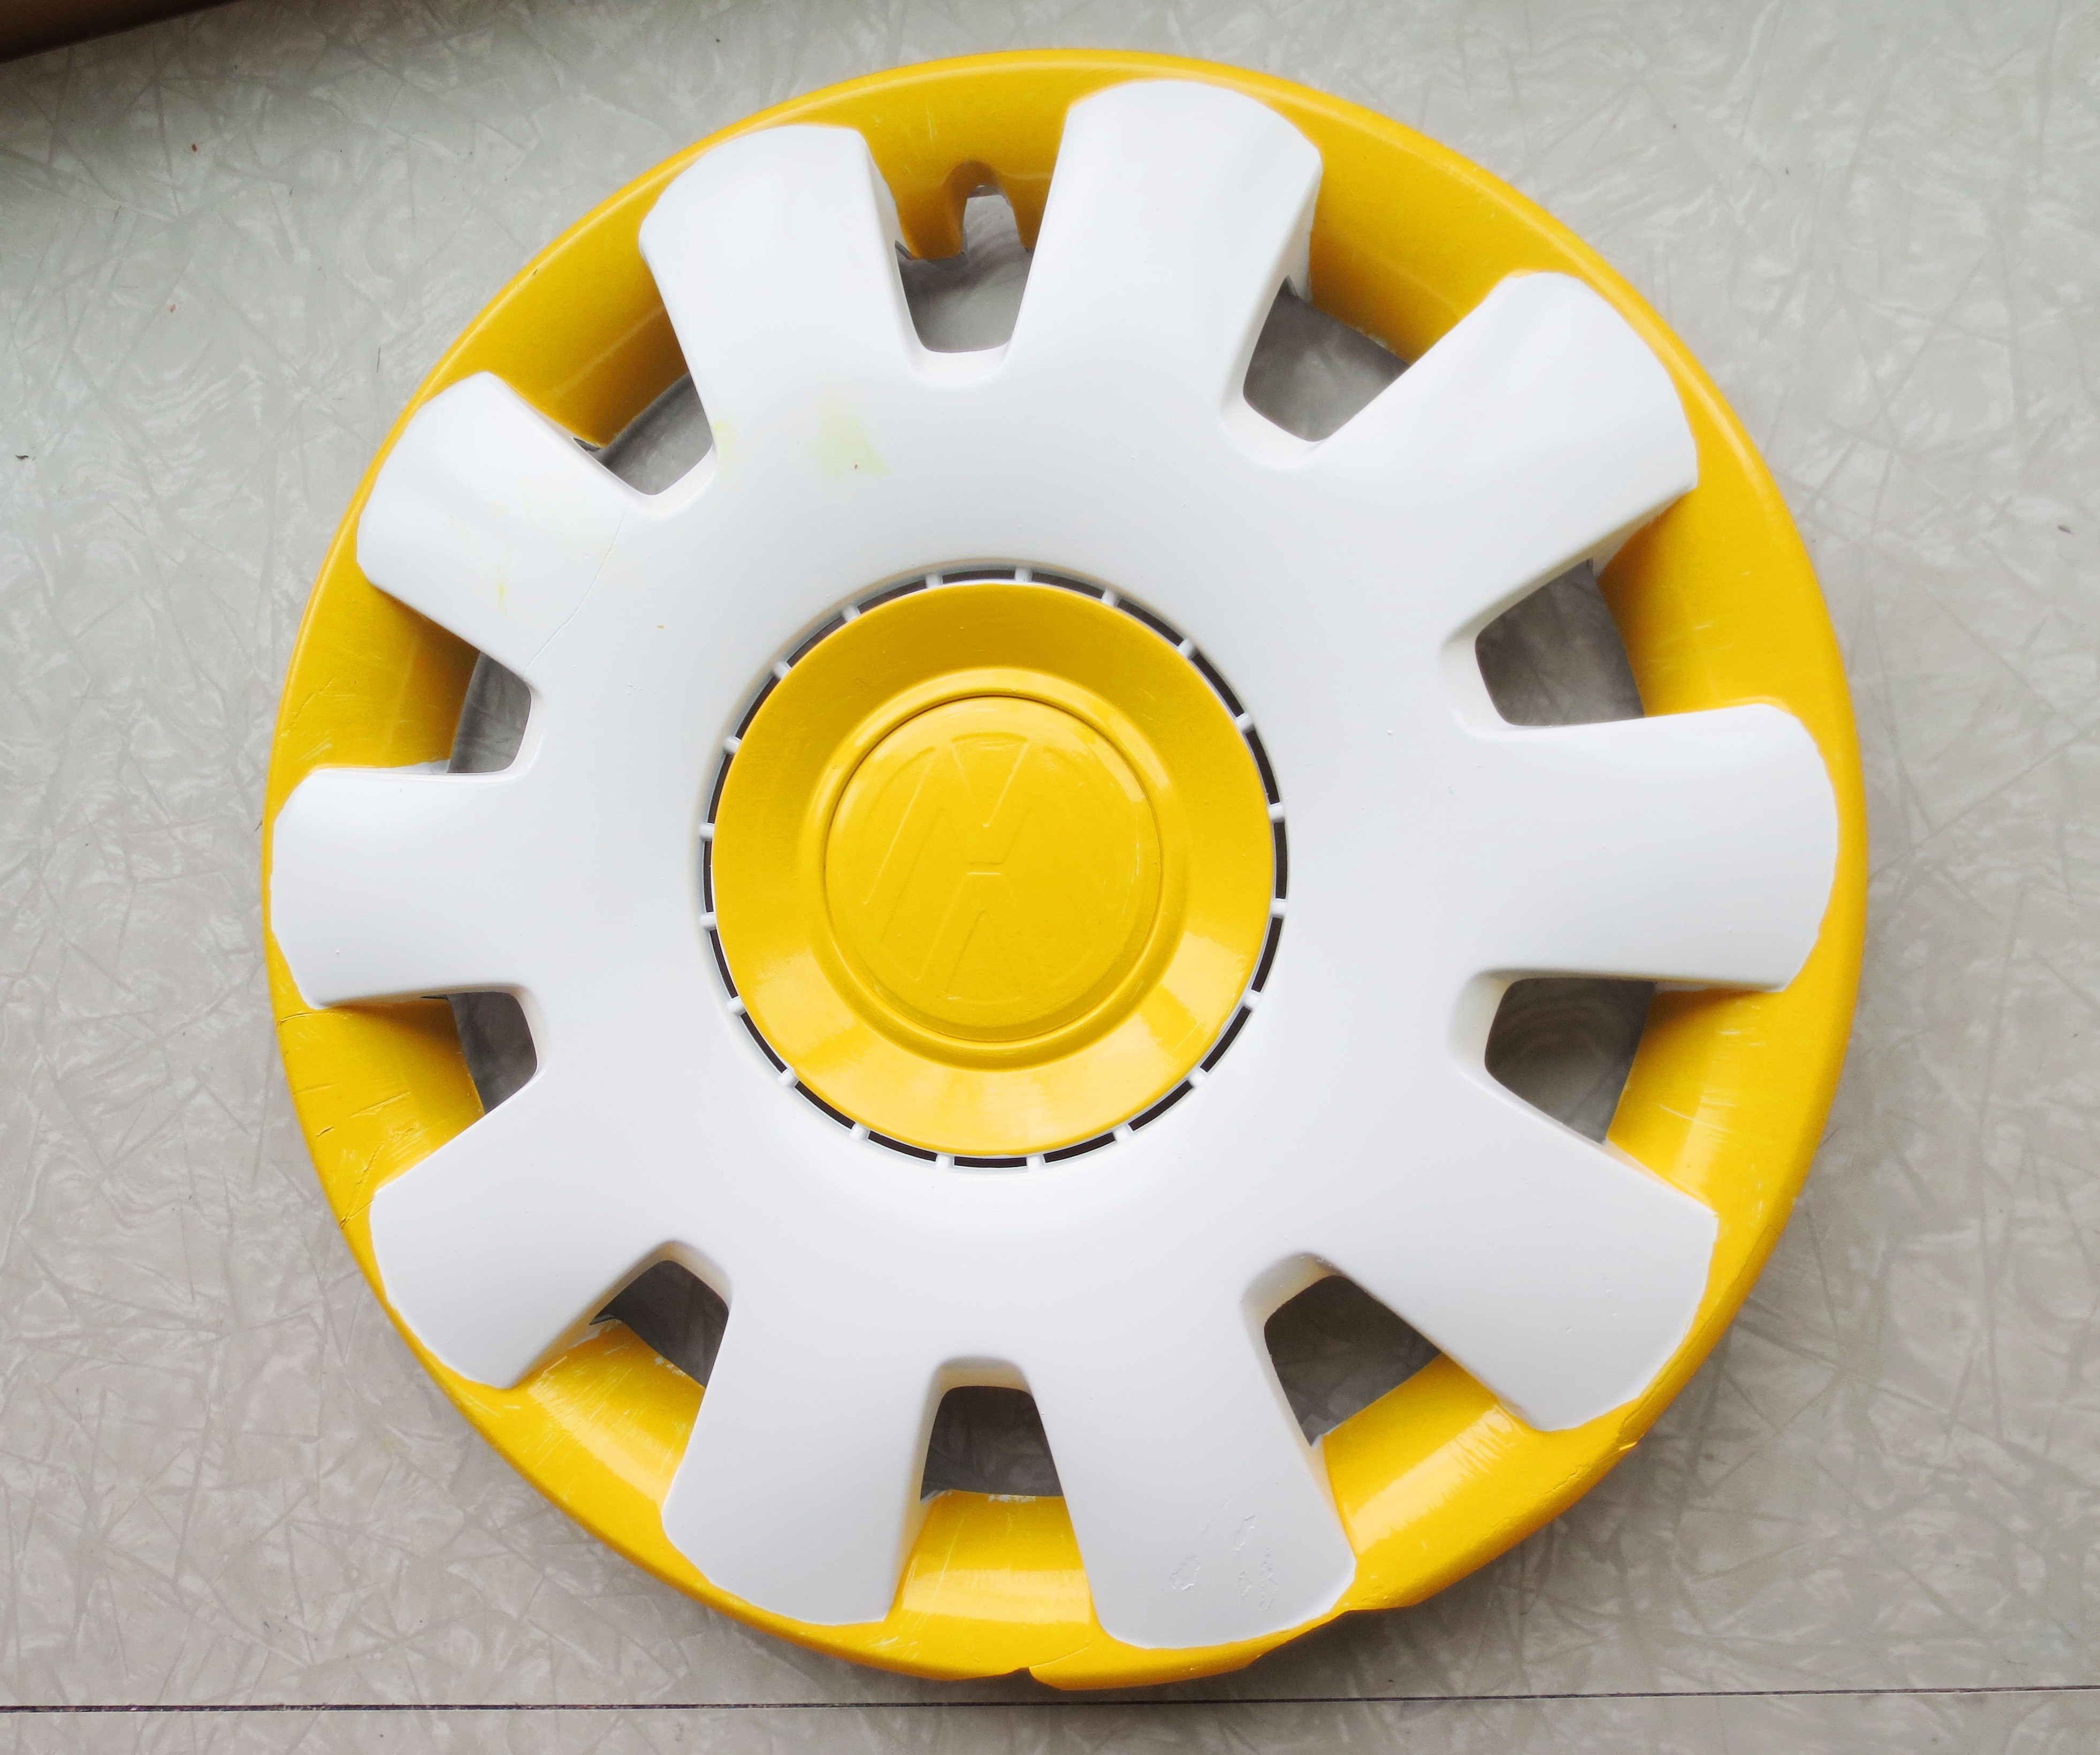
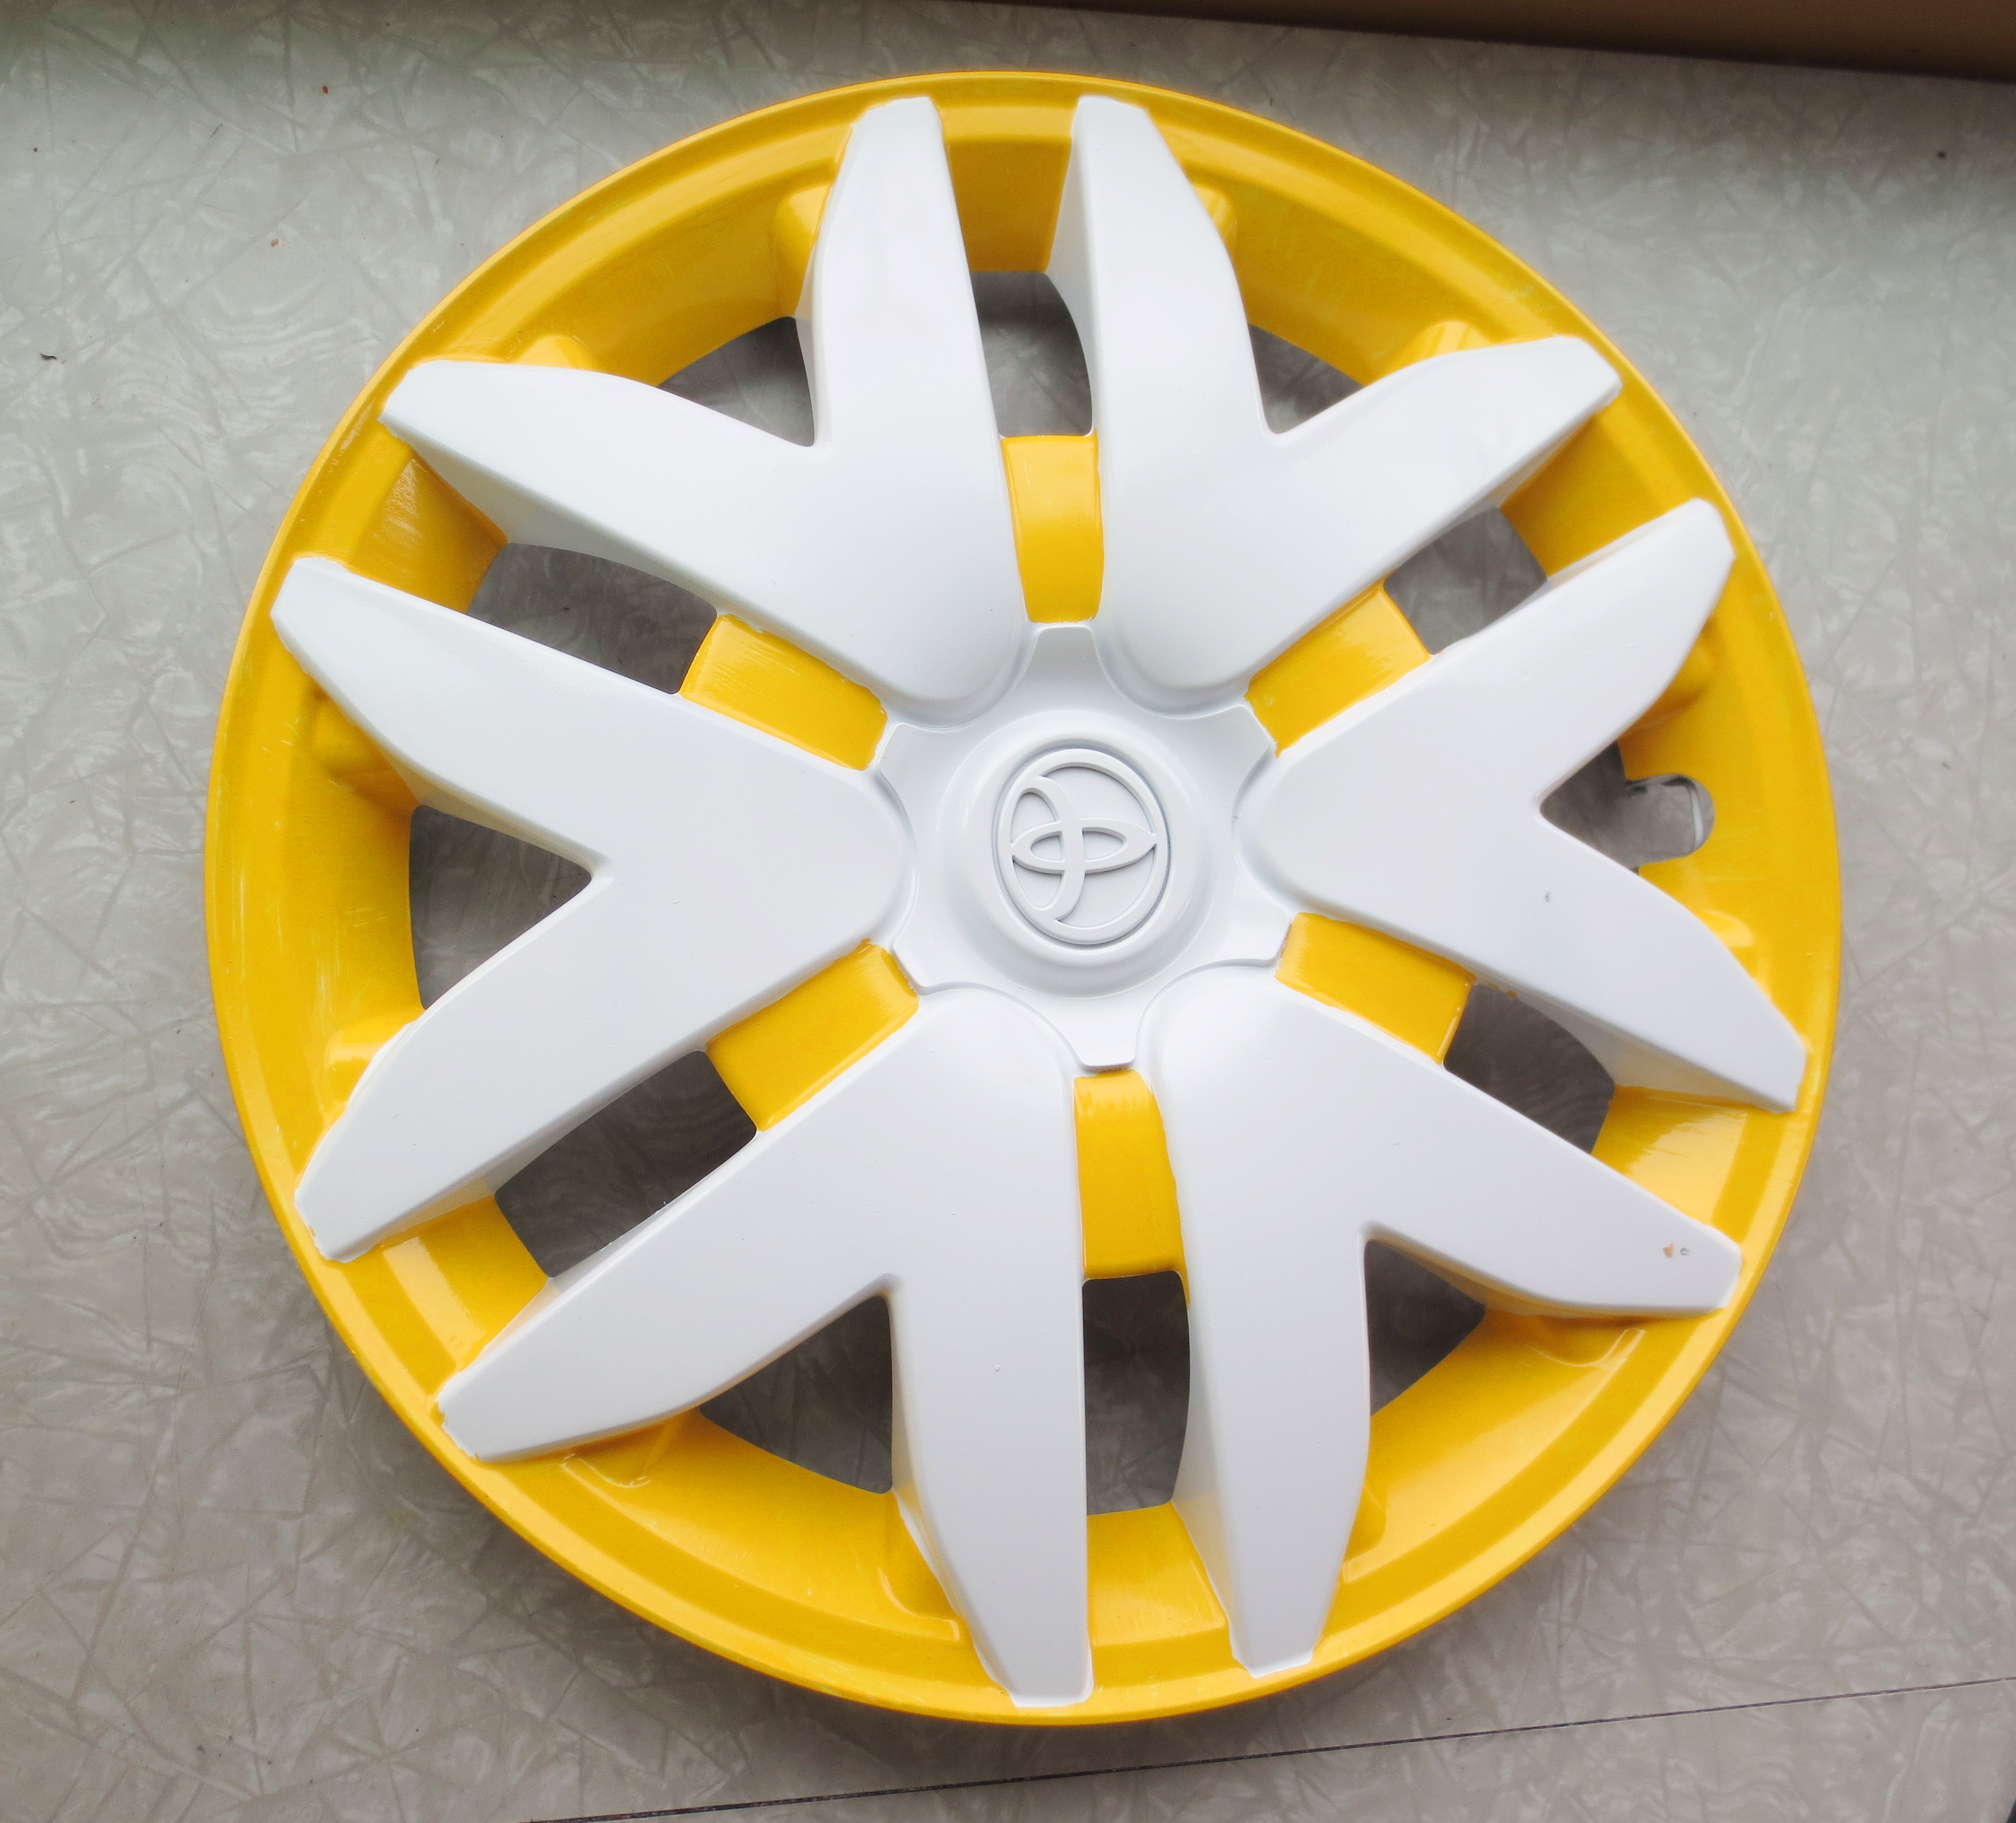
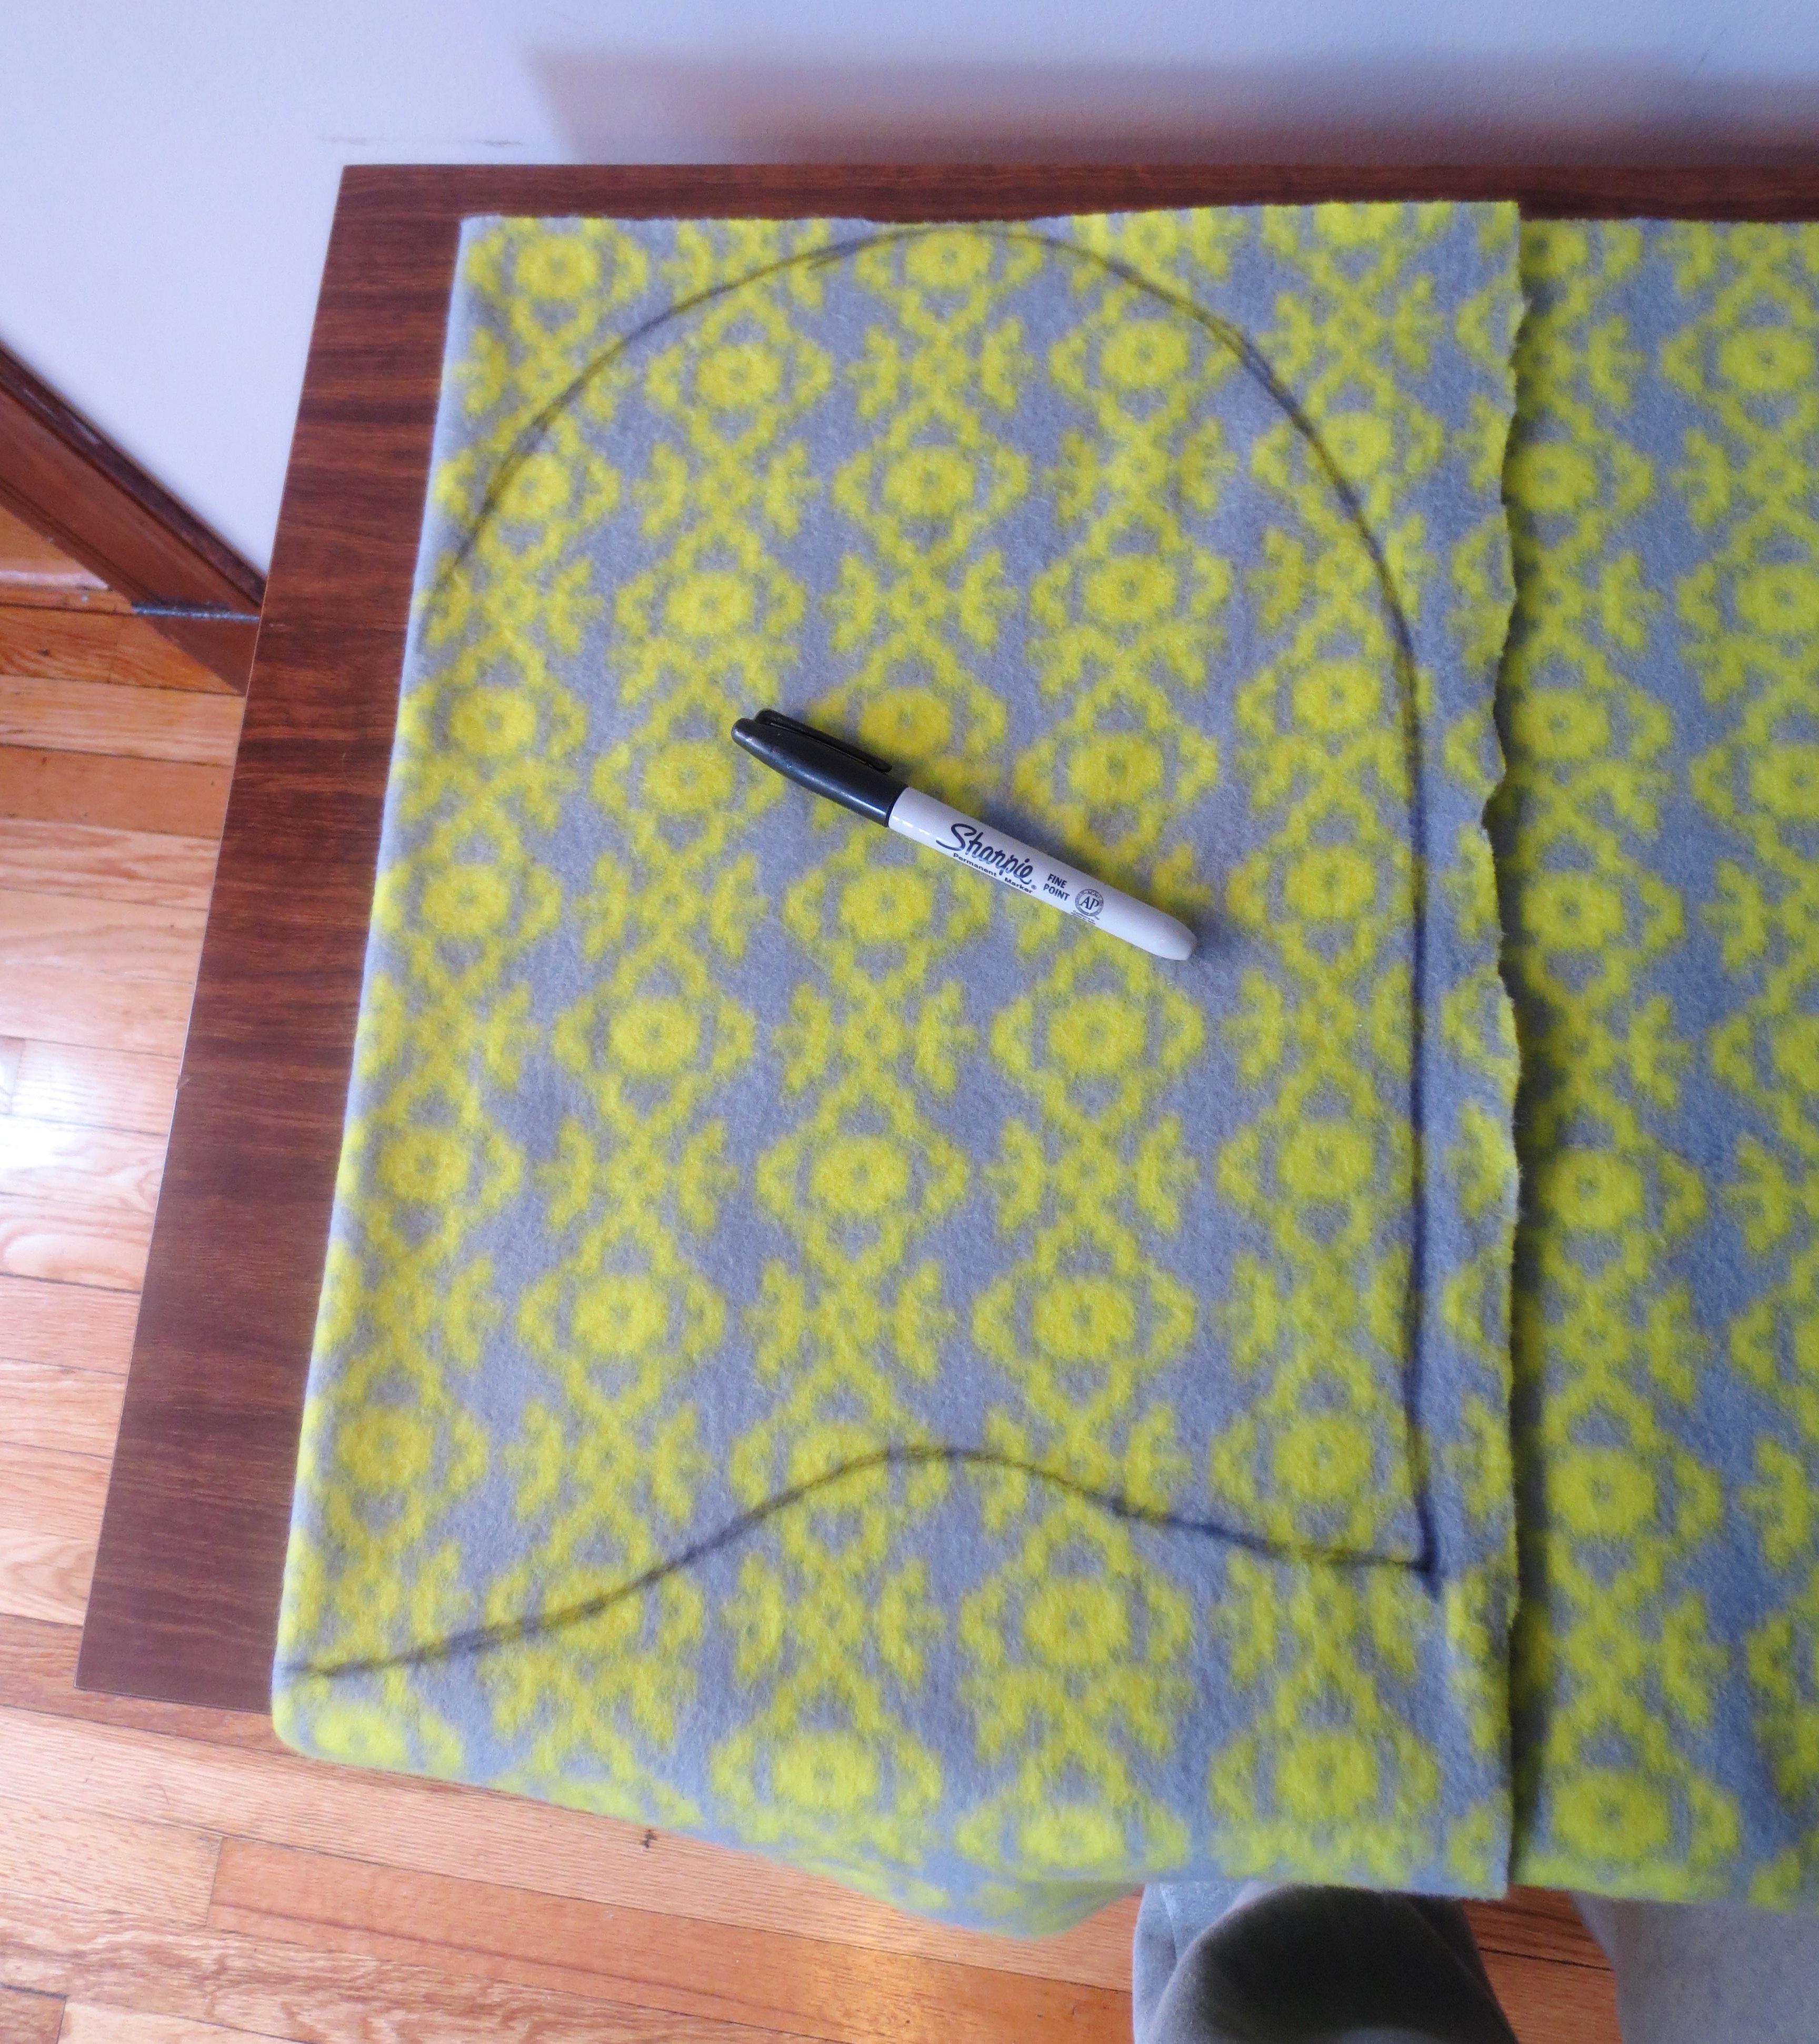
For the pouch, I wanted to stay with the theme of “old baby crap.” While rummaging around my sewing drawer, I found an old diaper cover that I had foolishly tried to revive with new Velcro™ (and, as you can see here, quickly gave up).  Here’s how cloth diapers work: you wrap the baby’s butt in the equivalent of a lumpy cotton dishtowel, and then wrap the cloth-covered butt with a sturdy, waterproof cover, usually in a fun pattern, like this one:**

IMG_3712
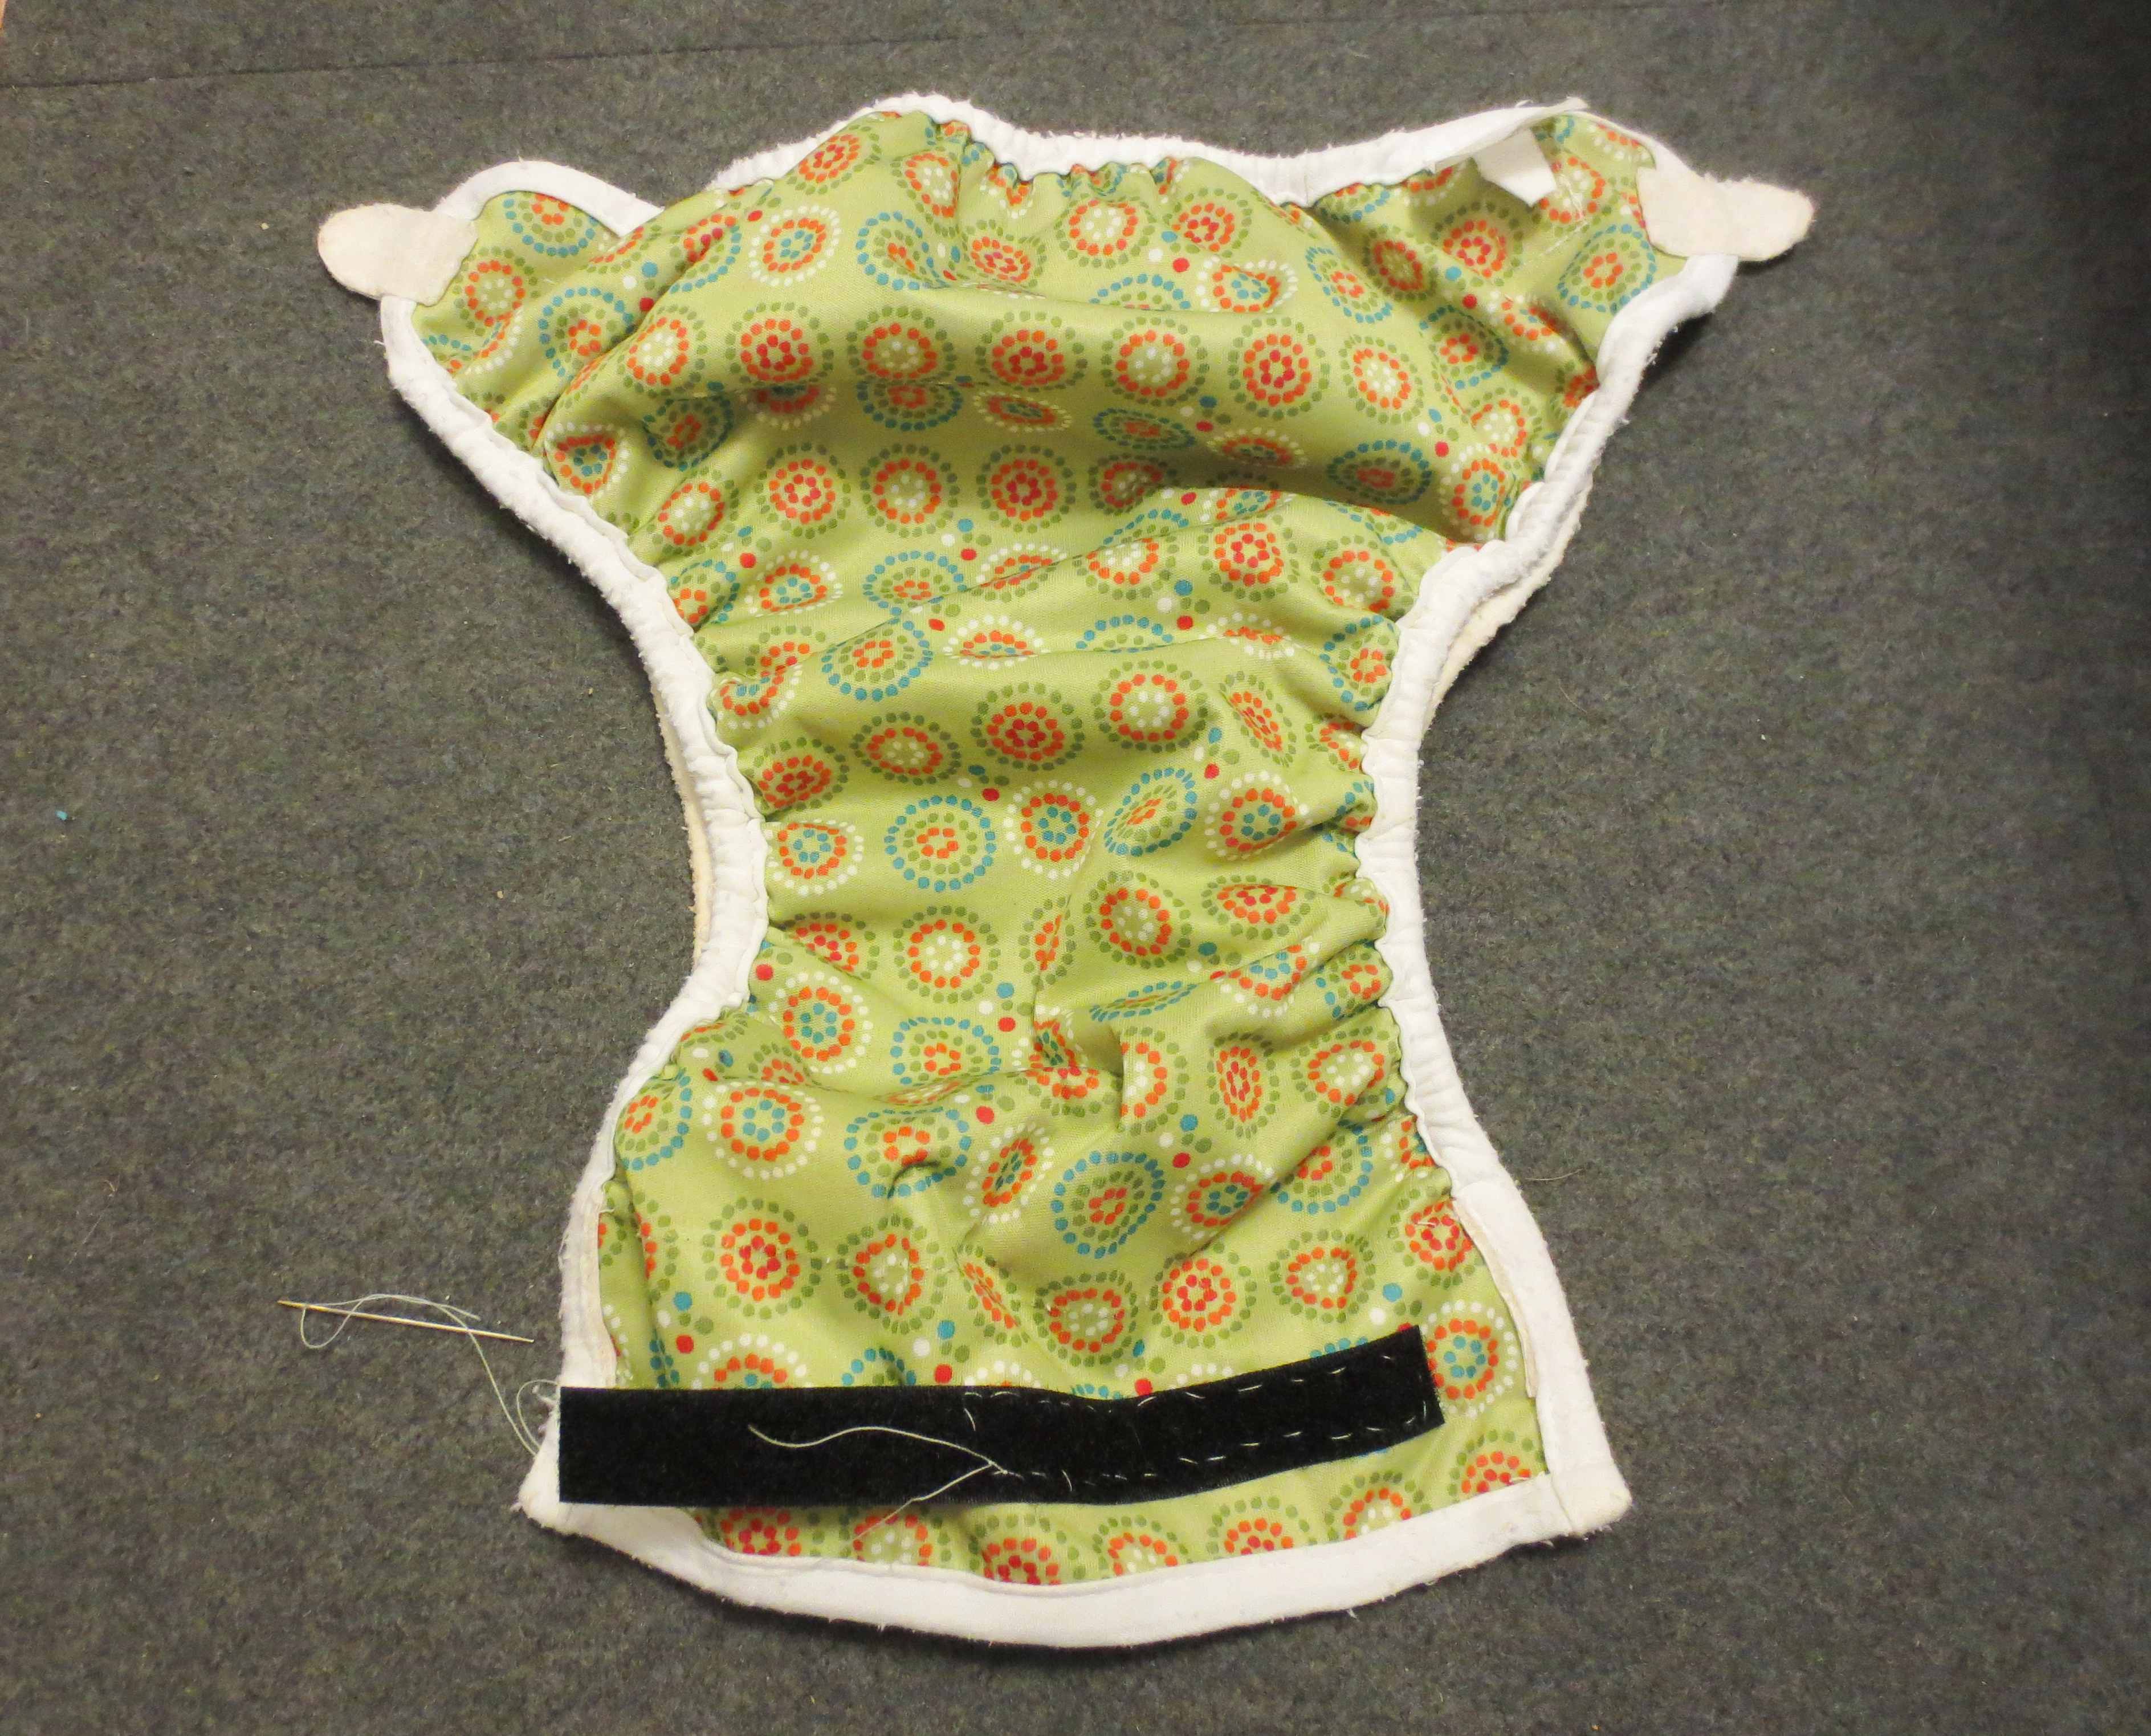
What better way to celebrate the end of diaper bags, than with a diaper-based wallet?!

INGREDIENTS:

  • One pair of old baby pajamas
  • One old diaper cover
  • Seam ripper and scissors
  • Needle + thread, or sewing machine

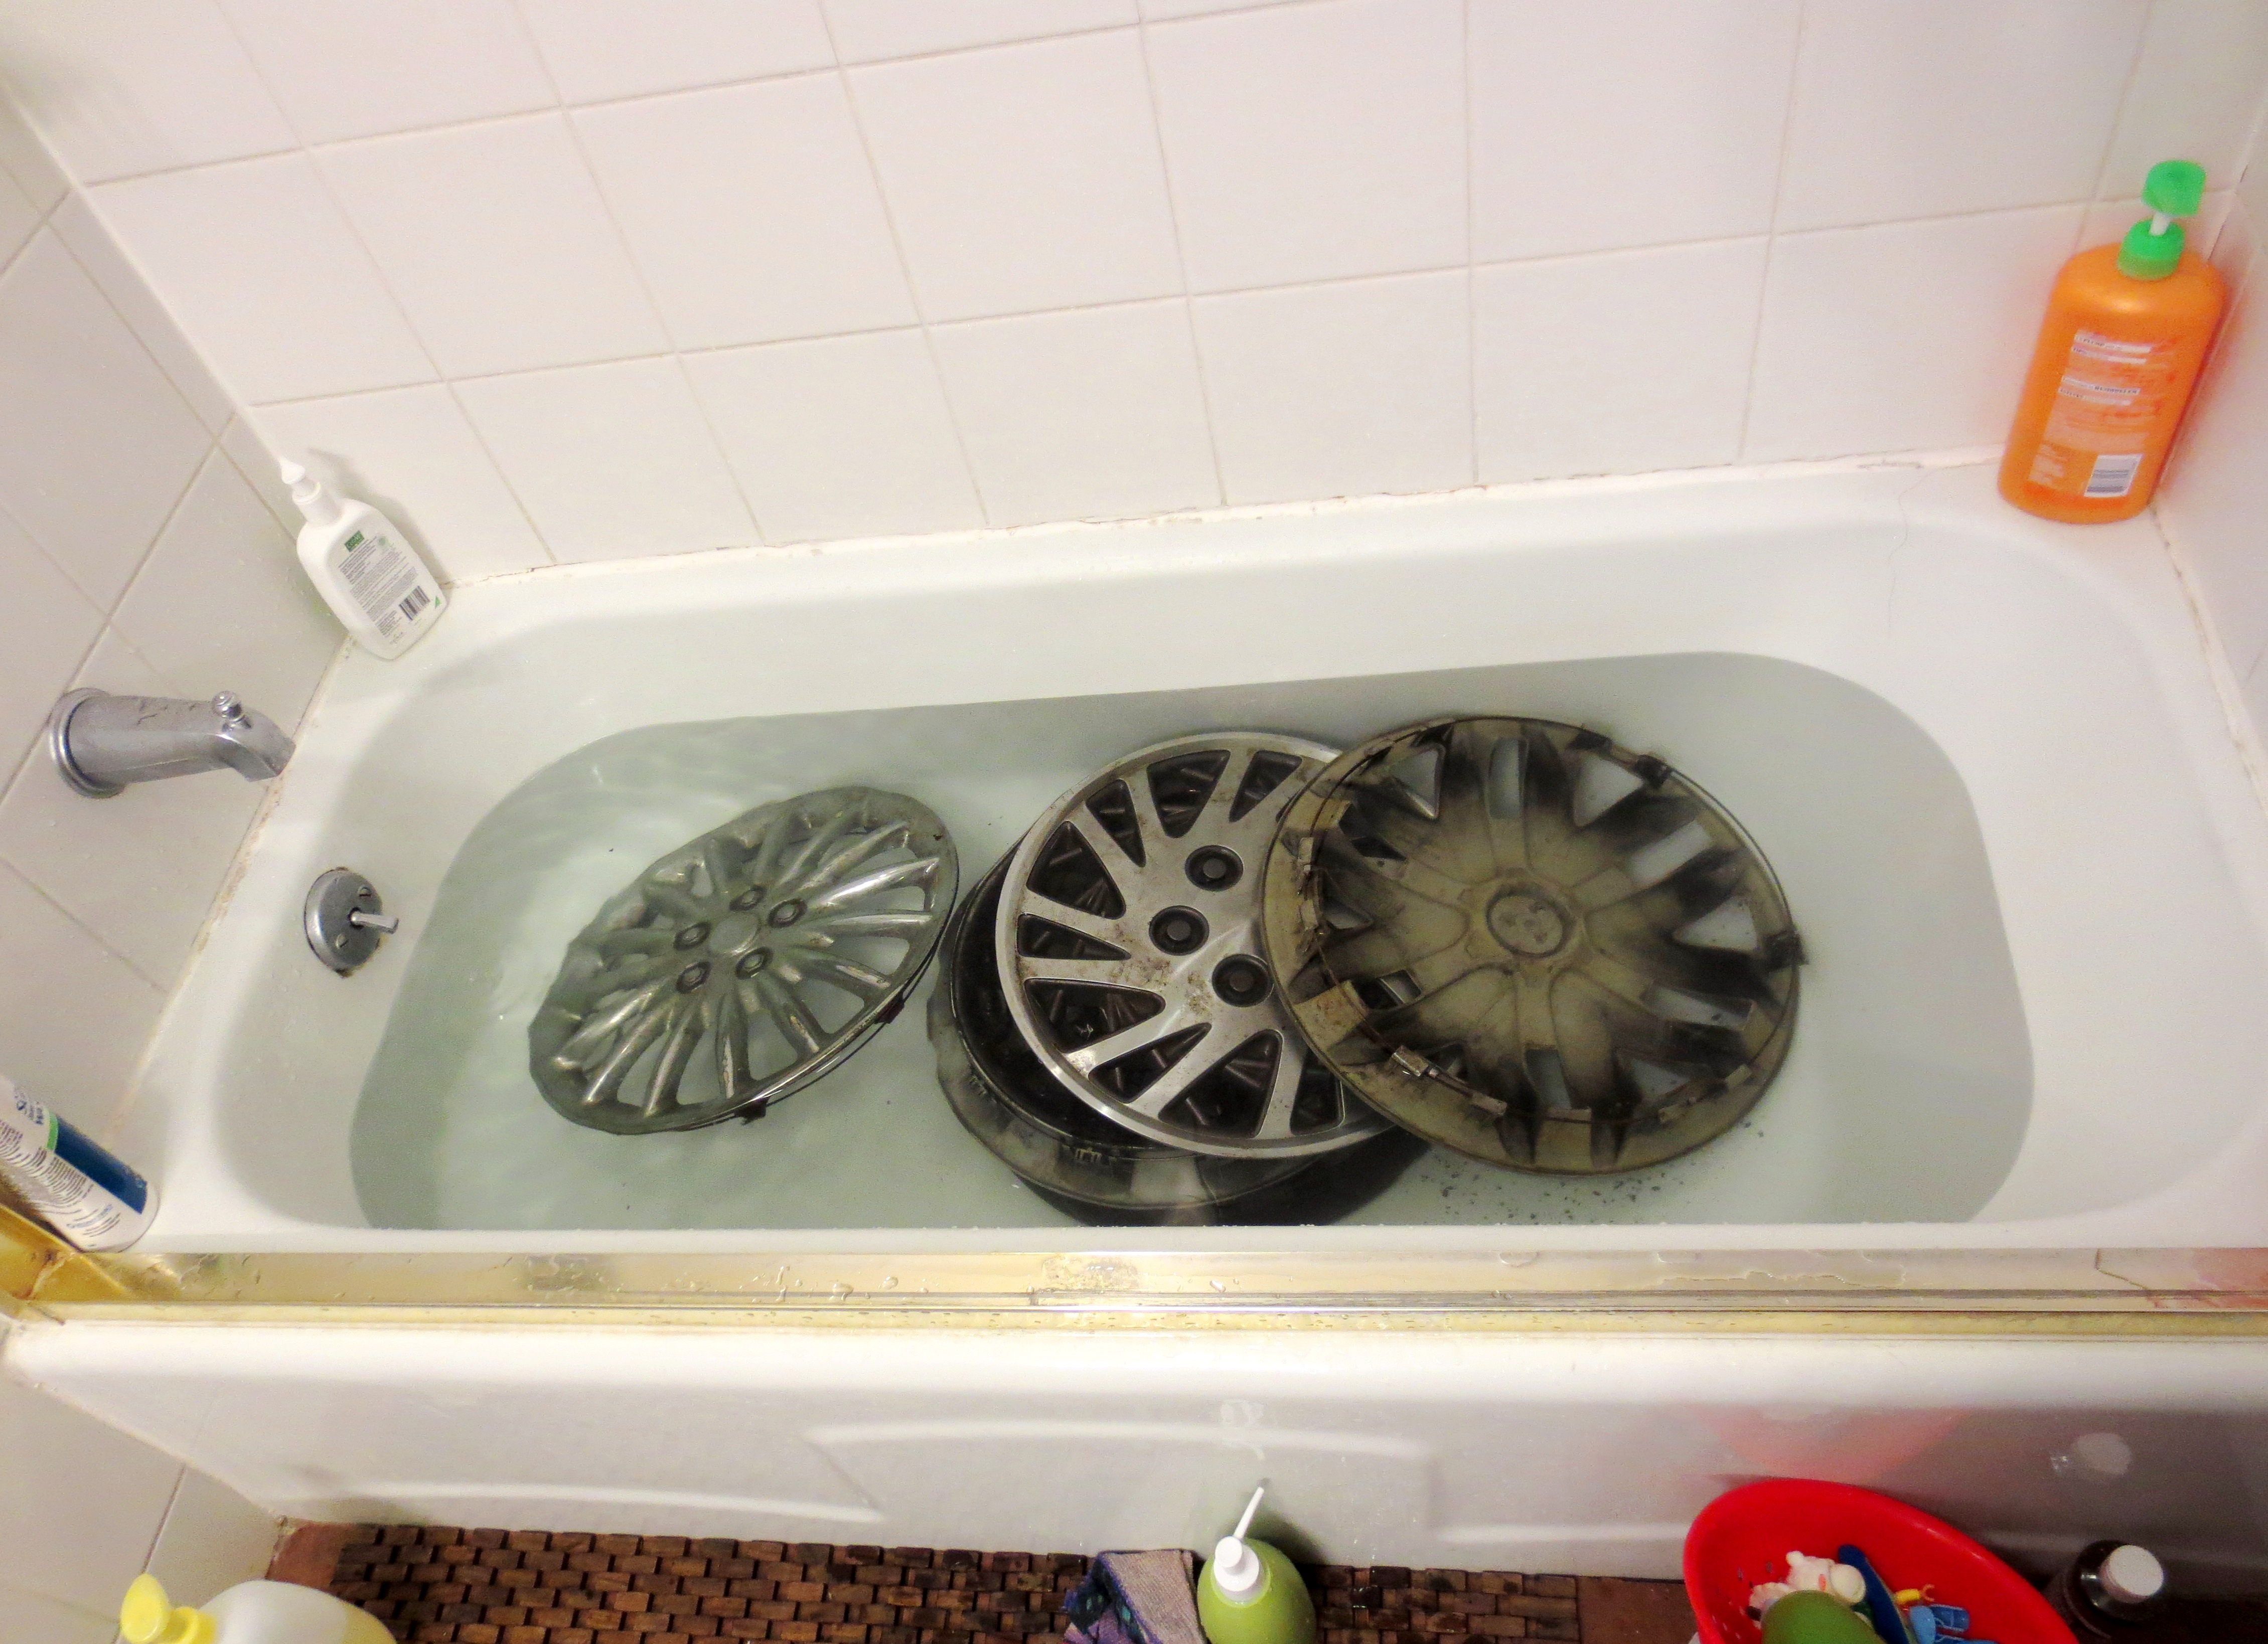
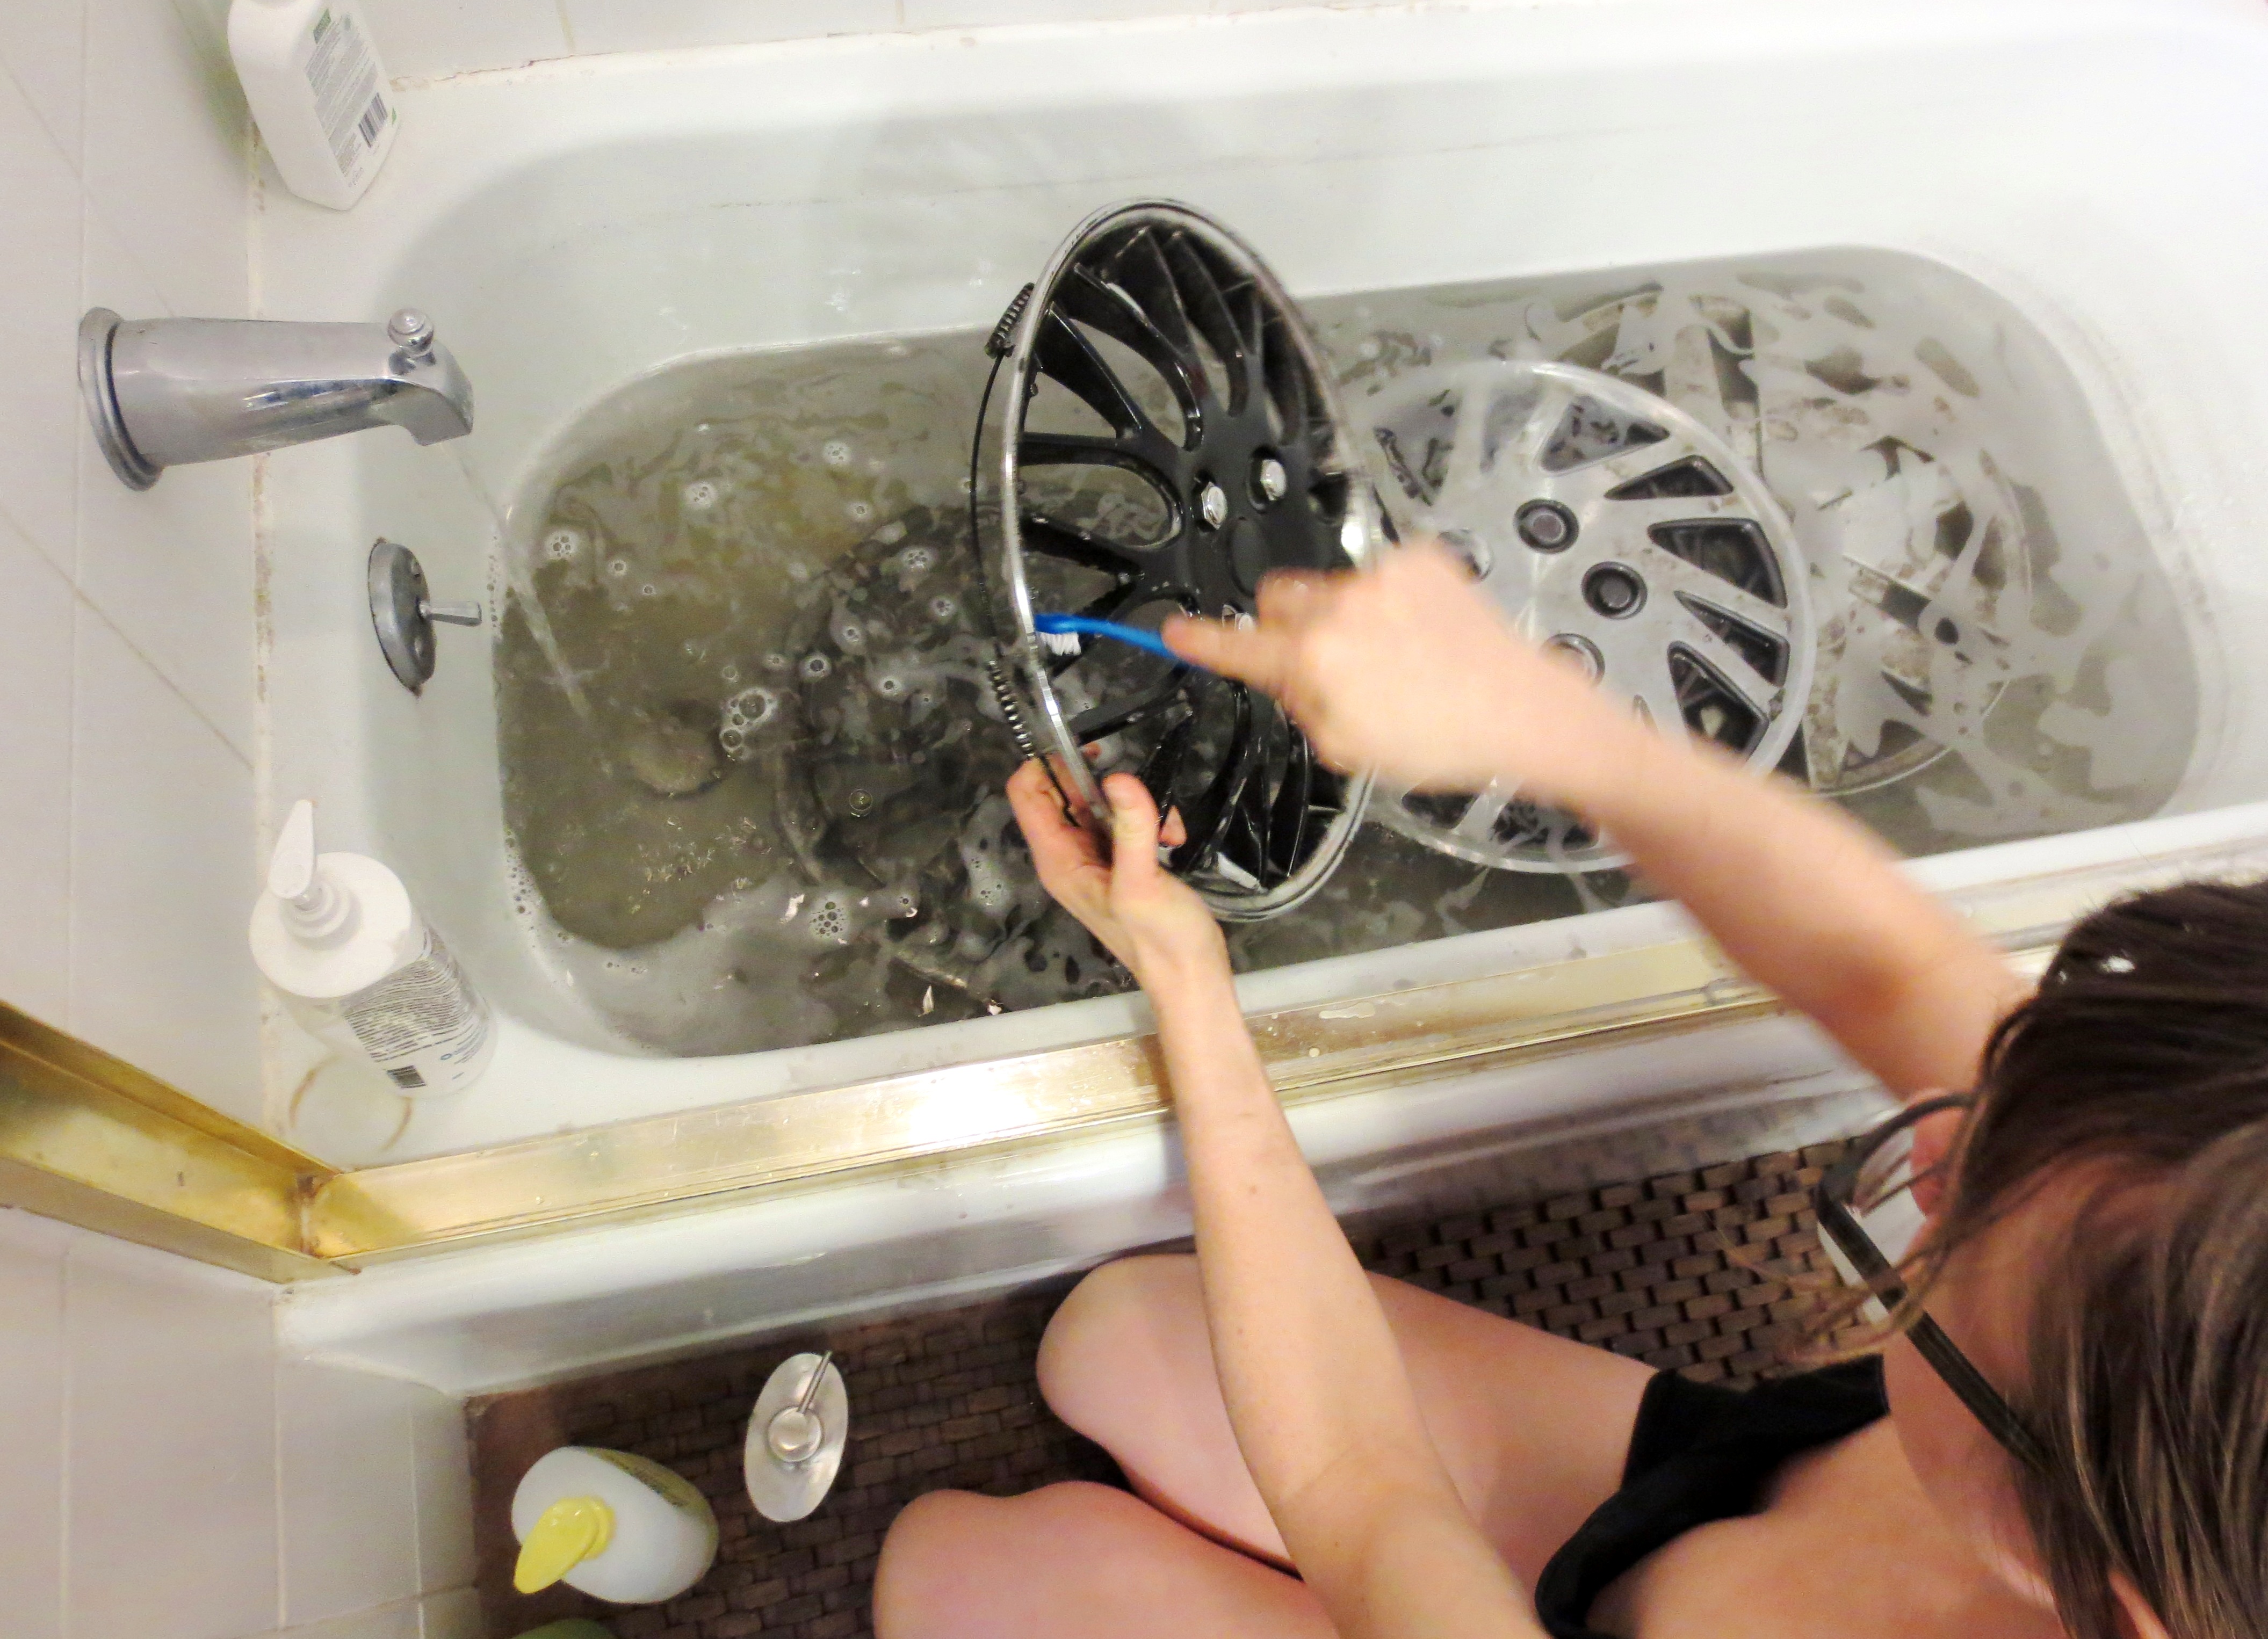
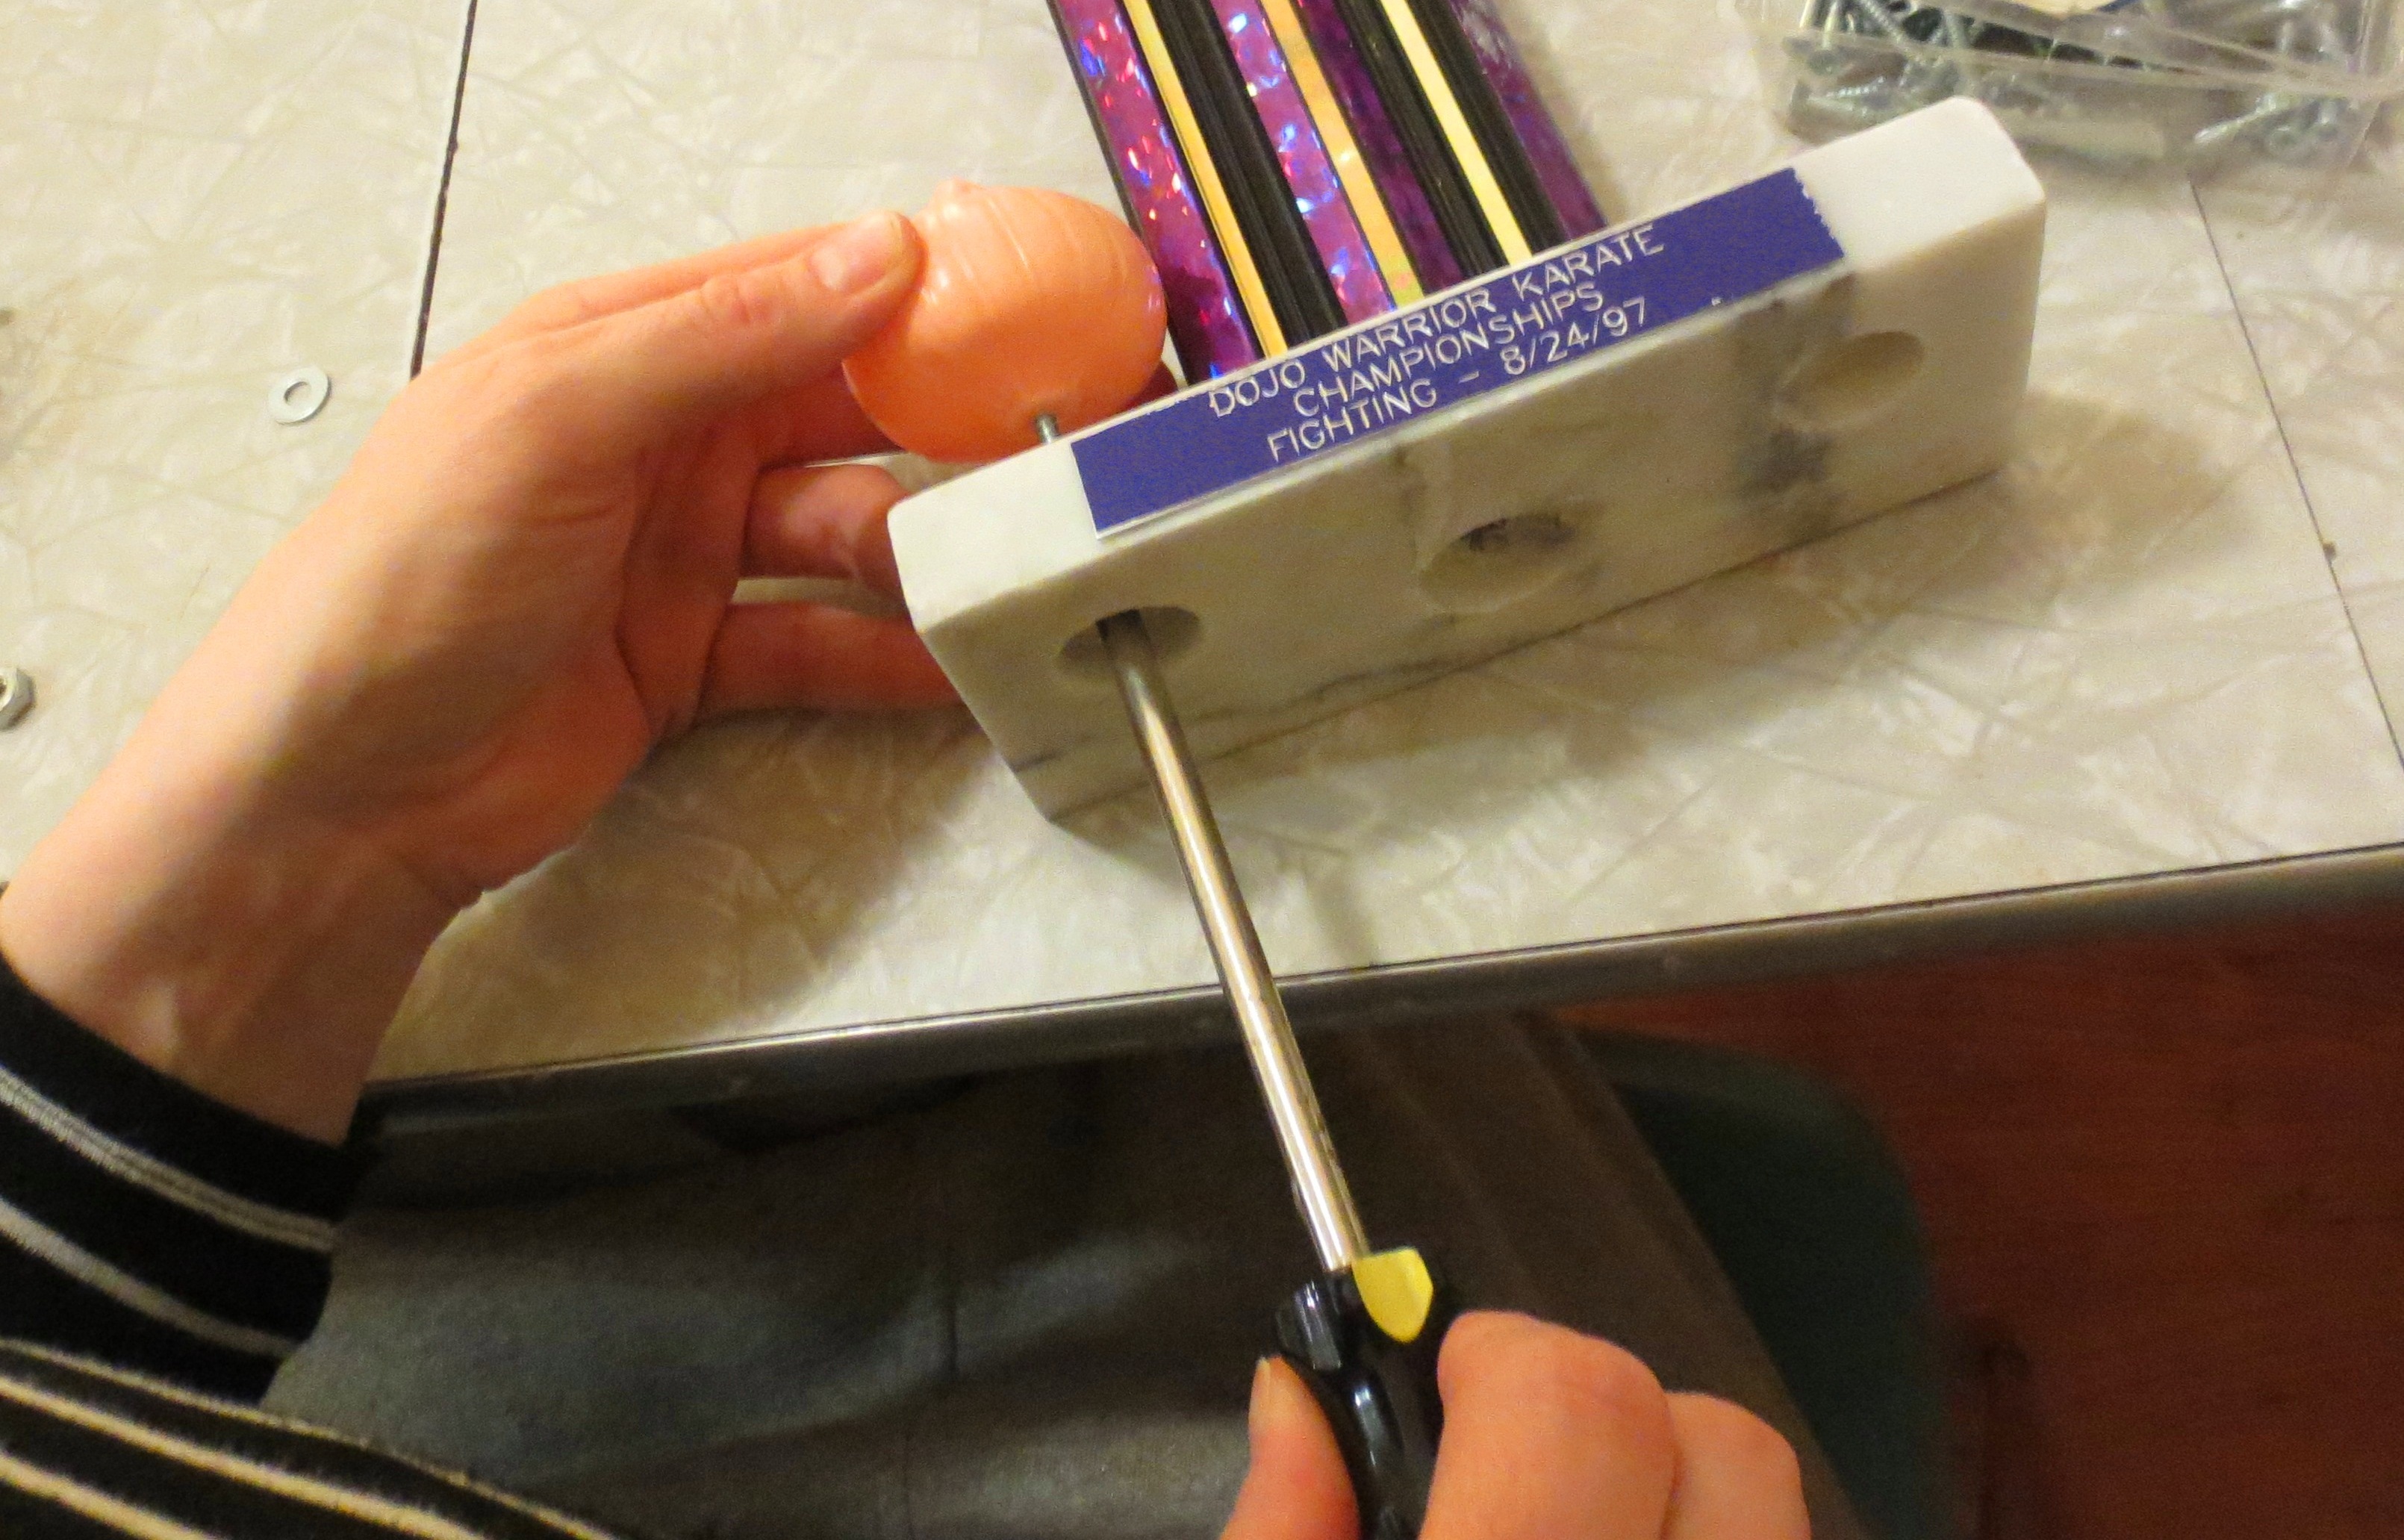
STEP ONE – HARVEST THE ZIPPER: You’ve heard the urban legend about the businessman who gets drugged in a New Orleans bar? He wakes up in a hotel room bathtub, chest-deep in ice, and finds stitches in his back where his kidneys used to be.

Although we’re supposed to identify with the businessman in this story, for this project let’s pretend to be the organ thieves of lore. Turn the PJs inside-out, and use a seam ripper to carefully snip the seams and remove the zipper from the pajamas.

IMG_3710 
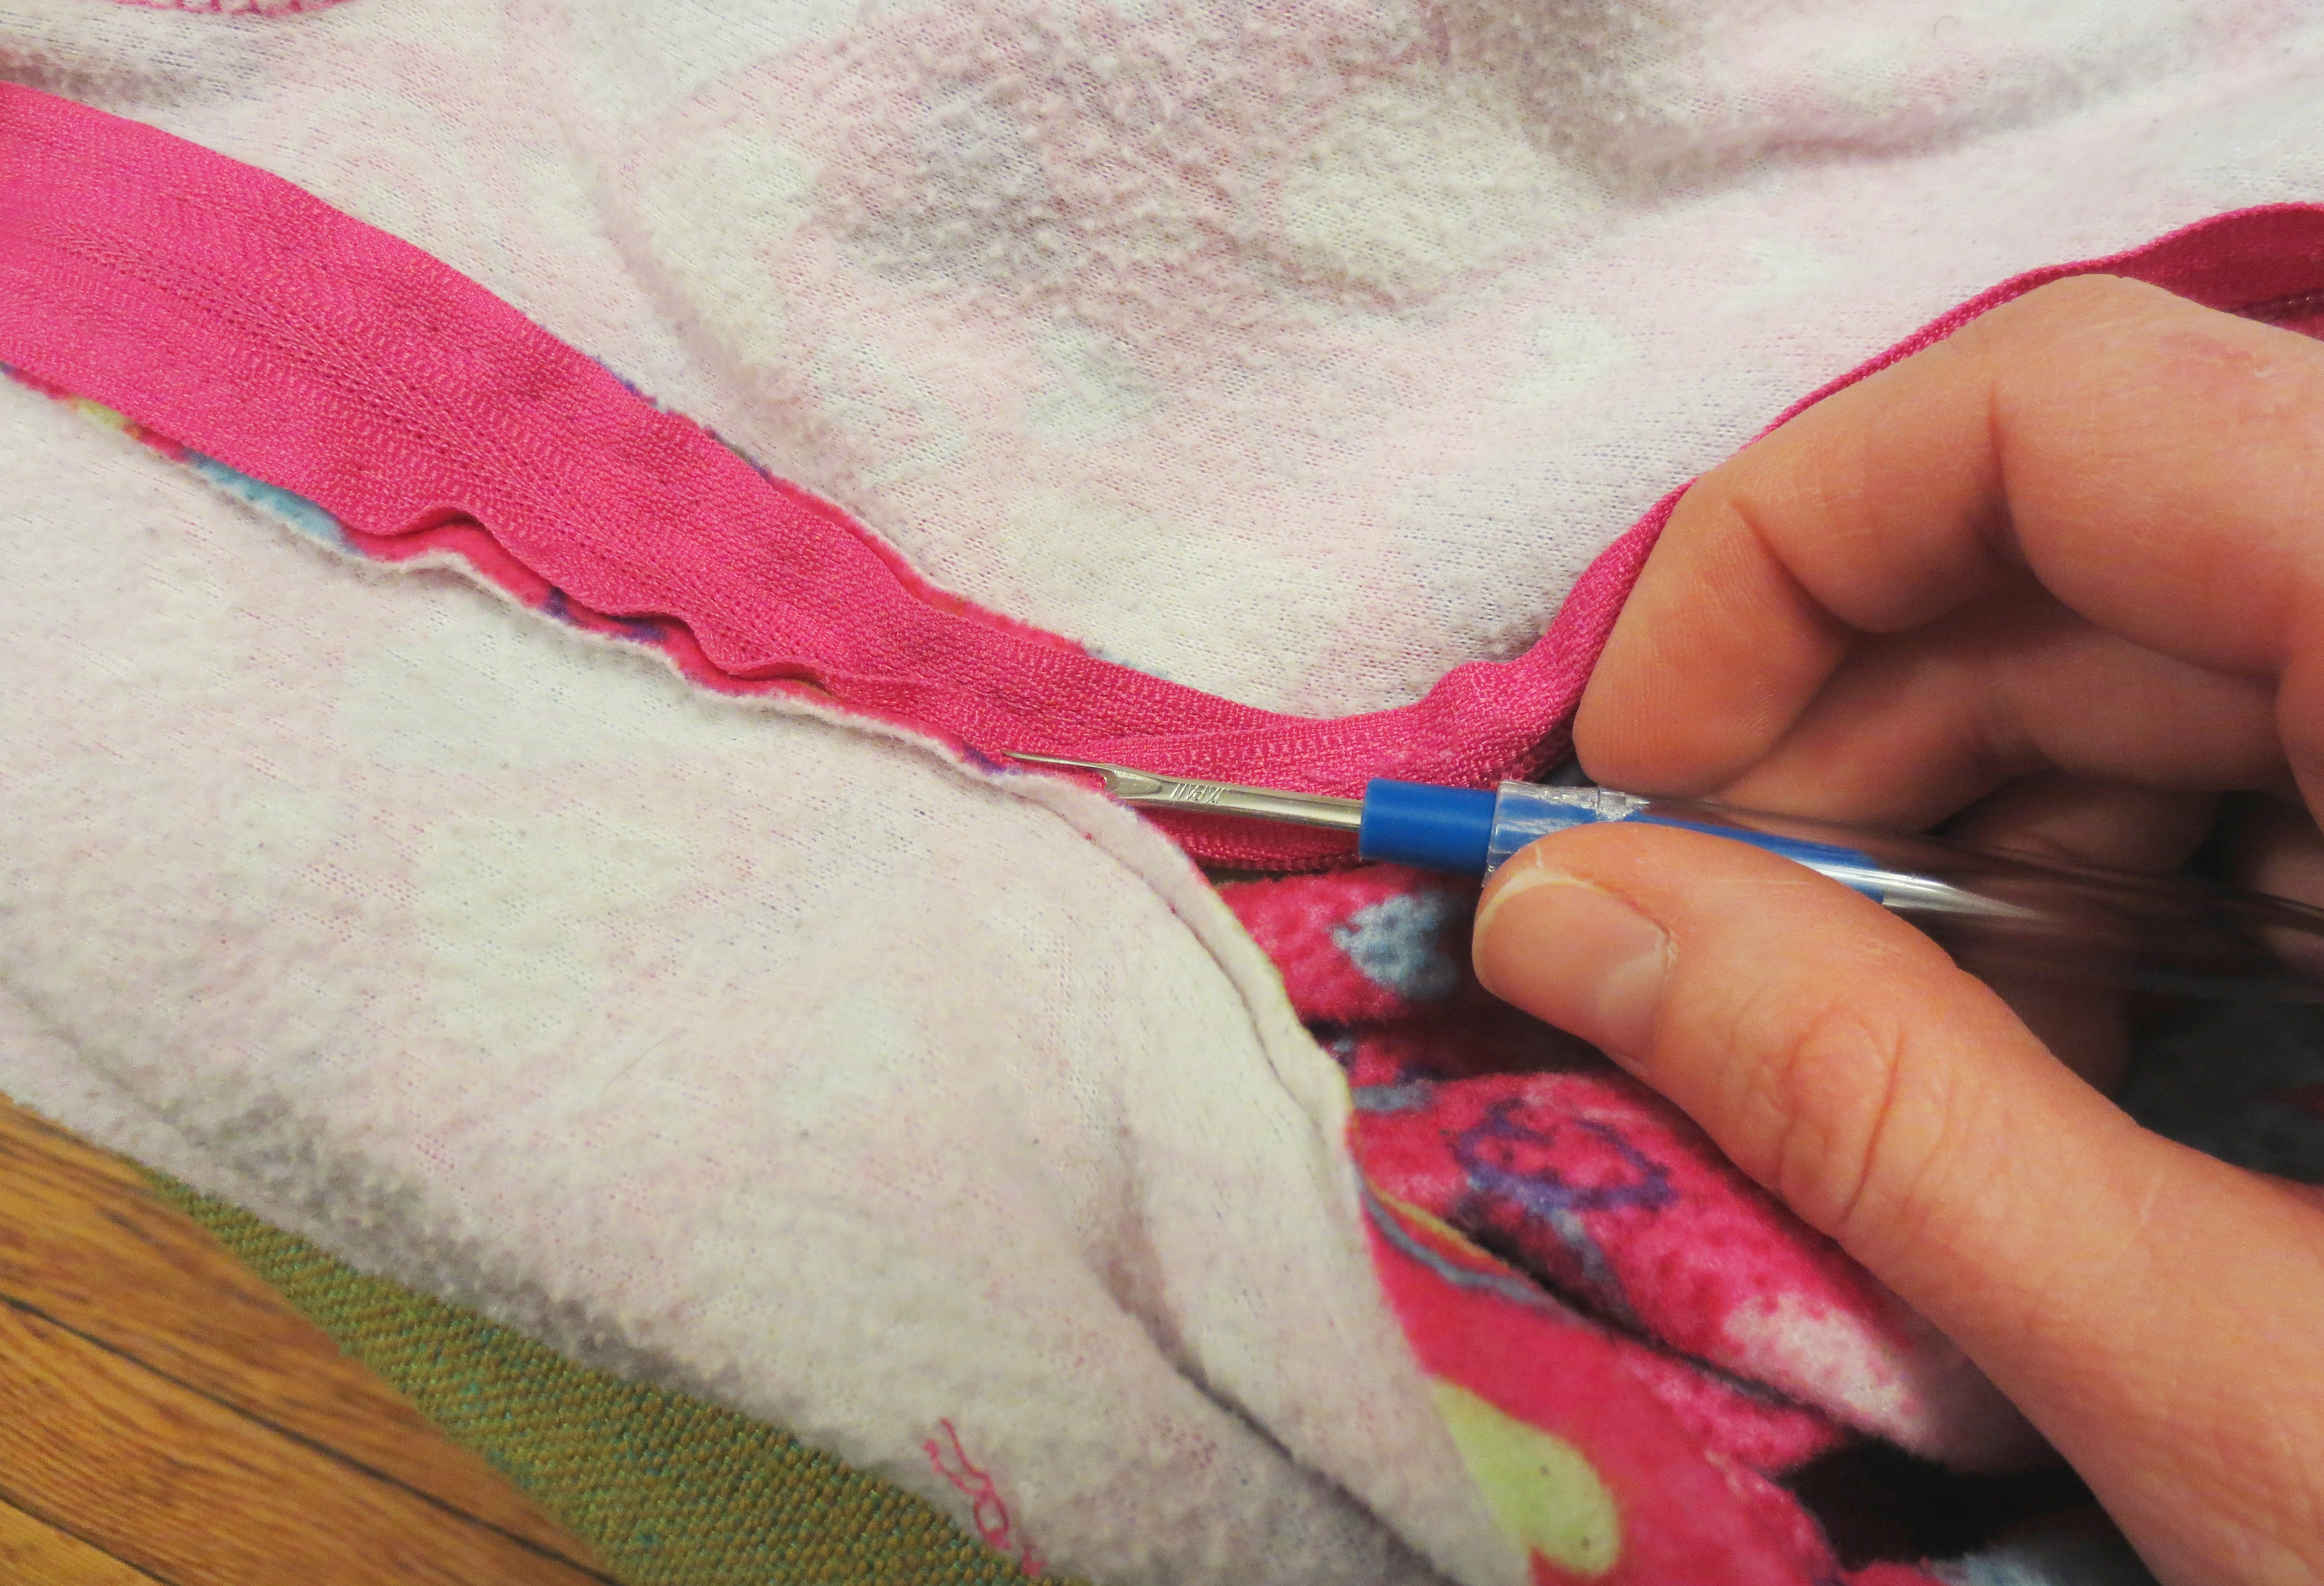
Unlike the businessman who sell them, children’s clothes are usually pretty shoddy, so this should only take a minute or two.
IMG_3711
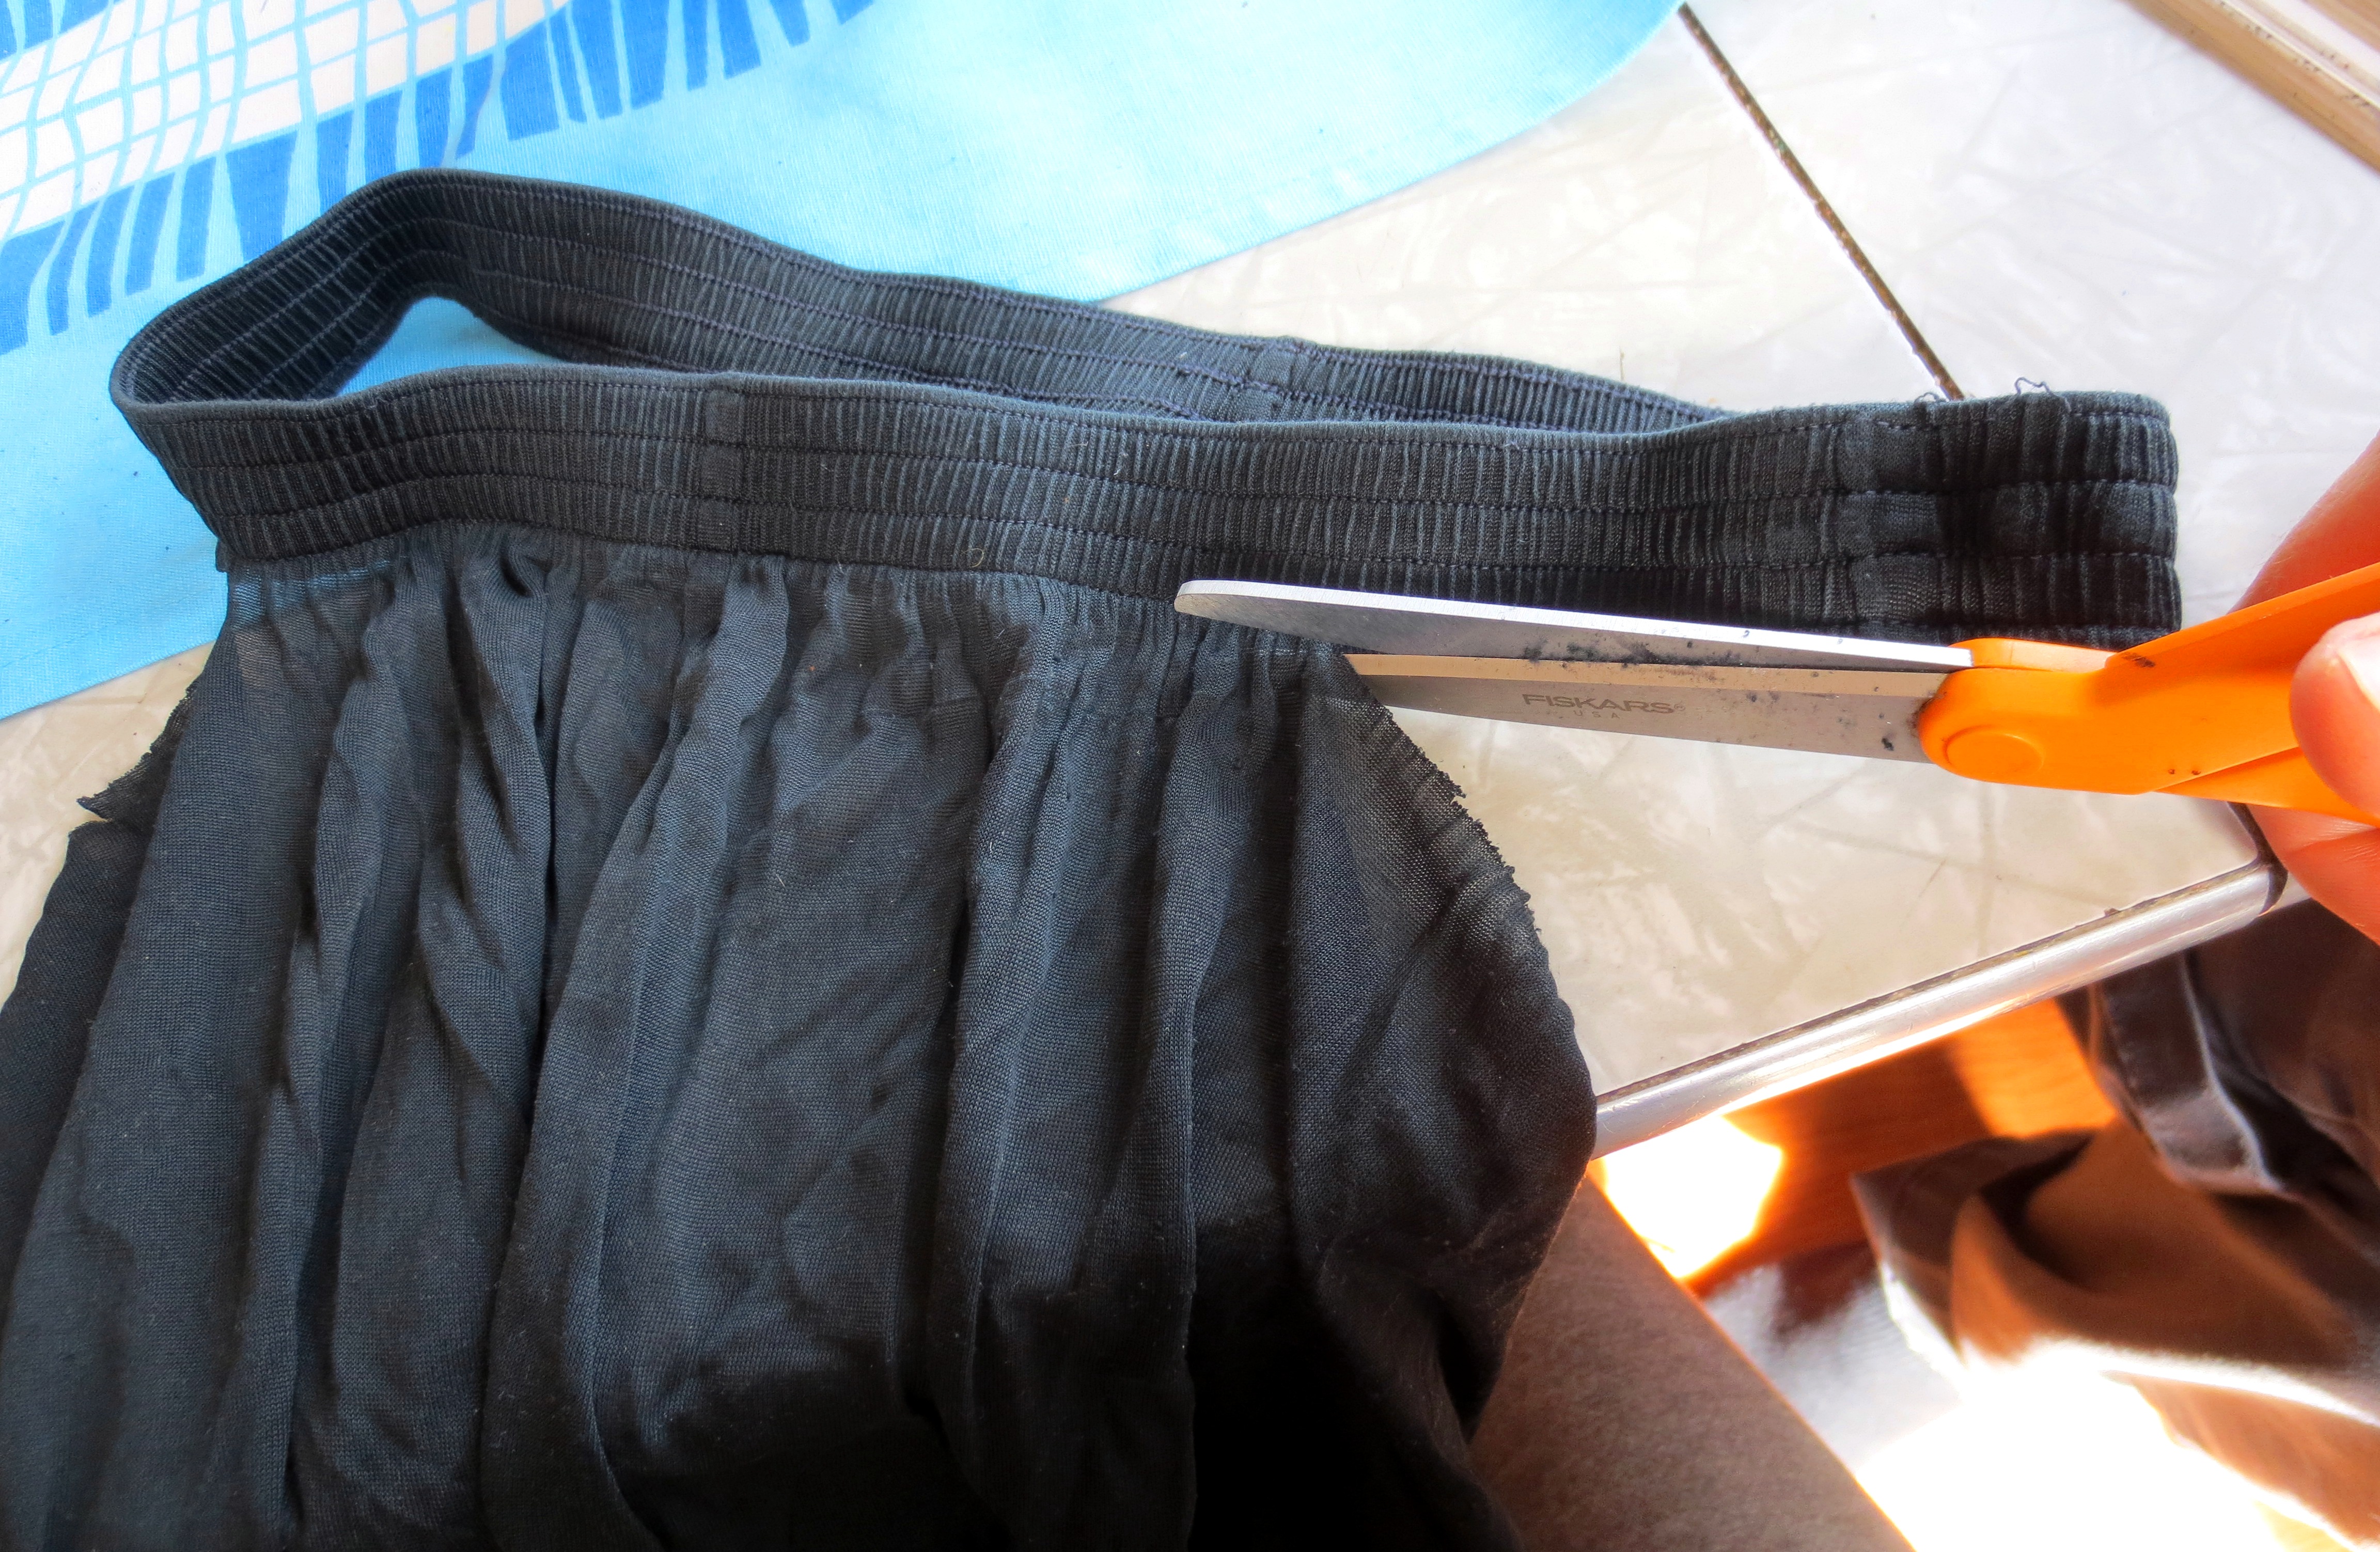
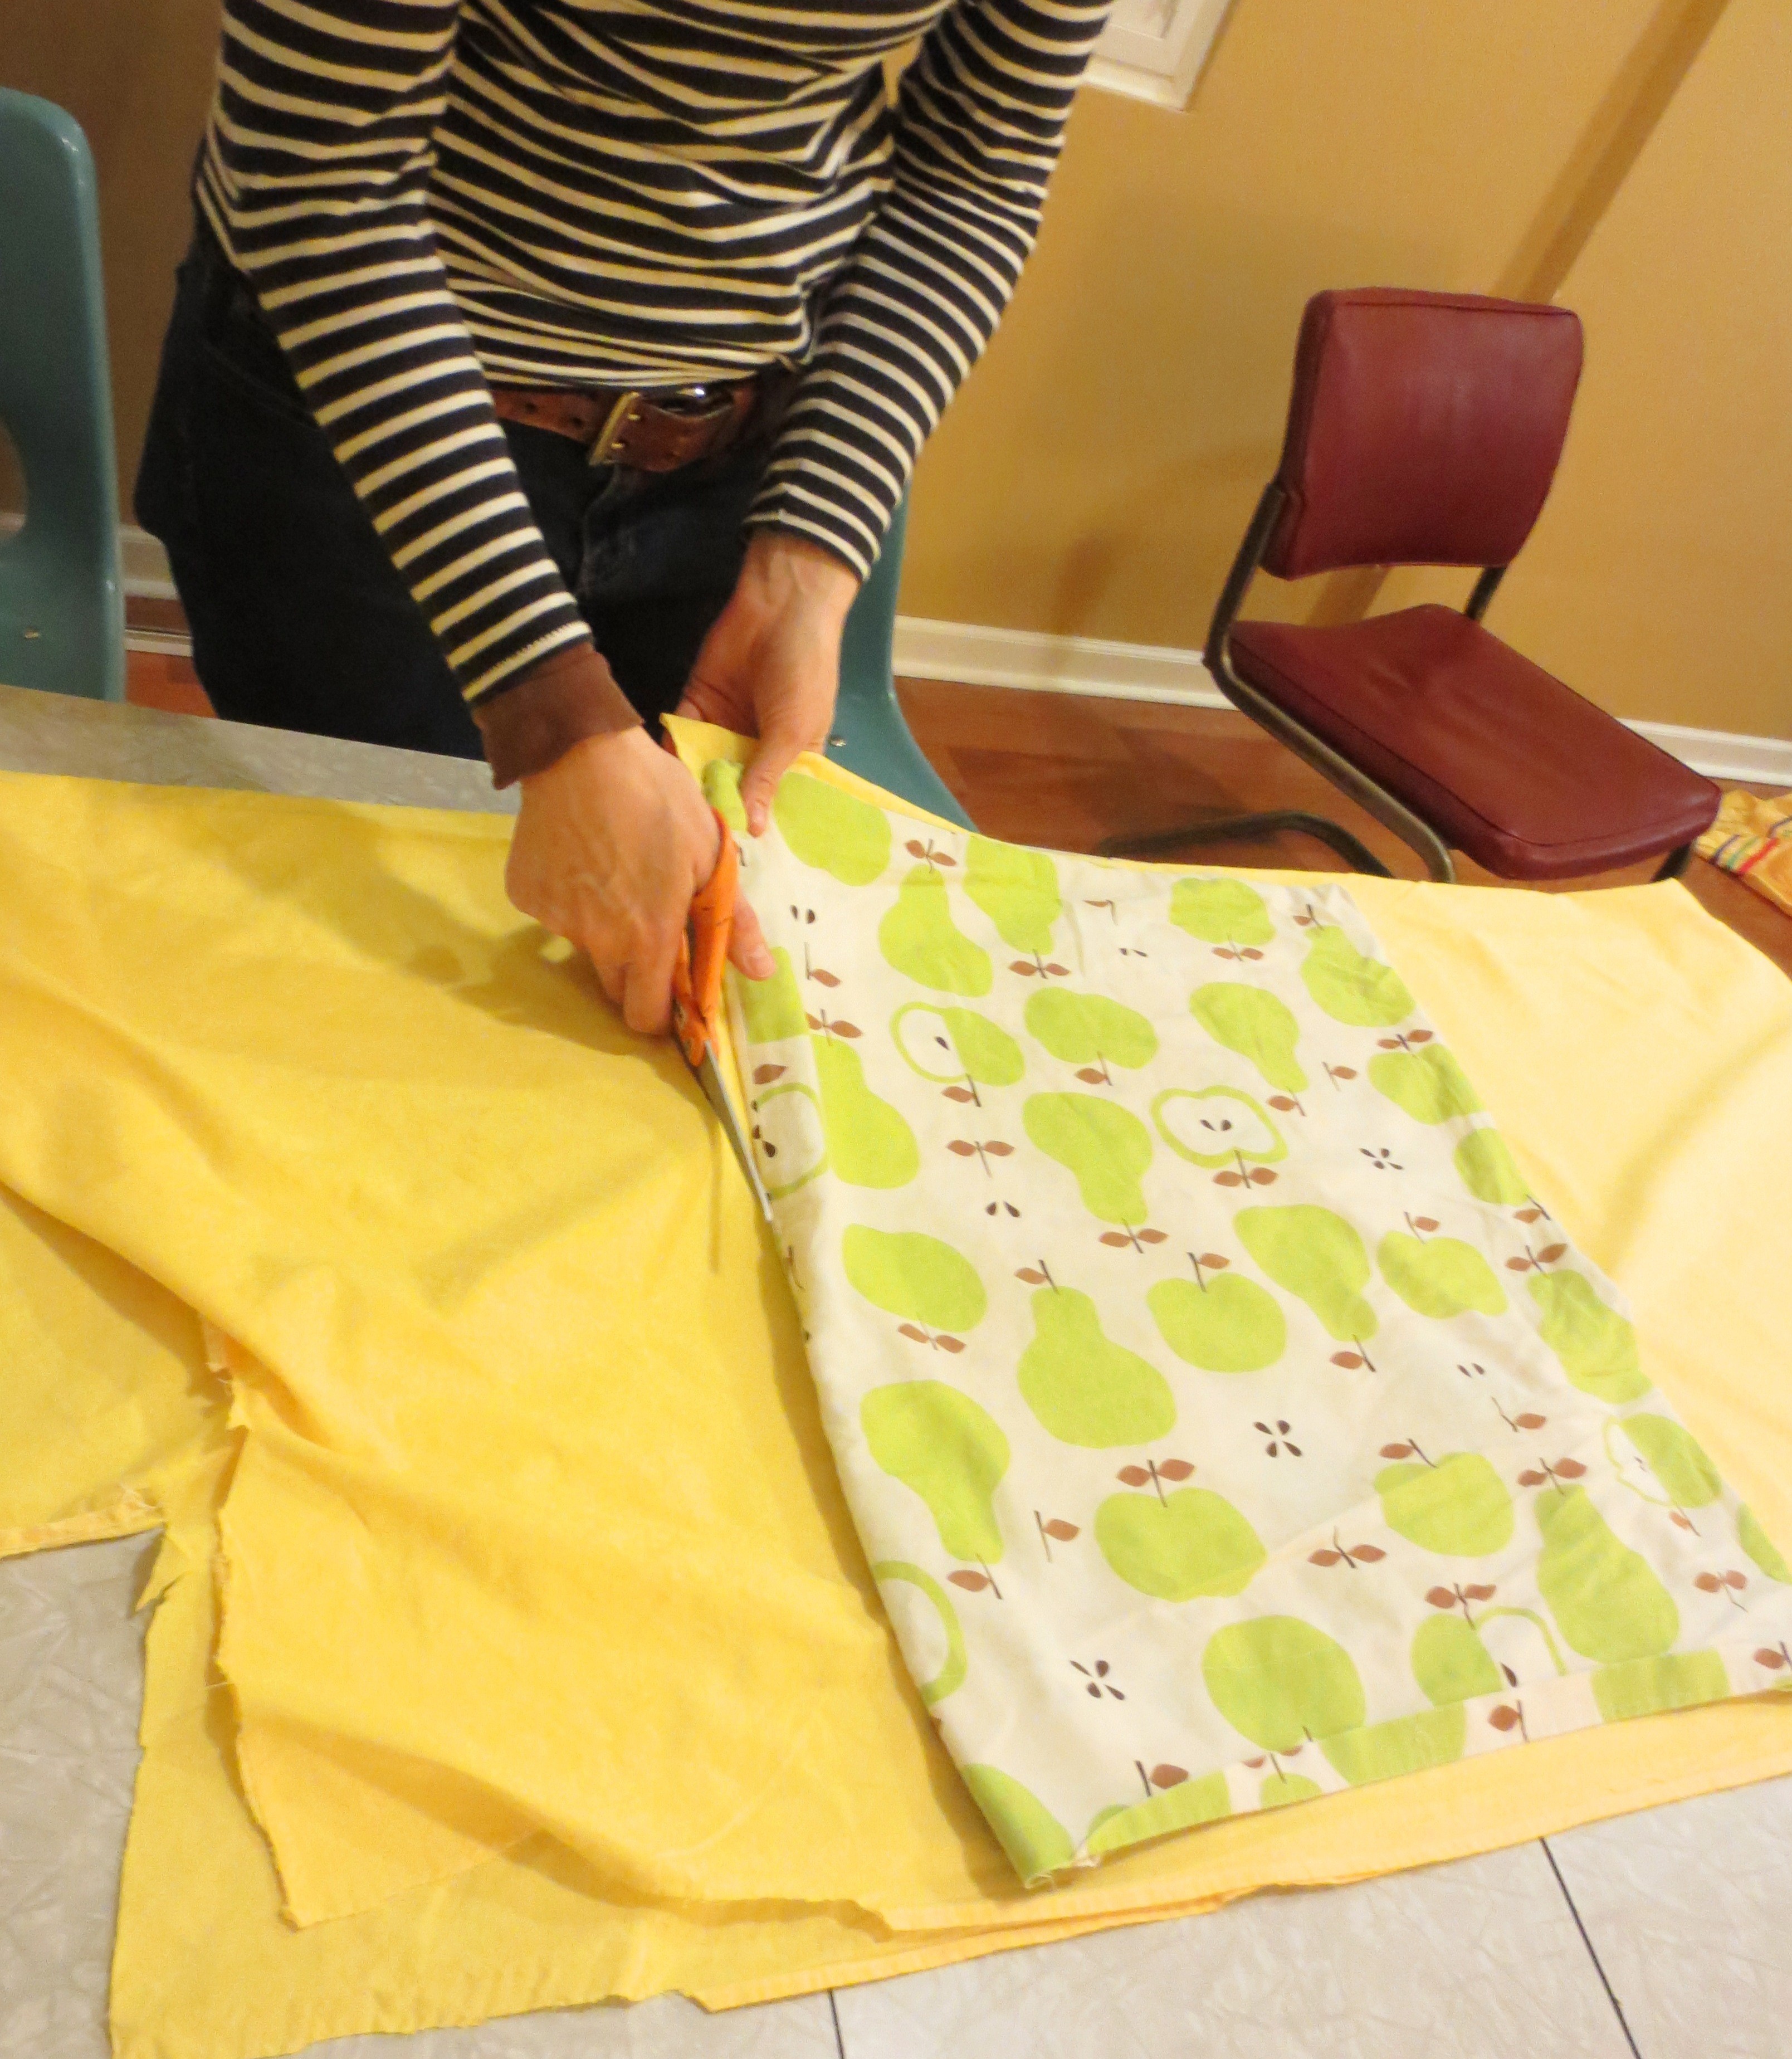
STEP TWO – SKIN THE DIAPER: Before you mutilate the diaper cover, plan the dimensions of your wallet. In my case, big enough to hold a handful of cards and some cash, plus a band-aid or a stick of gum – about 5 inches wide by 3.5 inches tall. While not totally necessary, I recommend trimming the elastic off the sides of the diaper cover so you can lay the fabric flat.

IMG_3715
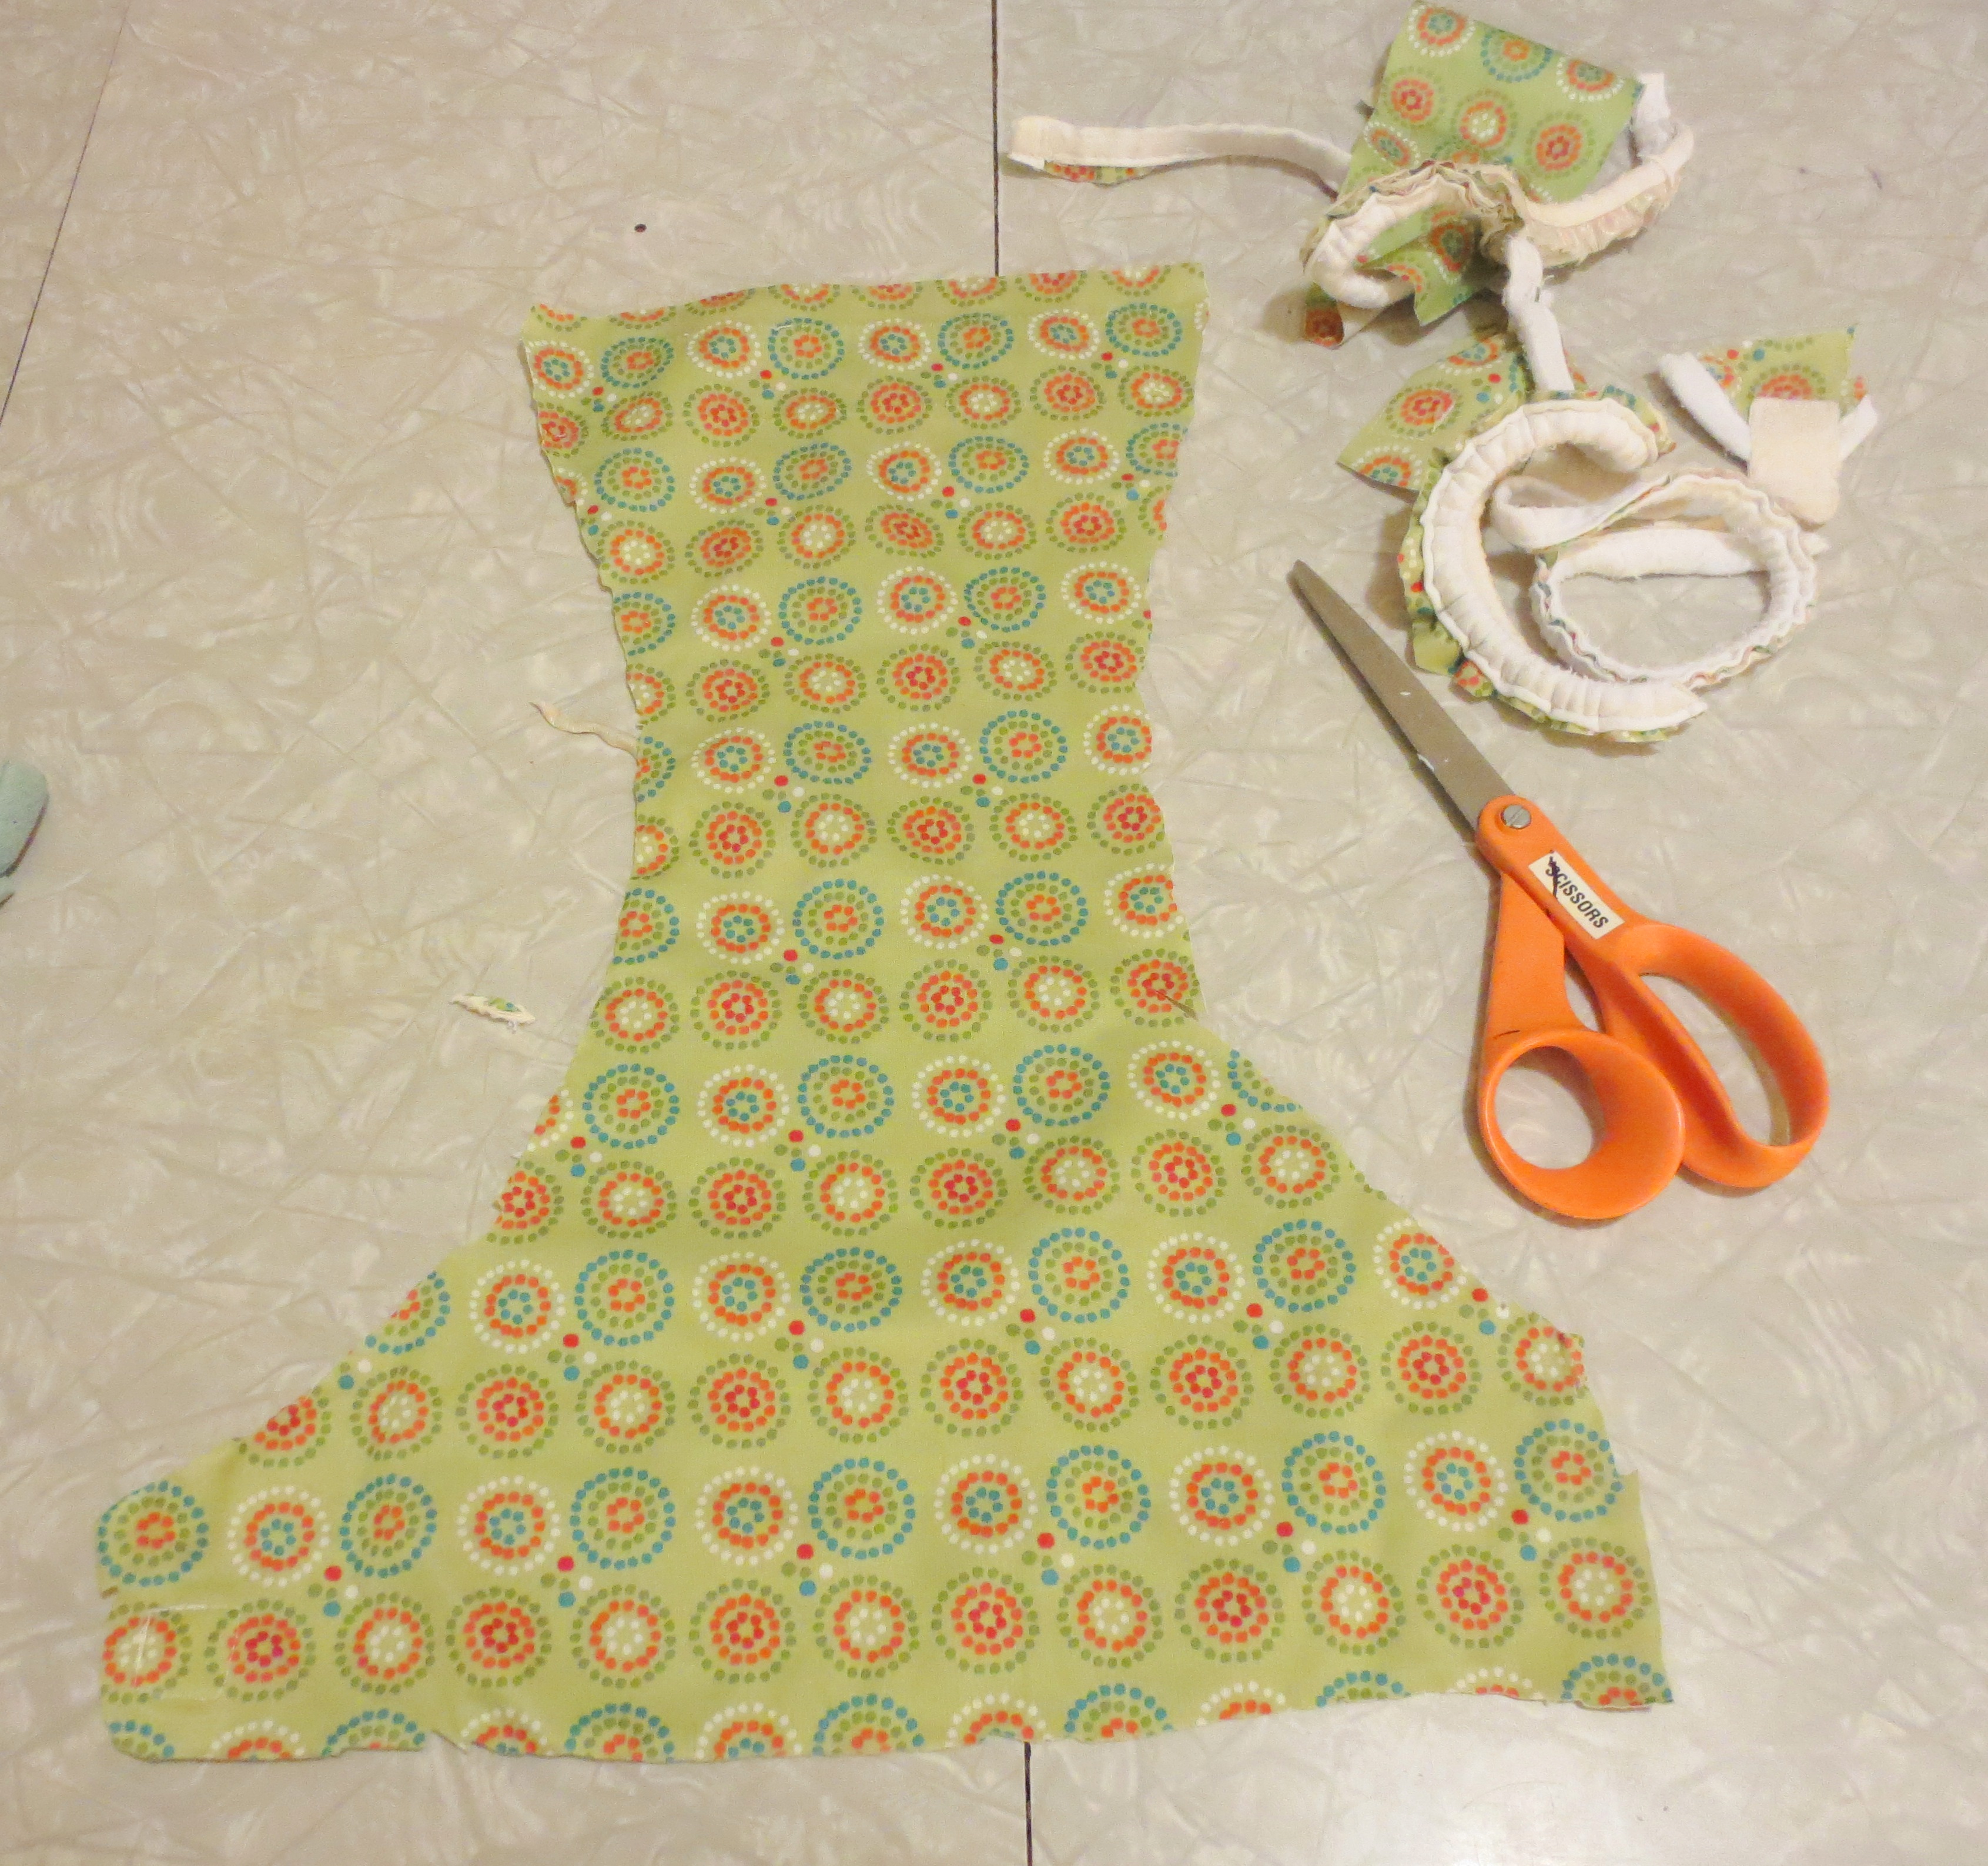
To determine how much fabric to cut, add about an inch to your desired width to account for seam clearance. Next, double your height and add another inch. So, to get a 5 x 3.5 inch wallet, cut a 6 x 8 swatch. Cut that in half to end up with equal “front” and “back” panels of 6 inches wide x 4 inches high.IMG_3718
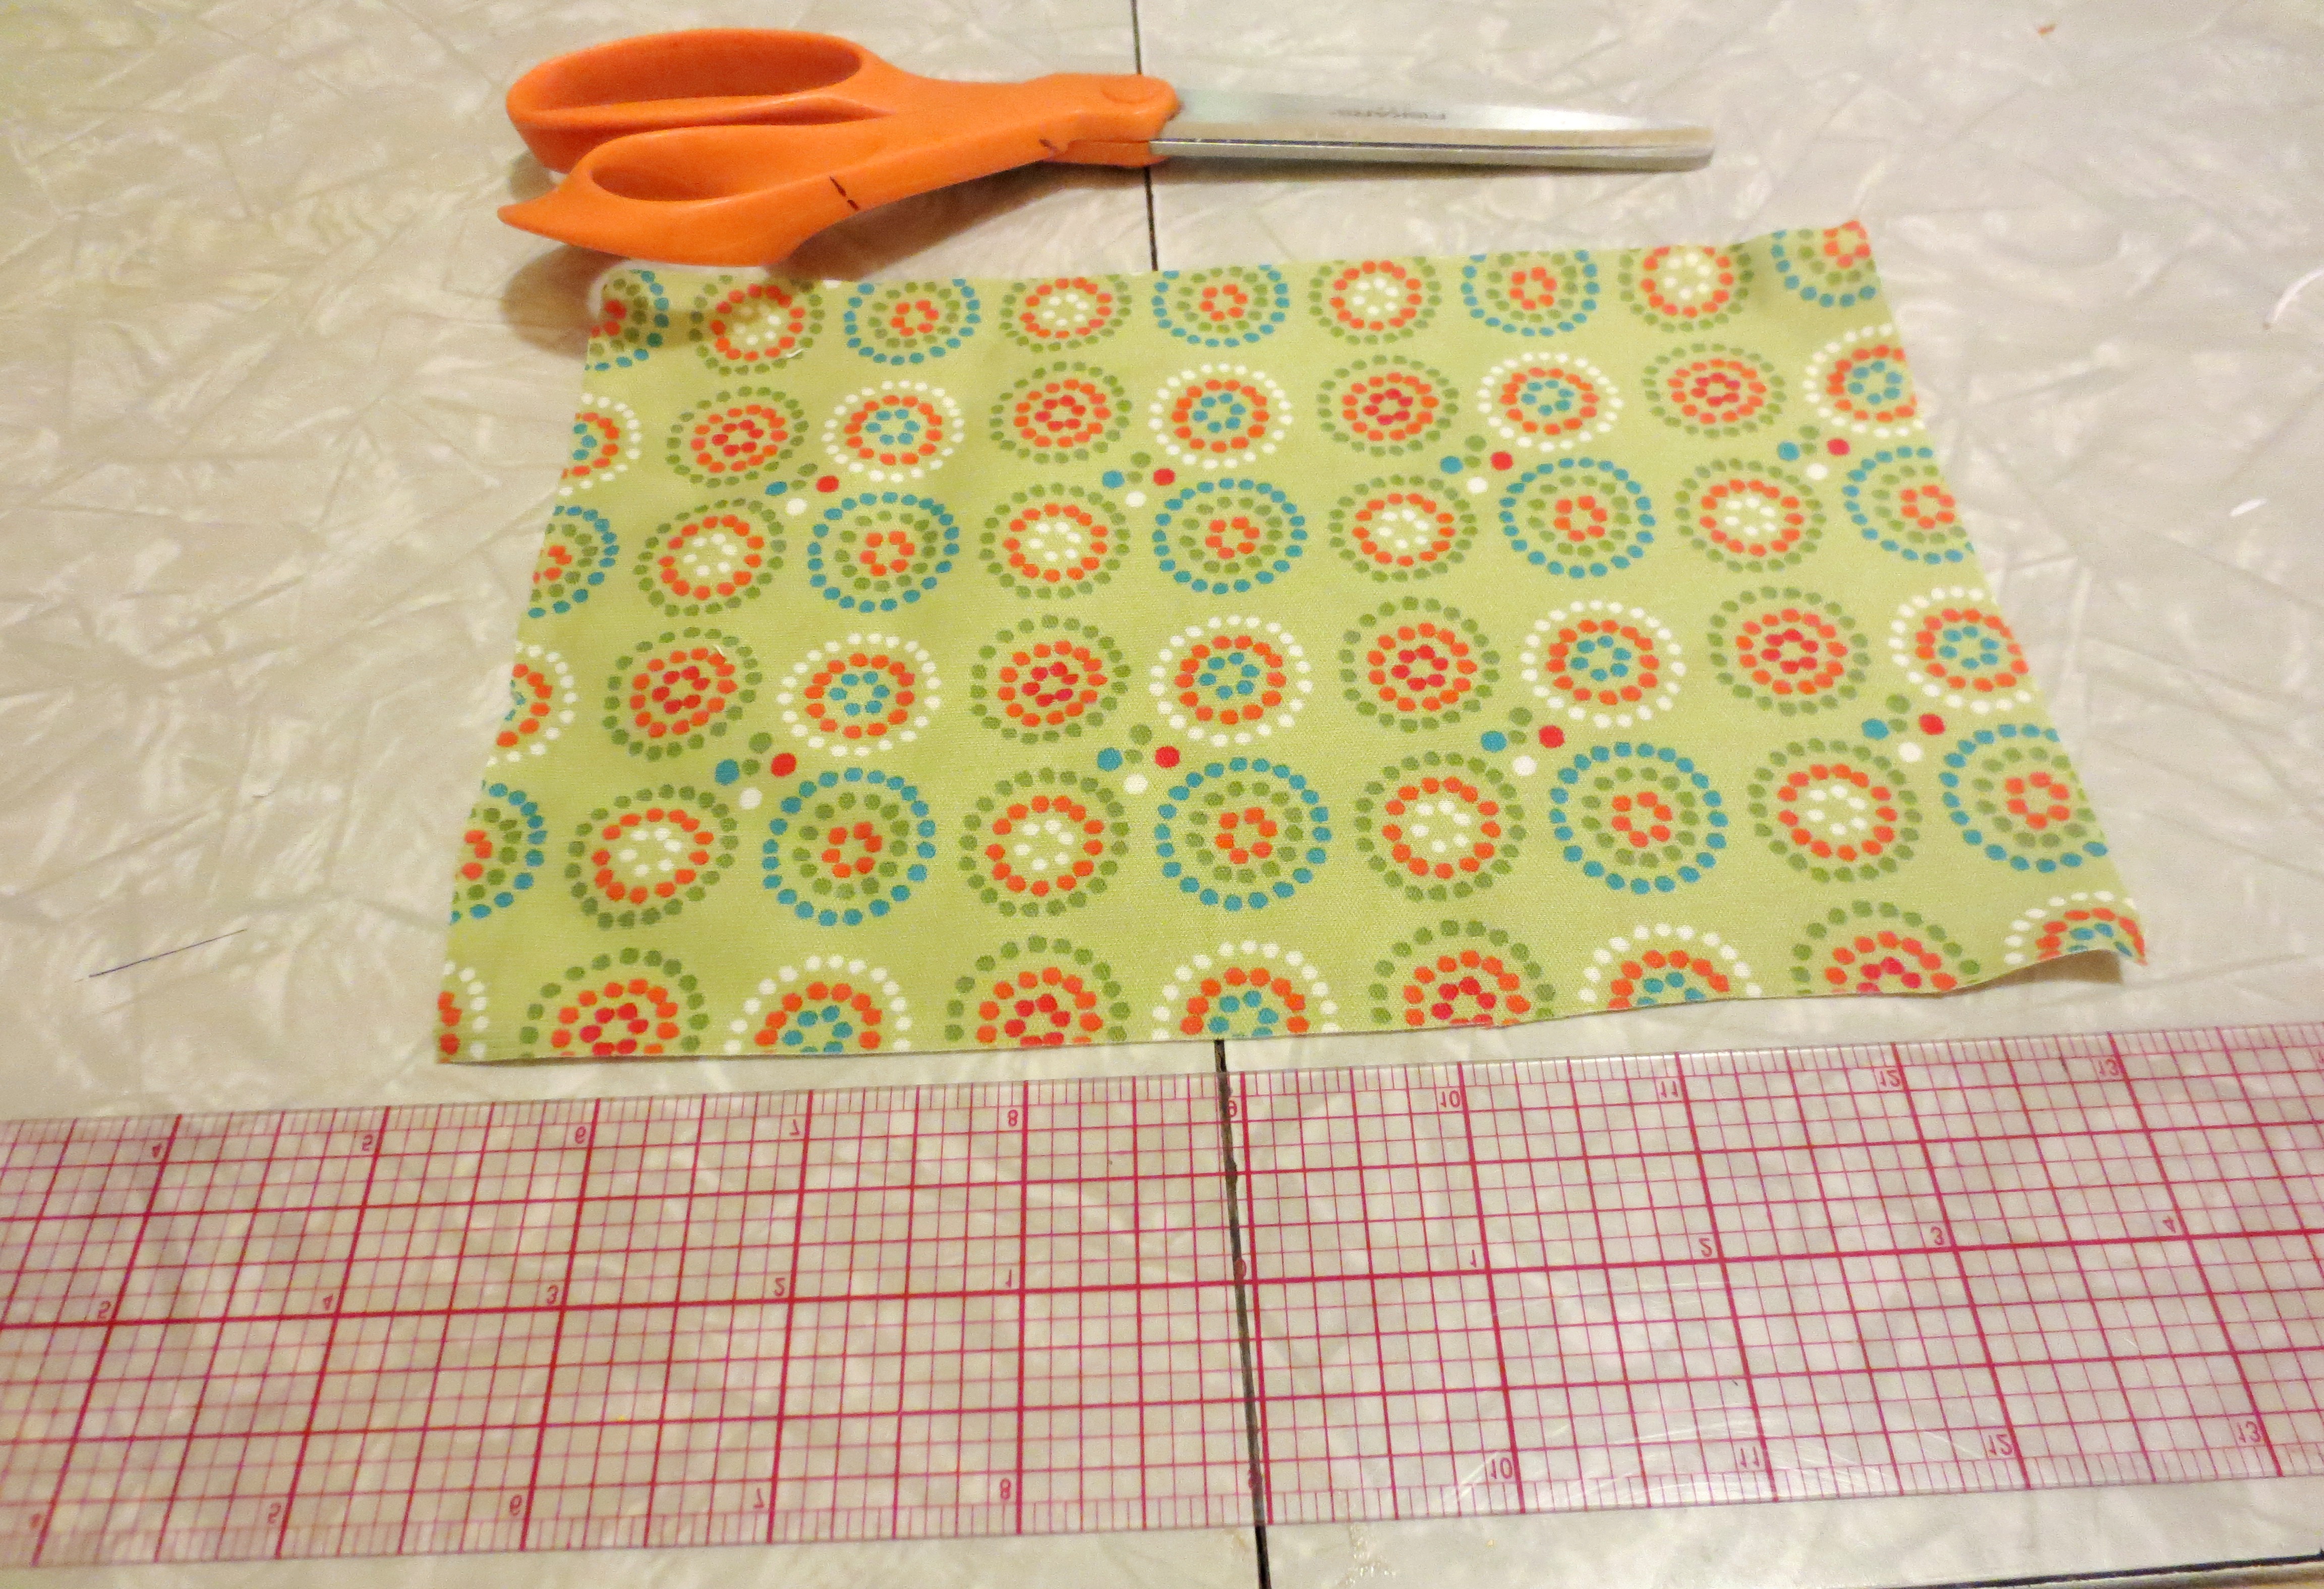
STEP THREE – SEW THE PARTS TOGETHER:   WARNING: I’m going to be using a lot of prepositions in this next step, so go ahead and diagram the sentences if necessary.

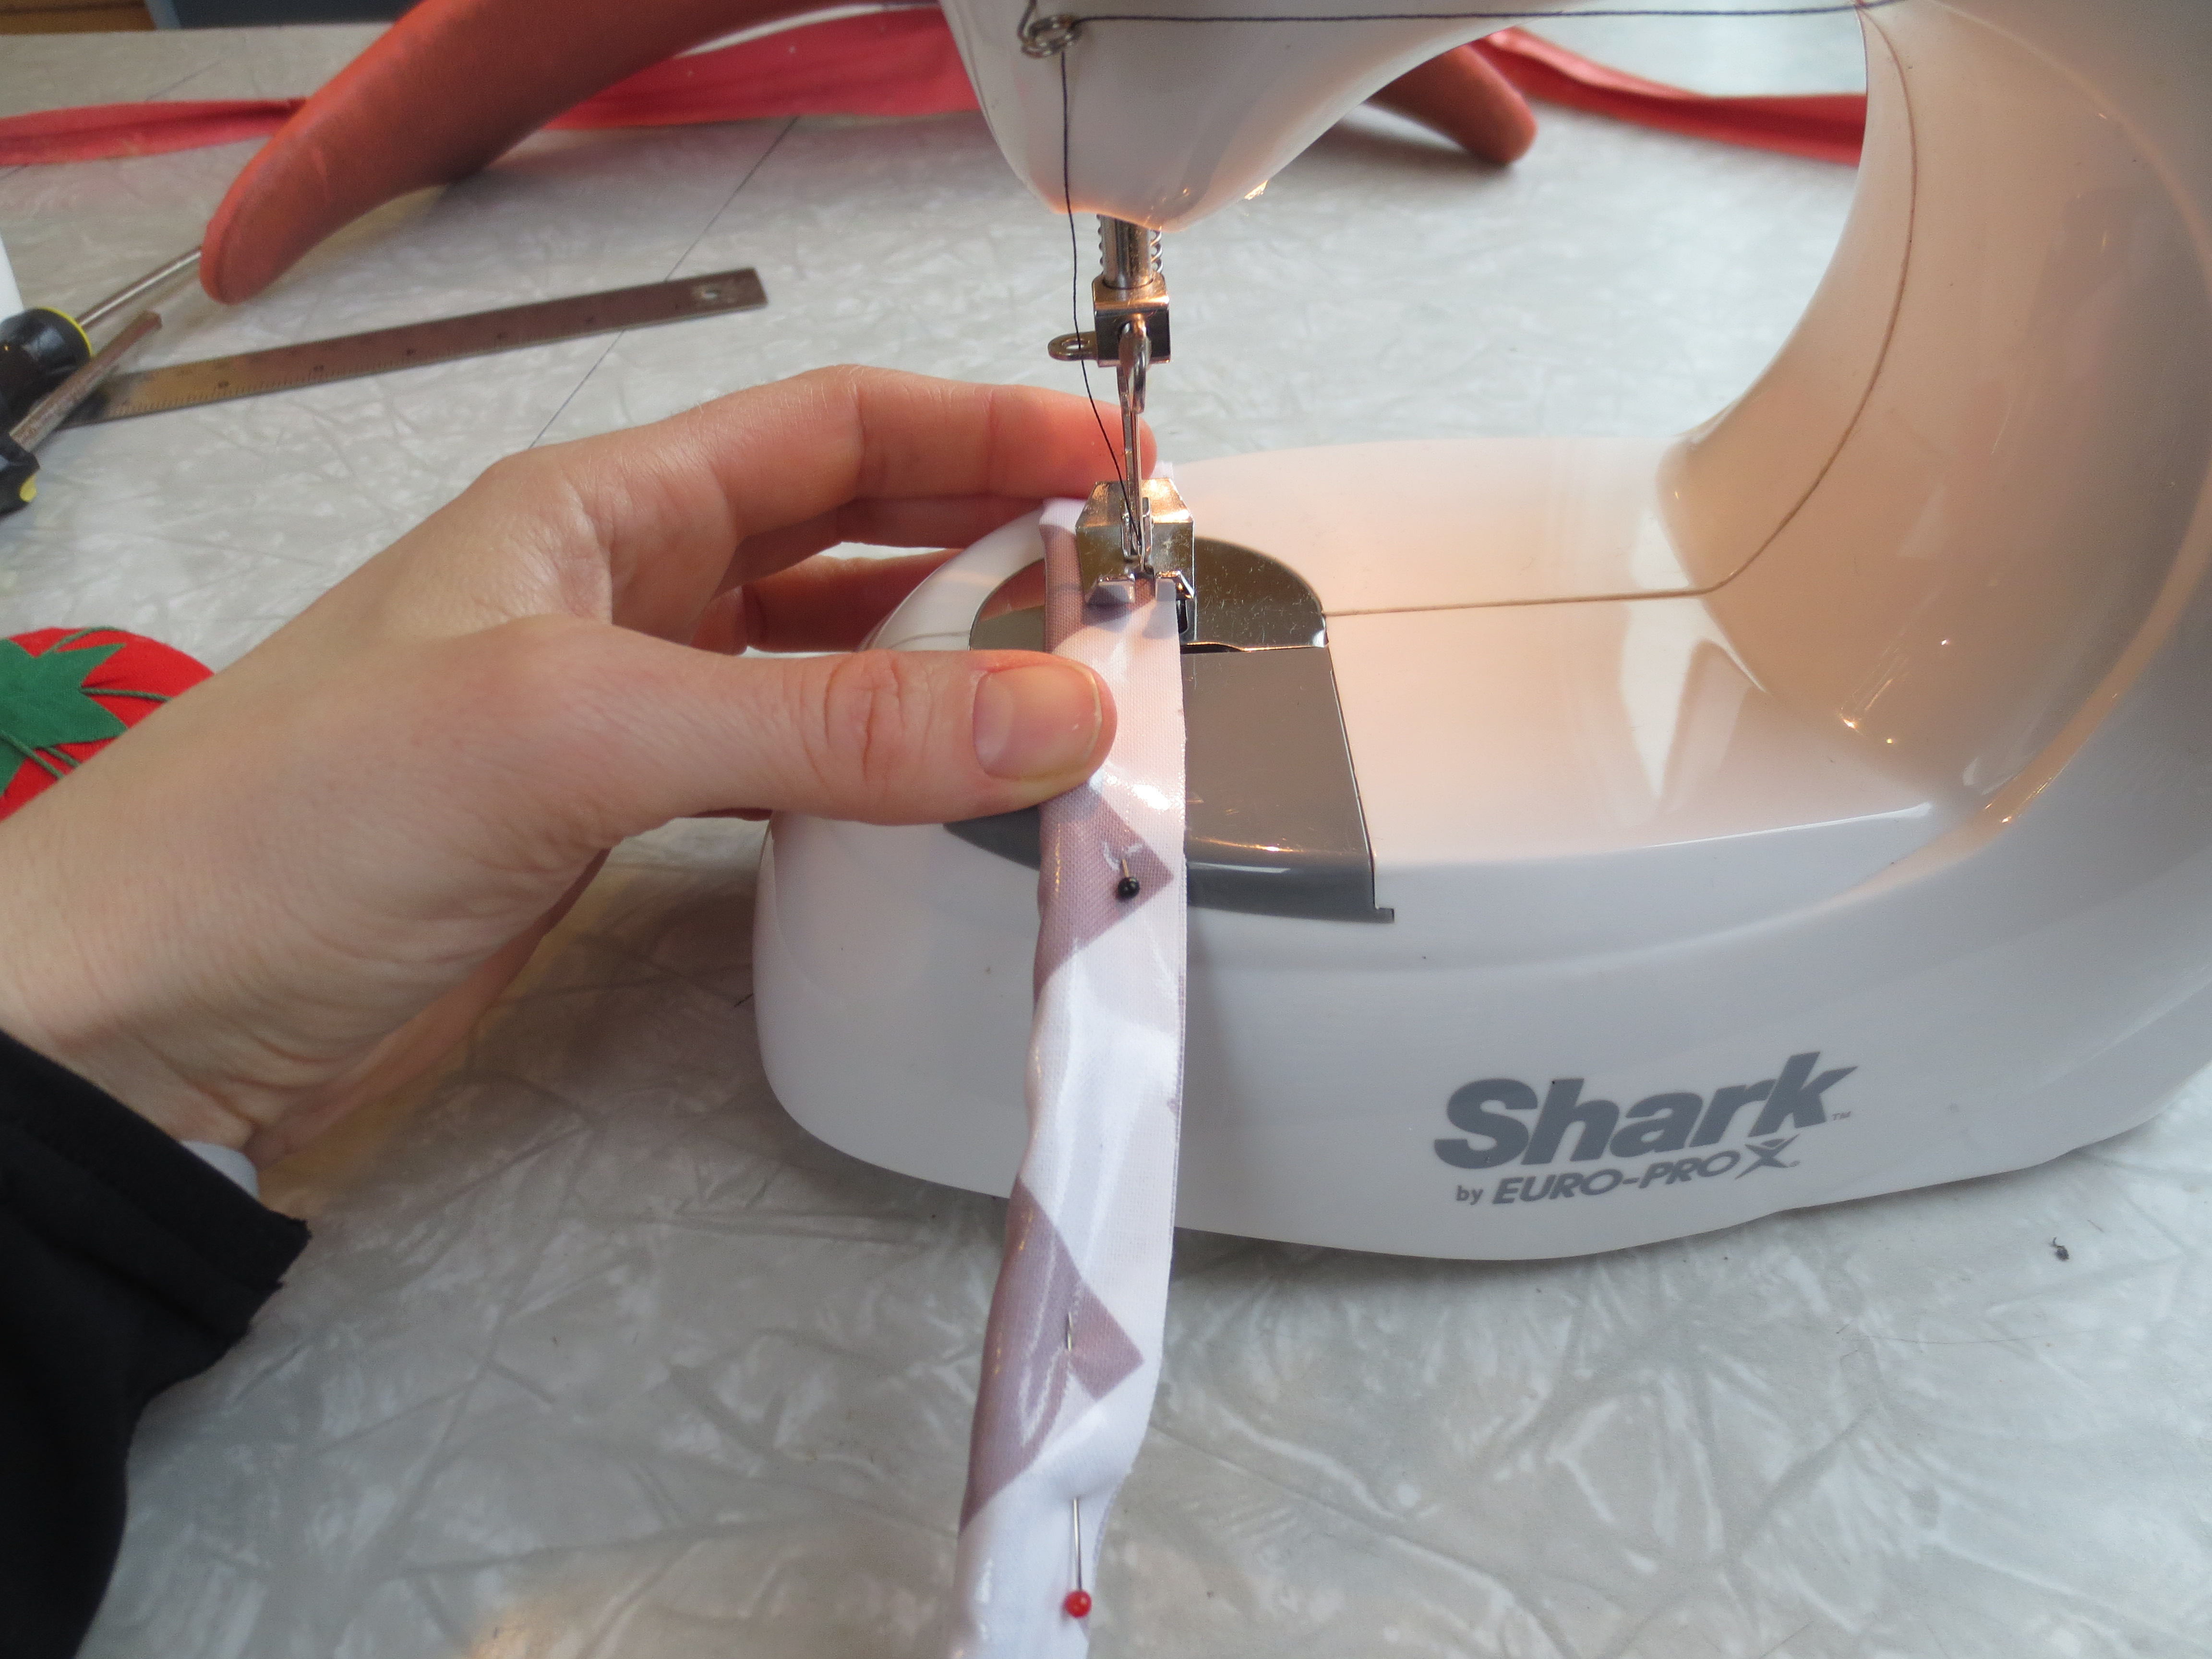
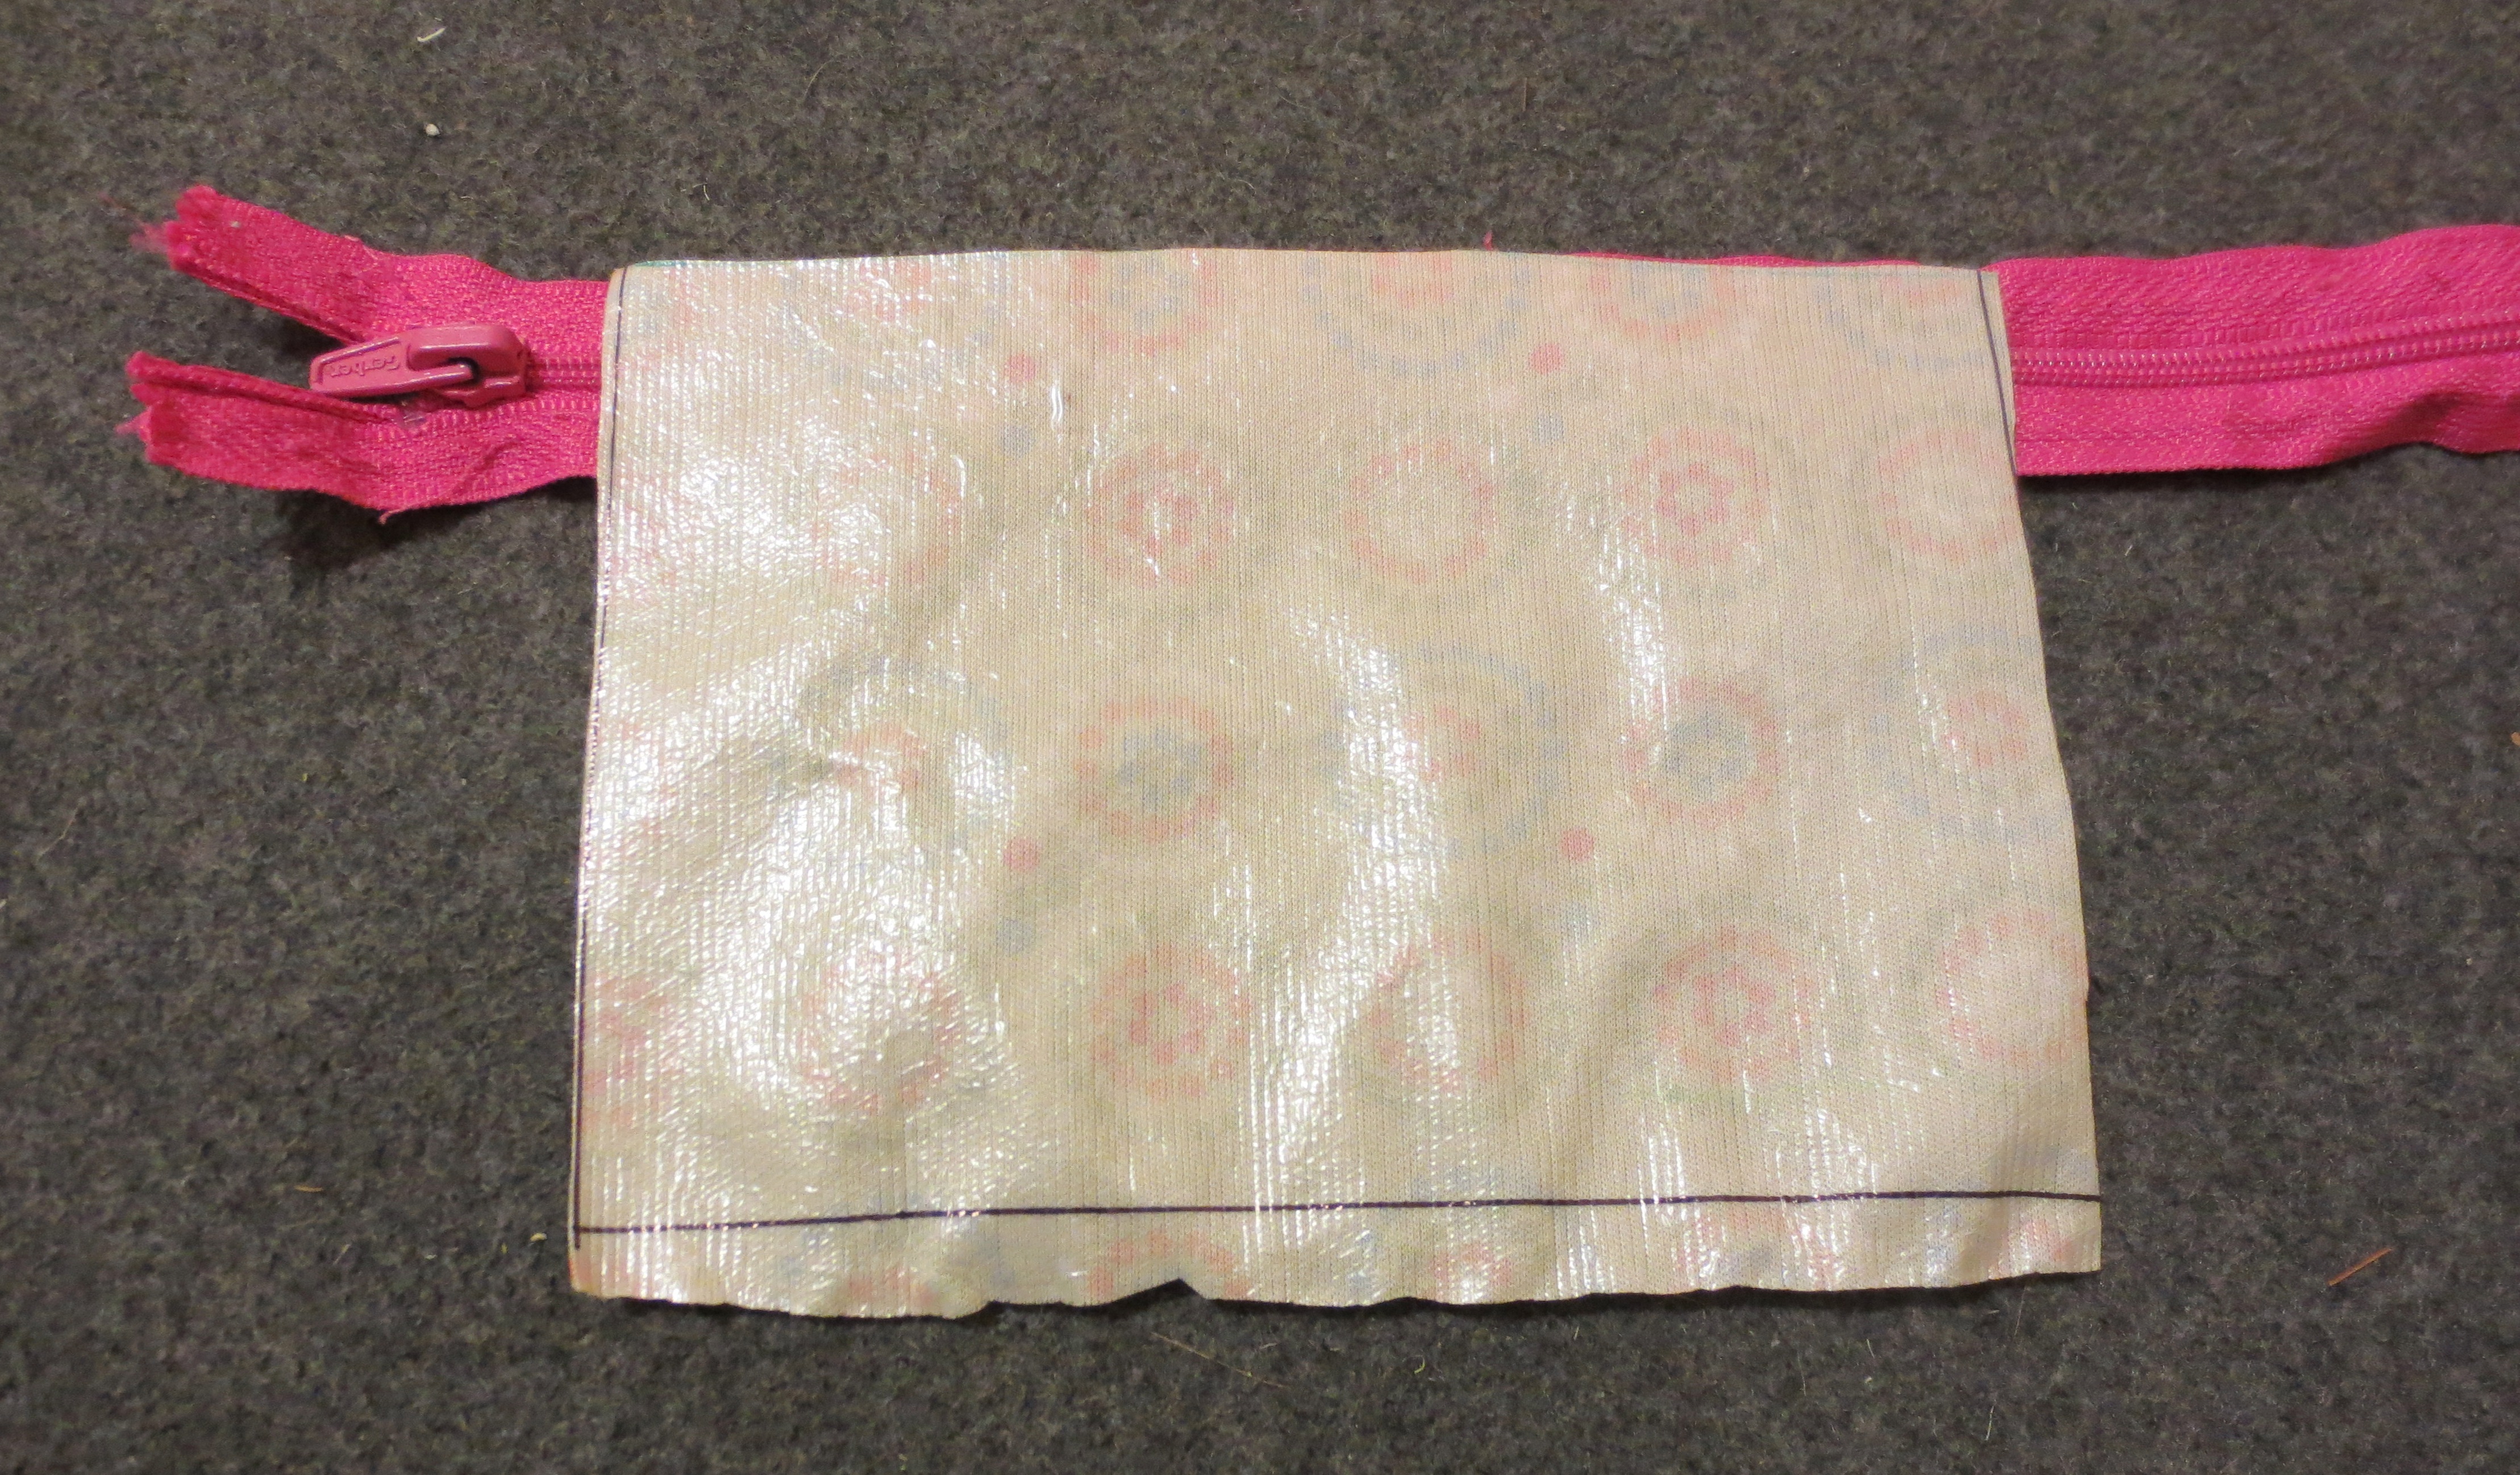
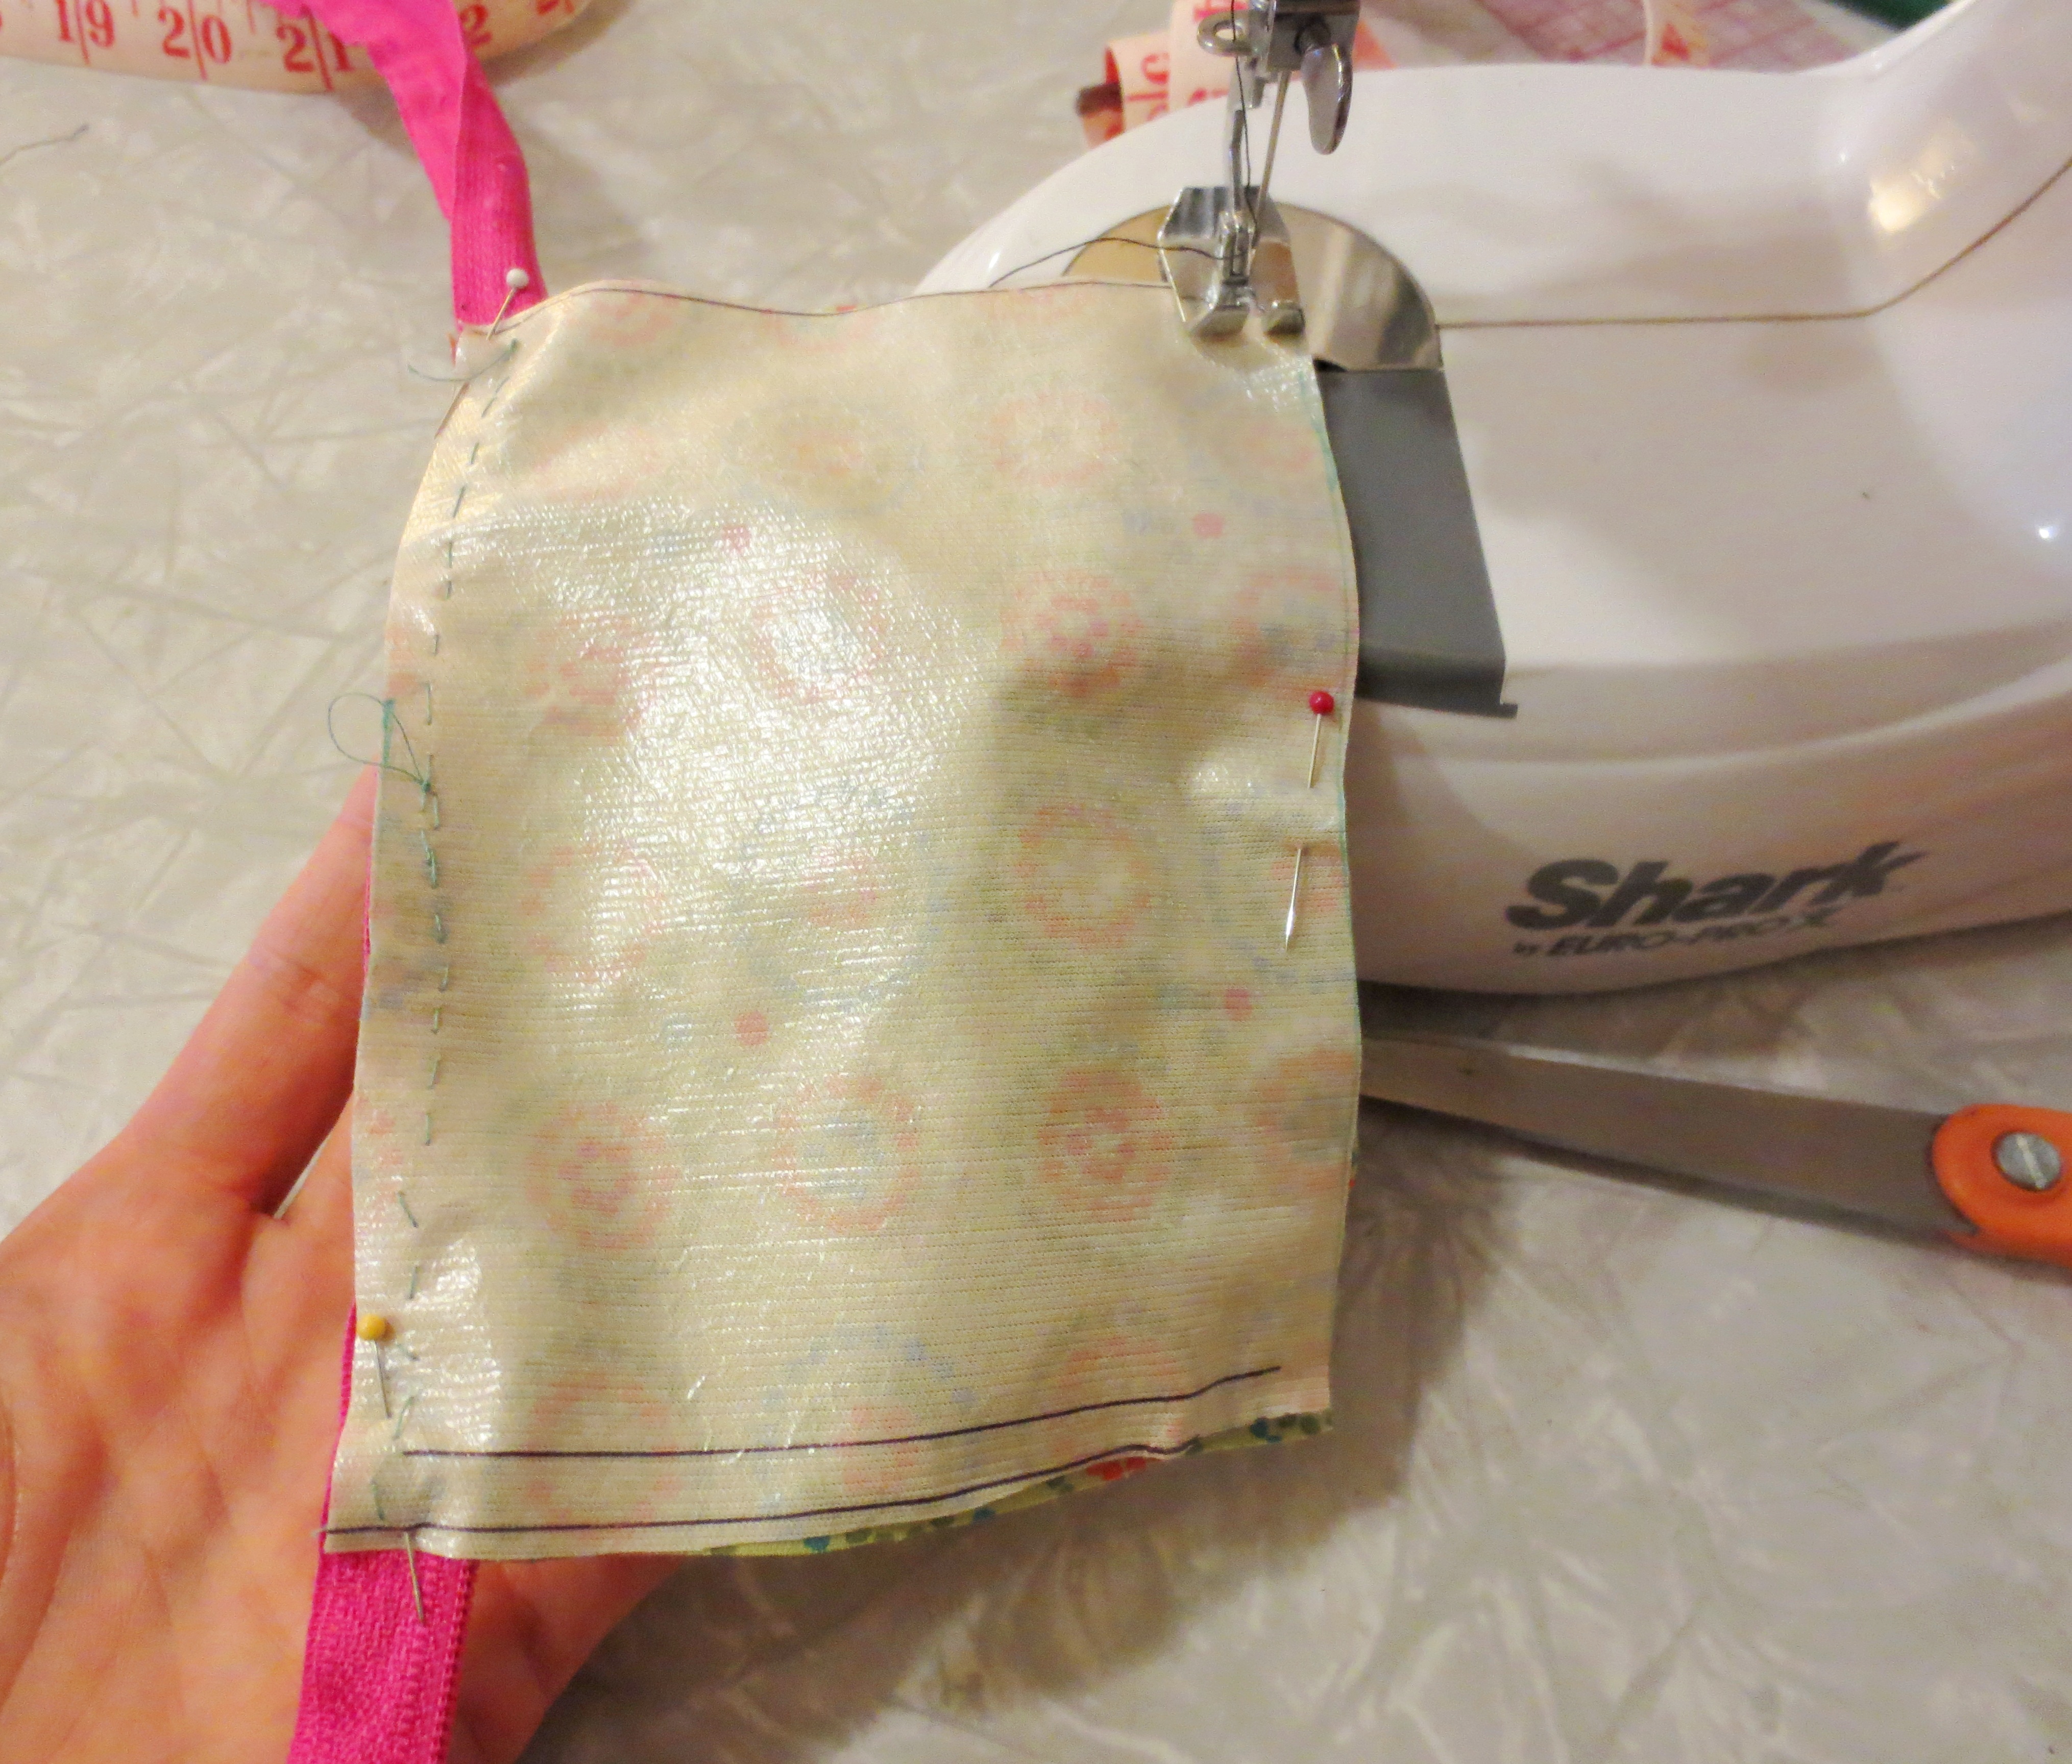
First, place the zipper down, front side (or teeth) facing up. Then, place one of the wallet sides wrong-side-up*** over the top edge of the zipper like this:
IMG_3722Now sew the first panel in place, using a zipper foot on your machine.

IMG_3728
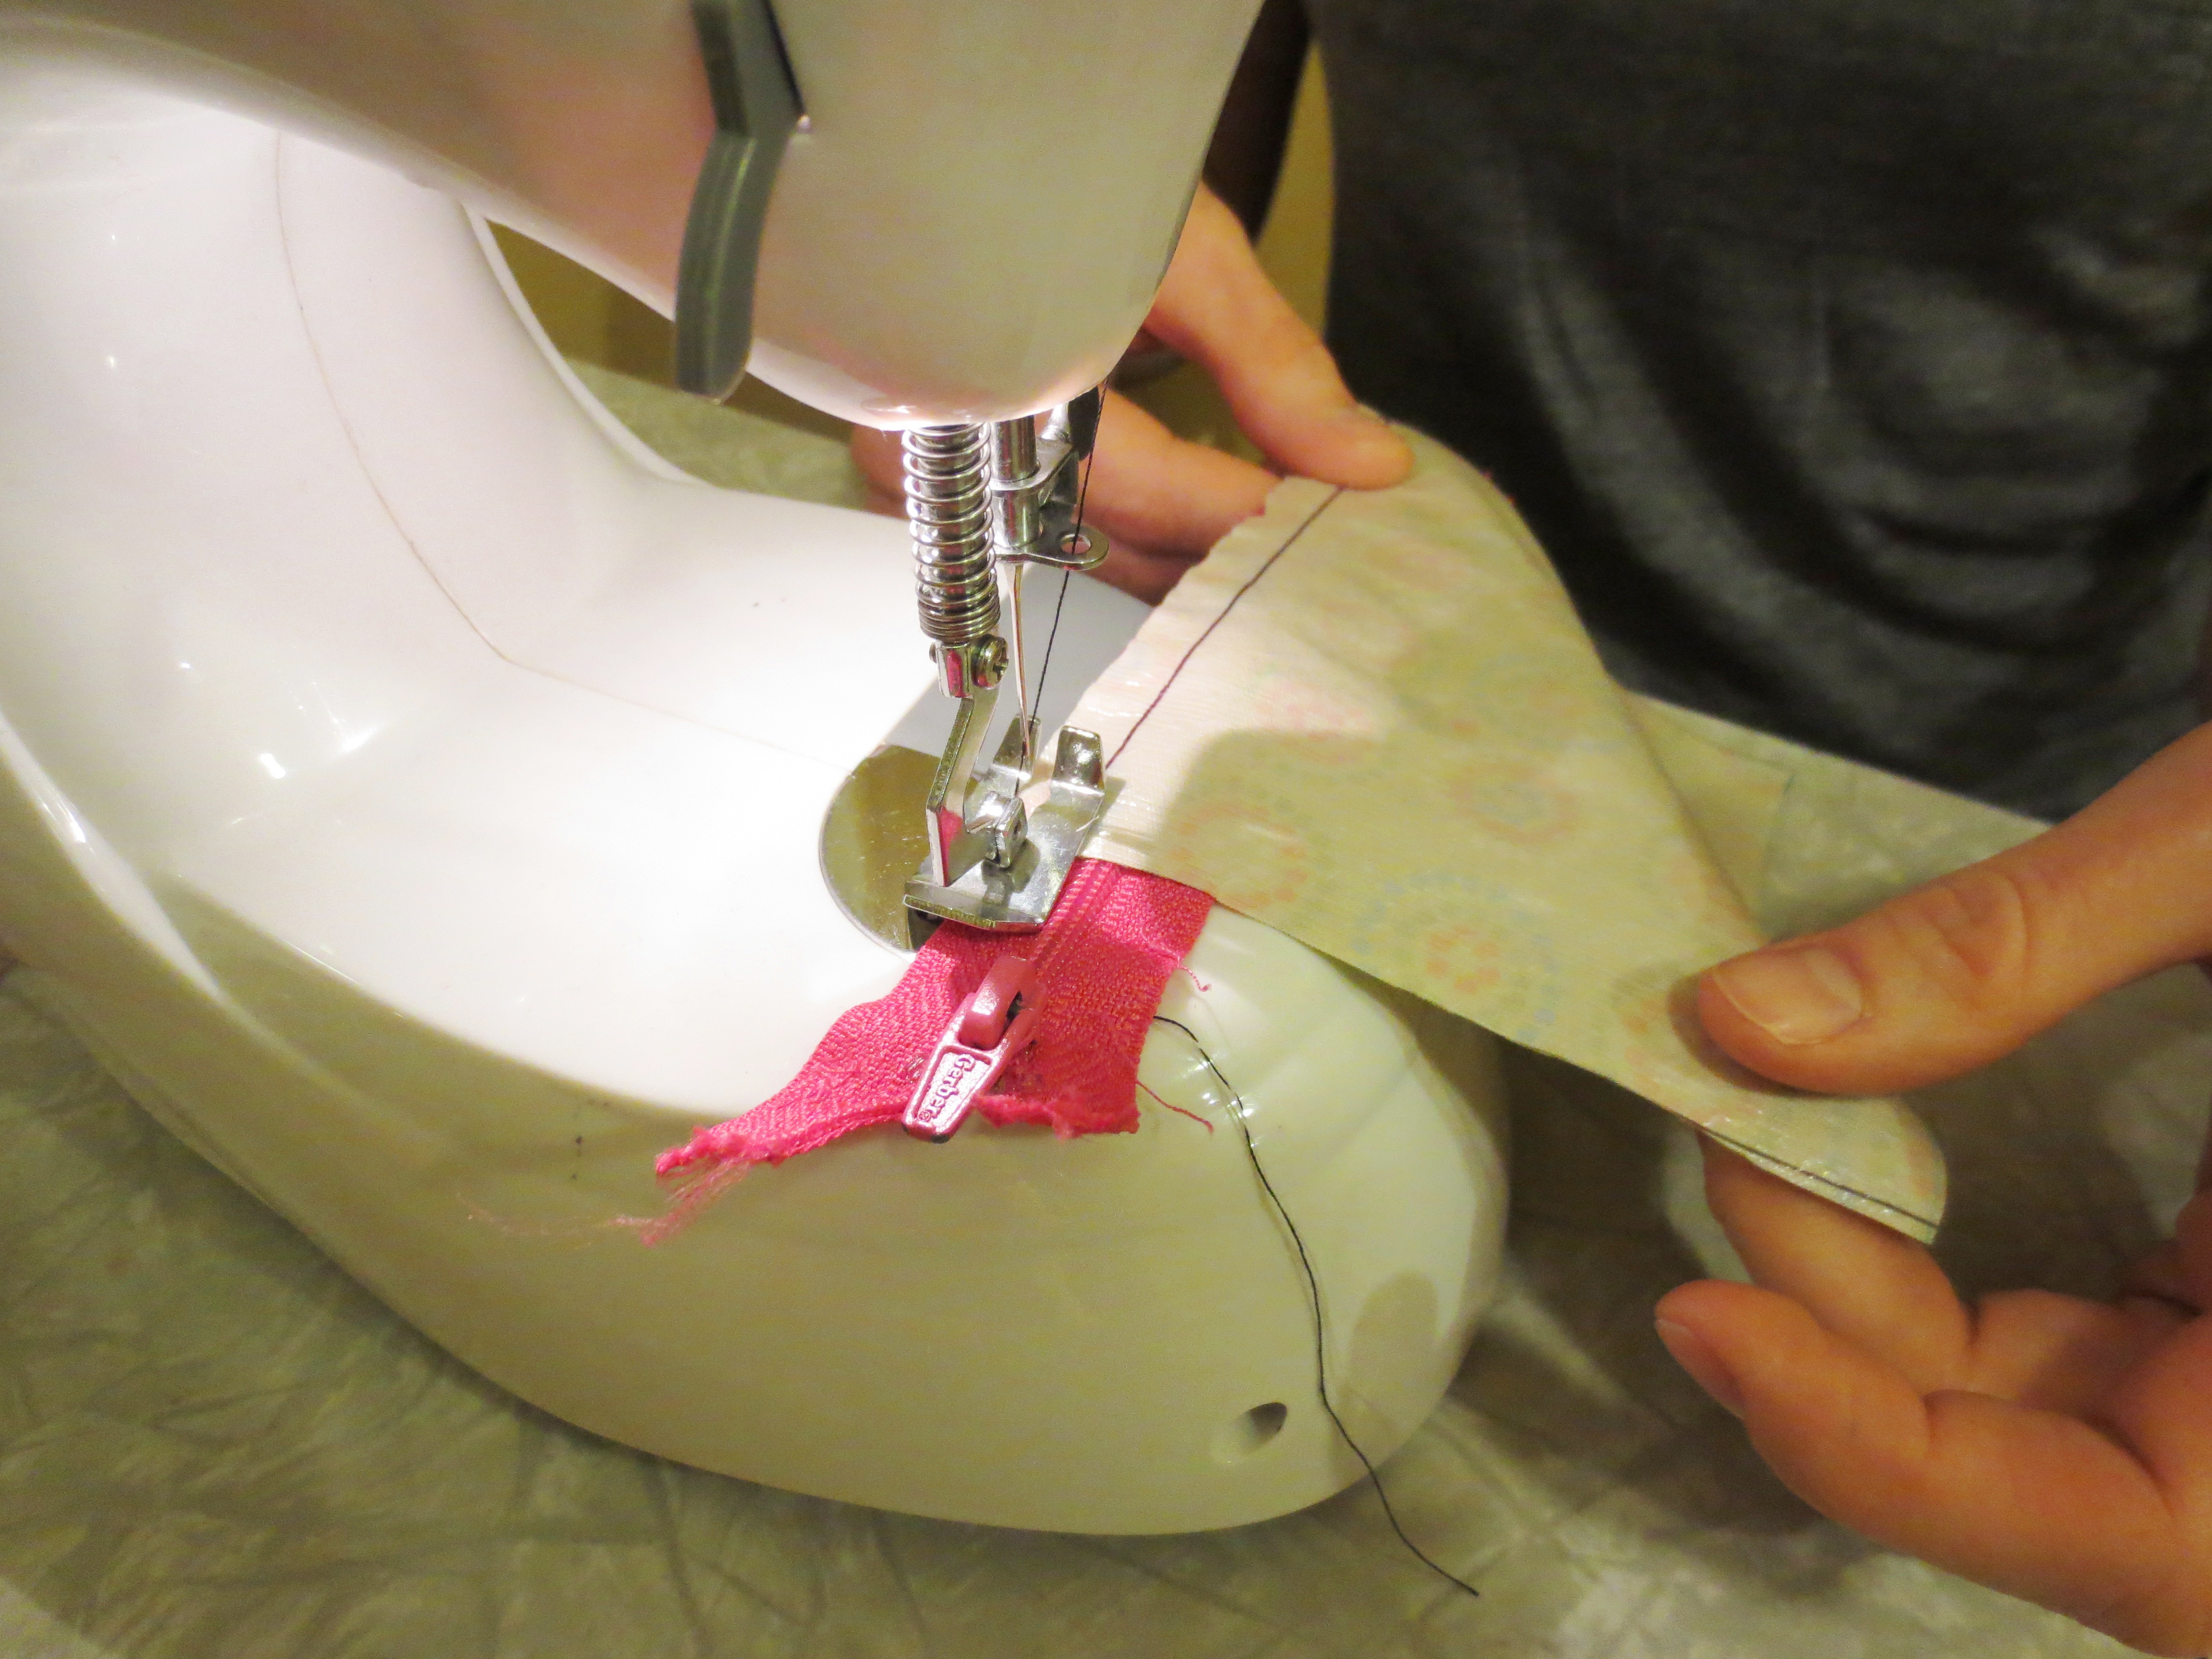
Full disclosure: This picture is a total fake-out. After Scott took the photo, I realized that I could not do this stitch without a zipper foot, which wasn’t included in my $20 Target sewing machine. Then Scott chimed in, helpfully, “Oh yeah, I had a bad case of zipper foot once, but I got it treated.”

I ended up pinning and sewing it by hand, which is actually quite relaxing and the recommended technique for daydreamers. IMG_3736
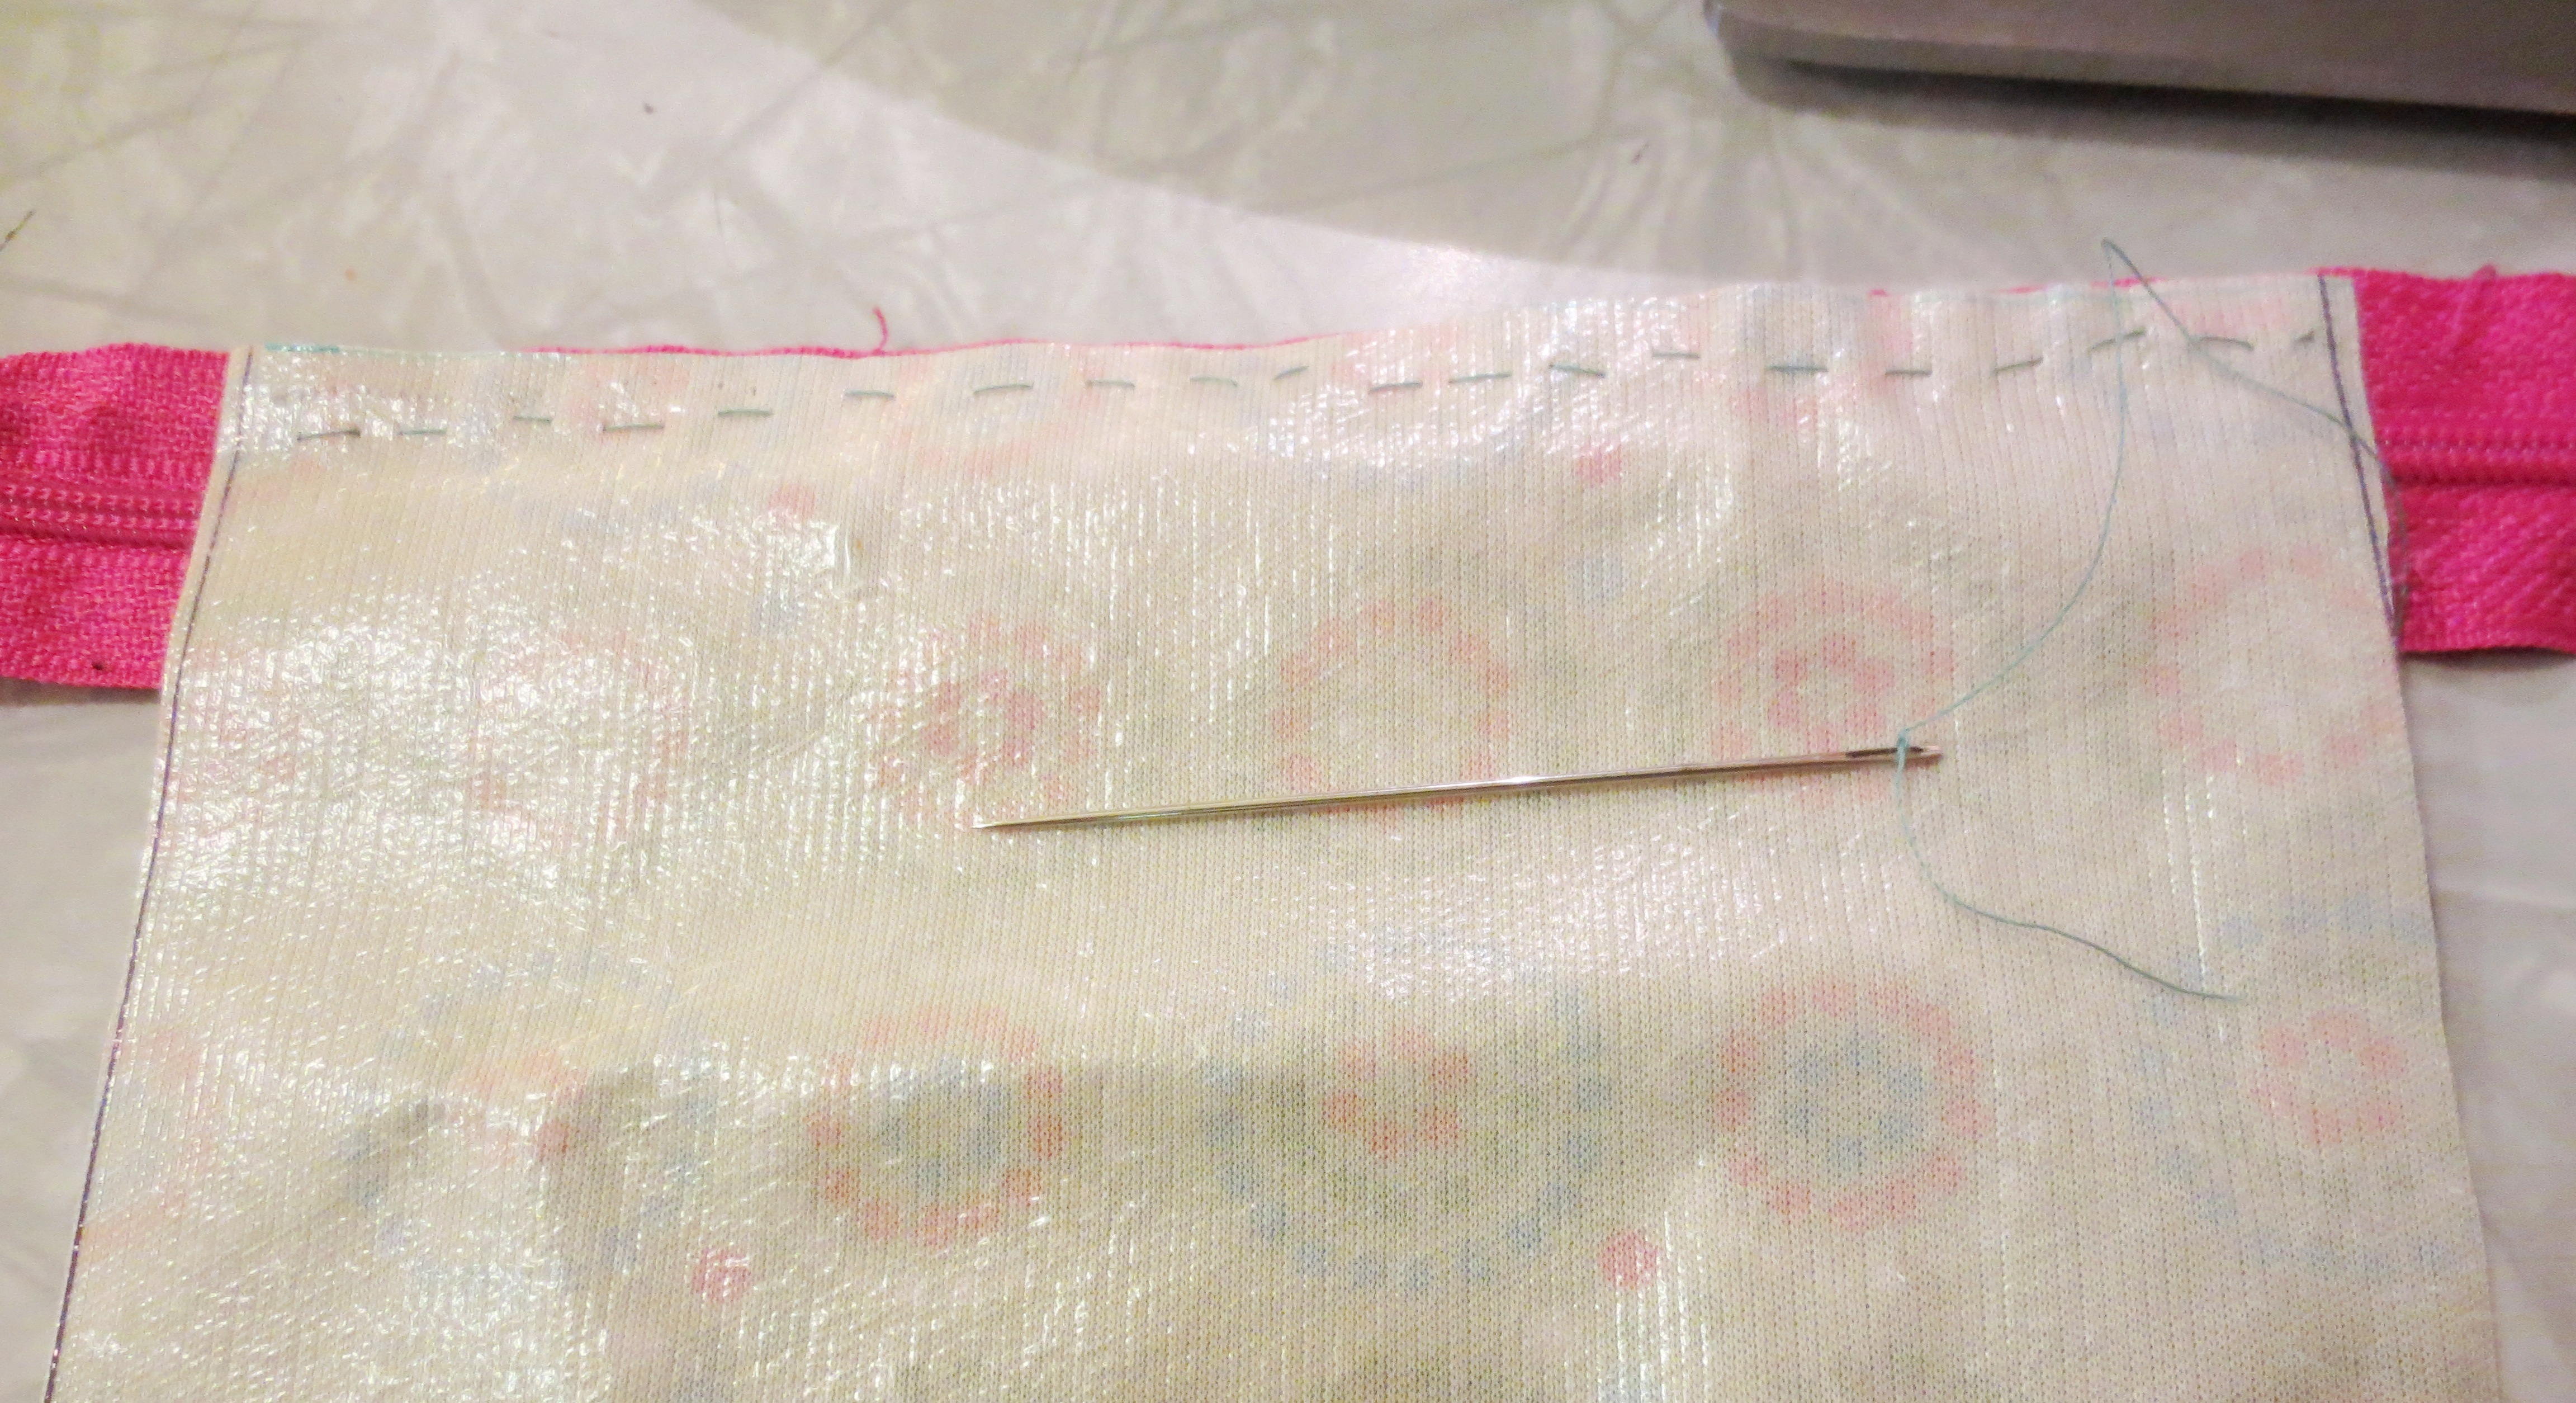
Repeat this step with the other panel, sewing the “wrong side” of the diaper cover onto the “right side” of the zipper. When you flip it open, it should look like this:

IMG_3741
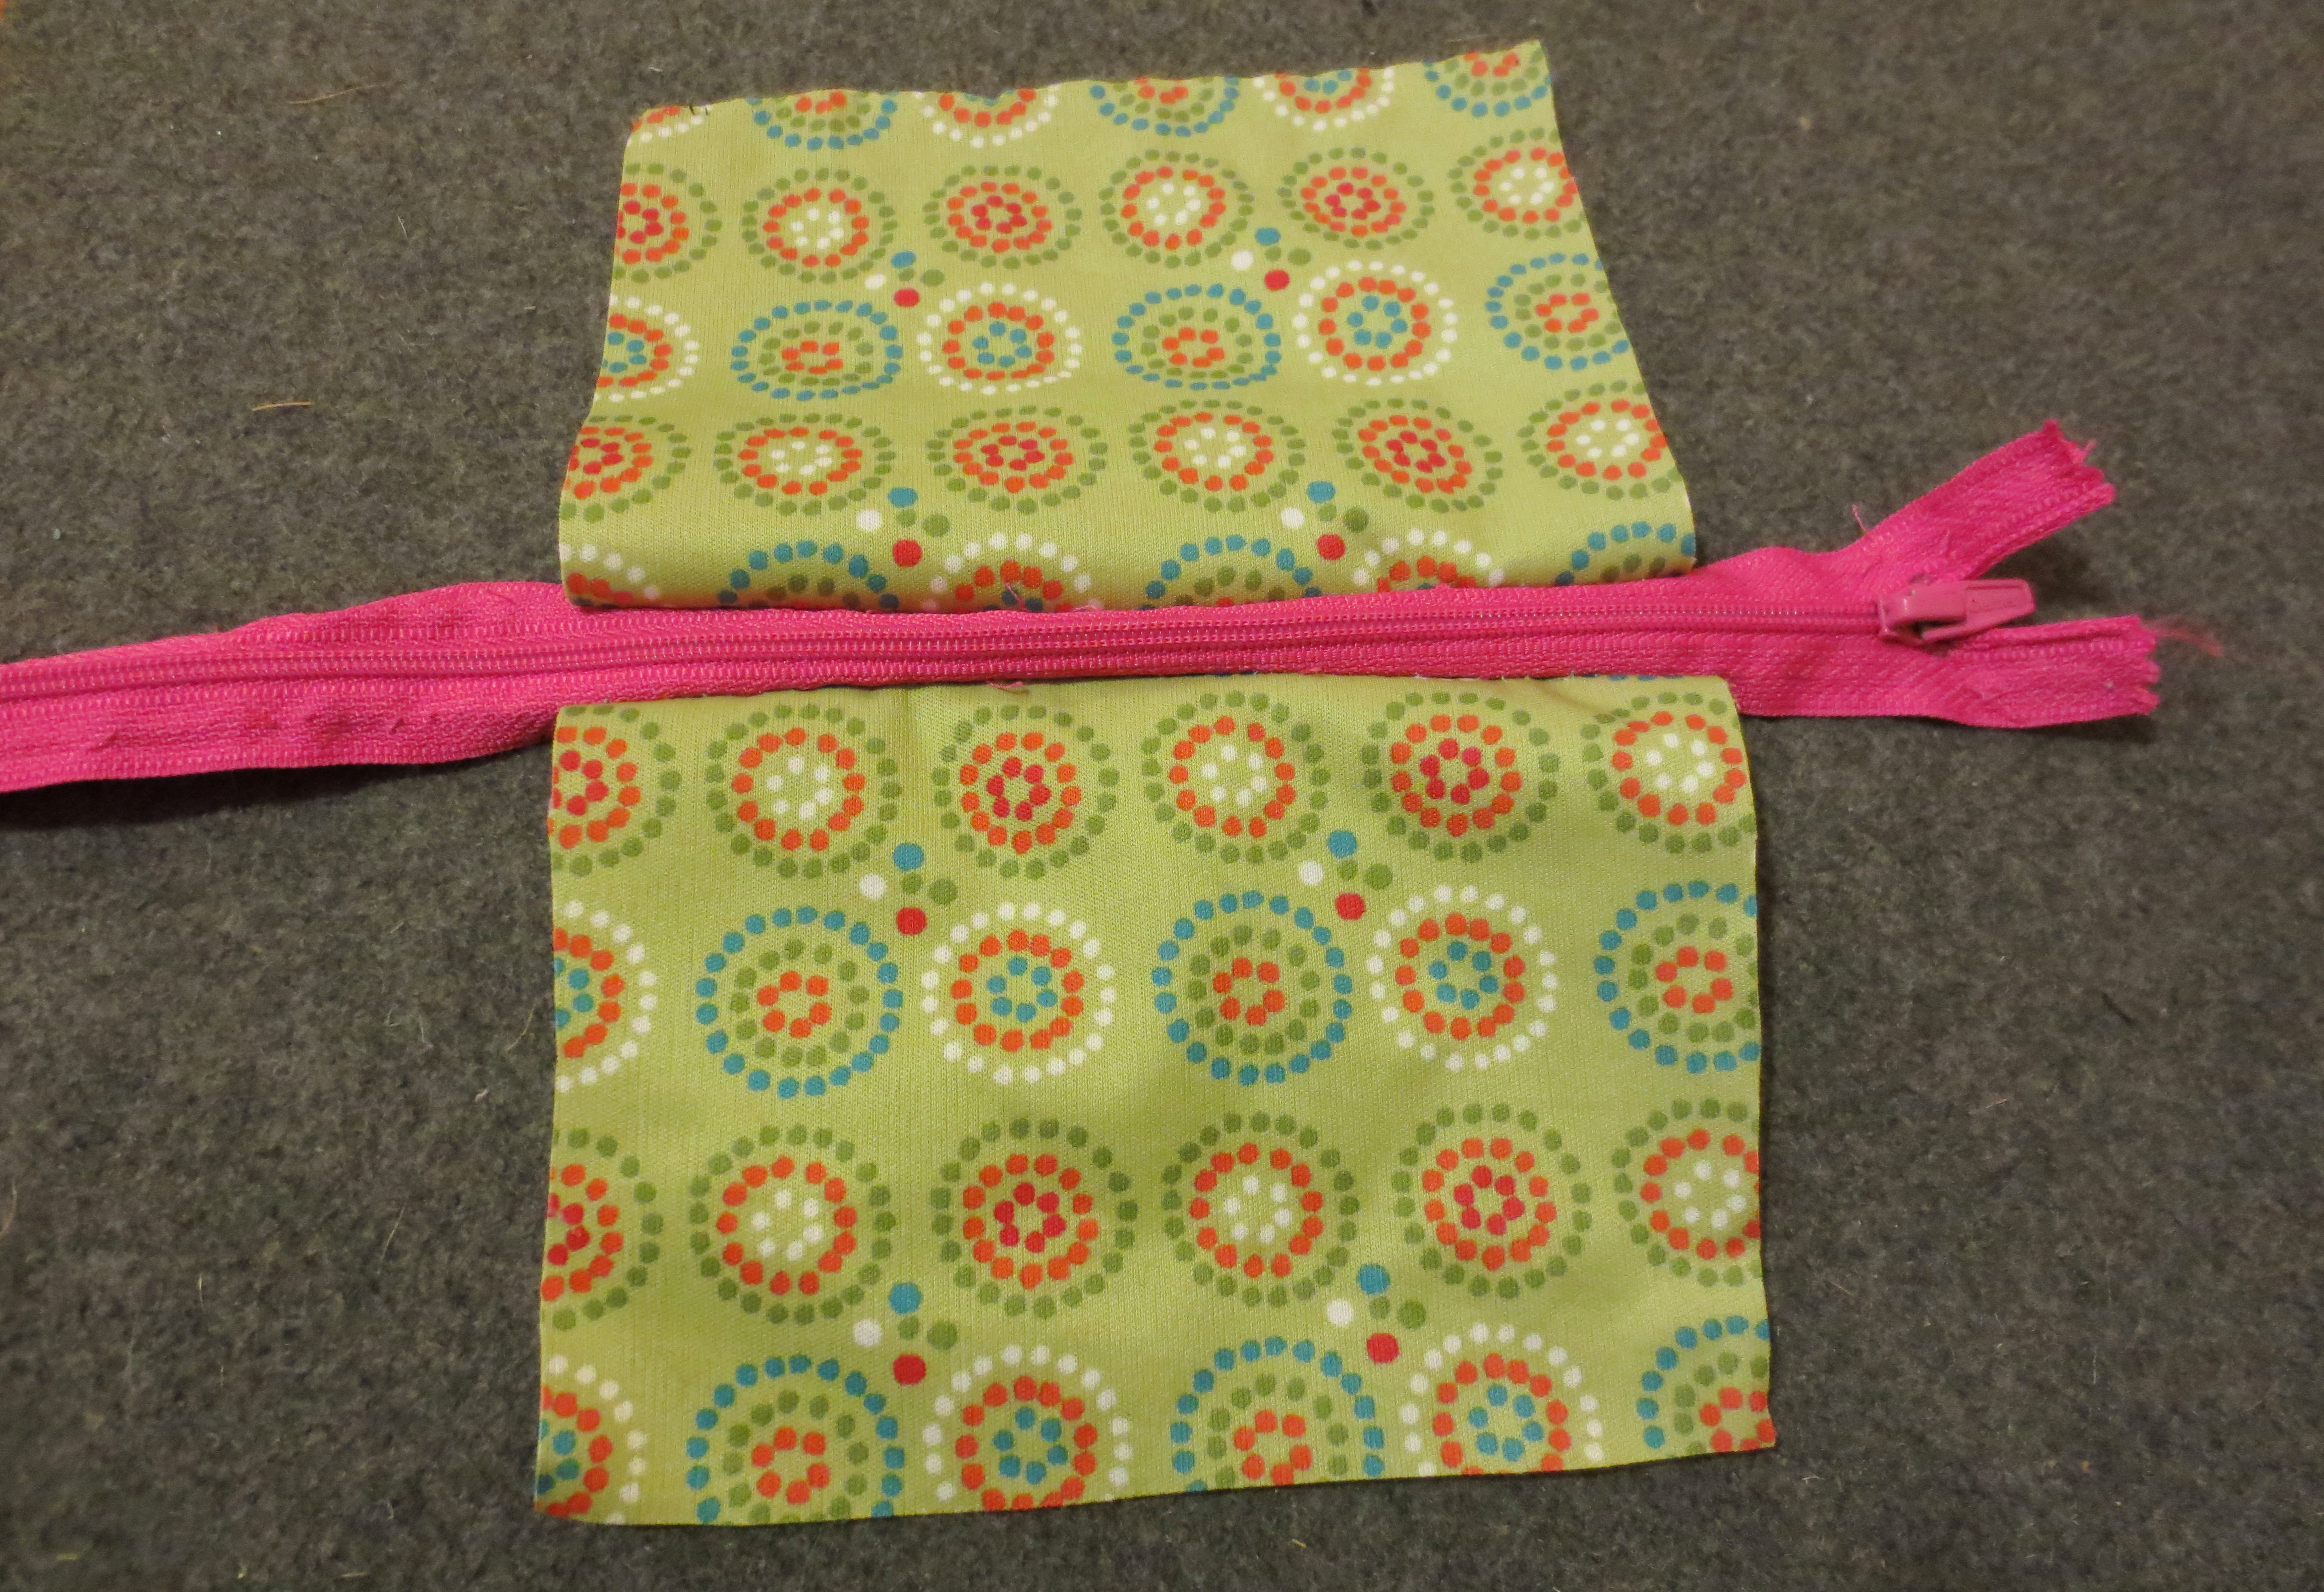
When both sides are sewn on, open the zipper about halfway, so that the pull is in the middle of the almost-finished wallet. You need to be able to flip the pouch back right-side-out after sewing.

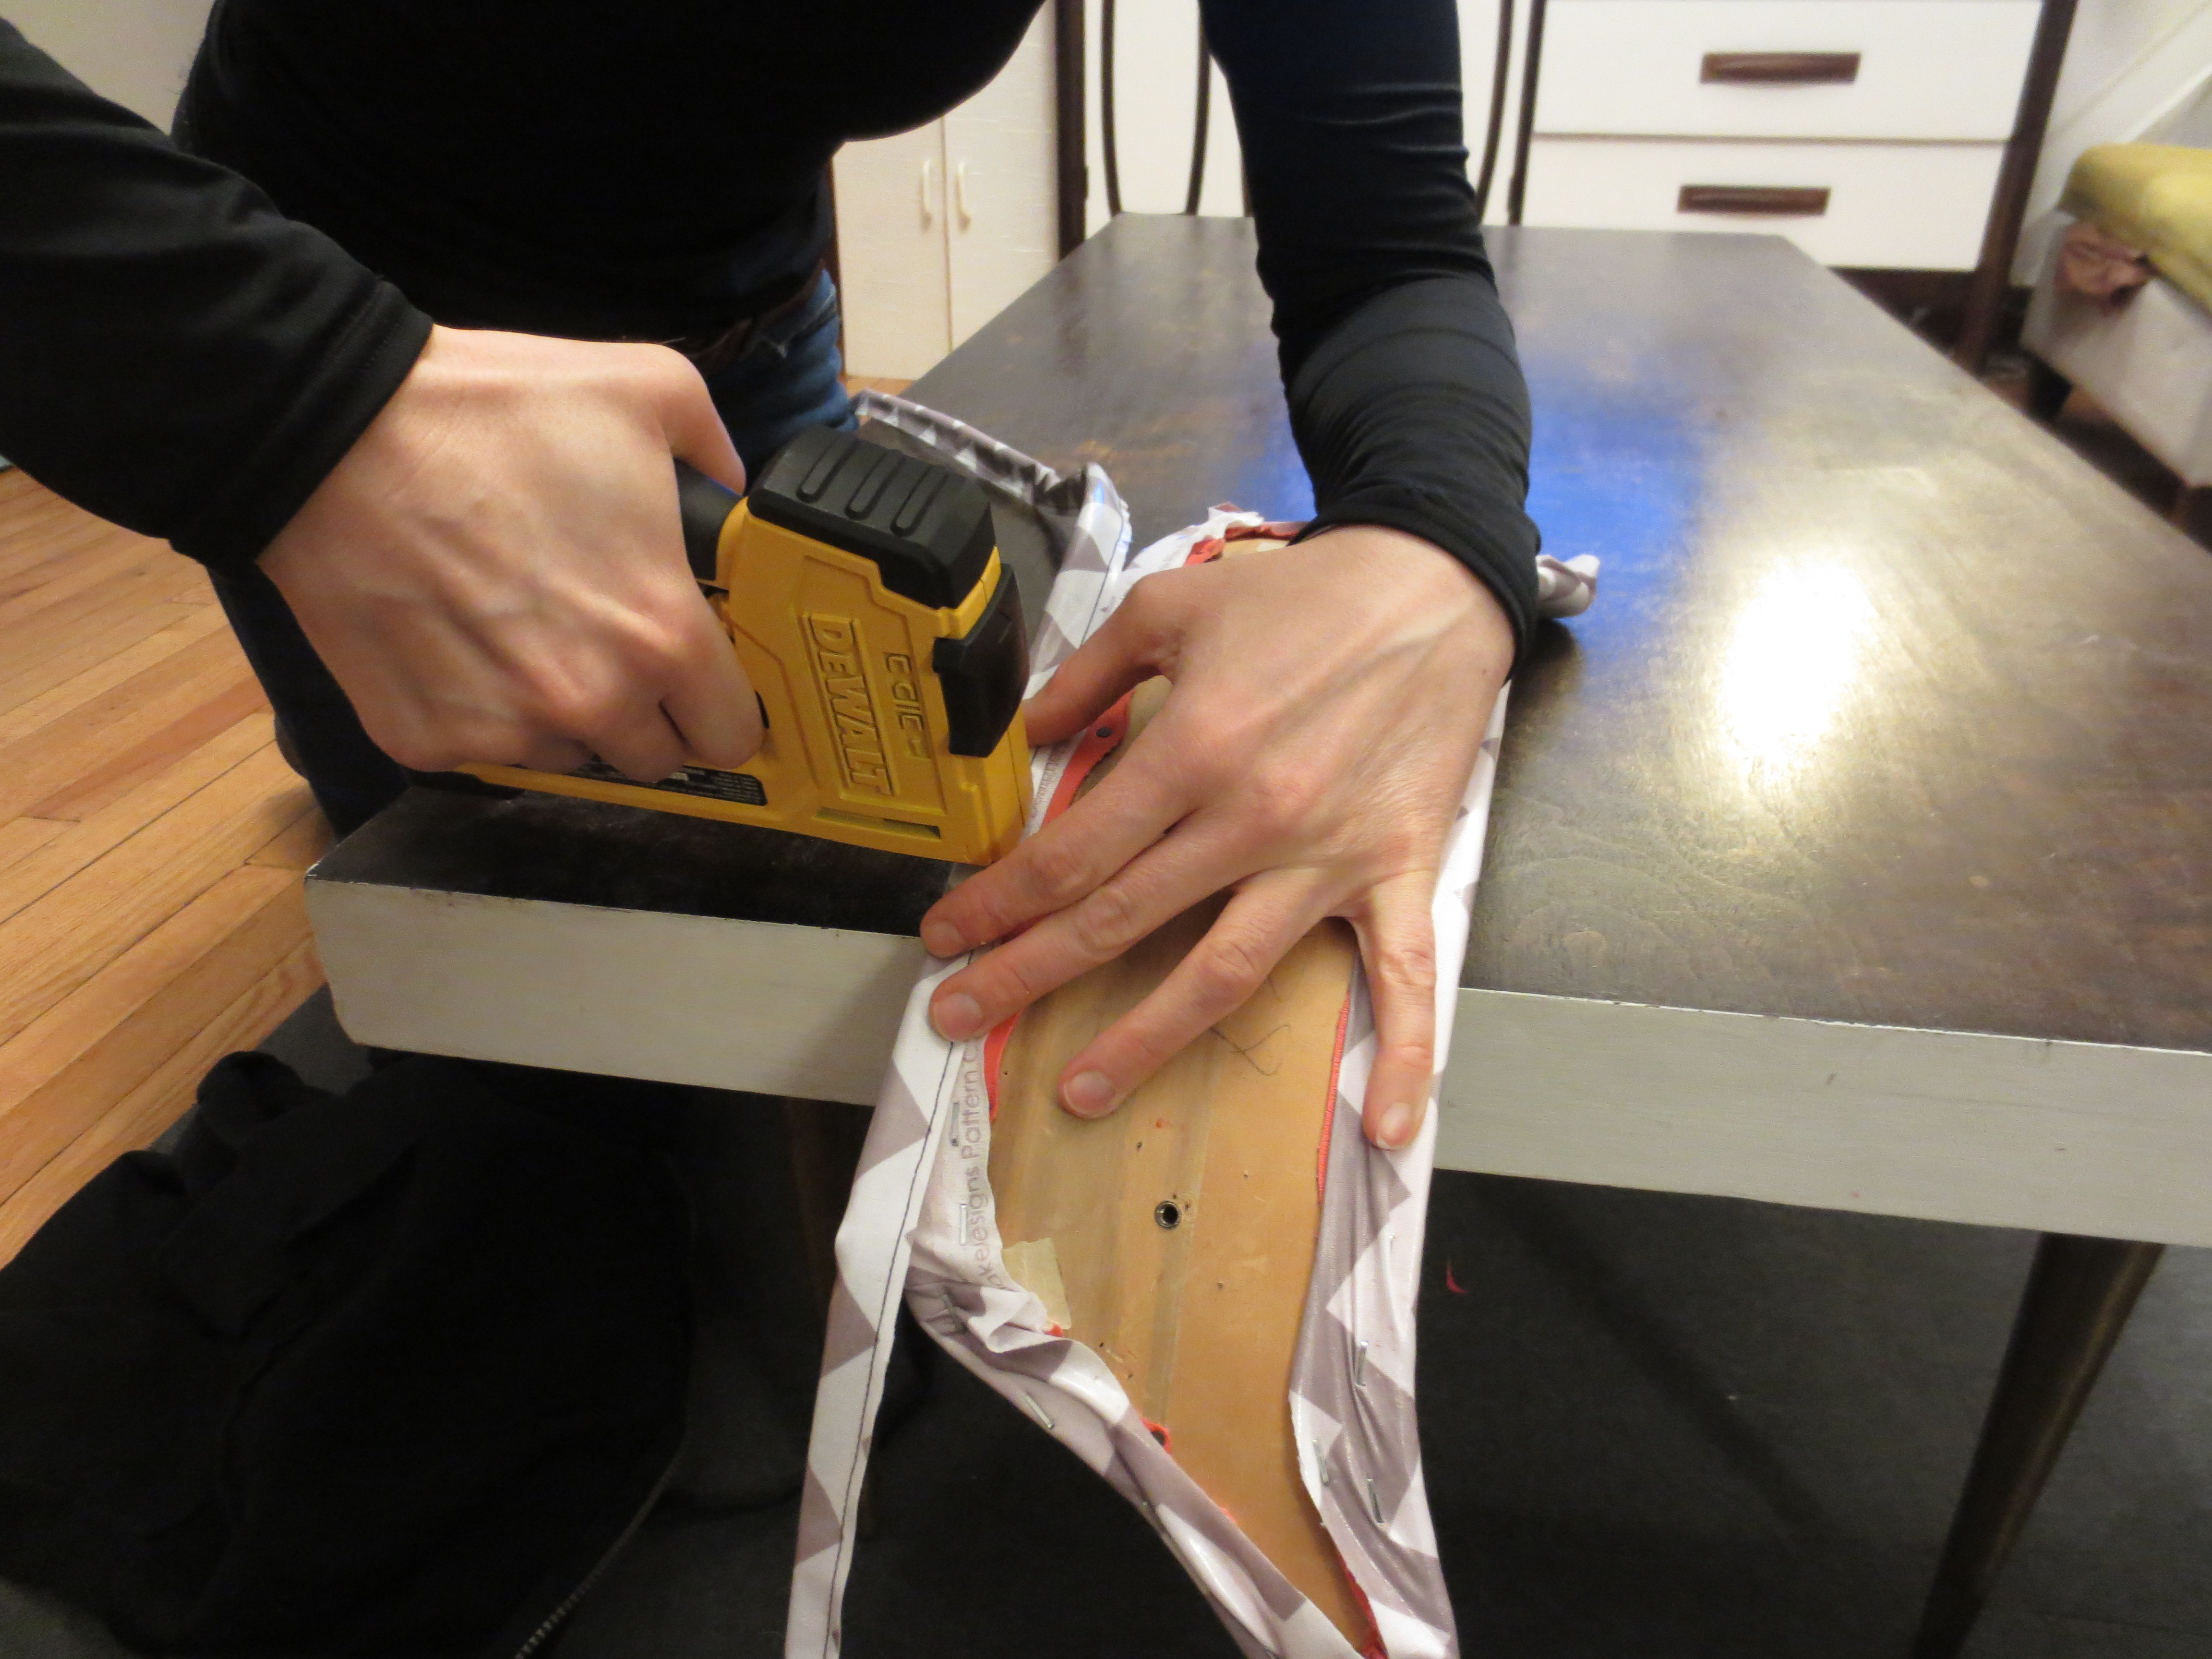
Pin the “right” sides of the diaper cover panels together, and sew a seam around the entire perimeter of the inside-out wallet. No zipper foot required.

IMG_3742
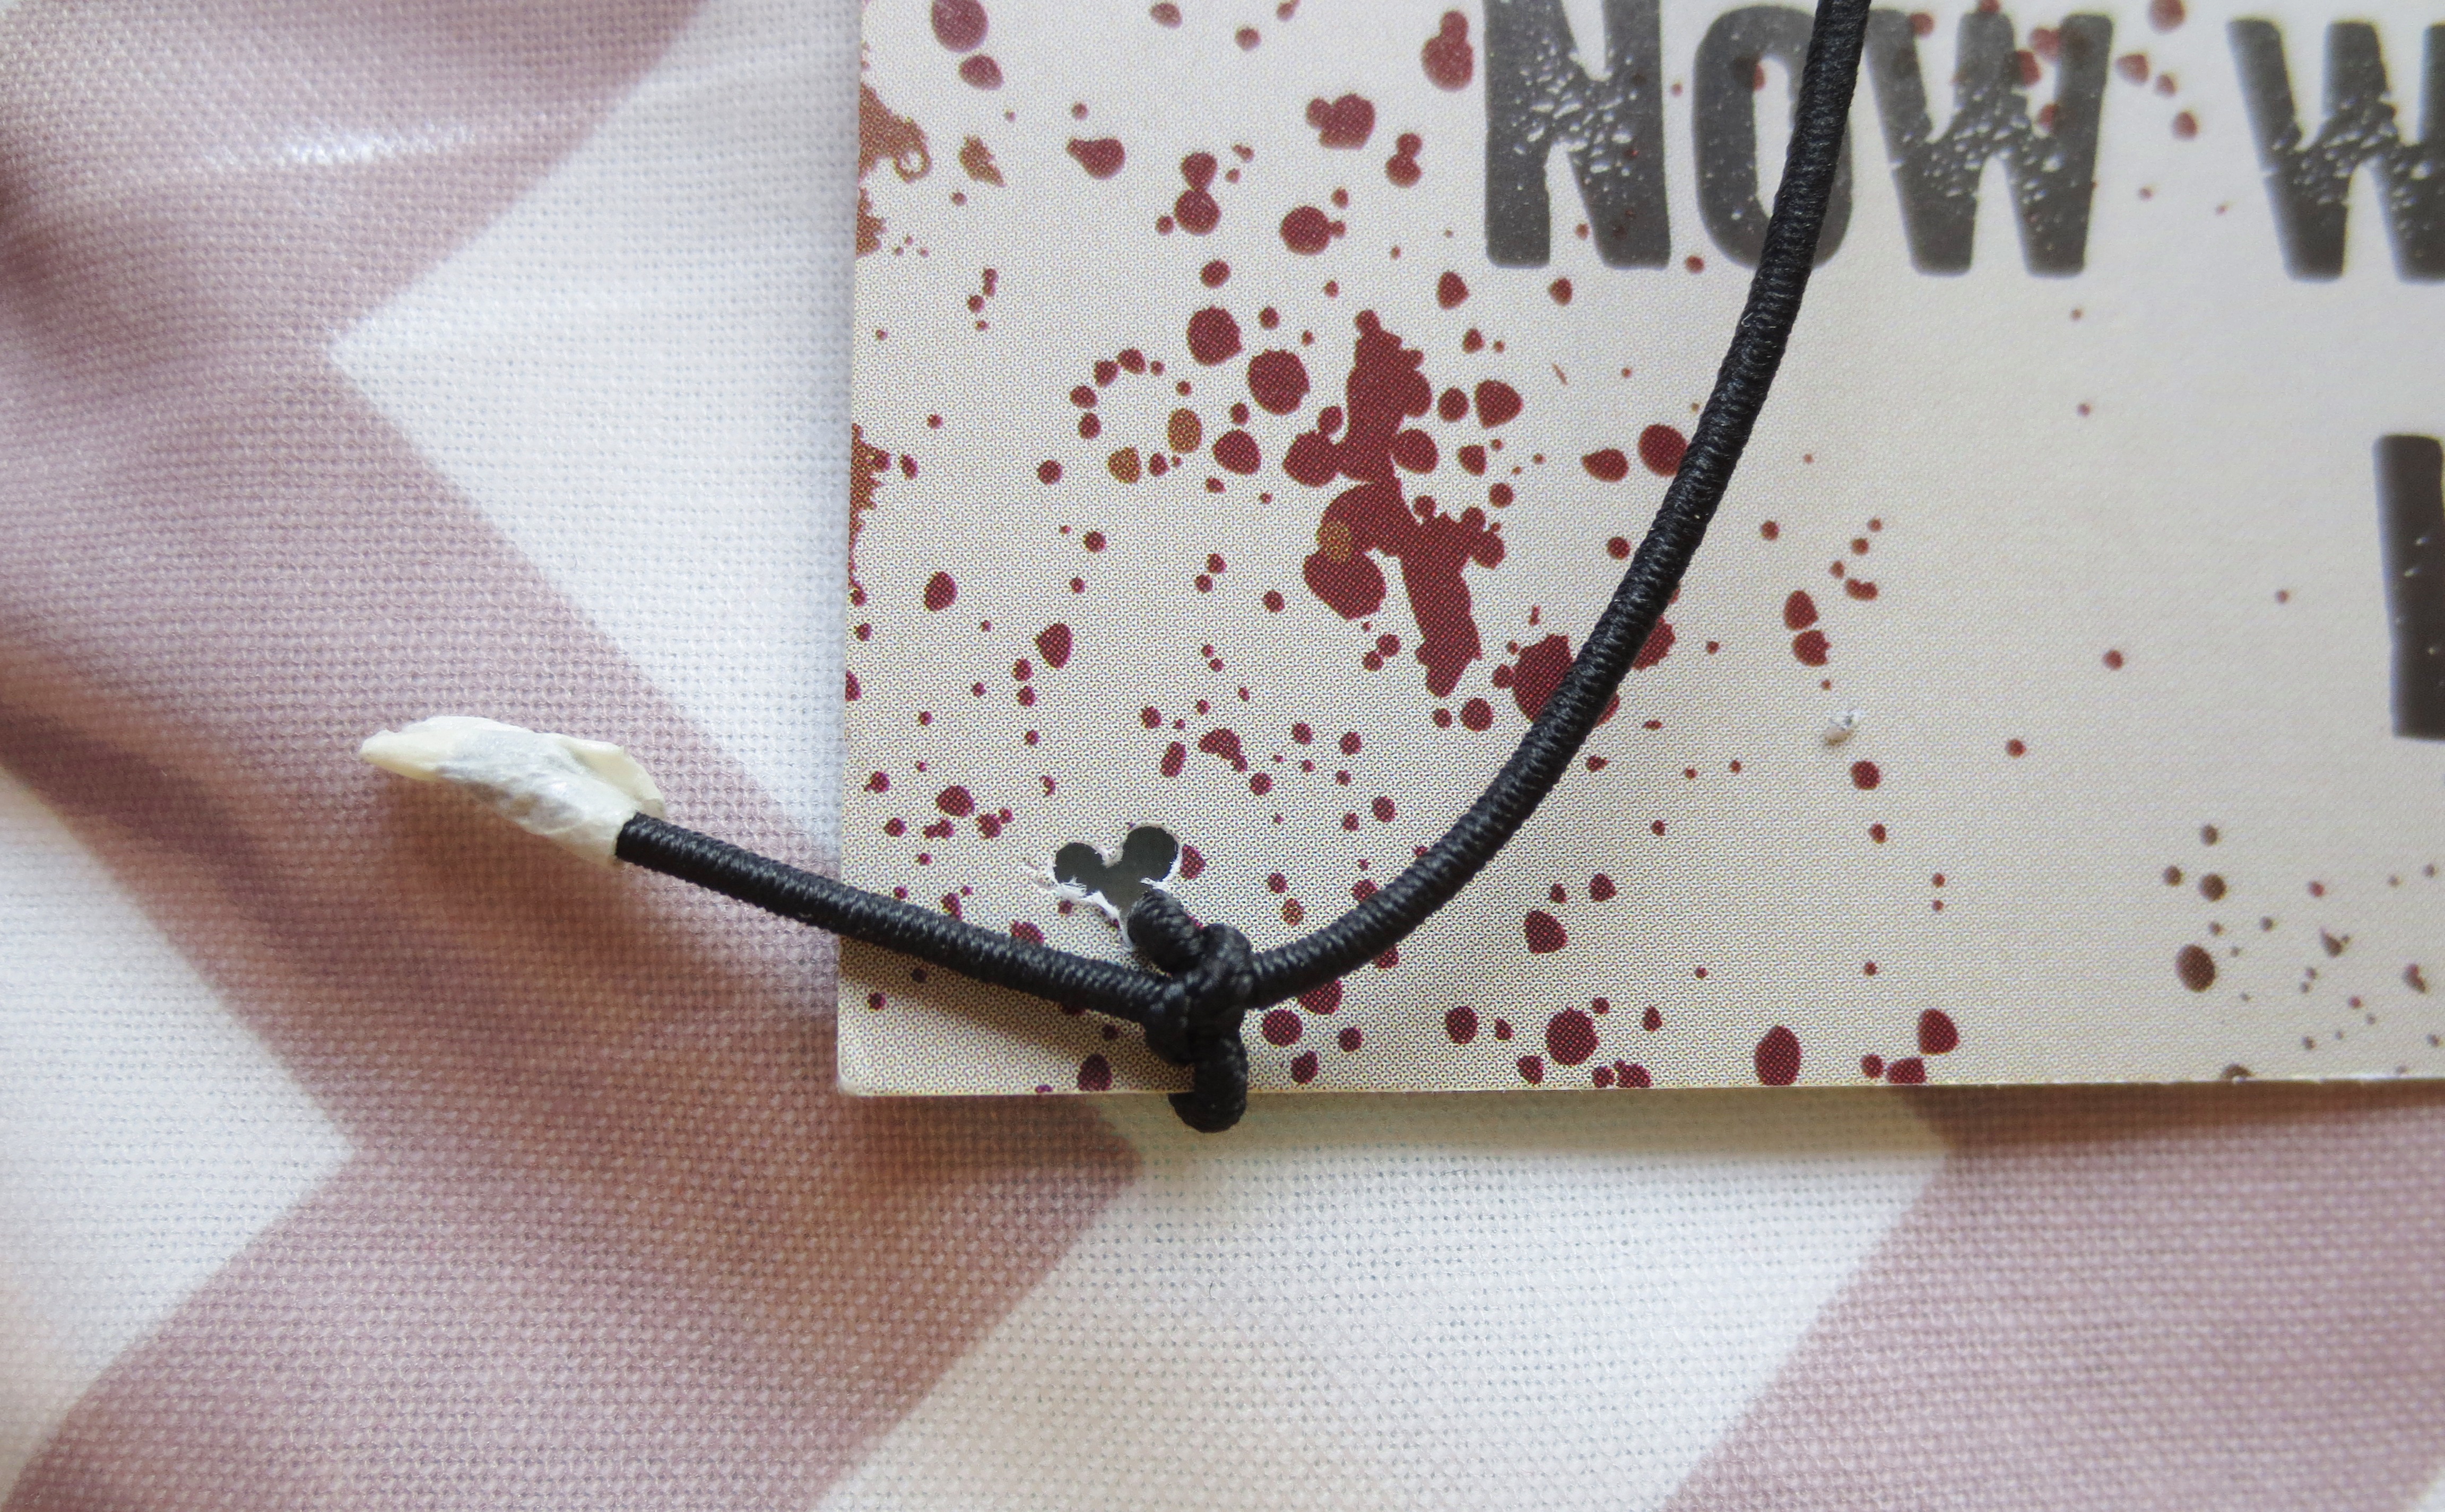
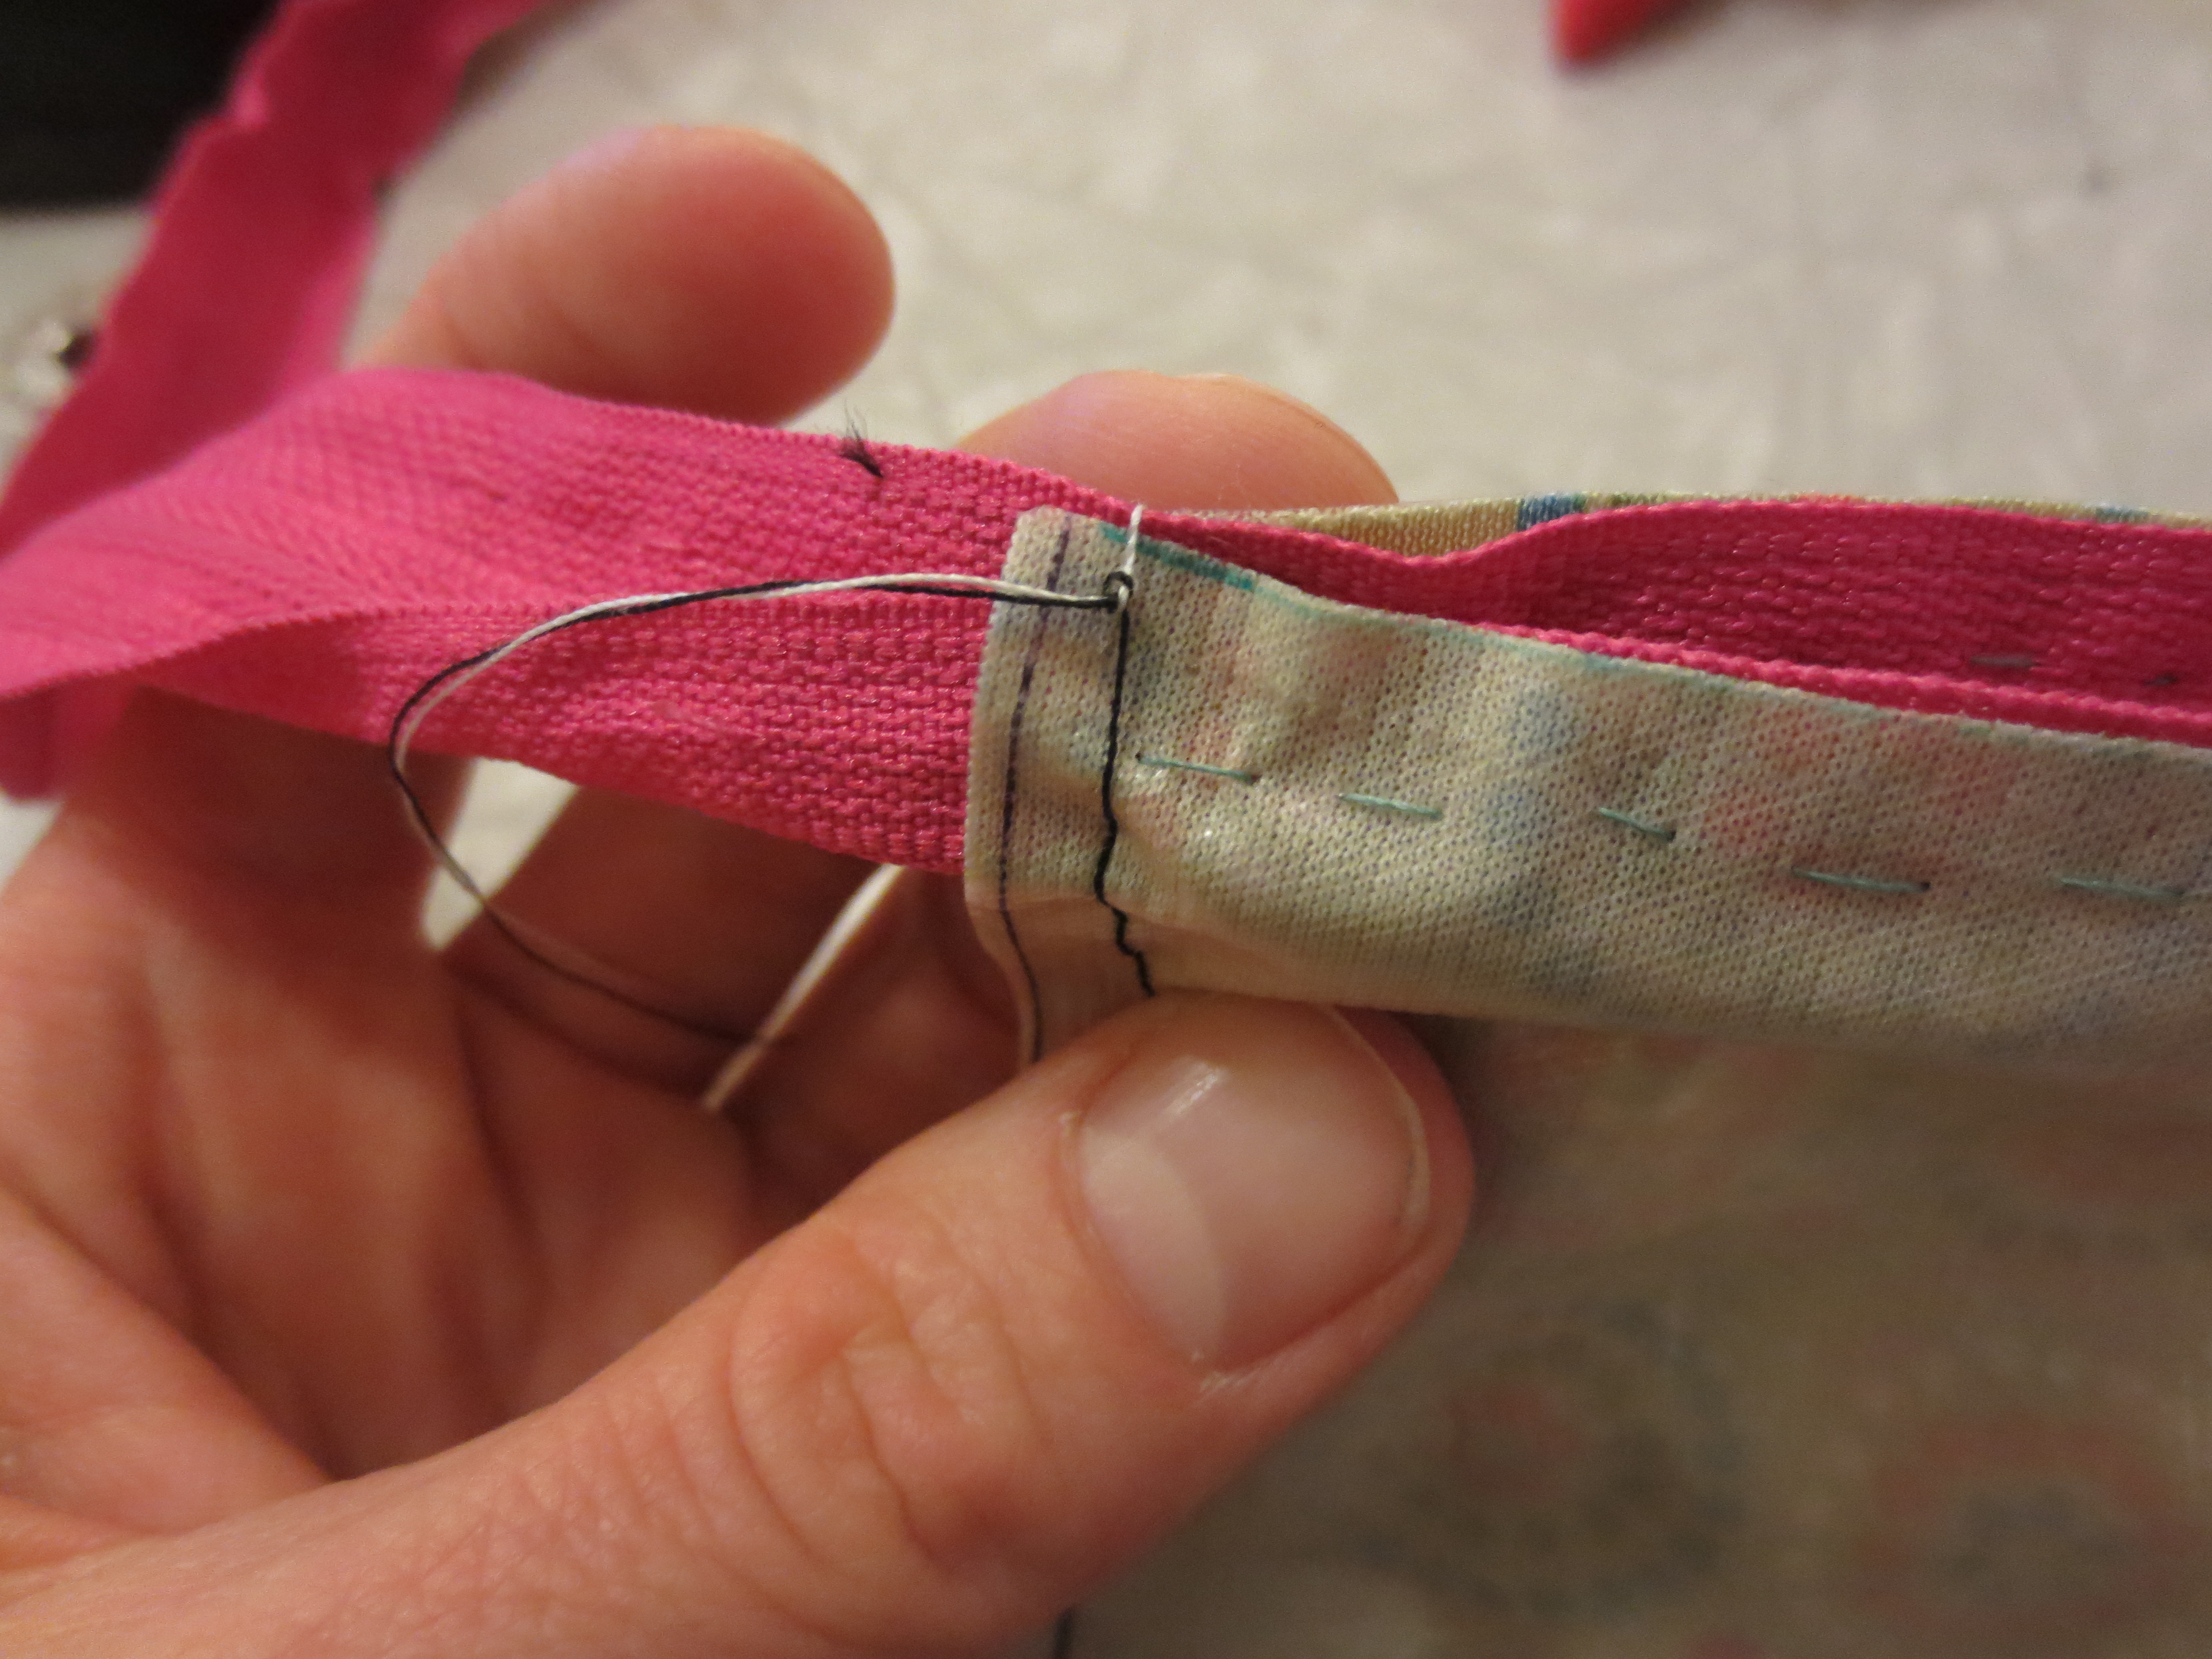
However, when you get to the top of the wallet, be sure to fold the zipper inwards like a taco, towards the top. Sew completely over the zipper, though it might feel a little strange.

IMG_3743
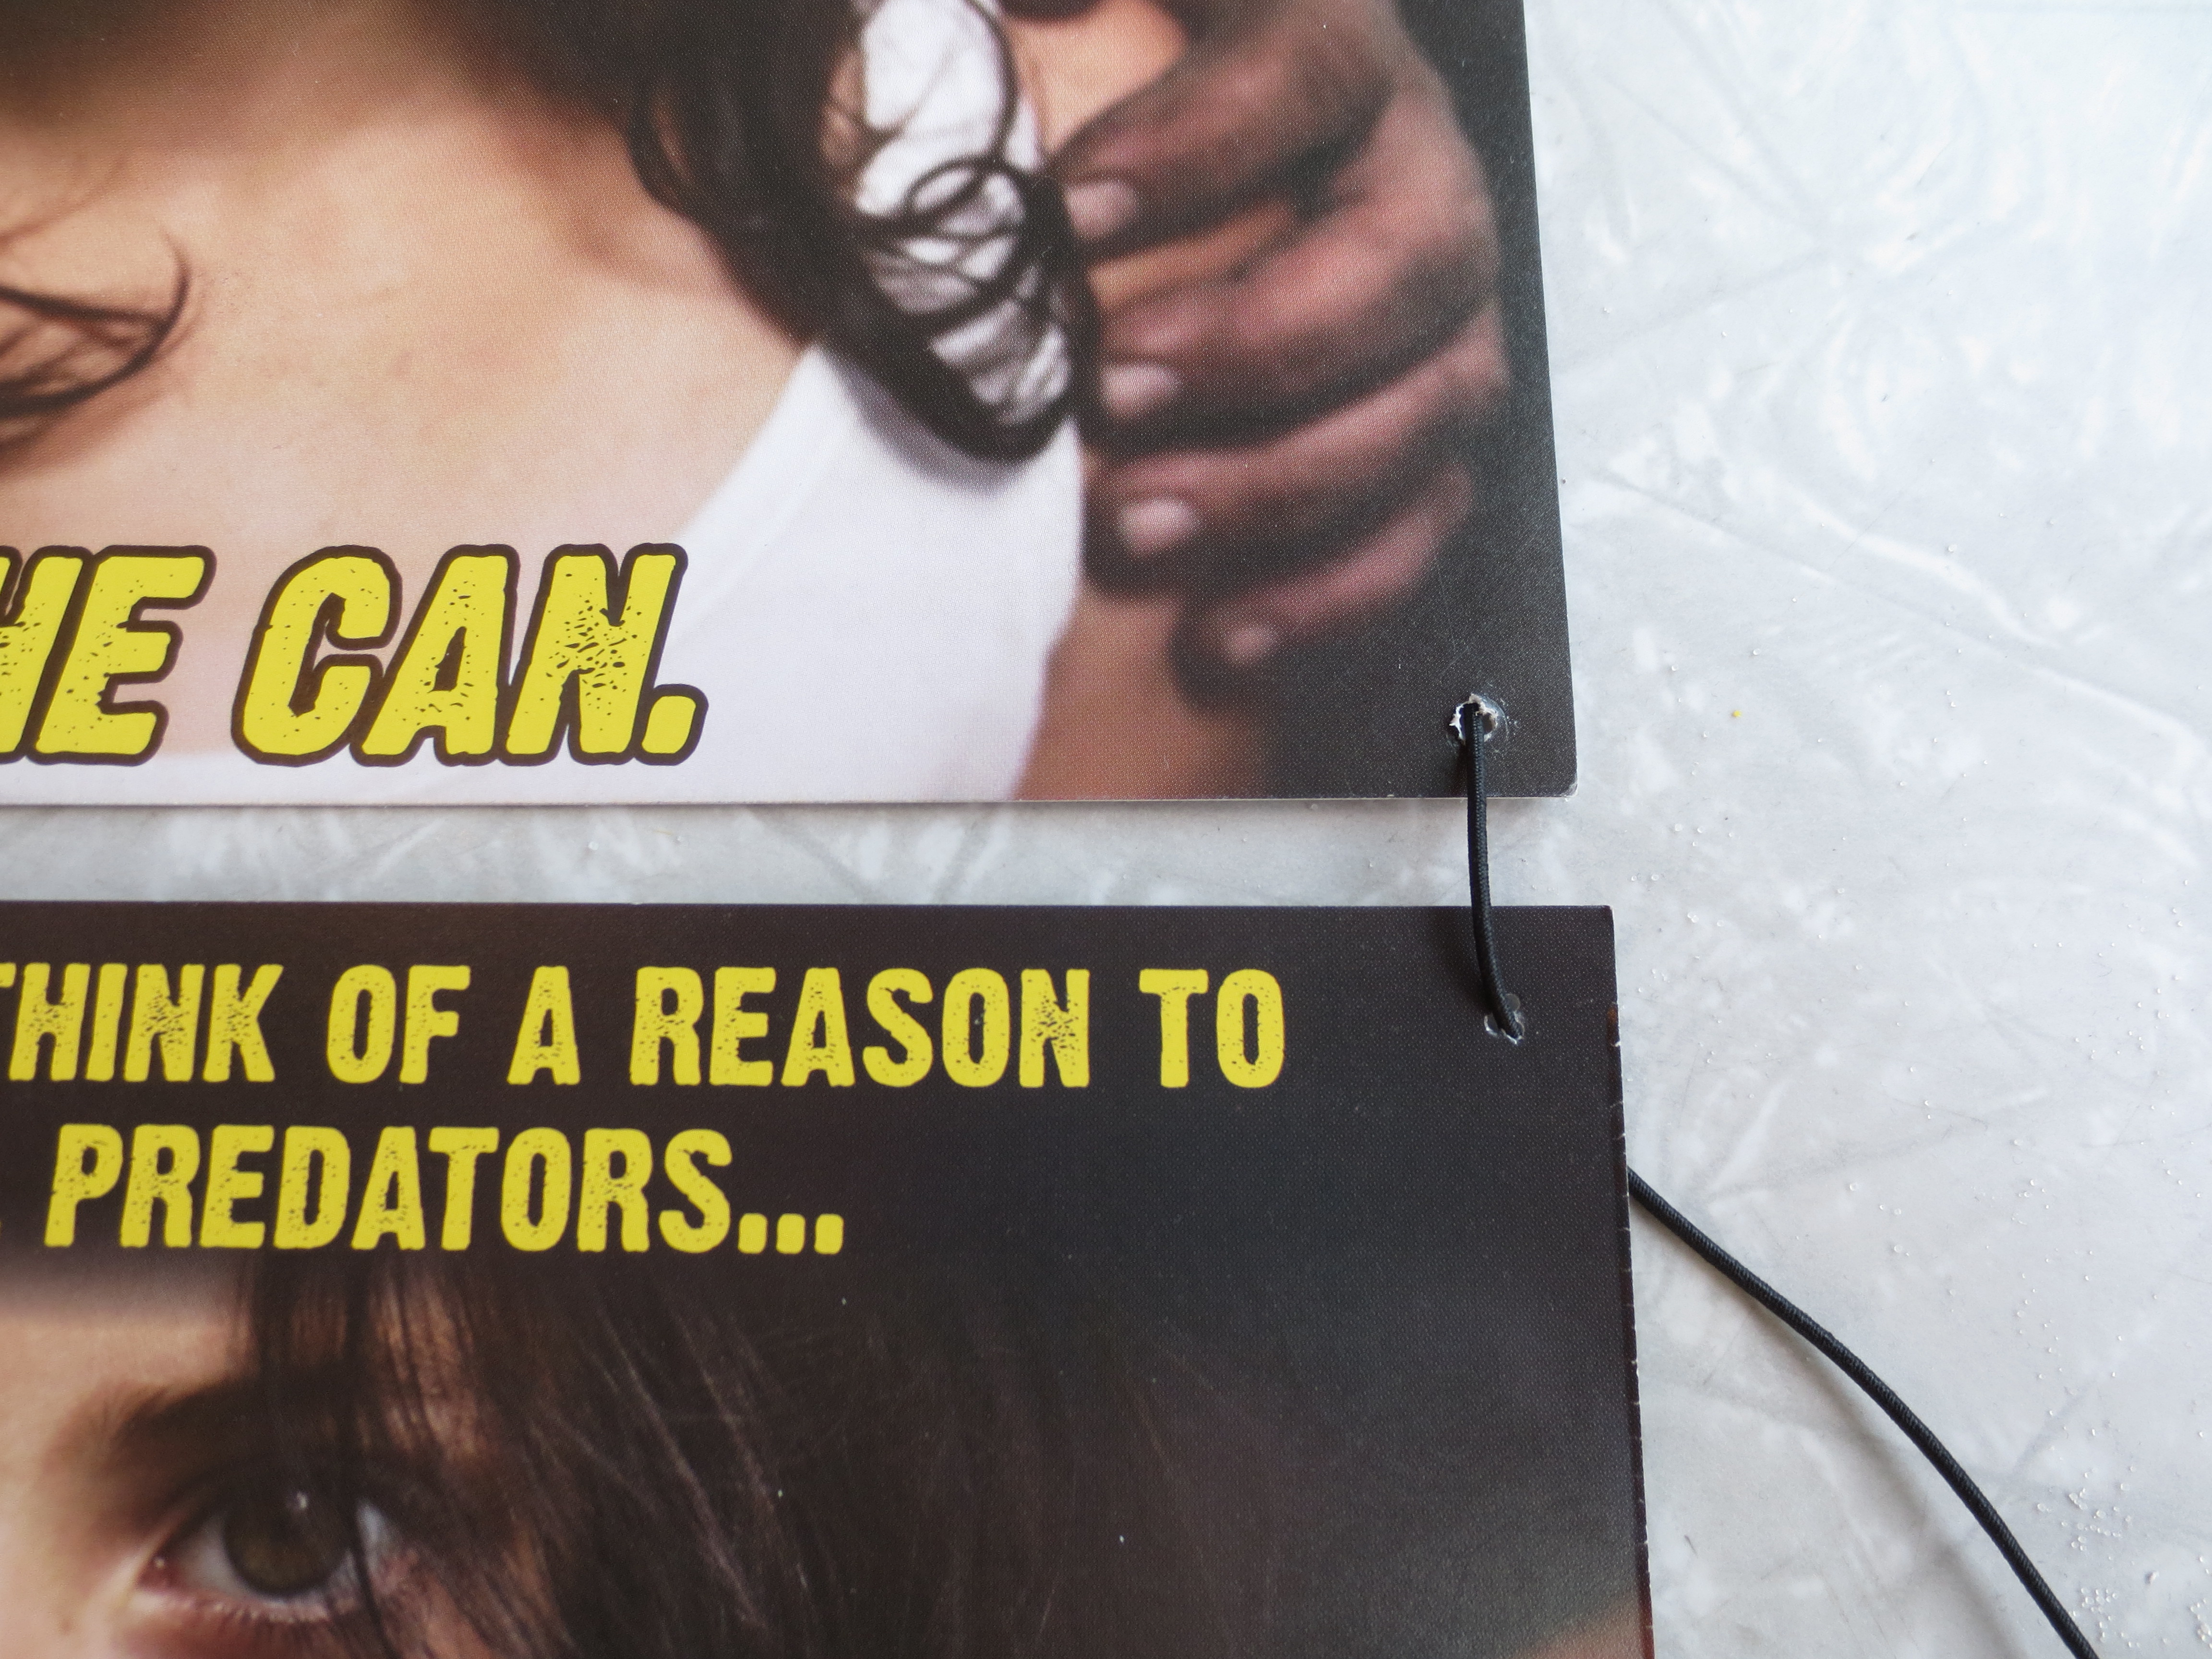
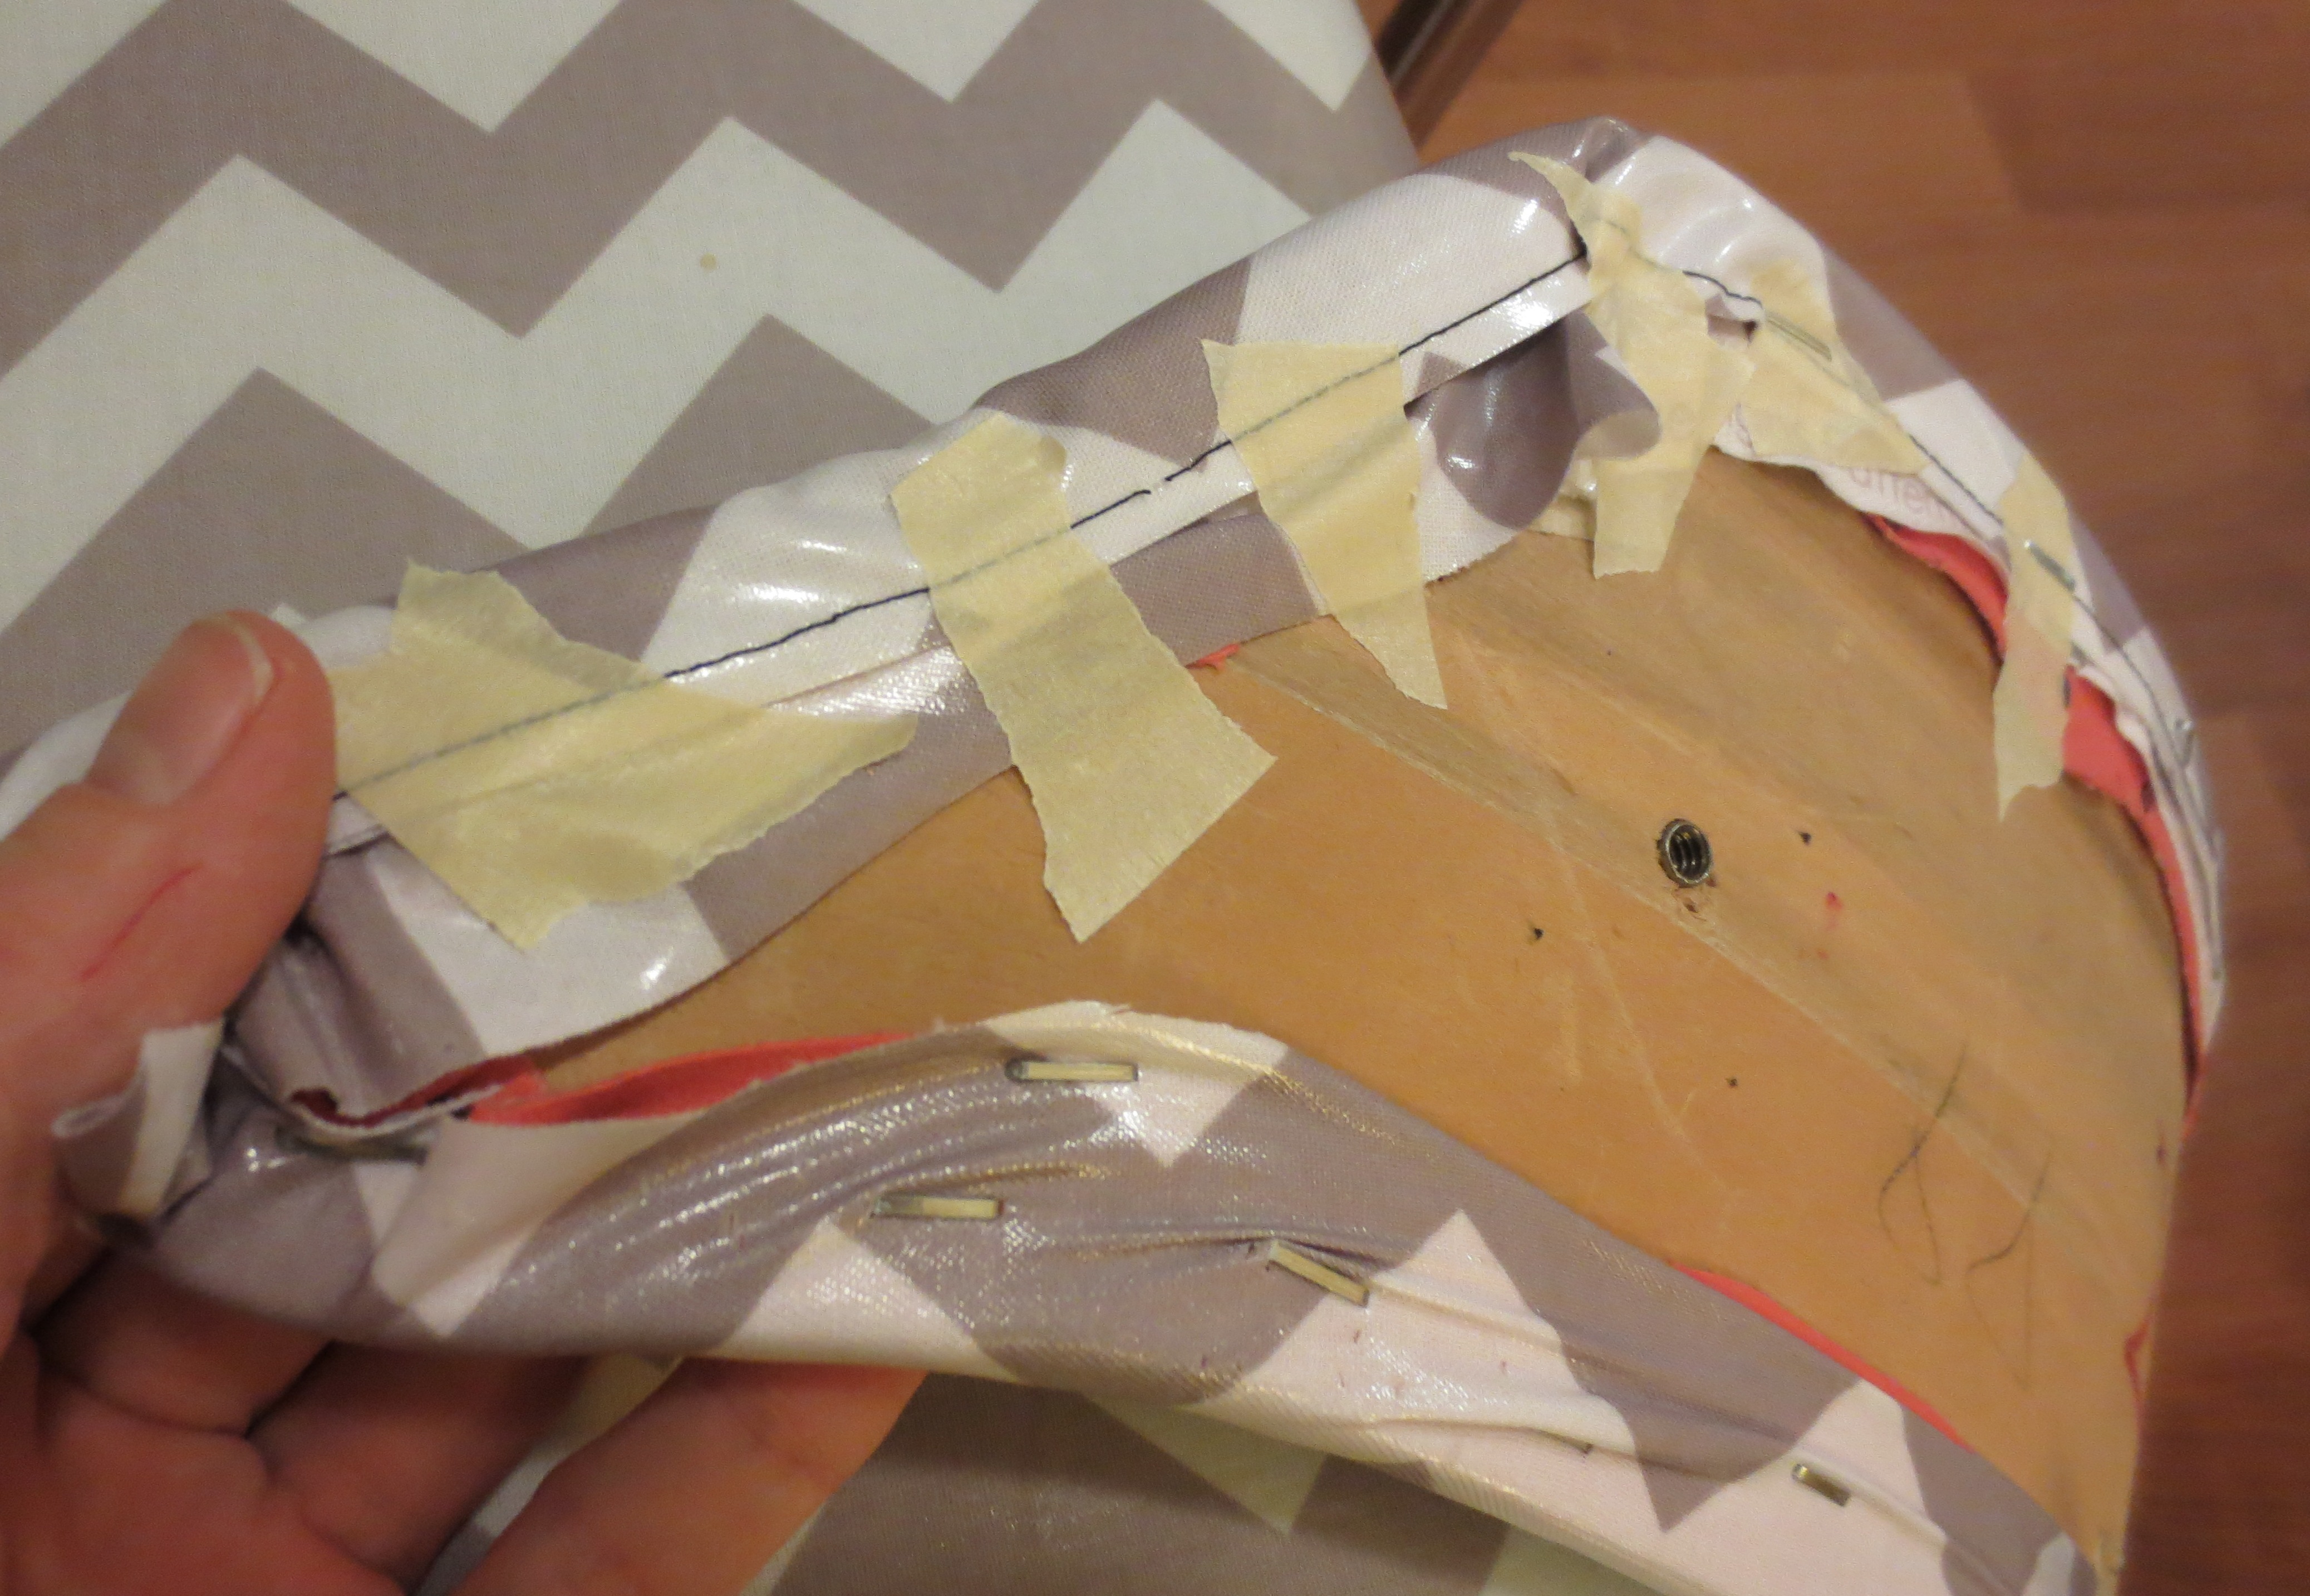
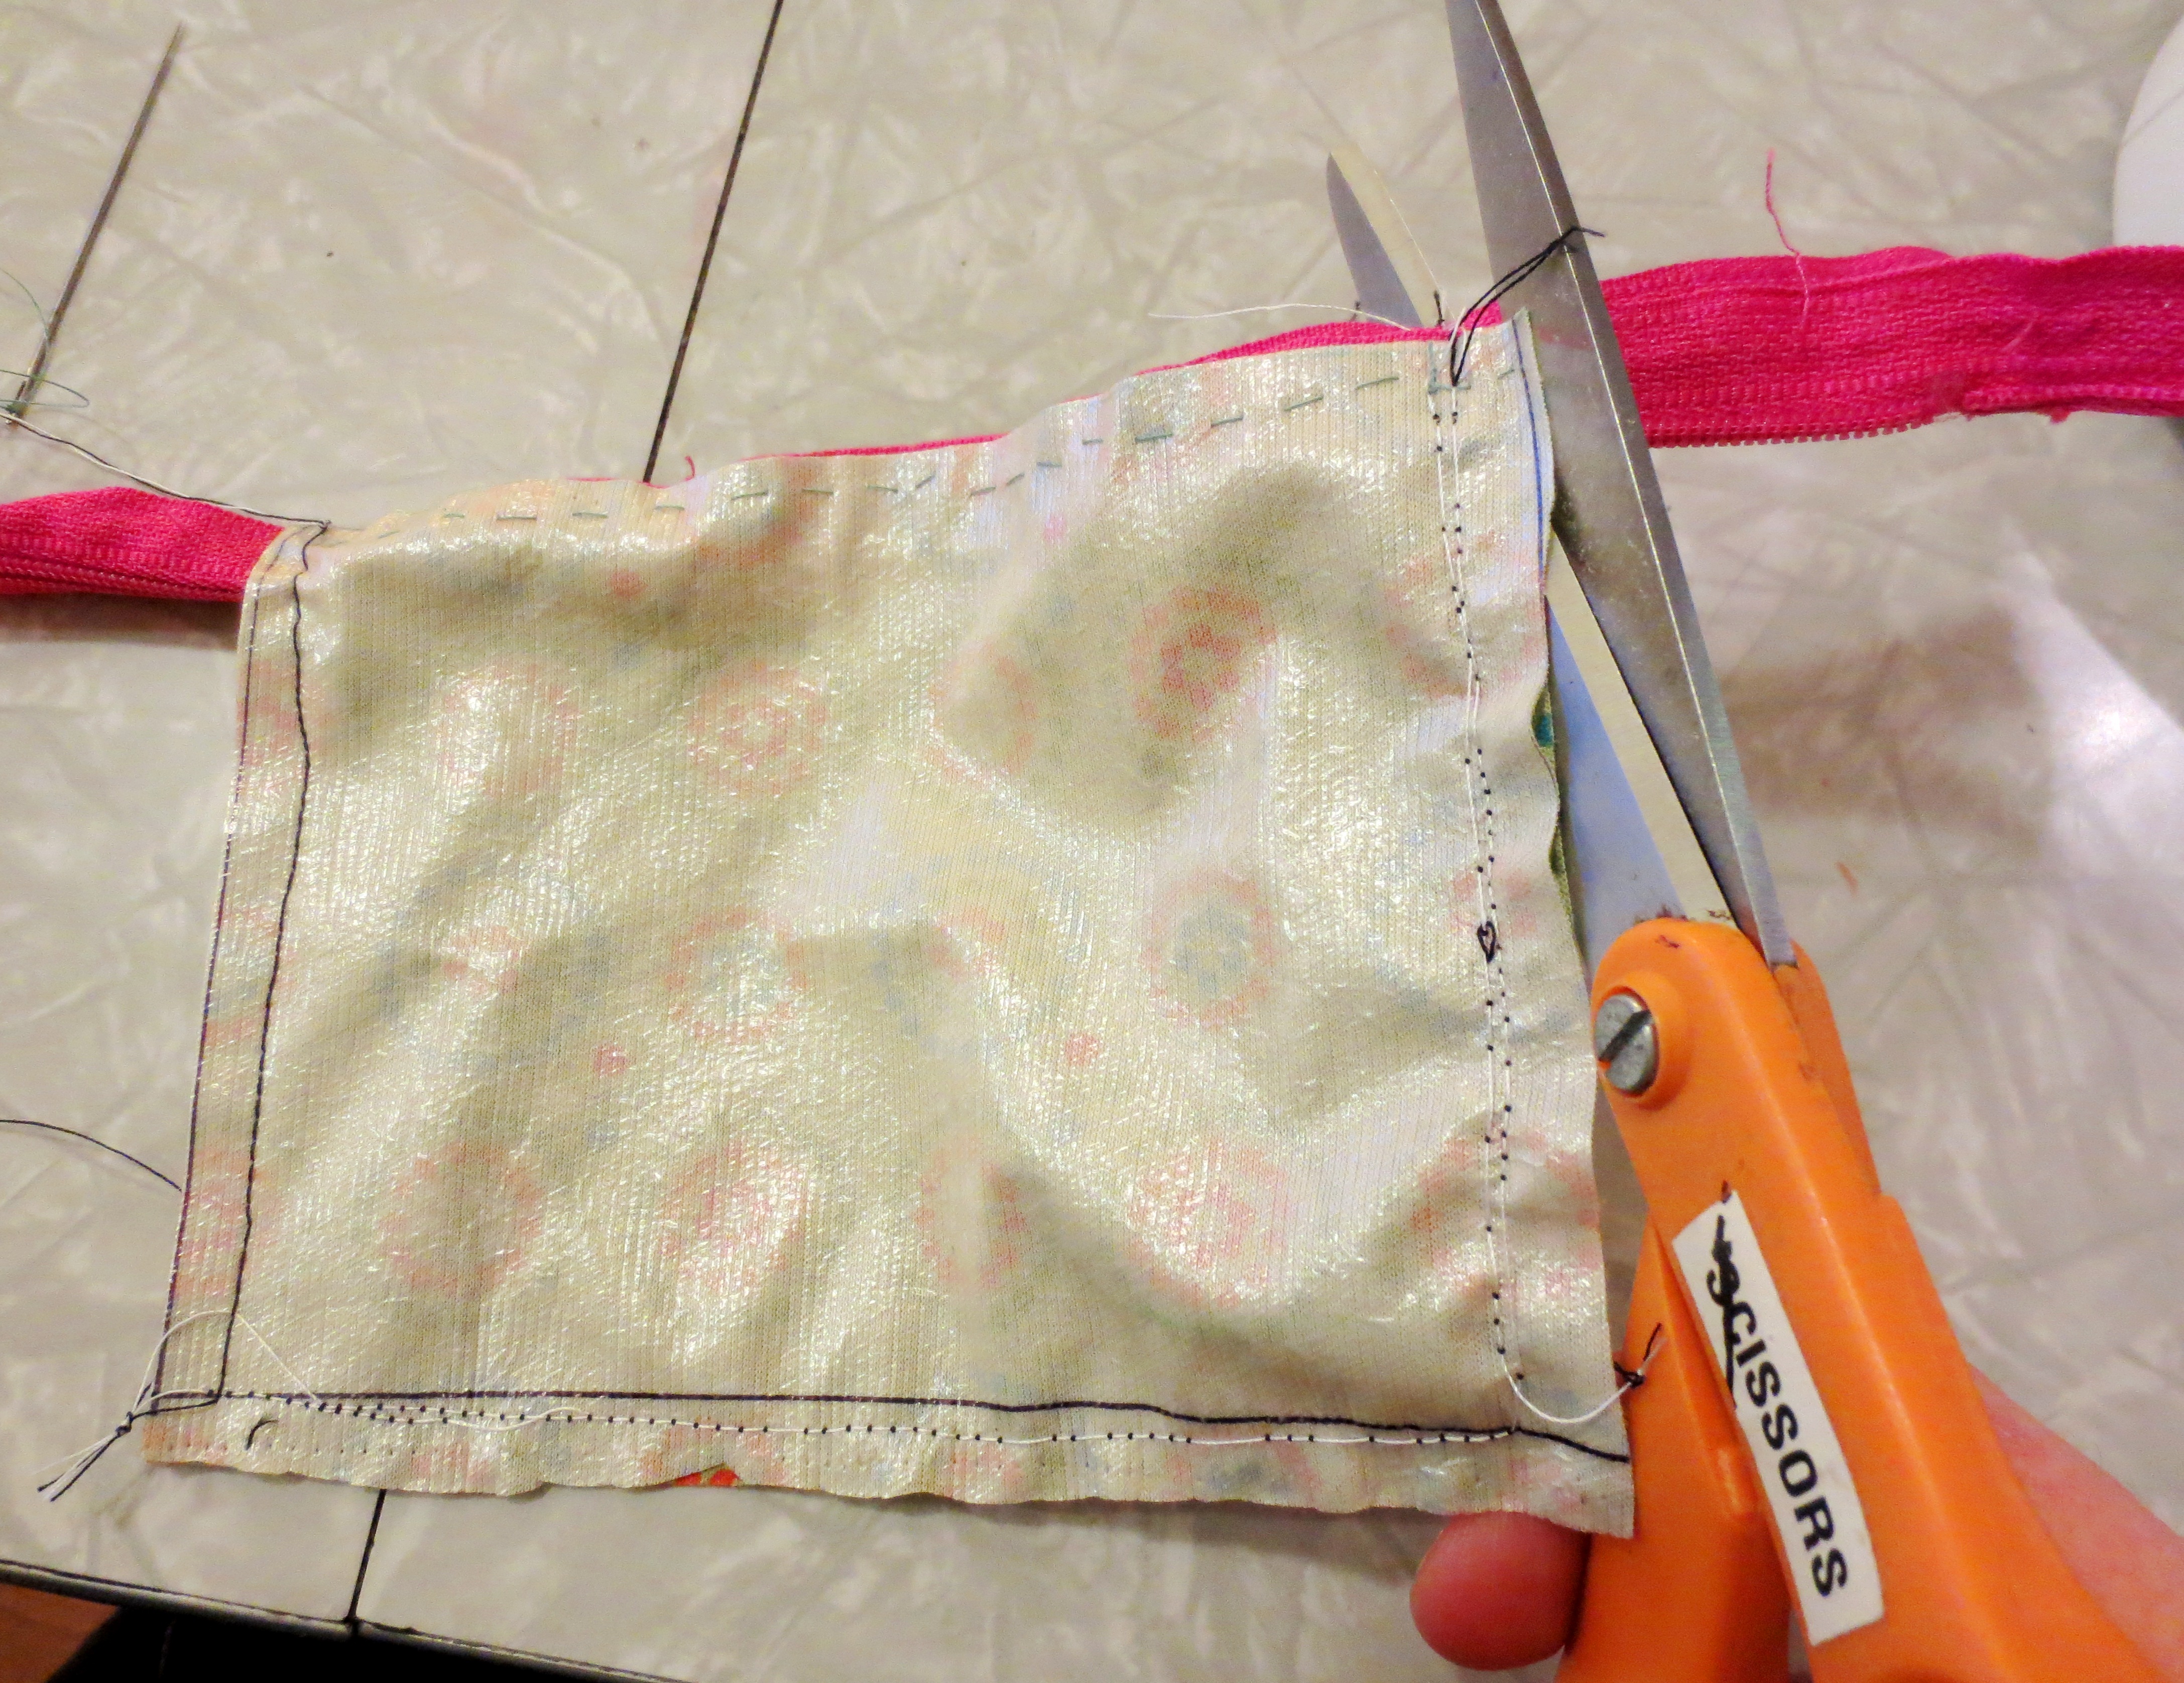
Now, get out your biggest, baddest scissors, and amputate the overhanging zipper, all the way to the wallet seams on both sides.

IMG_3747
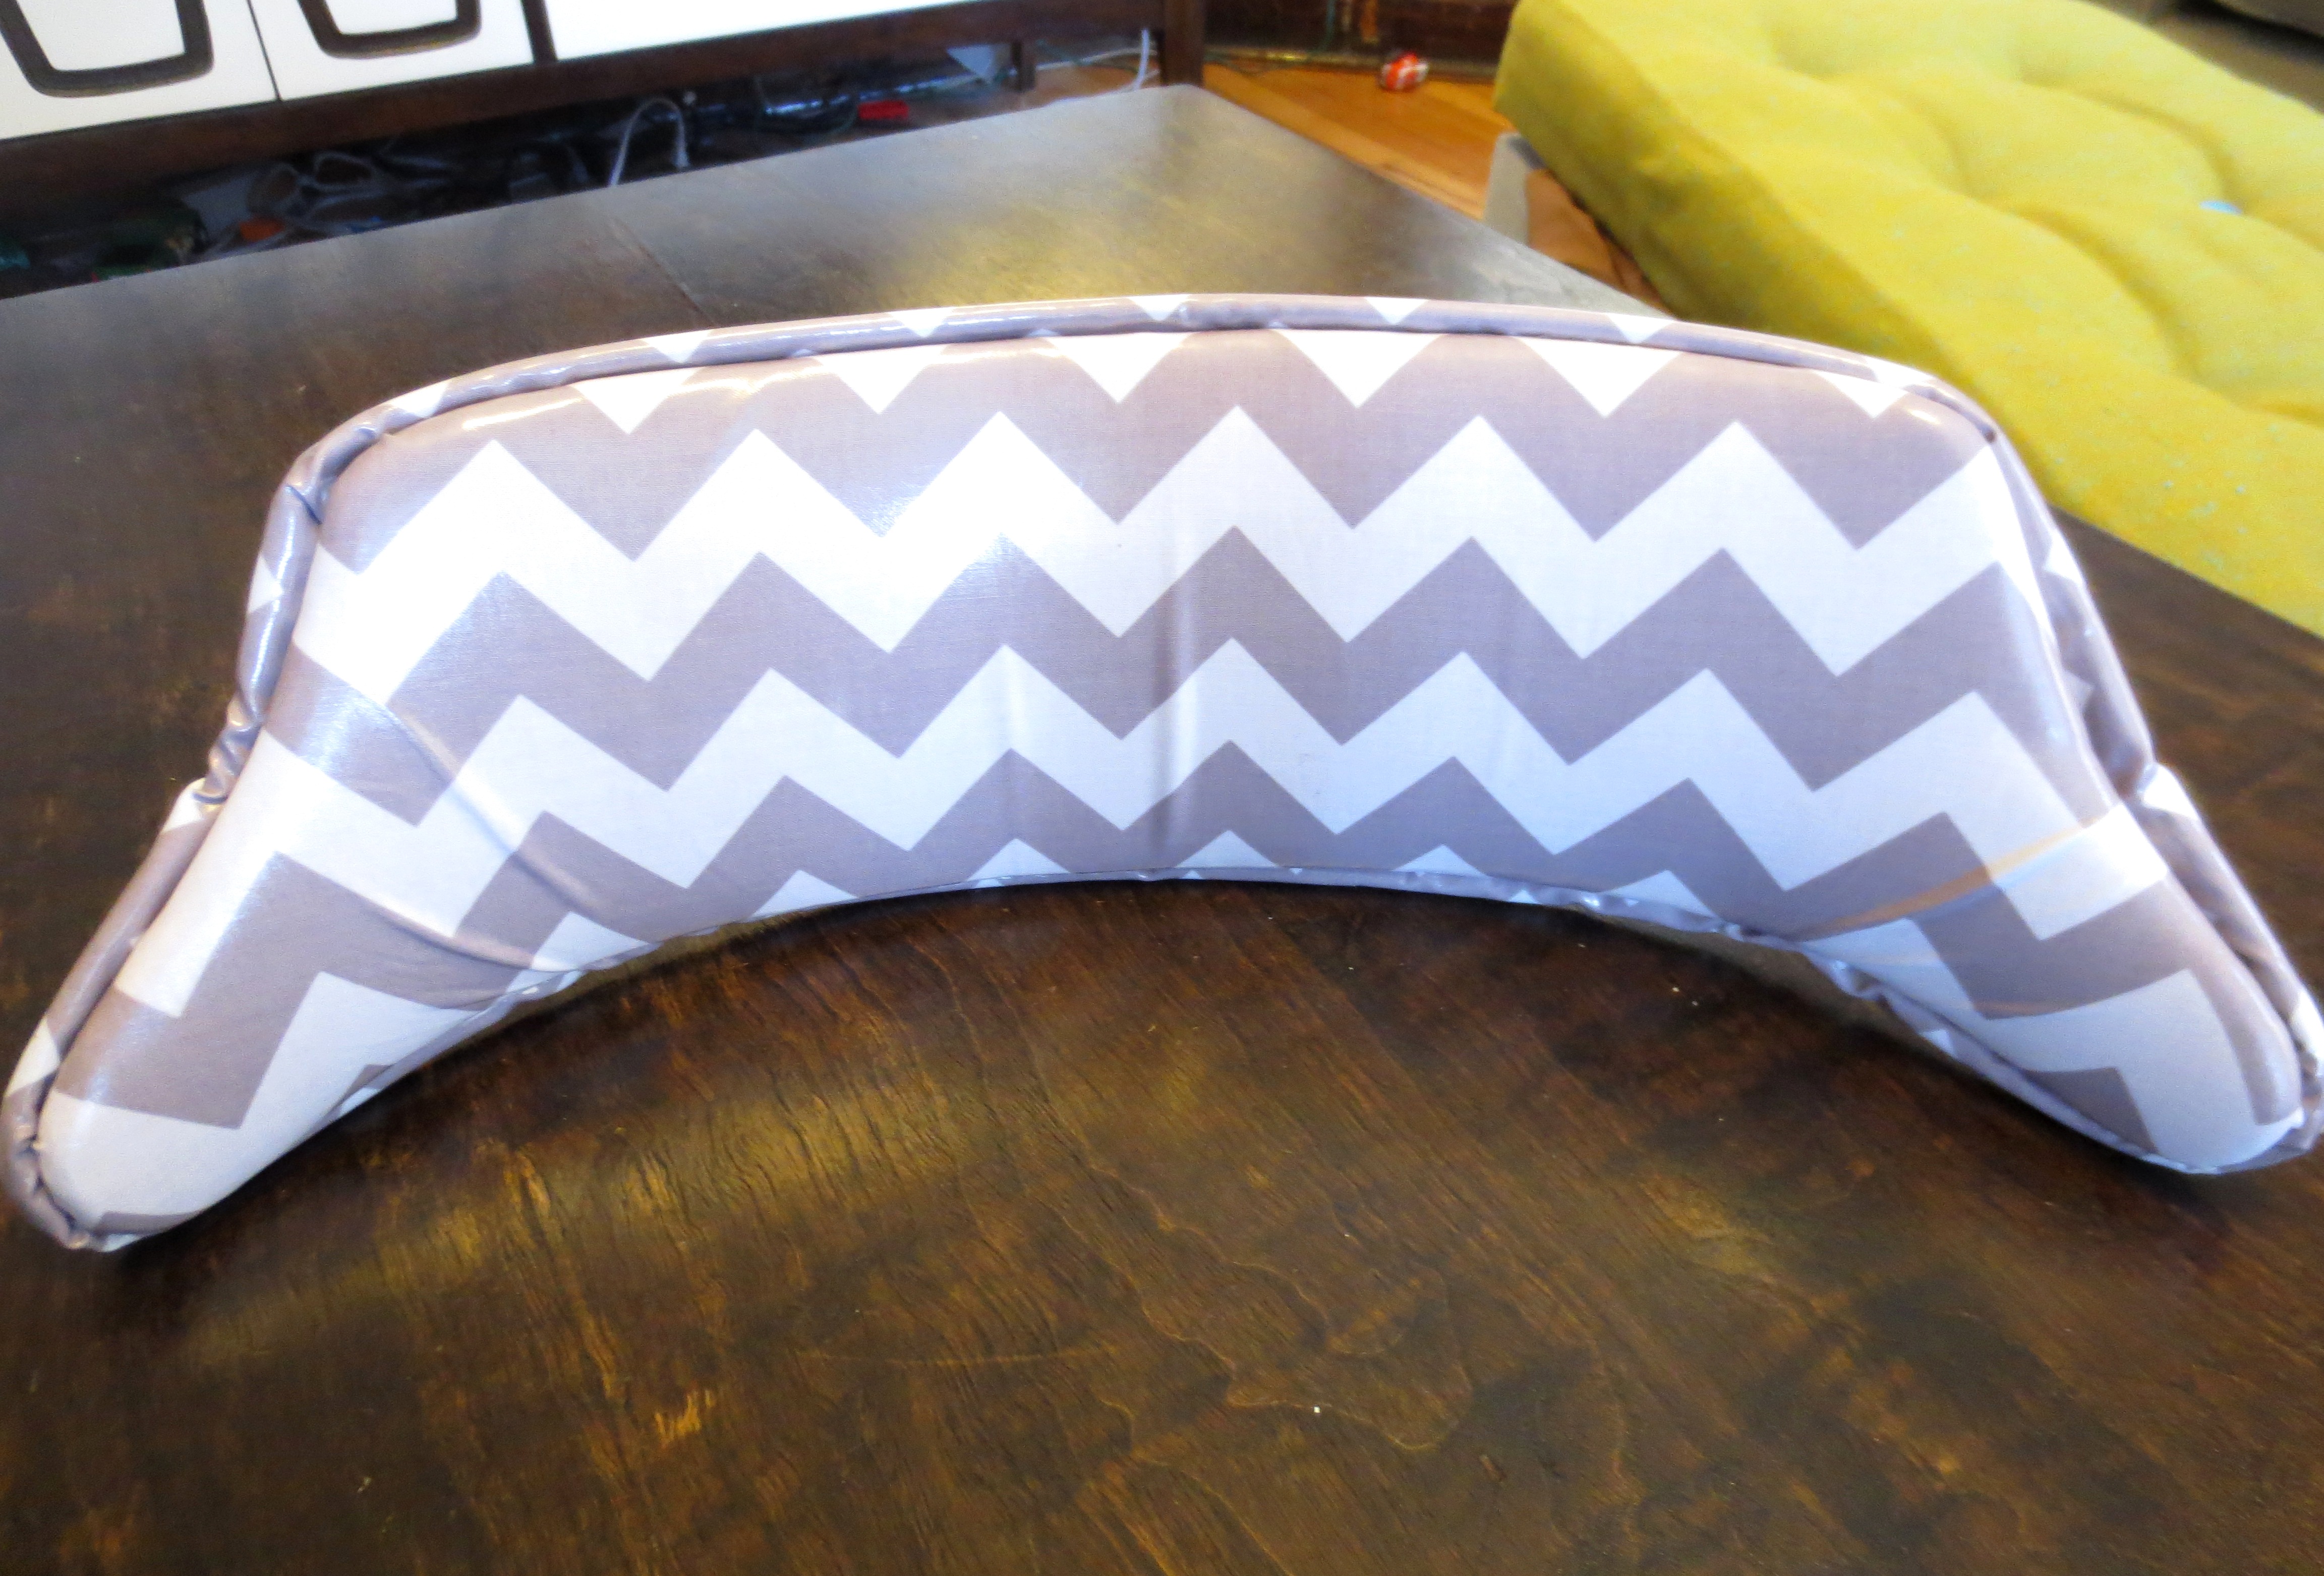
Finally, turn your wallet right-side-in through the open zipper. Yes, it really worked!IMG_3751IMG_3759
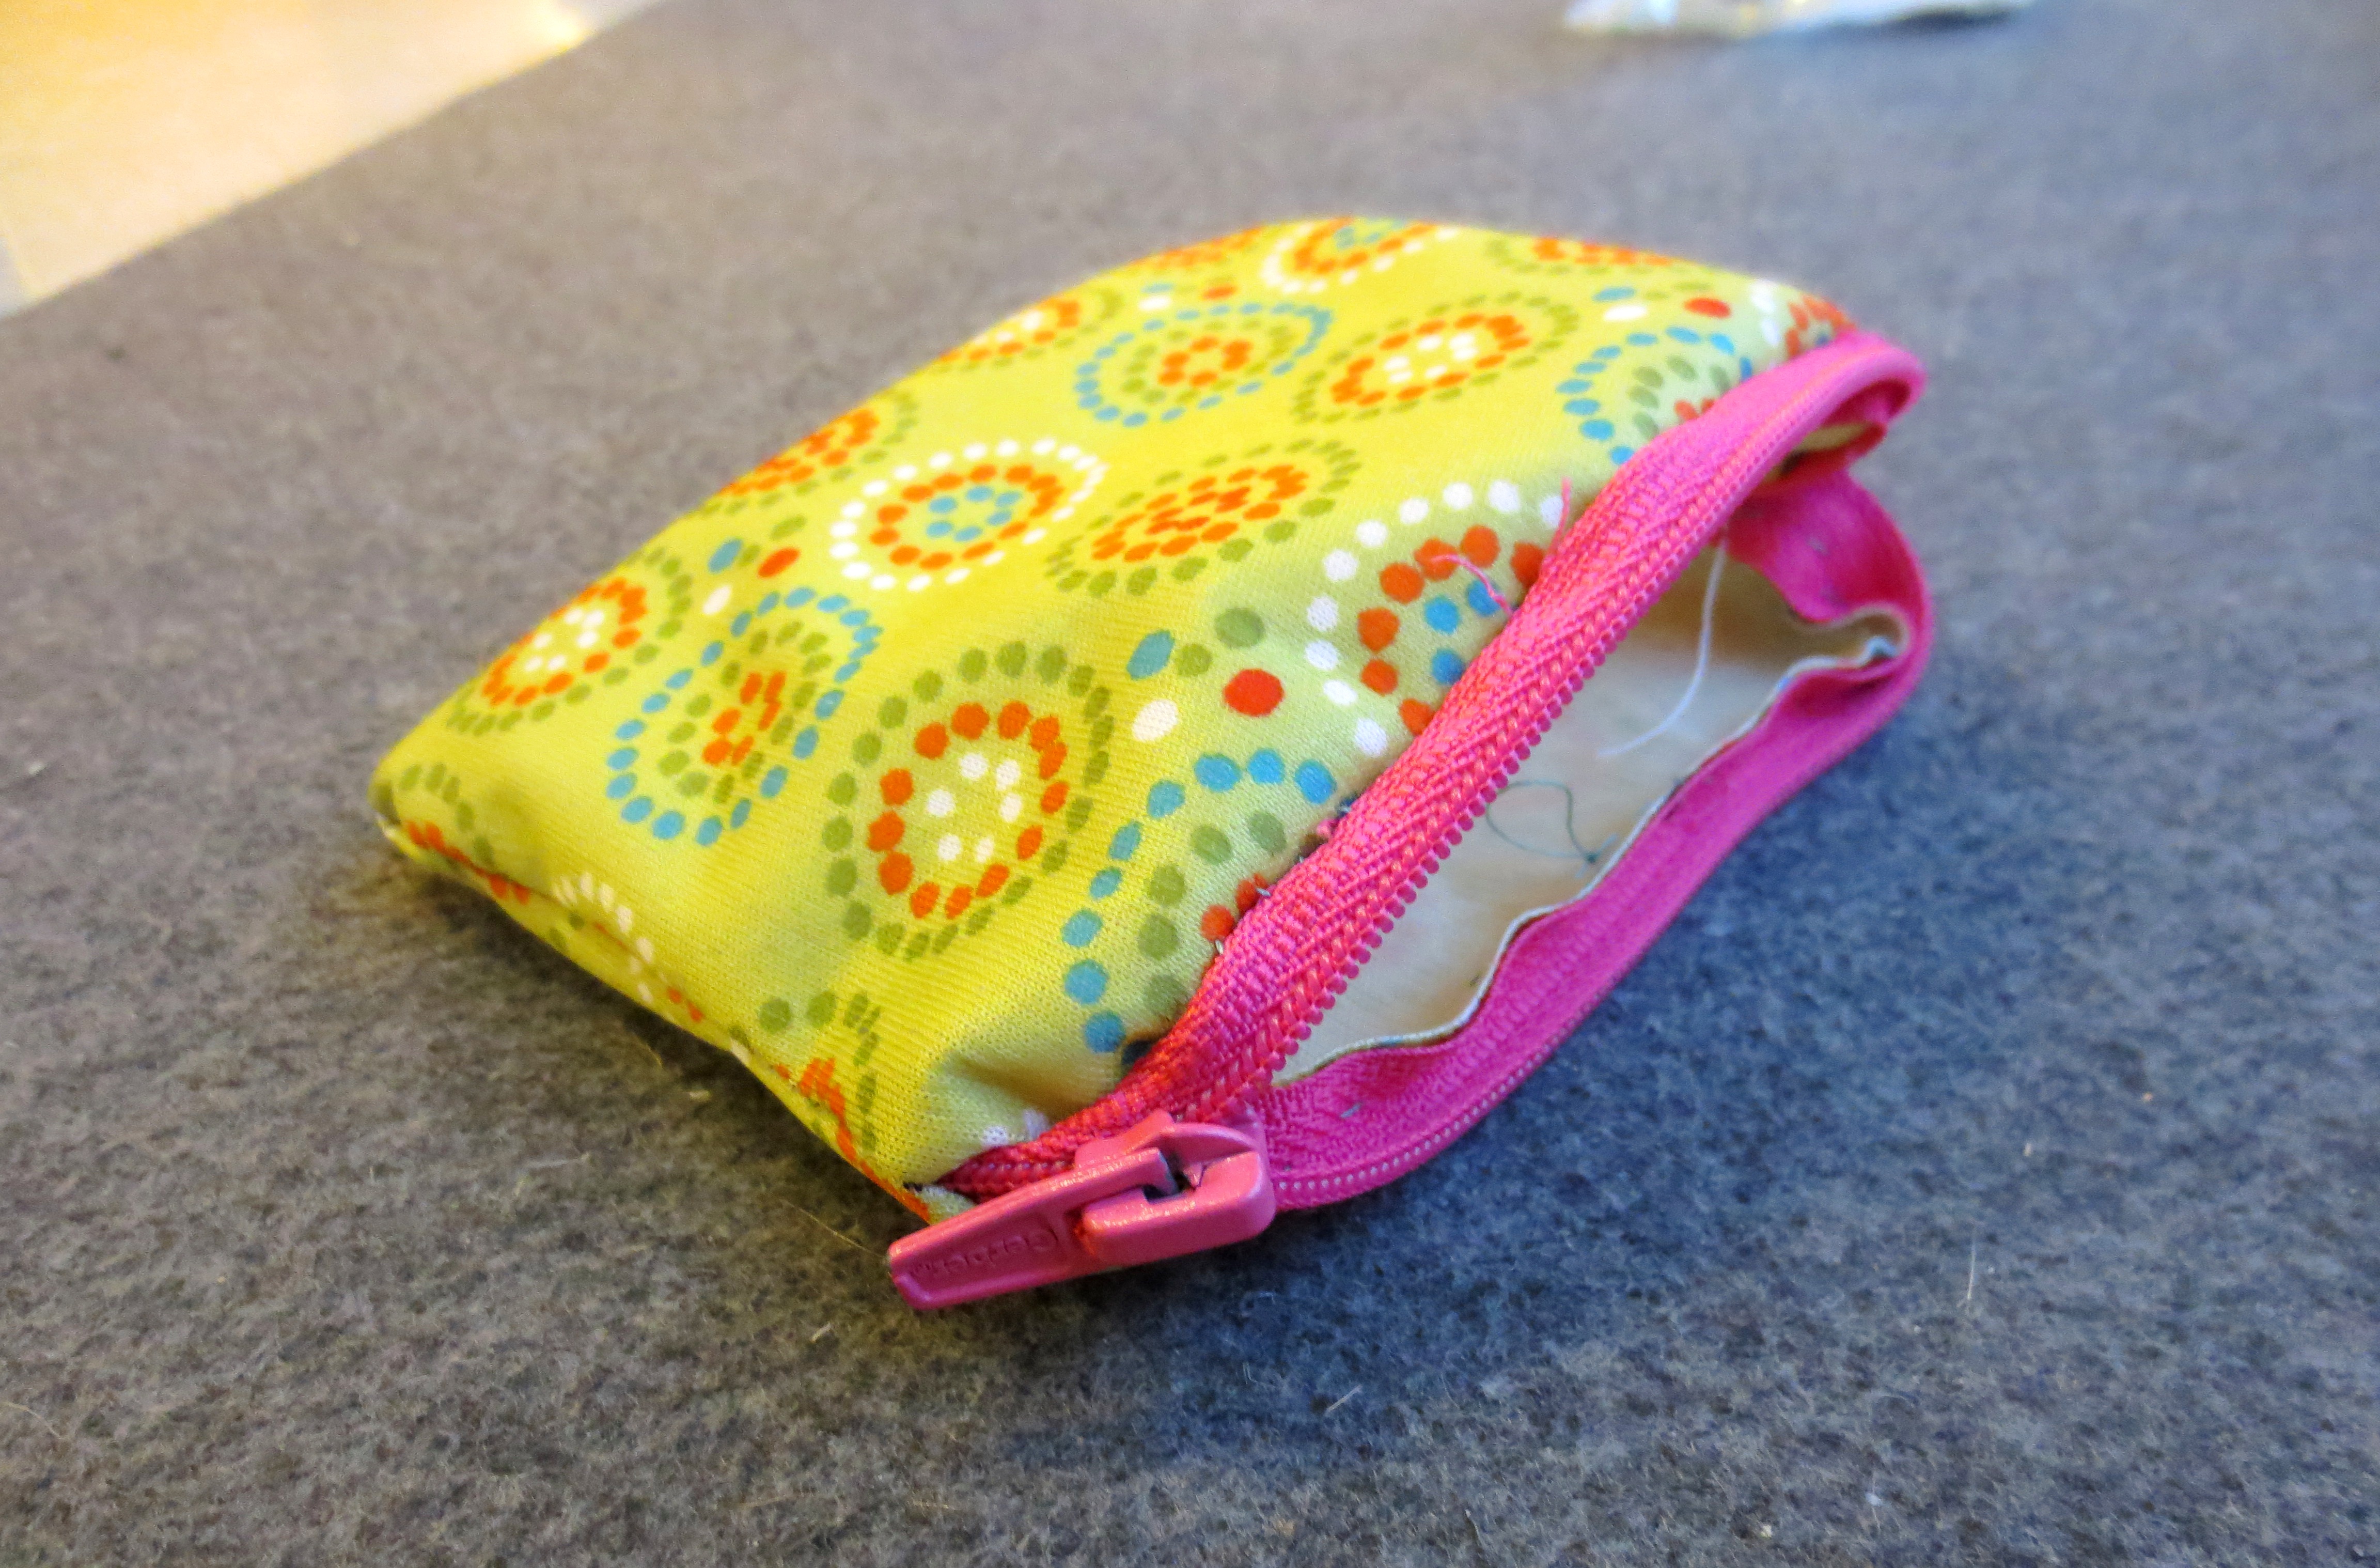
Per my agreement with the internet, I am contractually obligated to show you a before-and-after shot:

IMG_3755

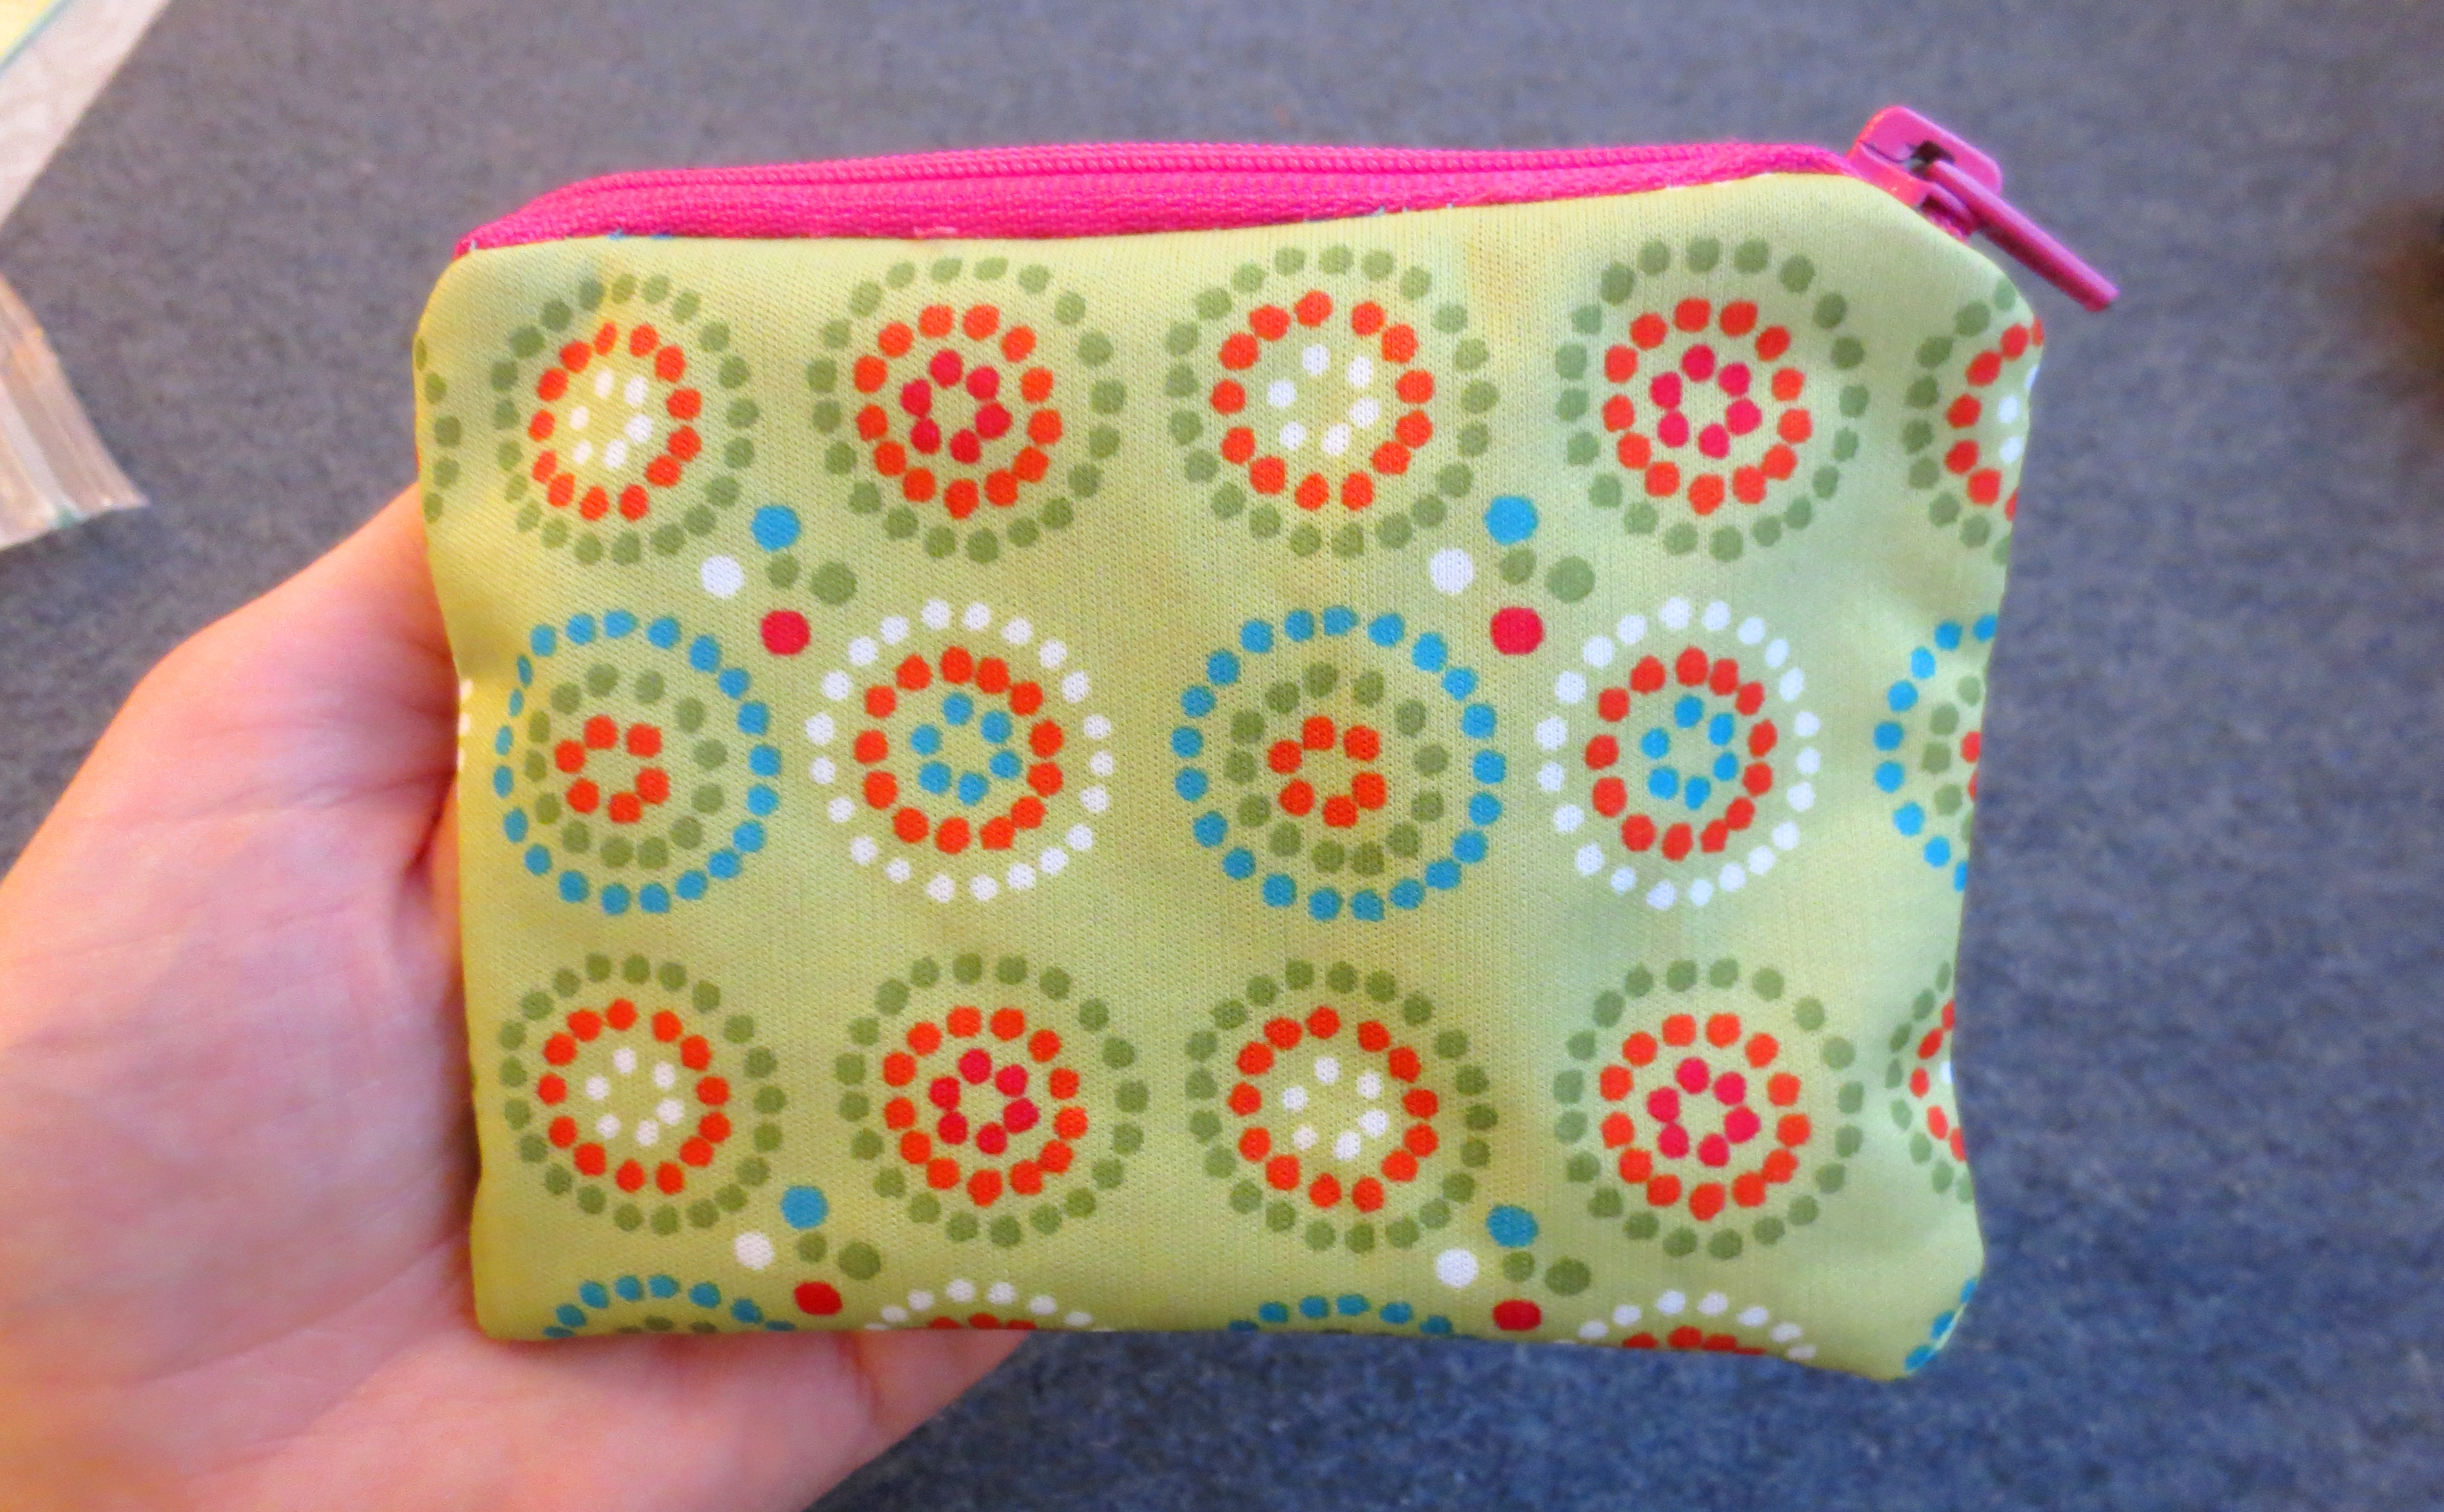
My wallet, before and after. You happy now?

Go on now – fill up that wallet with all the proof of your existence!

IMG_3757
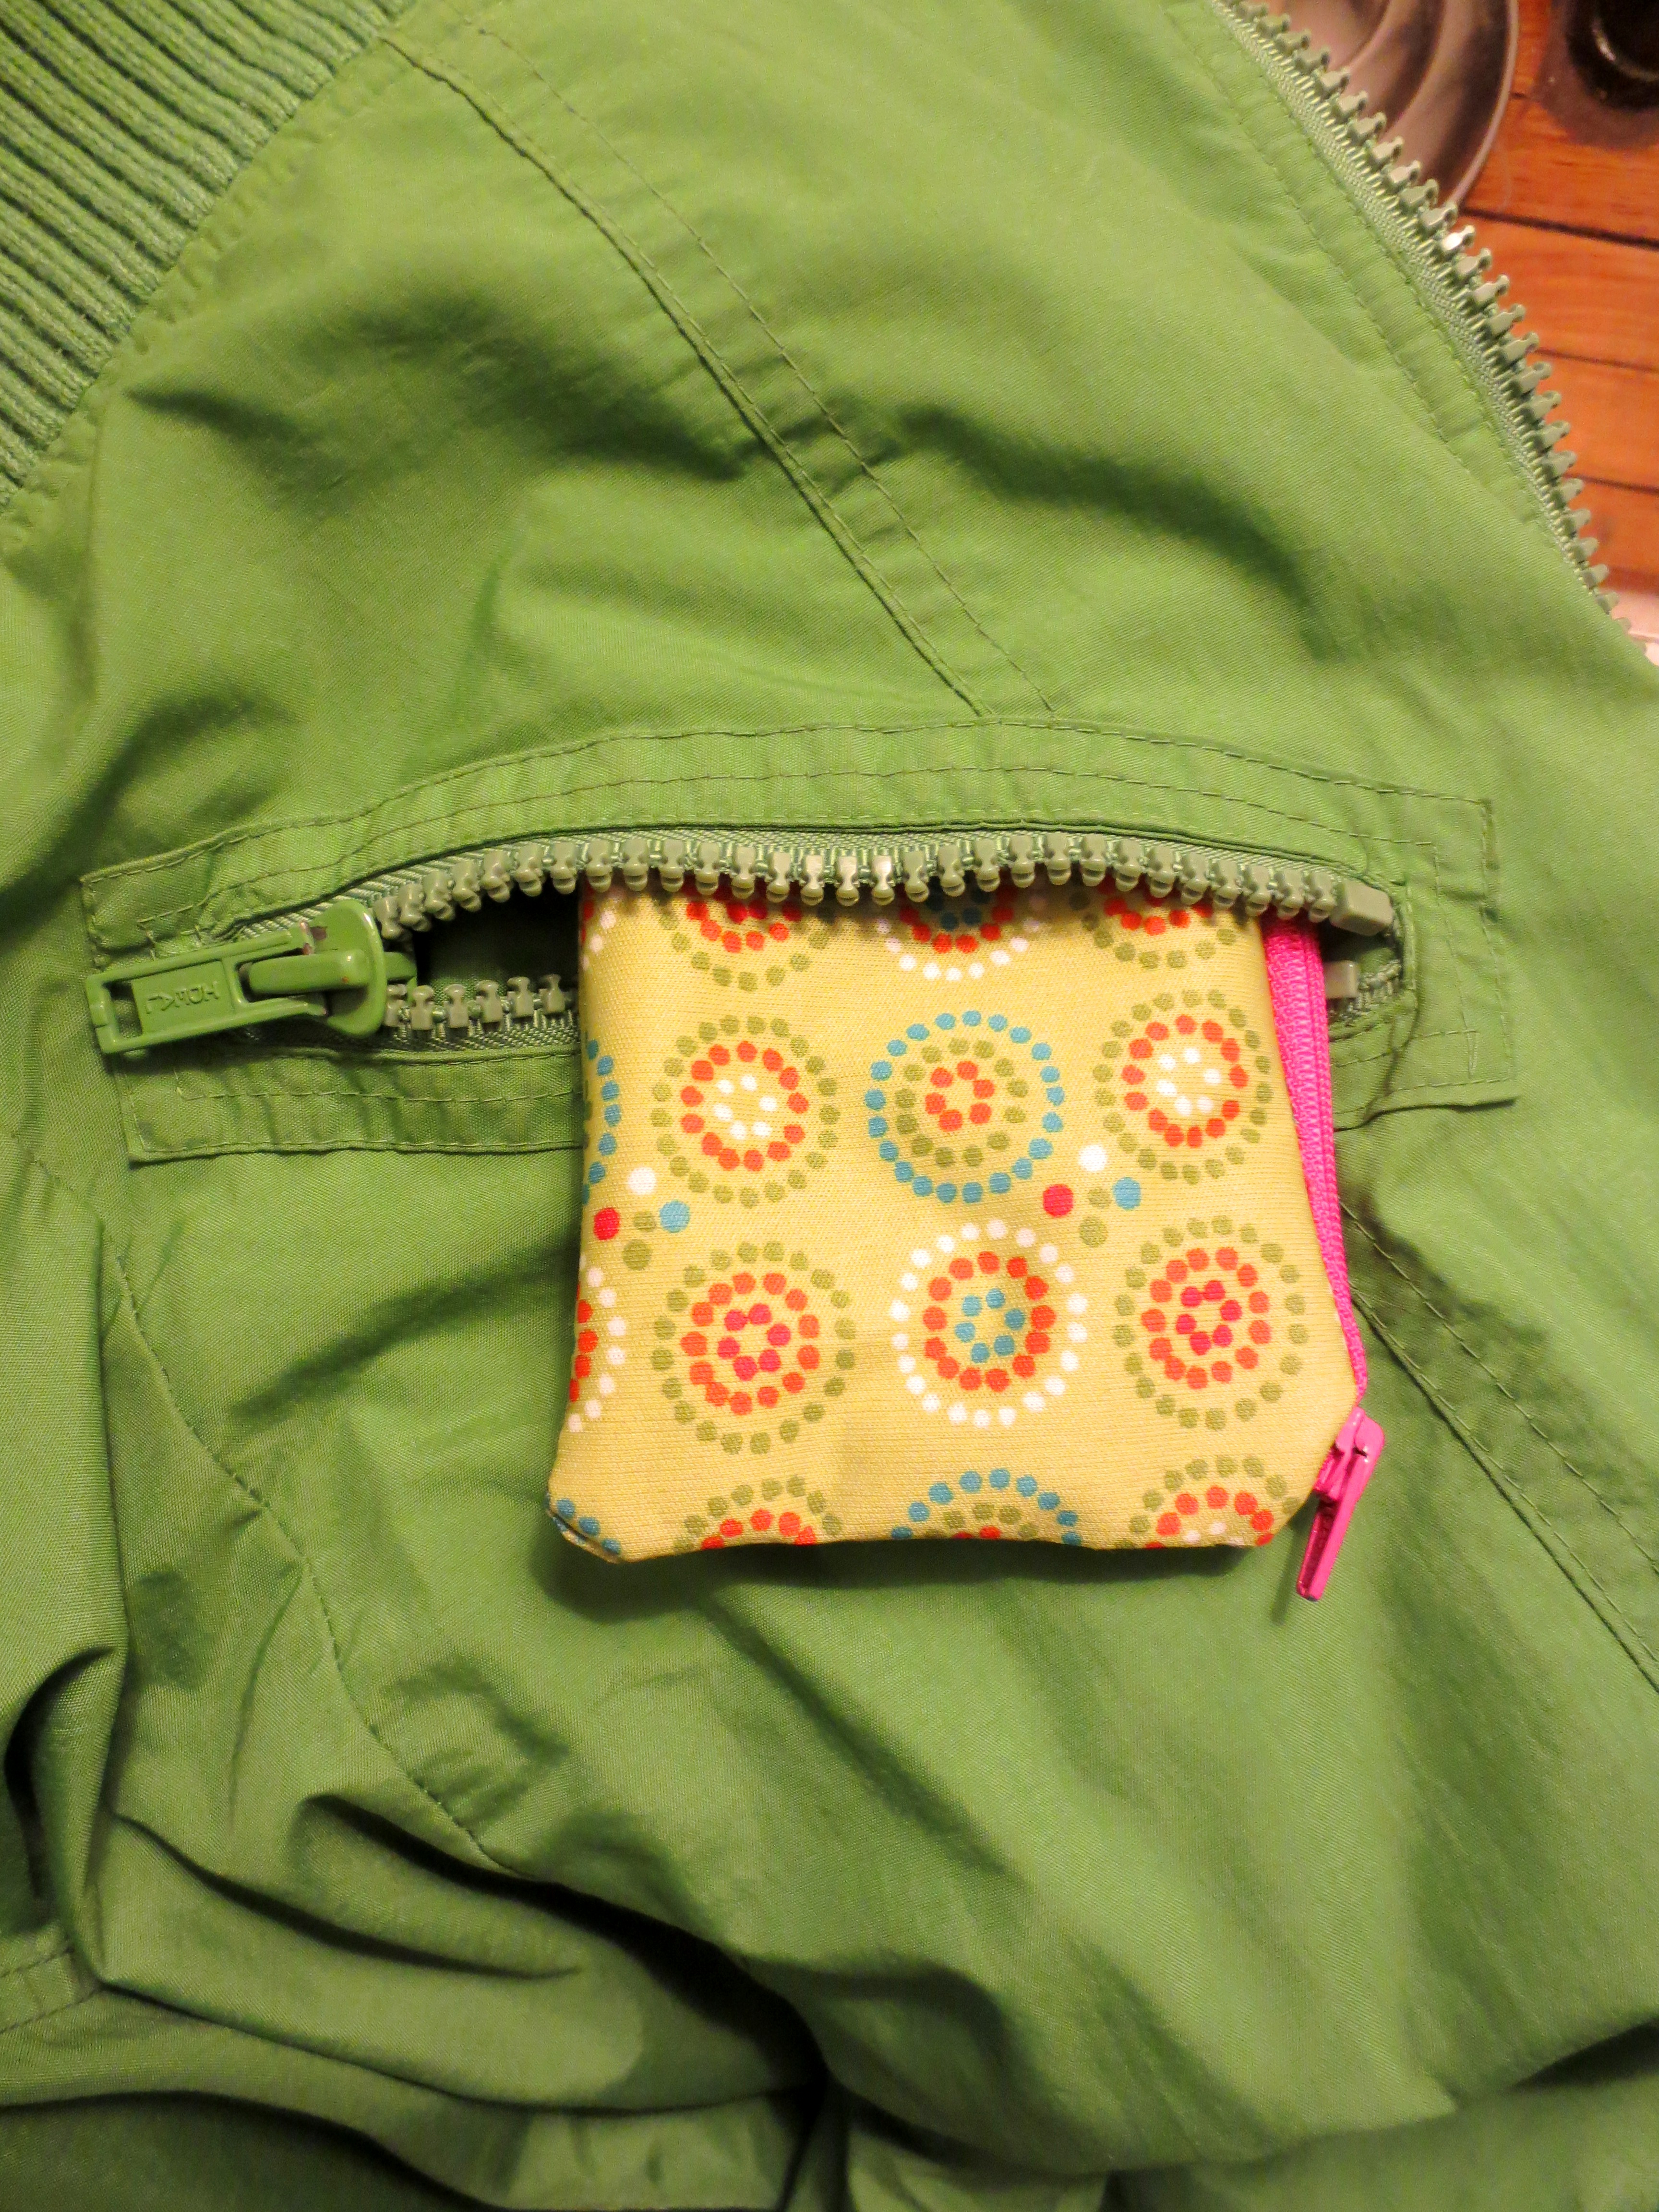
Slip it into your coat pocket and enjoy your new life of freedom!

IMG_3761* Its official title is Uterus Emeritus
**Aside from the pins and the Velcro™, diaper technology hasn’t changed much in last 200 years.

*** Who’s to say which side is “wrong” and which side is “right”? I’m no moral relativist, but in this case, the shiny white side is “wrong” and the colorful patterned side is “right.”

Make Your Own Election Night “Propagan-Dress” from Slimy Campaign Flyers

It’s Election Day here in Chicago. Well, it’s actually just the Primary, but Chicago has what political scientists might call a “one-party system.” Republicans? Ha, we never heard of ’em.

Me and most of my friends live in 39th House District of the Illinois General Assembly. Today we choose  between the (Democratic) incumbent, Toni Berrios, and her (Democratic) challenger, Will Guzzardi.

Toni Berrios is a child of one of the most powerful political families in Illinois. Her father is not only the Cook County Assessor, but the boss of the entire Cook County Democratic Party, affectionately called “the Machine.” If you’ve ever feared the day when machines become sentient and begin to reproduce, this is it.

Will Guzzardi, on the other hand, is a young, progressive community leader who lost his last challenge to Berrios by 125 votes.* Ouch. Since then, he’s built a happy army of grassroots supporters, who have knocked on over 60,000 doors in the district.

In response, the folks in the Berrios/Machine camp have covered the district in a diarrhea of negative campaign ads. Most of the flyers accuse Will Guzzardi of supporting sex offenders, based on out-of-context quote from his college newspaper.
IMG_3566Thank goodness for people like my friend Julie. Barely a day goes by when she’s not working to help elect progressive politicians, keep schools open and funded, and make our neighborhood a better place to live. Or, posing for pictures with her family in my bathroom:julieDuring a recent Sunday morning run, Julie joked that she had so many slimy campaign flyers from Toni Berrios, she could make a dress out of them and wear it to the Guzzardi victory party.  Since my guiding philosophy here at Projectophile is “make beautiful things out of dirty trash,” I felt obligated to bring this brilliant idea to life.  Also, I really wanted to go to the election night party. What better reason than to make a “PROPAGAN-DRESS” for my beautiful friend Julie.

HOW TO MAKE A “PROPAGAN-DRESS” OUT OF DIRTY CAMPAIGN FLYERS

STEP ONE – GATHER and SORT PROPAGANDA:  Since I’ve been tossing most of my political mail in the recycling, I sent a message to all my neighborhood friends to bring theirs to our bi-weekly “Playgroup Happy Hour.”** Before the night was over, I had a fat sack of propaganda – at least 100 flyers.

IMG_3553Now, it was time to curate the slime. First, we put aside all the fairly “vanilla” flyers: the ones that pictured Toni Berrios blankly staring at a table of senior citizens or couple of vigilant police officers.  Next, we cleared some space on the floor and instructed the children to play a fun game of “matching:”

IMG_3565PRO-TIP!!  Don’t just use your children as free labor. Now is a great time to discuss some serious topics, like the consequences of perpetuating the “stranger danger” myth, the effects of money on politics, and the representations of class and race in stereotypes about criminal sex offenders. But… you know… keep it fun. 

Next, see how many of each flyer you have, and if they are intact enough to be sewn into a dress.

IMG_3574STEP TWO – CONSTRUCT THE “SKIRT”: Luckily, Julie and I are about the same size, so I was able to use myself as the model.

To make the skirt, I wanted to hang rows of identical flyers off of a waistband. I needed the skirt to remain somewhat open and flowing, and not restrict Julie’s movement (there might be dancing!). First, I cut the waistband out of on old pair of silk long johns.

IMG_3558Since most of the campaign flyers were 10 inches wide, I figured that with some overlap, I could fit 4 rows of flyers around her waist.  While wearing the waistband, I had Scott (carefully!) slip 4 pins into it, one about every 8.5 inches. Then I sewed a large black button onto the waistband into each of the four spots we marked with pins:

IMG_3603

Yes, I can also see the crazy monster face in this picture.

To make the body of the “skirt,” I gathered up four of each flyer and punched holes in the corners with a hole punch.

IMG_3577Next, I grabbed about three feet of elastic cord to thread through the corner holes. You could also use yarn, but I wanted to keep as much movement as possible in the skirt (plus, I had a bunch of it leftover from Halloween). Start by pulling the cord from the front to the back of the top corner hole:
IMG_3583Then, pull it out through the bottom corner hole, then back through the top corner hole of the flyer below it, so the cord is only visible at the bottom and top of the flyers:

IMG_3584When you get to the bottom of the last flyer, tie the cord in a knot in back, and cut off any extra cord.  You can see here I slipped some masking tape over the cord end to help it slip through the holes easier.
IMG_3590Each “row” of flyers should now look like this. Repeat four times:

IMG_3591

If you stare at the picture long enough, the sex predator starts to move.

Finally, make a “handle” by tying the cord ends at the top together in a tight knot. When we finally get dressed for the party in Step Four, you’ll slip each handle over two of the buttons on the waistband.

STEP THREE – CONSTRUCT THE DRESS TOP:  For the top, we will first make  our “front” and “back” panels. Connect two pairs of flyers together using your cord or yarn:
IMG_3605Next, steal the ribbon from the handle of an old Christmas gift bag:
IMG_3607Punch holes in the top corners of each flyer set, and thread the ribbon through to connect the flyers, knotting it securely in back of each:

IMG_3617Finally, select one more pair of flyers for the “side panels.” Punch holes 1) in the corners of your side panels and 2) in the corners of the bottom flyer of the front and back panels. Tie them together with cord:
IMG_3620Your top should now look like this:
IMG_3639STEP FOUR – GET DRESSED FOR THE PARTY! I’ll confess, one of the biggest reasons I volunteered for the Will Guzzardi campaign is so I’ll have a reason to go to the election night party, perhaps to make up for being pregnant when Obama was elected in 2008.

To wear this dress, first pull on your fanciest black leggings and a tight or thin black shirt.  Either by yourself or, preferably, with the help of a friend, pull the Dress Top over your head. You can still make adjustments to the “shoulder ribbon” if necessary.

Next, pull on the waist with the buttons on it. Take your first row of flyers and hang its handle over two adjacent buttons.

IMG_3628Repeat with the other three rows of skirt flyers. Remember that each button will hold the handle of two flyer rows, so there will be a bit of overlap at the waist, but the skirt will remain open at the bottom for dancing or using the ladies’ room.

How did our Propagan-Dress do during the Victory Party?

Getting Julie dressed at home: IMG_3640IMG_3641Arriving at the Party. Free beer! What does that woman in blue think of the dress?

IMG_3645A couple hours later, post-Victory Speech, the dress is still intact! Our inhibition, not so much.

IMG_3652 Ladies and Gentlemen, the newest member of the Illinois General Assembly!

IMG_3655* To put it that number in perspective, there are at least 125 people living on my block.
** Playgroup Happy Hour = Every other Friday night, a bunch of families bring food and beer to someone’s house.  The parents drink and gab, the kids run around and play, everyone is happy.

Create Whimsical Wall Art out of Dirty Old Hubcaps

A few months ago, I took my parents on a tour of The Plant, a net-zero energy, urban vertical farm (including aquaponics!) and business incubator, started by our pal John. Driving back from the South Side, my father hit a pothole and heard one of his hubcaps pop off. He pulled over and ordered me to get out and find the missing cap.

ThePlantGreens

The Plant wants you to know that it is not responsible for any loss of hubcaps resulting from your visit.

So, I didn’t find his hubcap, but was surprised to discover at least a dozen others spread out across Ashland Avenue.  The more of them I saw, the more I noticed how beautiful they really were.  Each hubcap had a unique design. Some resembled grimy snowflakes, others dirty chrome daisies, blooming with bolts. But why were they all in this one spot? 

Turns out, I had just discovered my first HubCap Hotspot.™ These are places where lost hubcaps congregate, typically near expressway on/off ramps (Fullerton and 1-94), or long stretches of stop-free roads where citizens can drive recklessly (Sacramento in the middle of Humboldt Park).

hubcap map

Click on this Interactive Google Map to find a Hubcap Hotspot!

Now that the record-breaking snow of this winter is melting, you, too, are bound to see orphaned hubcaps loitering on every street corner. Why not turn them into something beautiful?

HOW TO MAKE QUIRKY WALL ART OUT OUT OF OLD HUBCAPS

STEP ONE – SCAVENGE:  Using my interactive HubCap Hotspot™ map as a starting point,* gather up as many lost hubcaps as you can carry. The scavenging step requires you to temporarily swallow any embarrassment you may have about picking up dirty things off the side of the road.  If you care about what your neighbors might think, scavenge in another neighborhood.  Or, wear a neon vest and carry a clipboard, because then it seems like you’re conducting Official Hupcap Business.

IMG_3482STEP TWO – CLEAN: First, give your children a bath:
IMG_3485Next, take your children out of the bath, but don’t drain the water. Drop your hubcaps in the Baby Broth, and then go to bed.
IMG_3490After a good overnight soak, get down and scrub those hubcaps, first with dishsoap on an (old) sponge, and then with a toothbrush for those hard-to-reach places. I recommend wearing an old swimsuit for this step, since washing hubcaps in your bathtub isn’t quite trashy enough:
IMG_3492PRO-TIP!! Only do this in your bathroom if you are a RENTER. This type of grime (and behavior) does not suit the dignity of property owners.

STEP THREE – PAINT:  When your hubcaps are clean and dry, take them out to the porch for two coats of white, high-gloss spray paint.

IMG_3498

IMG_3499 Look, I’ve been known to say “Everything is better with a coat of white paint.” But after I painted the hubcaps white, Scott declared, “Those just look like hubcaps that you painted white!” Which wasn’t really the look I was going for.

I needed a way to make their lines pop, to bring out their inner sunflower. I ran out and grabbed a small can of oil-based paint in Gloss Sunburst** Yellow. Using a small paintbrush, I colored in some the negative space, indentations, and other details (like the faux bolts). 

IMG_3503I think we were all a little surprised by how nicely these came out:

IMG_3509IMG_3510IMG_3511IMG_3512IMG_3513STEP FOUR – HANG:  My original plan was to hang the hubcaps above the bed, since we’ve got a lot of empty real estate up there, and the colors would really harmonize with the white+yellow chevron headboard.

But yesterday, I asked a visiting friend what he thought of hubcaps over the bed.  After a moment of reflection he shrugged and said, “I guess it depends on what you’re into… you know… in there.” That was enough for me. Hubcaps are going over the dresser, also part of my white-on-yellow theme.

I’ll be honest – I didn’t put much planning into the wall arrangement, other than for it to be somewhat whimsical (these are hubcaps, after all).  Using a regular picture hanging hook, I placed my favorite cap in the middle of the wall:

IMG_3516After that, I simply arranged the other four hubcaps around the first one:
IMG_3521Now, if you can ignore that pink (!) radiator, you’ll see that my bedroom dressing area is full of recycled light and whimsey!
IMG_3538IMG_3540 * Sorry, I already took the hubcaps on Fullerton. There’s still about a dozen along Sacramento, though.
  ** I don’t know what type of astronomical phenomenon a “Sunburst” is, but I bet it’s REALLY yellow.

Gentrify Your Neighborhood, One Abandoned Chair at a Time

I live in what you might call a “gentrifying” neighborhood. When I moved here 14 years ago, my hood had exactly half a coffee shop. And now we’ve got  least five, one of which installed metal plates over their outlets to keep creative/work-at-tome types like me from loitering all day on our outdated laptops. *

intelligentsia

Mean neighborhood coffee shop that won’t let me steal electricity or wi-fi, with name redacted.

Here’s yet another sign of gentrification: After the original owners died, the two-flat** next door is being gutted and flipped by developers.  Don’t worry Scooby-Doo, the house is not haunted.

Last week, while harvesting icicles in the alley (for the children to duel with, of course), I noticed an elegant piece of wood sticking out of the snow between two trash cans next door.  Since the contractors were gone for the day, I snuck back and dug out a beautiful mid-century wooden captain’s chair.

IMG_3301

View from my back window. Can you spot the orphaned chair?

I JUST HAD to rescue this chair from its snowy grave! But – even though it was clearly bound for the landfill – technically this chair was on private property, so I let it be. If only there was a version of Children and Family Services for neglected mid-century furniture!

That afternoon, I casually mentioned my ethical dilemma to Scott.  When he arrived home from work, he brought me a little present:

IMG_3306

Oh yeah… THAT’s why I married this guy.

This poor orphan was gorgeous and seriously solid, with neither a wiggle nor a creak in its joints. It was born just across the Hoosier curtain in Jasper, Indiana:

IMG_3310Maybe I’ve been watching too much “Sherlock,” but I’ve seen enough old chairs to know that this sticker included the words “Property of” and “Illinois.”  So my stolen chair was itself stolen from Illinois taxpayers. Sorry to confirm any stereotypes you may have had about Chicago.

IMG_3434Despite its solid bones, Orphan Chair was water-damaged and pockmarked from decades of abuse. Let’s take a closer look…

chair1WARNING: The following images may be difficult for our more sensitive readers…

IMG_3419IMG_3422Once I let the snow melt and the wood dry, it was time to get to work.  My goal was to give this chair a complete makeover without spending a dime. Here’s how I did it:

HOW TO GENTRIFY A STOLEN ABANDONED MID-CENTURY MODERN ARMCHAIR

STEP ONE – SEAT BACK CUSHION:  This chair’s vinyl cushion was mostly intact, but so permanently filthy that it can only be described as “Dirty Cow Tongue.”**

IMG_3356

See?  Cow Tongue.

Best just to re-cover it. Luckily, I had just enough white-and-grey chevron oilcloth from my IKEA bench recovering project to get the job done. First, unscrew the cushion from the back of the chair.

IMG_3357Due to decades of accumulated backsweat (and maybe some glue), I had to then pry the cushion off with a flathead screwdriver.

IMG_3362Take a moment to compare the exposed vinyl to the “virgin” vinyl in back, which could best be described as “nuclear bubble gum:”

IMG_3366 Now don’t freak out, but we’ll have to re-cover both the cushion and the PIPING. Remove the piping, which is nailed on to the back of the cushion. Go ahead and toss those little rusty nails on the floor, where you’ll never see them again.

IMG_3375Next, pull the cord out of the pink vinyl enclosure.  To make new piping, cut a piece of  fabric that is the length of the cord and 2 inches wide.

IMG_3383Wrap the new fabric around the cord like a taco, pin it in place and then sew it together. Put aside for a moment.

IMG_3388Next, cut a piece of the same fabric in the shape of the cushion, plus about an 2 inches extra.

IMG_3393Starting in the center and moving out towards the ends, staple the fabric VERY TIGHTLY to the back of the cushion. Since this cushion has a curve in the middle, it was tricky to staple it on without unsightly bunching.  Just keeping pulling tighter and stapling harder, making sure to throw in some swear words for your effort.

IMG_3395

IMG_3400Center your piping over the top of the cushion.

IMG_3405Starting at the top center, staple the piping to the back of the cushion over your new fabric. Position it so that the piping perfectly frames the sides of the cushion.

IMG_3411Since position is so important in this step, I found it helpful to tape the piping in place as I stapled it down.

IMG_3414When your piping gets to the bottom center of the cushion, simply insert one end of the cord into the “taco shell” of the the other end and staple shut, so that no cord is exposed.  This concept is pretty much impossible to explain in photos:

IMG_3416_arrowSee, that wasn’t so bad!

IMG_3417STEP TWO – REFINISH THE WOOD:  We’ll have to sand down this whole chair for two reasons: 1) to even out the scars in the wood and, 2) to remove the original shiny finish so that our new stain will “take.” This requires the use of a power sander.

PRO-TIP!!  This winter has been particularly brutal for crafty types without basements or garages. But don’t let that stop you from sanding, drilling and  painting all season long!  Simply find a room near the back of your house, preferably with plenty of windows (in my case the dining room). Use two pants hangers to drape an old sheet over the door to keep the fumes/dust/poisonous gases from reaching the lungs of delicate family members. SAFETY FIRST!

IMG_3427Now, go ahead and sand the @#$%* out of that chair. Seriously, go to town on that thing, starting with 80-grit paper and finishing it with 150. Remember, the higher the grit number, the finer the sanding.

IMG_3429

IMG_3430

Sanding the @#$ out of your chair: Before and After

Wipe off the dust with a damp rag and let dry. Next, grab a can of wood stain and finish. I happened to have this can of Dark Walnut, which I also used to refinish a coffee table, my standing desk, and our Credenza/TV stand. If I wasn’t such a cheap-ass, I would have picked a lighter stain, but hey, it was already there, and I really wanted to spend zero dollars on this project.

IMG_3435Following the directions on the can, use an old rag (I used baby sweatpants!) to apply a sloppy coat of stain to the raw wood. Make sure to wipe the excess stain within 5-10 minutes, or else it will dry into a sticky, tar-like mess. You can always apply a second coat if it doesn’t seem dark or even enough at first.

IMG_3438

IMG_3440Wait 24 hours, get some fresh air, and apply the Polyurethane varnish in three VERY THIN coats, with about two hours dry time between each coat. The varnish will go on in a disturbing milky blueish white, but will dry clear and shiny!

IMG_3449When all your chemicals have dried, screw the cushion into the back of the chair, and take the whole thing into your bathroom to take pictures!

IMG_3464IMG_3462IMG_3463Pretty soon, I’ll have enough old chairs to open a coffee shop of my OWN!

* Don’t worry, there are still at least two coffee shops left in the neighborhood with musty furniture and disturbing artwork.
**Two-flat is a Chicago term for a building with two apartments.  Except that nobody calls their apartment a “flat;” that just sounds snooty.
*** As a certified City Girl, this is only an approximation of what I believe a dirty cow tongue to look like.

Valentine’s Special: Construct Poetry from the Last Sentences of Books & Magazine Articles

Anyone who has ever written anything – from a third-grade book report to a nonlinear postmodern novel – knows that the hardest sentence to write is the LAST.  In fact, experts estimate that up to 34% of all writing frustration is devoted to that pesky final line.  The closing words must match the tone, tie up plot (or rhetorical) points, and make a sweeping gesture towards some kind of greater meaning.

IMG_3321

I bet it took the author about 1.7 hours to come up with that closer. Pretty deep!

As Valentine’s Day approaches, you may be wondering how you can impress that Special Someone with meaningful words of your own. However, there is so much lovely raw emotion concentrated in the closing sentences of books and magazines – why waste your own energy when you can just harvest the words of others?

I’ve always loved poetry, but can’t claim that I’m any good at writing it. Nevertheless, in college I took THREE poetry classes, partly because I loved poetry, and partly because I had a crush on a certain Poetry Major, whose name I already forgot. *

In honor of Valentines’, I decided to construct a collection of lightly plagiarized poems – poems constructed entirely from the final sentences of my favorite books and magazines.  The results were heartbreakingly beautiful, and that is only a slight exaggeration.

Perhaps you’re in the Roses Are Red, Violets Are Blue camp, and need your Valentine’s poetry to be structured, straightforward, and syrupy sweet. This is not the poetry for you.

But if you’re ready for an adventure in verse, I’ll show you how to make your own Last Sentence Poetry, and provide examples that you can use on your very own Sweetheart.

STEP ONE – TRANSCRIBE:  Let’s start with magazines. Organize yours by title (we subscribe to National Geographic and the New Yorker).

IMG_3318Locate the last sentence in every long-form article, skipping the short stuff like restaurant and book reviews.  If you like the old-fashioned charm of a ransom note, cut out the last line with a scissors. Since I pass my New Yorkers on to my mother (who then passes them on to my aunt, and then to my cousin’s wife), I didn’t want to mangle them up.

Type out all the last lines in a word processing document in the order that you find them.

IMG_3332STEP TWO – ARRANGE: If your sweetheart prefers a Postmodern Nonlinear Narrative, leave the lines in the order you found them.  However, I recommend playing around with their order so they make some kind of sense, at least by poetry standards.  Also, I find arranging the sentences to be relaxing, like constructing a puzzle or doing the first part of my taxes.

STEP THREE – FORMAT:  Now this is where my 9 credit hours of college poetry comes in. When you’ve arranged your sentences in a pleasing narrative, increase the right margin to about four inches. Poetry should look like a shopping list of sentiment; the eyes should flow downward like a waterfall of emotion, giving your Sweetheart space to savor each line.  And don’t neglect those line breaks! Think of where you want your sweetheart’s inner voice to pause and… linger.

STEP FOUR – PRINT AND CREATE:  Now that you’ve created your poetry, you could just email it to your sweetheart, or post it on his Facebook page to draw extra attention to yourself. But since you really love him, you want to create a memento for the ages.  Print your formatted poem(s) out on colorful paper.  Note how the poems never take up more than half the width of the page.

IMG_3334Cut a poem out and glue it to a piece of colored construction paper you swiped from your kids’ art supplies.  I like pink-on-orange, cause it matches my blog.

IMG_3341To make your romantic intentions clear, fold the paper in half and glue a heart on the front of the card.

IMG_3346IMG_3349FREE DOWNLOADABLE “LAST-LINE” POETRY (MAGAZINES):

Vision isn’t in the eyes, it’s in the mind.
Can the modern world sustain beauty it hasn’t created itself?
This land is not so foreign; it’s a beautiful place to go for a drive.

If you give gravity enough time,
it will do stuff like this.

If I ever felt the skeletons did not want me there,
I would leave. This time I did.

But for now at least, in the steamy aftermath of another bountiful wet season,
the kings seem secure on their throne.

Just so we know whom to thank.
At least this bird had a chance to die free.
— (National Geographic, July 2013)


Put your passions to a more productive use.
We’re just humans running this company.
He says he’ll think twice before doing it again.
But so is the havoc.

She sat on the train, head bent, her phone in her hands as though it were
an illuminated manuscript.
It went against all good sense and a raft of statistics, but he couldn’t help it.
He was afraid of flying.
There were bystanders, and they would get the message, too.

Why try to win a game that makes you miserable?
It felt as though we were ready to begin again,
in the present tense.
It was like patience on a monument, smiling at grief.
It was determined to be driftwood.

It is both immensely joyous and immensely sad, because, like first love, it can never be repeated.
Whether you swallow her act may simply depend on your taste for tiger blood.
— (New Yorker, November 25)


You don’t know what love is.
The lesson is being learned.
“There are pictures in my head,” he said. “And they gotta come out.”
He would file a report with his superior
in the provincial capital.
“Don’t let me win,” he demanded. “Don’t you dare let me win.”

The wish for simplicity may be the most destructive thing in the world.

At some point, though I don’t know when, people will look back and wonder what all the fuss was about.
There will be no empty seats.
Would it still be the Hot Tamale capital of the world?
— (New Yorker, January 6)


He leaned forward, his elbow resting on his knee and his chin resting on his knee
and his chin resting in his palm, his eyes shining as if he bore
all the sorrows of the world.

I looked at him through the railings and wondered what to do.
There’s a will, but there’s not a way. He represents a way.
If it does start to crumble, they’re the people who actually go with the hard hats and fix it.

History is the shadow cast by the dead. So long as there’s light,
the shadow will fall.
How did the music trick the body into thinking
it had a soul?

That said, I also believe in lying.
— (New Yorker, January 20)


There is a stranger by every lake.
The boat turned back before the city came into view.
“How do you feel?” he asked me. I felt tough.

A new kind of cognition, inflected by passion, that allows strangers to think out loud, solving mysteries together.
As this man has bravely and admirably done.
He has leaped between worlds, and changed them.

Not Probably. It’s definitely a good thing.

A tale of marginalization amid the forces of aggression, idolatry, and disenfranchisement.
It brings back the spirit, but doesn’t sound like any one thing.
— (New Yorker, January 27)


She did not stop swimming until her time was up.
The ocean – it turns out it’s pretty impersonal. It doesn’t care.

We’ve been doing stuff together most of our lives.
I’m sure there will be more to do.

The minister shut his mouth and followed.
The silence spoke; and the world comprehendeth it not.
One of the most dangerous things you can do
is believe.

All we can hope for, time after time,
is that somebody lives to tell the tale.
— (New Yorker, February 10)


We’re the keepers of the planet’s knowledge.
We meet their gaze and connect across
the distance of place and culture.
Amid all the laughing and pointing and waving, to have with them in their crowded quarters two small needy bodies still close enough to embrace.

Thirty-six hours later we made it to the other side, a distance of less than a mile.
If we hustle, we can get another climb in before dark.

He takes off like a shot into the woods, flinging dirt and rocks with madly scraping claws – the no-nonsense retreat of a real-life dragon.
He stands firm. He returns his face to a frown.
Long may he run.
— (National Geographic, July 2013)

BOOKS:
If you’re not the magazine sort, just pull 20 novels off your shelf, and repeat STEPS ONE thru FOUR above. Here’s what I came up with. Book credits follow the poem:

IMG_3326

Unedited peek of what’s on my nightstand.

She was seventy five and was going to make some changes in life.

“I will walk without noise, and I will open the door in darkness, and I will…”
But now I must sleep.
Fear made her quickly lower her eyes. The city was still there.

The old man was dreaming about the lions.
“Forever,” he said.
Taking the pigtail in one of his paws, he pressed it to his wet mustache.

His soul swooned slowly as he heard the snow falling faintly
through the universe and faintly falling, like the descent of their last end,
upon all the living and the dead.
Poor, frail universe, born of nothing, all we are and do resembles you?
She called in her soul to come and see.

I had no idea where to go; I kept running.
For the ones I left behind, for the ones I cannot out.

He heard the ring of steel against steel as a far door clanged shut.
We would have been safe.

And it may be that love sometimes occurs without pain or misery.
If only I’d known. The beauty! The beauty!
“It’s sweet,” they chime.  “Swee-eet!”
Isn’t this a great country altogether?

I just wanted to make sure I had the last word; I think I’ve earned that.

—The Corrections; Everything is Illuminated; Atonement; Blindness; The Old Man and the Sea; Love in the time of Cholera; Confederacy of Dunces; Dubliners; Numbers in the Dark & other Stories; Their Eyes Were Watching God; Portrait of an Eye; The House on Mango Street; Native Son; Extremely Loud and Incredibly Close; The Shipping News; The Brief Wondrous Life of Oscar Wao; Even Cowgirls Get the Blues; Angela’s Ashes; Gone Girl

* Don’t judge; many of the world’s greatest accomplishments were instigated to impress a cutie.

This One Weird Trick Will Make Your EXPEDIT Less IKEA-looking!

As a public service to my friends and family, I have vowed not to complain about the weather any more this winter, even though I have officially been diagnosed with a severe case of “Vortex Fever.”

OK, one quick complaint: For the last two months, the usually bountiful alleys of Chicago have been hibernating under a foot of snow and ice.

IMG_3296

Actual picture out my back window today. Note the conspicuous lack of treasures.

Fortunately, this past summer and fall – perhaps sensing the oncoming freeze – I’ve fattened myself up on scavenged coffee tables, foam, ottomans and door art.

But remember that scavenging in the alley isn’t just about dragging home the big-ticket items.  It’s about picking the useful bits of hardware off of the hopelessly irreparable home goods: the wooden legs off a soiled couch, the casters off of busted kitchen cart, the drawer pulls off of a warped particleboard dresser.

Generally, I don’t believe in aspirational hoarding.* I’ve got three kids and a husband with rather complicated hobbies; there’s just no space for it .

IMG_3294

Our pantry, dedicated to complicated hobbies. Note the absence of actual food.

But, there’s always room for drawer pulls.

Yesterday I was stretching on the floor of the living room. Stretching is a necessary but boring activity that usually results in me noticing something I don’t like about my living room. This time, I was struck by how “IKEA-looking” our EXPEDIT shelving unit looked.

IMG_3277I’ve managed to replace most of the most “IKEA-looking” wares in our house with lovingly-restored vintage items from Craigslist or the Thrift store.  But this shelf will be with us for a while, because there’s no where else to put the books and toys, and also I’m not sure how to get this beast out of the house.

Damnit! I thought, pounding my fist to the floor. There’s got to be a way to make this particleboard monster more charming.  Suddenly, between the hamstring stretch and the sciatic nerve slides, I realized how easy it would be to replace these cheesy IKEA chrome door and drawer pulls:
IMG_3278After rooting around in my scavenged hardware collection, I found this little container of slightly clownish – but otherwise adorable – drawer pulls, most likely pulled off an old dresser back in the Fall, when the alleys were still plentiful:

IMG_3281They were wooden, originally painted white… then blue… then silver. And the screws were just the right size.
IMG_3283PRO-TIP: When scavenging drawer pulls, always take both the knob AND the screws.

This project (if you can even call it that) is so easy that I don’t want to insult you with instructions. But just in case you like being insulted, here you go:

STEP ONE: Remove the old pulls from your doors and drawers. Keep the screws and pulls together when storing.
IMG_3284STEP TWO: Screw in the new pulls. This step may or may not involve a screwdriver.

IMG_3286STEP THREE: Just kidding. You’re done. Lay down on your living room rug and admire your slightly more charming EXPEDIT bookshelf.
IMG_3288IMG_3289IMG_3291* Aspirational hoarding: Collecting stuff that you have no use for in the present, but “might” need sometime in the future. This activity is strongly discouraged.


Throw A Super Bowl Party for Friends Who Love Snacks But Don’t Give a $%* About Football

Apologies to my international readers, who (for reasons I don’t understand) are almost all in Australia.  In the States, we have this game called “football,” but it’s not the football you’re thinking of. In American Football, male players try to run a strangely-shaped ball from one side of the field to the other, while all the players smash each other up. There’s also a lot of standing around.

Picture 1129

This cake proudly displays my ignorance of football. What do you mean there’s only two teams?

Contemporary American Football won’t be around forever, as the forces of bubble-wrap parenting collide with new data on brain injuries. Perhaps the game will become more gentle (probably not), or shortened, or otherwise changed until all that’s left on Super Bowl Sunday are the commercials and the halftime show.

But you know what will never go away? SNACKS.

I’ve attended Super Bowl parties every year of my adult life, just for the snacks:  piles of orange, crunchy, salty, gooey food; food I would never touch 364 days of the year. To me, Super Bowl Sunday is about celebrating the sodium, the grease, the sugar and spice of life. It is the Day of the Snack, washed down with ice-cold beer.

Last year, I decided to cut out the middleman and host a Superbowl party that wasn’t about football.  To my surprise, our apartment was wall-to-wall with snack-loving friends eating processed cheese and chips every shade of orange the food scientists could dream of. Two kinds of pigs-in-a-blanket (both vegan and animal-based). And the dips! Six.. seven …EIGHT layers! Layers you never even heard of.  And don’t even get me started on the flavors of the Doritos!*

The next morning, the apartment was covered in a thin layer of orange dust.  I found sausages in the kids’ play kitchen, and smears of bright orange cheese product under the rug.
Picture 1133And we’re doing it all again this Sunday. But this year, I want to make it more interactive (and let’s be honest, I want to motivate everyone else to bring food).

We will reward superior snack-making efforts in three categories:
♥ Most Unhealthy Snack
♥ Orangest Snack
♥ Best Overall Snack

I don’t have anything of real value to give to the winners, so why not something symbolic? And what’s more worthless, but symbolic, than a trophy?

D.I.Y. TROPHIES FOR YOUR SUPERBOWL PARTY FOR PEOPLE WHO LOVE SNACKS BUT DON’T CARE ABOUT FOOTBALL

SUPPLIES:
– three old trophies (two small and one big)
– plastic fork and hollow plastic golf or ping-pong ball
– toy salt shaker, onion and pepper from your kids’ play kitchen**
– hot glue gun
– white & orange spray paint
– silver paint
– husband with access to label paper and printer

STEP ONE —  CHOOSE AND PREPARE TROPHIES:  If you’re in Chicago, head to the Unique Thrift Store on 35th and Archer.  You’ll find the trophies in what I call the “lost memories” aisle, along with used photo albums, picture frames, and off-brand Precious Moments figurines.  I chose one gigantic trophy for “Best Overall” and two smaller, but slightly different, trophies for “Orangest” and “Most Unhealthy.”
IMG_3186PRO-TIP: Before you leave the thrift store, don’t forget to make your Valentine’s Day plans!
IMG_3194Wash the trophies in hot, soapy water to eliminate grime and the tears of second-place losers.  Next, clip off any symbols of actual sports, like this completely unnecessary baseball bat:
IMG_3195Collect any items you want to attach to the figurines, in this case a plastic fork (Best Overall), and a tiny fake salt shaker from my kids’ play kitchen (Most Unhealthy).

Borrow your friend’s hot glue gun, and adhere the toy salt shaker to the figurine in the “Most Unhealthy” trophy and the fork to the “Best Overall” trophy.

IMG_3215IMG_3211

STEP TWO — PAINT:  Now we’re going to paint the gold parts of our trophies white, because white makes anything seem more modern and sophisticated. Cover the base of the two smaller trophies in masking tape. IMG_3220For the bigger trophy, wrap a plastic bag around the base and the bottom half.
IMG_3223Spray with a high-gloss white paint.  Two light, even coats should do it.  Gorgeous, right? Jeff Koons would approve:
IMG_3227STEP THREE — FINISHING TOUCHES: When your white paint dries, paint both the plastic fork (Best Overall) and the top of the salt shaker (Most Unhealthy) with silver paint.

IMG_3256IMG_3230OPTIONAL: If you are feeling nervous that people aren’t going to get the symbolism, write “SALT” on the salt shaker with a black Sharpie.
IMG_3238While the silver paint dries, grab your “Orangest” trophy and tiny golf ball. First, spray the ball a delightfully toxic shade of orange.
IMG_3231When the ball is dry, poke a hole in the bottom and screw it on to the end of the figurine’s bat.

Next, spray some orange paint into the lid of a jelly jar, and use a cotton swab to smear orange around the figure’s mouth and hands, symbolizing a frenzied binge on orange-hued snacks.
IMG_3232IMG_3237For the “Best Overall” trophy, unscrew the “97” and “2nd Place” icons from the base (but hold on to them for future jewelry projects!).  Grab your kids’ toy pepper and onion.  Going through the existing hole in the base, push the sharp end of a wood screw through the bottom of your onion. Secure the head of the screw with a washer and screw until the onion is tightly attached to the base.
IMG_3243Repeat with a Pepper: IMG_3246If your trophies have engraving plates, tear those off.  Type your new titles in a word processing document, and have your husband print them off on adhesive label-making paper at work.  To be on the safe side, I printed mine in 9, 10, 11, 12, and 14-point font.  If done correctly, your page of labels should look like a madmen’s eye chart.IMG_3248Affix a title to the appropriate trophy, and cover with packing tape if you are worried about staining (you should be).

Now send out your party invitations and wait for the Snack Offensive Line!
IMG_3249
IMG_3251
IMG_3252IMG_3254* Unlike its real food cousins, the tomato and potato, there is no “e” in the plural of Dorito. 

** Don’t judge. I had to take the Play Golf Club set away cause the kids were using the golf clubs as weapons (of course).  And I’m pretty sure we have another toy salt shaker under the couch, where I found the first one.

Trouble in the Bedroom? Turn a Thrifted Sheet into Happy Yellow Pillowcases

Lately, Scott and I have been having a bit of, um… trouble in the bedroom.

But not for lack of trying. When we first moved in, I painted the whole room a soothing shade of grey and hung floor-length white curtains over the window. Ahhh. A year later, I added a touch of five-star-hotel glamor with this white-and-yellow chevron tufted headboard.
Picture 064I adored my new headboard. But combined with my green apple-and-pear print pillowcases and this thrifted yellow circle bedspread, the room was starting to feel less like a peaceful grownup retreat, and more like Pee-Wee’s playhouse (minus the celebrity guest appearances).
Theater Pee Wee Herman I swapped the busy bedspread for a simple white duvet cover, but just couldn’t let go of the apple pillowcases, which I lovingly made 3 years ago with designer fabric from my local independent Fabric Boutique.

Then last week, fate intervened. While we were stuffing a pillow back into a freshly-laundered* case, the case SPLIT in HALF.  Two days later, one of its brothers suffered his own fatal tear.  Shock, grief, than acceptance.

But this time, I didn’t run off to the fabric boutique to grab the latest adorable Japanese imports, because I’ve discovered a new fabric source: the Bedding Section at the Thrift Store! If you can overlook the flowery grandma prints and pee-stained Little Mermaid twin sheets, you can uncover yards and yards of great fabric.

Here’s the two key reasons why I chose thrifted bedsheets for my pillowcase project:

1)   MONEY: Last time, I spent about $60 on fabric to make four pillowcases. Here’s a print from one of my favorite designers, at a cool $21 a yard. Even a set of the cheapest cases from Target would set me back at least $10.**  Thrift store bed sheet = $1.

expensive fabric2)   TIME (AKA LAZINESS):  By buying a sheet instead of raw fabric, we’ve just eliminated one big step from this project – folding and sewing the end hem.  If we cut strategically, we’ll use the existing hemmed ends of the sheet for the ends of our pillowcase.  See? And by folding the sheet lengthwise in STEP THREE, you also won’t have to sew the bottom end of the case. It only took me about 10 minutes to sew three cases.
IMG_3151HOW TO MAKE PILLOWCASES FROM A THRIFTED BED SHEET:

STEP ONE – BUY:  Head to your favorite and least-grossest thrift store and buy a double, queen or king-sized bed sheet (flat or fitted). Skip the twin sheets — they don’t have enough fabric and tend to sport 1980s Disney characters.  I was looking for solid yellow to match my dresser/nightstand set and chevron headboard. Found it in 30 seconds!
thrifted sheetsSTEP TWO – PREPARE:  Wash and dry your sheet. You want to eliminate any smell or thrift-store cooties (real or perceived), and also make sure the fabric is properly shrunk. Or is it shranked?

Now you’ll need to iron the whole sheet. But if you bought a fitted sheet, carefully snip off the elastic and the seams of the folded corners. This will make ironing much easier as the sheet will be flat, and you won’t accidentally melt the rubber. Don’t buy a sheet with the elastic that spans the whole perimeter of the sheet — you will have to cut it off and lose the built-in hem.

IMG_3147STEP THREE – CUT:  Fold the sheet length-wise so the two long ends are now touching each other.  The folded edge will be the bottom (closed) end of your pillow case. You’re welcome –this is yet another step that I am saving you! Lay your folded sheet on on a well-scrubbed dining room table, and make sure it is inside-out.
IMG_3149The width of the cases is a matter of taste. Do you like your pillows wrapped tightly like sausages or tube socks? Or do you prefer them loose and flimsy, in the European style?***  Personally, I can’t deal with my pillows slipping out of their cases in the middle of the night, which seems to happen pretty frequently in our bedroom.

The easiest way to measure your fabric is to take your existing pillowcase — or what’s left of it — and lay it flat over your (folded) sheet. IMG_3154Add about a half inch to each side (not the ends — they’re done), and trace the outline with chalk, or just cut it freehand if you’re brave. I had enough fabric to make three pillowcases.IMG_3157STEP FOUR – SEW:  Insert pins along the cut edges, perpendicular to the seams, about 2 inches apart. This is a straight stitch, but you want to keep your fabric from bunching up as you sew.
IMG_3159Sew a straight line along the open edges on each side.

Remind me not to use red permanent marker the next time I write someone's address on the top of my hand.

Remind me not to use red permanent marker the next time I write someone’s address on the top of my hand.

Repeat STEP FOUR three times, or once for each case.

Turn each case right-side-in and insert a pillow. Now lay back and enjoy your happy lumps of sunshine!
IMG_3175IMG_3172IMG_3171 I recommend that you wash your pillowcases at least twice a year.
**  Buying pillowcases at Target is obviously not an option for a self-respecting DIY blogger.
***  “European Style” is a stereotype I just made up from looking at the loose, flimsy pillows in the IKEA catalog. We ‘Mericans like our cases tight, like cowboy jeans after a big ‘ol slice of Apple Pie.

DIY Vocabulary: 12 New Words for the English Language

I used to work with a woman from Panama who we’ll call Linda (her real name).  One day, she boasted that Spanish is superior to English because, as she claimed, “there’s a word in Spanish for everything.”

To prove her point, Linda asked, “What is the English word for that plug you pull in the bathtub to make the water run out of the shower instead of the faucet?” I had to admit that I had no word for it, and until that moment, had never discussed that gadget with another human being.  Linda then told me the Spanish word for it, which I forgot ten minutes later.

IMG_3139_arrowThinking back on that conversation, I’m sure there IS an English word for that thingy, and is surely common knowledge among plumbers and bathtub enthusiasts across the English-speaking world.

But Linda was right – there are many gaping holes in the English language; too many experiences and phenomenon for which we just don’t have a proper word. And here at Projectophile, our motto is:

If you need it, (and can’t buy it), then make it yourself.

As a public service, the Projectophile D.I.Y. Linguistic Committee proposes adding the following words and phrases to the English language:*

BOOKCOMMIT:  The act of reading a terrible book until the end because the reader has already read one or two chapters.  In terms of financial investment, economists call these “sunk costs,” but the phenomenon can be applied to books, movies and sometimes boyfriends.

IMG_3140

189 pages in, and I’m still not sure what this book is about.

DREAMBARASSMENT:  The mix of social anxiety and irrational embarrassment caused when one encounters an individual — such as a co-worker, acquaintance, or casual friend — the morning after having dreamed about him. Many times the Dreamer, having forgotten the dream, suddenly remembers it upon seeing the Dreamee’s face, and feels that the Dreamee somehow “knows” about the dream. Occasionally this mix of emotions is accompanied by an urge to tell the Dreamee all about it; this is not recommended for those outside of one’s “Dreamcircle” (see below).

DREAMCIRCLE: The close circle of intimates, usually confined to the dreamer’s immediate family, romantic partners, and very close friends, with whom a one feels comfortable telling about a dream in which the intimate person appeared.  Not to be confused with a “dreamcatcher,” most commonly found hanging from rear-view mirrors, or tattooed on the feet and shoulders of  free-spirited women in their twenties.
dream-catcher-tattoo-on-footFACEBOOKQUAINTANCE:  An individual that one knows — sometimes quite well — from the comments that the individual deposits on your mutual Facebook friends’ posts. It is quite common upon meeting a Facebookquaintance in person for the first time, for one to declare, for example, “I know you from our 23 mutual friends on Facebook, and admire your mastery of emoticons.”  It is not clear, based on today’s social norms, whether it is appropriate to tell a new Facebookquaintance that Facebook has repeatedly suggested you two should be friends.

GUSTATORY DISSONANCE:  The feeling of shock and disgust an eater feels upon tasting a food that is different from one’s expectations. For example, a coworker brought a plate of what appeared to be glazed donuts to a work party. Upon biting into one, I discovered that they were actually CHINESE HAM BUNS.  I have yet to recover from that experience.

SONY DSC

Is that really strawberry jelly oozing from your “donut”?

NERDBRAG: The act of calling oneself a “Nerd” because one really just wants others to know that one is “smart.”  To avoid looking boastful, the Projectophile Linguistic Committee suggests instead utilizing the word “enthusiast.”

NOMENESIA:  Forgetting the name of a new acquaintance because one is so anxious about remembering it.

PEDESTRIDANCE:  The awkward shuffle to one side, and then the other, and perhaps another, that oncoming pedestrians perform to avoid collision. The “pedestridancers” often appear as mirror images of each other.  This phenomenon is sounds more poetic than it really is.

PICKFULLNESS:  The shameful feeling that a Home Cook experiences after having taken so many little tastes and samples of the dish that she is preparing, that by the time the meal is ready to eat, she is so full that she can only sit and watch others eat it.  After the meal has ended, the Home Cook will often continue to pick at the leftovers before retiring them to the refrigerator.

PROCRASTOLUTION: The successful act of procrastinating until the task is no longer relevant.**

SIMULATED NOCTURNAL DEAFNESS:  Behavior commonly exhibited by parents of young children, wherein one parent pretends to be sleeping so soundly that he cannot hear the cries of his offspring, in an effort to coerce the other parent to rouse from slumber and attend to the child’s needs. It is important for the simulated sleeper to “wake” momentarily to acknowledge the situation, after the other parent has completed the task. For example, “Oh, Honey, was that the baby crying? I must have been sound asleep.” Note the use of the male pronoun, which masks the fact that in my household, I am usually the Big Faker.

VACATILLUSION:  The irresistible — and completely irrational — urge to immediately pick up and move to the town where one is spending his or her vacation.  This feeling is fueled by the false belief that one could enjoy living permanently in that particular small town/ seaside resort/ tourist trap, when in reality, one would be miserable after a week when one realizes that one could never find a job in one’s field, or locate good Thai food or even a decent cup of coffee within 50 miles.

225688_1026612777949_5686_n

Tractors on poles! I could totally live here forever!

VOCABULAWARNESS:  The feeling of ignorance and embarrassment that one typically feels upon learning either 1) a new word, or 2) the correct meaning of a known word, and suddenly seeing and hearing it EVERYWHERE. Each time one sees the new (or newly understood) word, it is a reminder of how much one really doesn’t know. And one wonders how she could have lived for 37 years on this earth without ever knowing the meaning of APHORISM, because now it seems to be everywhere around her as a reminder of her ignorance.

So, fellow Projectophilians, what do you suggest? Do you have any DIY words to add to the English language?

* To make room, we also suggest eliminating “webinar,” which experts agree is the worst word ever.
** Idea courtesy of M. Avery.

DIY Gift Guide Part II: A Head-Warming Gift for your Favorite Crossing Guard

I’ll admit: I’m not afraid of strangers kidnapping my children. I’m not terribly worried about them getting hit by lightning, or falling off the swings at the playground, or eating the wrong kind of dirt.  I’m a pretty rational about my fears.

Which is why I am absolutely terrified of cars, making our daily walk/ bike ride to school feel like a game of Frogger. froggerNeedless to say, I take my neighborhood Crossing Guards very seriously.

We encounter two crossing guards on the way to my daughter’s school. The first one, whom we’ll call “Wilma” (not her real name), is stationed at the intersection of a very busy four-lane road, with no stop sign at our crossing point. We normally find Wilma slouching in her car, staring at her phone, her hand-held STOP sign laying impotently on the ground as four lanes of traffic whiz past.

Three blocks later we are relieved to find Betty (her real name). Betty isn’t just a Crossing Guard, she’s a Traffic Conductor, a maestro of the intersection. She’s like Moses, parting the traffic with a graceful wave of her arm. “Good MOOORN-ing!” she shouts from across the street to Estelle and me, “Have a great day!”  Swoon.

Betty deserves something special this year — something useful, unique and maybe a bit a beautiful. Something homemade.
IMG_3136
Experts agree:  You can actually enjoy the winters of the upper Midwest by wearing a BALACLAVA. Balaclavas are like ski masks with one single hole for the eyes and nose —  a serious game-changer for those who spend more than a few minutes at a time outside. Happily, they are as easy to make as they are fun to wear. I think Betty would love one.

DIY CROSSING GUARD BALACLAVA:

INGREDIENTS:
Fleece in a festive pattern
Marker
Scissors
Sewing Machine OR Thread-and-Needle
(Optional) Old Hat for reference

 STEP ONE – CUT:  At the fabric store, pick a fleece pattern that reflects the style – real or perceived – of your crossing guard.  I thought this fabric would really complement the electric yellow and reflective silver of Betty’s safety vest.

Picture 001Lay the fabric flat and then fold in half.  Place your favorite knit hat over the fabric, about an inch in from the fold.

Picture 006Now draw a line around the hat, with an extra inch on all sides. My pattern was about 11 inches wide and 16 inches long.  Make sure that one of the outside edges corresponds with the fold — it will save you a bit of sewing in the next step.

Picture 007With the fabric still folded, cut out your shape, leaving the fold intact. When opened, your fabric should now look somewhat like the Ten Commandments  (again with the Moses metaphor!):

Picture 011STEP TWO – SEW: Fold the fabric back again, and with a sewing machine or thread-and-needle, sew shut all the open edges where you had just cut (except for the bottom, dummy! That’s how you get your head into this thing.)

Picture 012Sew the seam as close to the edge as possible. If you leave too much space between the seam and the edge of the fabric, it will produce an unsightly bulge along the middle of the finished balaclava. This could give your hat-wearer the appearance of a cone head, and cause uncomfortable bulk if worn under a bike helmet or basket of fruit.

 PRO-TIP!!  Stop here to get a sense of your balaclava’s fit and the placement of the Face Hole. Turn the hat outside-in, and put it on your head, with the stitched  side on the back and the folded side on the front.  Come on now, let’s just see how it feels. Have a little fun with it. And just ignore those small children wrestling in the next room.

Picture 016_redcircleHowever, if you really want to freak out those naughty children, chase them around the house looking like this:

Picture 017They will immediately forget what they were fighting about in the first place.

STEP THREE – CUT THE FACE HOLE: When you’re done screwing around, take a moment to mark the areas around your eyes and nose where you want to make your Face Hole. You COULD use pins, but a few dots with a marker will work just as well.   Remove the hat, turn it back inside out, and lay flat again.  Draw a line to show where you will cut your hole. Err on the small side — you can always cut more later.

Picture 019 It’s OK to cut into the seam, just make sure to knot any loose threads after doing so.

Turn your finished balaclava right-side in and try it on again to make sure you can see and breath through your Face Hole.

Picture 021The balaclava — in its relaxed state — should cover your nose and mouth, but the Face Hole should also be big enough to pull over your chin. Take a quick selfie in front of your giant Marimekko print before you wrap the balaclava up for gift-giving.

Picture 022Merry Christmas to Betty and to all our traffic safety heroes. May the wind of Chicago winter never sting your ears!